 |
| Lippert storms Contracania |
Having recently fought the Battle of San Martino with the Rejects (see: San Martino Part 1, San Martino Don't Thow a One!)) and Mike (see: San Martino Game #2), it was the UK Monday Night Group's turn to try their hands at the scenario.
Like the Rejects' game, the battle was fought over two sessions. In the first session, Graham and Ian commanded the Austrians while Richard and Phil took charge of the Sardinians. In the second session, players remained the same with the addition of Chris as a third Sardinian player.
Let's see how the game played out.
The battle begins with Benedek's Corps massed around Pozzolengo with Lippert's Brigade positioned at the foot of the San Martino Heights, Philoppovic and the reserve situated near Pozzolengo, and Watervliet deployed upon the high ground to the north of Pozzolengo. Mollard's Recon Column is deployed in San Martino, Ortaglia, Roccolo, and Contracania. For now, Mollard is on his own but reinforcements are expected to arrive soon.
 |
| Benedek's corps poised to attack. |
 |
| Mollard's recon column stands alone at San Martino. |
 |
| Mollard defends San Martino. |
To open the action, Mollard repositions Monferrato's two squadrons of light cavalry from the left to the right. Graham remarked that Richard's cavalry repositioning was a brilliant ploy and mucked up the Austrian plan of attack from the get-go. Perhaps, but as will be seen later in the battle, facing no Sardinian cavalry on the Austrian right, Watervliet and the Reserve hussars could advance unmolested by enemy cavalry. Still, good example of thinking outside of the box for Richard.
For the Austrian plan, Watervliet is ordered to advance upon the enemy left while Lippert makes a direct attack up the heights. Philoppovic is ordered to advance upon San Donnino to secure the Austrian left and prevent a Sardinian stab toward the vital bridge. The Austrian Reserve hangs back around Pozzolengo awaiting further developments.
 |
| Opening maneuvers. |
Seeing Mollard alone at San Martino, Benedek wastes no time in bringing on the fight. Watervliet advances smartly upon the Sardinian left with thoughts of turning that flank while Lippert makes a direct attack upon Contracania. The Sardinian defenders in Ortaglia keep their heads down as both Lippert and Watervliet's batteries bombard the farm complex.
Mollard is relieved to see Arnaldi arrive from the north to take up positions on his left in the vineyards surrounding San Martino. Mollard's left may be secure for now. Having Morozzo's large brigade arrive from the north to shore up the Sardinian exposed right offers even more relief.
 |
| Austrians on the attack! |
In the first serious exchanges of battle, Lippert sees his lead infantry battalion from the 59th Line evaporates under the hail of lead from the villas and treelines on the heights. To compound this early setback, the assault upon Contracania does not go as expected. While the Sardinian Bergalieri are thrown out of the villa, the Sardinians are able to rally and counterattack before the Austrians consolidate any gain. Lippert is left out in the open exposed to enemy fire. Casualties rise quickly as musketry erupts from the two villas on the Heights. The attack is not starting off well. Further upsetting the Austrian plans to defend San Donnino and the bridge, one of Monferrato's light cavalry squadrons slips over the bridge before Philoppovic can secure it. Damn!
 |
| Lippert attacks Contracania. |
Returning to action on the Austrian right and Watervliet's advance upon San Martino, Arnaldi arrives to shore-up the Sardinian left in order to provide a buffer around San Martino. Unfortunately, this buffer zone is not completely secure. Austrian hussars swing around to attack an exposed battalion of the 7th Infantry positioned in the vineyard. Surprised by this bold attack, the Sardinians, nevertheless, manage to retire from this close call although much worse for the wear.  |
| Austrian hussars attack! |
Following up on the rough handling of the Sardinians by cavalry near San Martino, the King orders the village to be secured. So concerned is Sardinian command of the situation that both Victor Emmanuele and Mollard personally oversee these deployments. Infantry quickly file through the village to close the exposed gap between Ortaglia on the Heights and San Martino. Arnaldi pushes his brigade out to the left with his artillery pounding Austrian positions. Seeing Sardinian infantry deploying in front of San Martino accompanied by the King's entourage of staff officers, Austrian artillery changes target from Ortaglia to the Sardinians on the road. This bombardment is very effective and nearly catastrophic. The infantry moving up in front of the village are scattered and both King and Mollard narrowly escape death.  |
| Arnaldi reinforces San Martino |
On the Austrian left, caught off guard by Monferrato's sudden dash to the bridge, Philippovic must divert precious resources to contain and eliminate this nuisance. He sends one jaeger and one infantry battalion south to deal with this interloper. Meanwhile, the brigade battery is unlimbered on the road to the west of San Donnino to bring more enemy cavalry under fire. The remainder of his brigade forms up in front of the village forming a link to the heights and Lippert. The long line of white-coated troops makes fine targets for Morozzo's two batteries. |
| Dealing with a nuisance. |
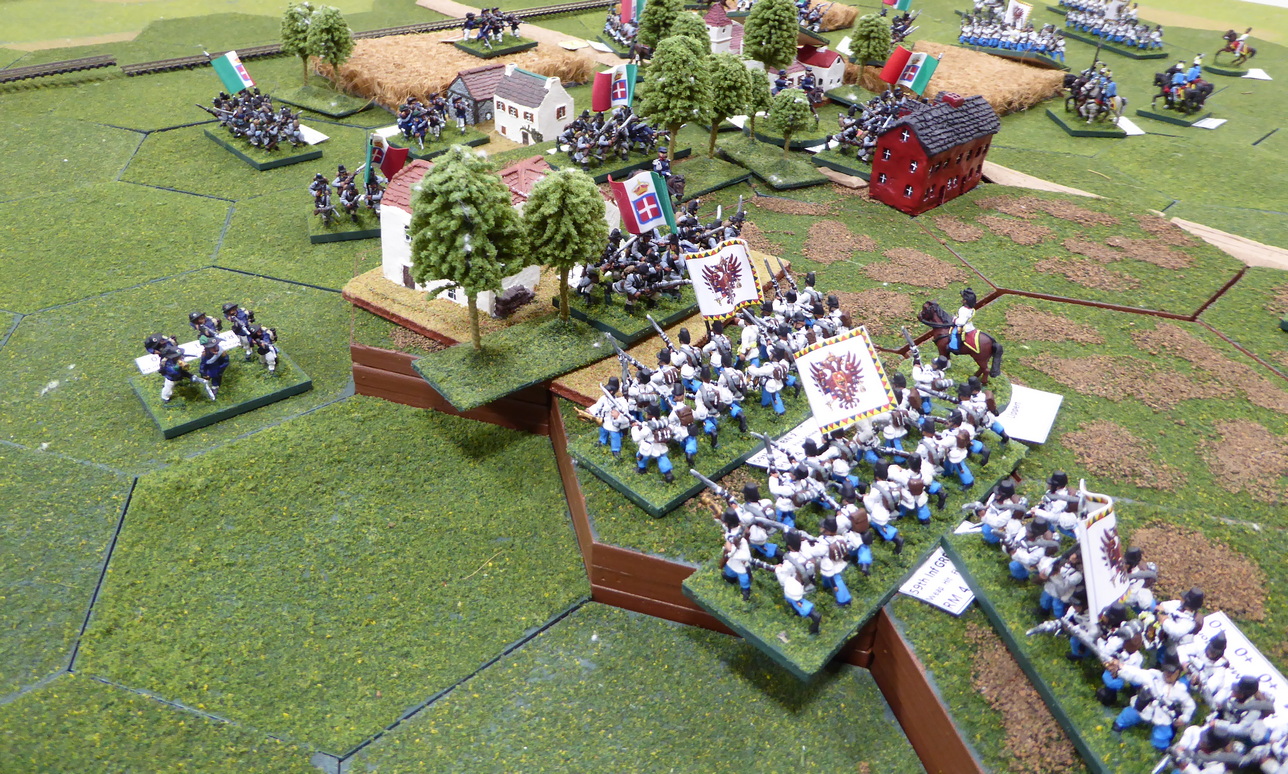
While Philippovic's situation on the Austrian left seems to be unraveling, Lippert makes one more assault against the fortified villa of Contracania. Personally leading the attack, Lippert first sends the 2/59th against the enemy occupied villa. This attack is repulsed with heavy casualties. Without hesitation, Lippert leads the 59th grenadiers into the villa. Once again, the Austrian attack is repulsed. The grenadiers, too, suffer mightily at the hands of the stout defenders. With these two costly repulses, Lippert calls off the attack upon the Heights.
 |
| Lippert assaults Contracania. |
While Lippert makes every effort to take Contracania and the Heights in the Austrian center, Watervliet cautiously advances against the Sardinian left. Having two infantry battalions seeing heavy casualties in the first clashes, Watervliet is careful not to expend his limited resources carelessly. This hesitation allows Arnaldi to bring up supports and strengthen his lines in front on San Martino. Not only does Arnaldi bring up supports but his brigade actually increases its buffer around San Martino.
Austrian artillery fire, seemingly pounding Ortaglia since the battle began, sees these bombardments finally pay out. The defenders of Ortaglia are scattered and Mollard's command breaks. Luckily, Morozzo has infantry close at hand and can occupy this vital position before it falls into enemy hands.
 |
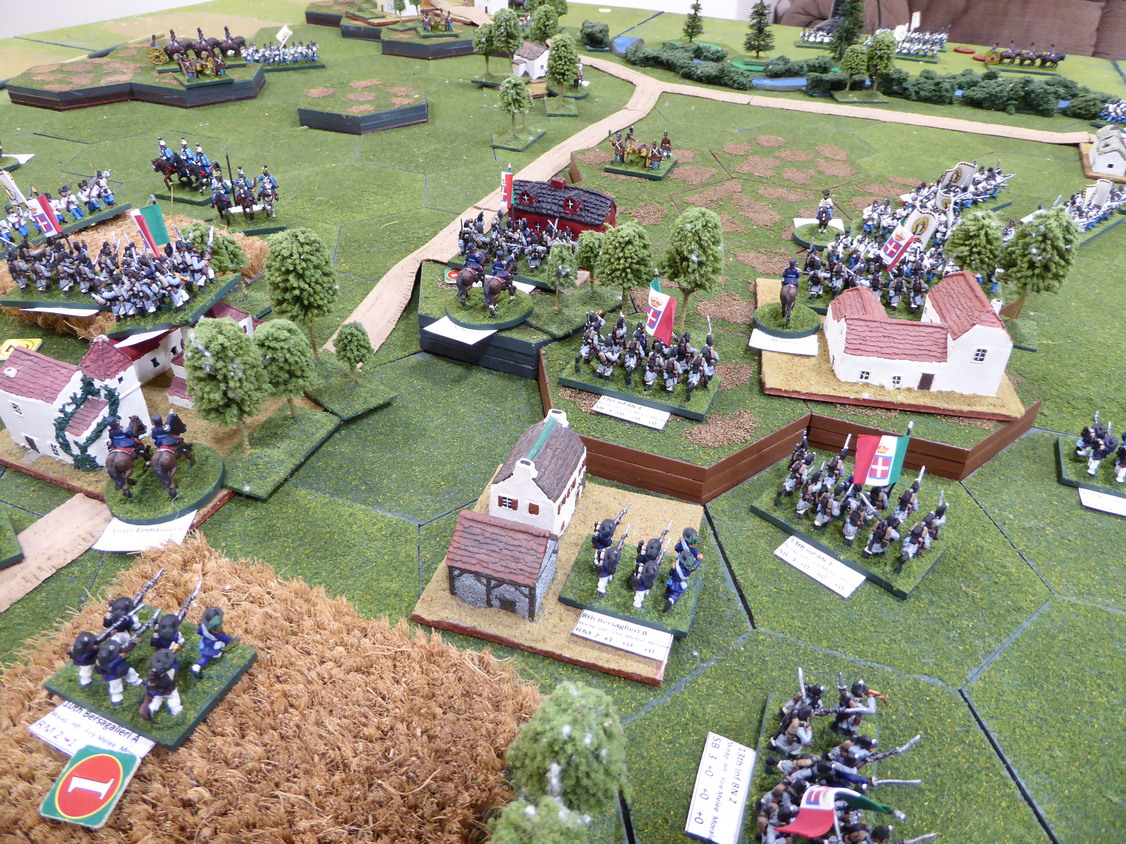
| Arnaldi's defense of San Martino. |
 |
| Sardinian defense of San Martino and the Heights. |
 |
| Battle Situation Turn 5. |
Back on the Austrian left, Philippovic rids himself of the harassing cavalry across the river. Unfortunately, this diversion costs valuable time. Before his lines can reform, his unsupported artillery is overrun by another roving squadron of cavalry. With all of the losses sustained before, the loss of the battery breaks Philippovic's Brigade.  |
| Philippovic breaks! |
Fighting intensifies on the Sardinian left as Arnaldi counterattacks out of the vineyard while Austrian jaegers attempt to encircle San Martino. Arnaldi's command is teetering on edge when Arnaldi sees that Watervliet has called off the attack. What? Watervliet's brigade begins to retire back toward Pozzolengo.  |
| Firefight on the Sardinian left. |
To cover Watervielt's withdrawal, two squadrons of the 1st Hussars charge Arnaldi's unsupported battery on the railroad. Not expecting such a bold action in the face of enemy retirement, the gunners are caught unprepared and the battery is lost. Unfortunately for Arnaldi, the loss of the guns is enough to push the brigade over the breaking point. In a waterfall of unfortunate events, Arnaldi's collapse causes the Sardinian army to break. The battle is over.  |
| 1st Hussars charge Arnaldi's guns. |
Well! The third battle of San Martino came down to a nail-biting end played over two sessions. A narrow victory for the Austrians but one that was hard-fought. Looking at the rosters, post-game, the outcome was very close indeed. Lippert's command was only two hits away from, itself, breaking. It really could have gone either way. A shame, really, that anyone had to lose such a closely contested fight.
Congratulations to all players as they fought splendidly while coming to terms with a new set of rules. Well played all!
For me, hosting the battle a third time was great fun. I learn a little more with each playing.
Thanks guys.


Another great outing for this scenario Jon - I read Graham's version of events about twelve hours ago and it certainly went down to the wire - bit of different luck and it would have been a Sardinian win...and that was reflected in Graham's belief/expectation that he (the Austrian commander) had lost!
ReplyDeleteKeith, I thought this was a successful outing for the armies and scenario too. The breaking of the second Sardinian brigade occurred at a time when Morozzo may have been able to hold off Benedek's Corps by himself.
DeleteThe outcome was very close and could easily have gone against the Austrians.
These two-session games seem to work quite well, in that they seem to give the players a chance to regroup and think about the next phase of the battle. It wouldn't happen in real life of course, but the player enjoyment comes through in the reports.
ReplyDeleteThe two-session games work well for the host too. Two, three-hour sessions are much easier to master than one, five or six-hour session. With space to leave a gam lay in situ, this was a good solution.
DeleteExcellent game. I called off the attack on the Austrian right because I thought Chris with Arnaldi's brigade was about to punch a hole through and capture Pozzolengo. We didn't have much behind our front line.
ReplyDeleteThanks! I thought the battle had lots of good tension and drama especially when both Mollard and the King nearly met their Maker.
DeleteAnother great and close fought battle. Looks like it could have gone either way
ReplyDeleteThanks, Neil! Yes, the battle could have tipped either way on a die roll.
DeleteA good looking game. What rules do you use?
ReplyDeleteThanks, Peter! The rules are spin-off from Fields of Honor that you and used in our AWI game.
DeleteA versatile set of rules
DeleteIf the core game engine is solid, no reason that the same engine cannot to transported to other periods.
DeleteA very thrilling and interesting trilogy to follow. Well done Jonathan and of course the various generals who took part.
ReplyDeleteGlad you thought the battle account engaging, Phil! Thank you! I could not have done this without the players so kudos to them, for sure.
DeleteEntertaining and intriguing battle and a close run thing, which is what we all really want, it's good to still be in it up until the last throw, even if you lose!
ReplyDeleteBest Iain
Thanks, Iain! You are right. Everyone wants to remain in the game until the end. It may not always work that way but when it does, even the vanquished can walk away with heads held high.
DeleteWow, what a great game. Kudos to the players. Excellent report Jonathan. This game certainly has legs, and nice to see that the Austrians can win... even if only by a whisker. Brilliant post.
ReplyDeleteThanks, Richard! Your encouragement is much appreciated. The Austrians can win. In this case, it required breaking the Sardinian army to do so. Very fun and down to the wire.
DeleteA cracking game once again Jon and always great when the result is in doubt until the last moment. It does show that much fun can be had by replaying the same scenario, whether solo or as here, with different groups of gamers. Much to learn I'm sure from how each group approached their tasks in hand.
ReplyDeleteThanks, Steve! I agree with everything you state!
DeleteVery nice looking game Jonathan!
ReplyDeleteBest
Thank you!
DeleteIt’s amazing how many different permutations the same game can have at the hands of different players. A great well done to all. Expected a Sardinian victory there but the Austrians managed to snatch it in the end.
ReplyDeleteMike, the variability in battle results emphasizes the point that the historical outcome represents one data point only. With a variety of inputs, decisions, players, and luck, a number of possible outcomes may be seen in repeated recreations.
DeleteThe Sardinians nearly did it again.
I think the MNG is a useful datapoint in comparing battles. You pretty much know we will attack with everything, everywhere all at once.
DeleteThe group is an aggressive bunch, for sure.
DeleteWith so many AARs I think I’m starting to recognize the command stands. 😀
ReplyDeleteGood, right?
DeleteALL good. 😀
DeleteA great looking San Martino's AAR, obviously a battle to play and play again!
ReplyDeleteThank you, Phil! Obviously, repeat playing works!
DeleteA great looking battle Jon I am inspired by your dedication 👍
ReplyDeleteThank you, Matt!
Delete