Sunday, June 27, 2021

Hot Times on the Palouse!

Rapeseed in bloom, late June
Photo taken on a morning ride
The Palouse and the entire West Coast are experiencing a heat wave of nearly unprecedented proportions.  Daytime temperatures are nearly 30 degrees above normal.  A look at the 10 day forecast is mind boiling.  Records will fall, for sure.  We will be frying eggs on sidewalks, I expect.

Spokane 10 Day Forecast
What does one do when the heat climbs to such extremes?  

For one, road cycling gets done in the morning before the temperatures rise.  Even yesterday by 07:30 when I went for the daily workout, the temperature was already above 70F.  Two hours later when I returned, the thermometer read 85F.    Today, I am heading out on the road even earlier. 

For another, I retreat indoors to the coolness provided by A/C. What better way to pass the time than having a game?  This is how I am spending a portion of my day.  Later this morning, I host a F2F game in the even cooler, basement game room.

On deck is a recreation of the ECW Battle of Montgomery, 1644.  There is more than one interpretation of how the forces were deployed for this battle.  I chose to interpret the deployments as shown in the diagram below:

Initial Dispositions

A battle report will likely show up in (over)due time.  Until then, stay cool!

Friday, June 25, 2021

A Test of "Test of Resolve"

Having both a newly fostered interest in gaming the War of the Roses through play tests of Battle Commander and knowing Peter (Blunders on the Danube) for years, I jumped at the chance to participate with him in a remote game of the recently published Test of Resolve (ToR) at Virtual Huzzah in May.

The battle on display for this day's contest was the Battle of Towton. Armed with OB, QRS, and battlefield dispositions, I was ready for the challenge. I would be fighting for the Lancs having been given command of Somerset's Battle on the right. To my front, I was opposed by Warwick.
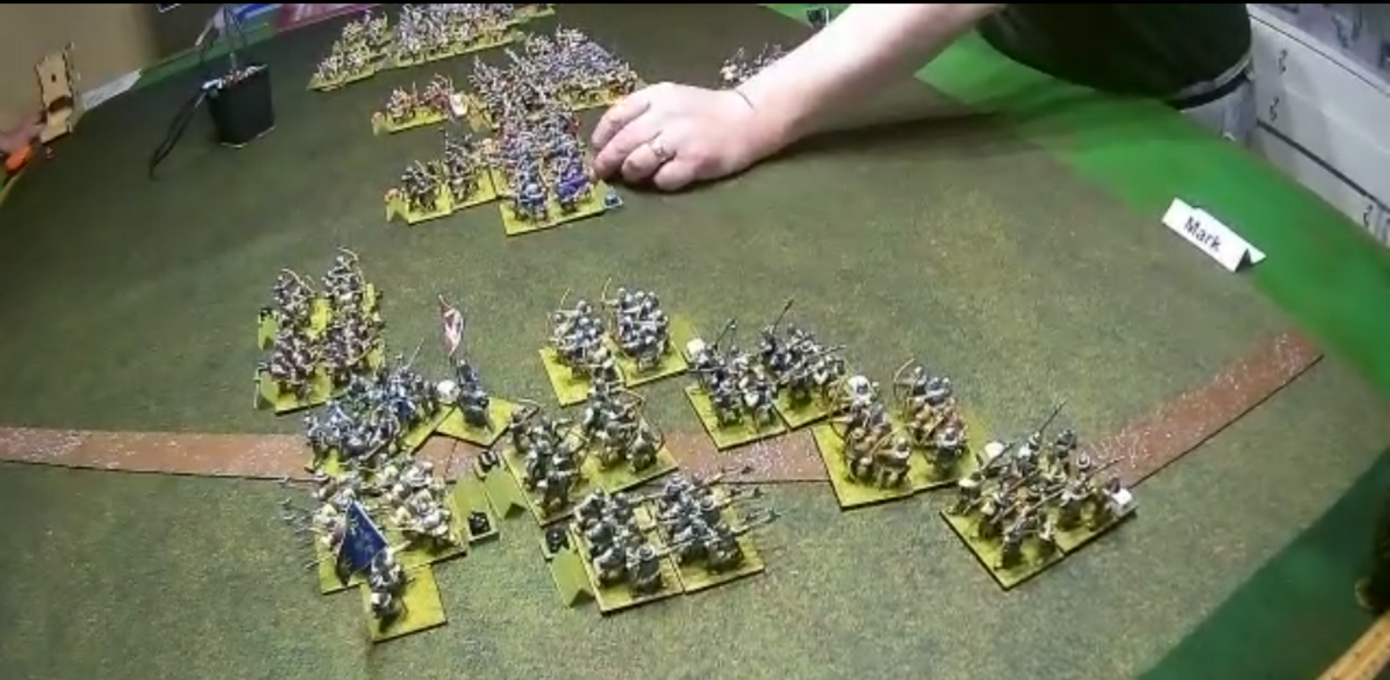
Somerset's command

The first notion to strike me was the difference in which the rules I have been playtesting and ToR depict a commander's Battle.  In Battle Commander, each Battle is depicted as a series of melee lines each having a distinct type (archers in the front line, bills in the second line, and MAA in the third line).  ToR, on the other hand, models each Battle as a series of company formations all abreast with an archer screen deployed forward.  Interesting.  Do both methods model the same fighting formation?  

Initial dispositions

Anyway, after David presented an introduction to the battle and rules, and the battle lines drawn, we began.

David providing an overview
Lanc battle line

The Battle for the Lancastrian Right.
While Percy and Dacre step off, Somerset lingers. 
Somerset snaps into action and advances.
Warwick's archers launch their volleys.
Almost immediately, Somerset's archers
 lose their nerve falling back.
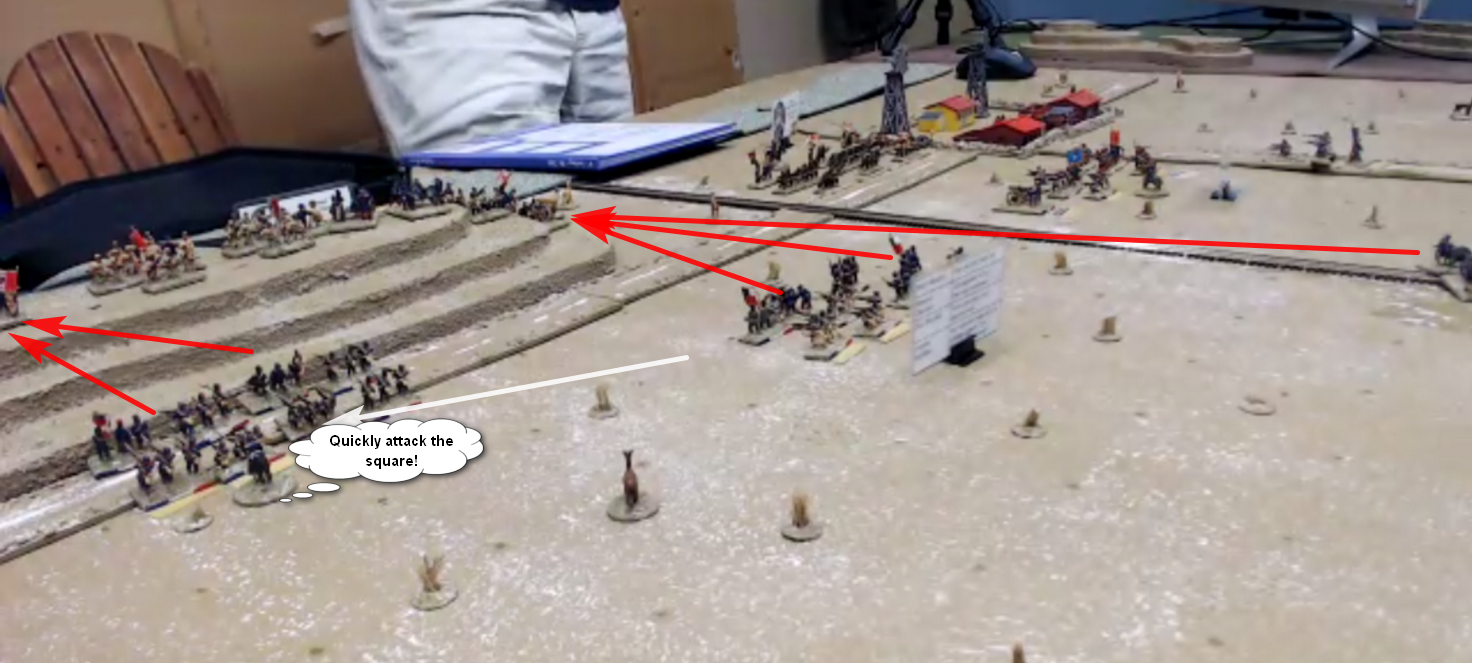
Rather than being shot to pieces,
Somerset charges into Warwick.
An ambush laying in wait.
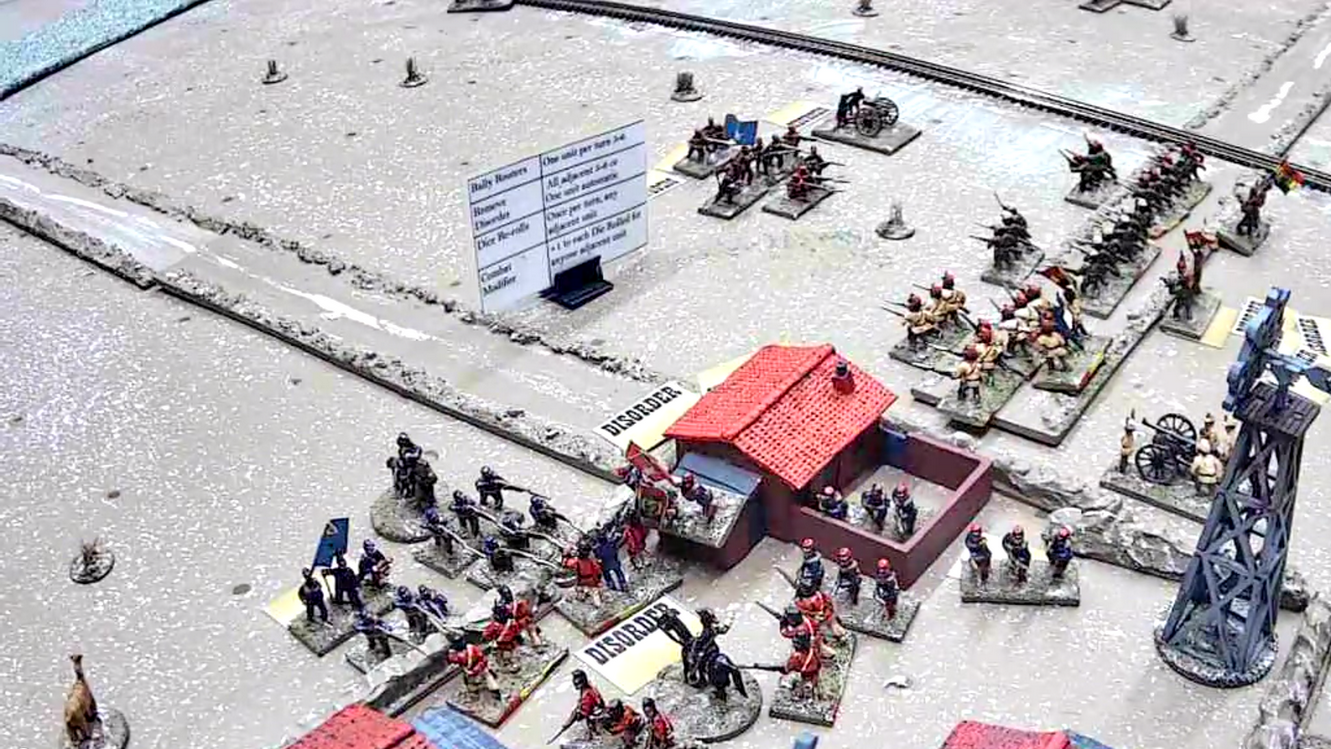
The two Battles clash in vicious hand to hand melee.
The ambush is sprung!
Oh! There is fighting elsewhere?
Casualties are mounting.
"If you lead with this unit,
you do not get a flanking attack.
"
Some companies see success, others failure.
A big shoving match on the Lanc right.
Notice the ambush was dispatched quickly. Sigh.
Peter's command is heavily engaged in the center
One company of Somerset's archers breaks for the rear
rather than remain in combat.
Somerset and Warwick have fought themselves
 into near exhaustion. 
Both Battles are at Morale Level 0.
Next to take a Battle Morale Test is likely to be done for. 
and that would be...Somerset.
Warwick turns his Battle inward toward the center.
After Somerset broke and headed toward safety, couriers caught up with the column to inform Somerset that the battle was lost.  Both Dacre and Percy broke when the Lanc right collapsed.   
The author (Tim) summarizes the battle
 and thanks all for their participation.
Even in defeat, that was a very good gaming session.  I learned a little about the rules and enjoyed the remote battle.  Tim and David performed splendidly as GMs in setting up the game for remote viewing, pushing troops around, adjudicating combat, and educating many of the players on the play of the rules.  Chapeau to you all and thank you!

Wednesday, June 23, 2021

Chile Con Carnage

In this week's remote battle, Graham sent us back to South America and the War of the Pacific.  Rules in play would be It's Getting a Bit Chile.  The two Chilean commands are tasked with taking both a hill and an Officia on the Peruvian/Bolivian baseline while the allies have orders to take a hill on the Chilean baseline.  So, both sides need to attack across the table and seize far-flung objective(s).  The Chileans need to take two; the Allies only one.  I command the Chilean left.  Steve the Chilean right.  Ian and Phil command the Allies.  I will be facing Ian's Peruvians as I march upon the hill.

How did the battle pan out?  Being heavily engaged upon the Chilean left, events concerning the attack upon the Officia on the the right are fuzzy.  Therefore, this action focuses on the attack upon the Peruvian front and the hill.

The Chilean guns under my command are brought up and unlimber.  Unfortunately, the guns unlimber such that they are deployed unable to bring the enemy immediately to bear.  Rats!  One turn is wasted to pivot the guns.  One hazard of remote play is that one cannot always see what one is doing!  The remainder of my command moves toward the enemy occupied hill with the cavalry pushing out to the left.
Having adjusted the guns, they begin concentrating fire upon the Peruvians positioned on the slopes of the hill nearest the railroad.
The artillery keeps up its bombardment as the Chileans advance.
As the range closes, the battlefield erupts in violence.  The firefight is fierce but commanders are nearby to rally the troops.
The cavalry on the left press on to the foot of the hill in an attempt to outflank the Peruvians.  The Chilean right descends upon the enemy held Officia.  Bolivian reinforcements reach the battlefield in strength.
With the sight of enemy cavalry approaching a flank, Peruvian infantry holding the end of the Peruvian line forms square.
While pressure is maintained against the Peruvian infantry and Gatling gun on the lower slopes of the hill, two Chilean battalions rush to the foot of the hill and let loose volleys into the square.  The tightly packed square suffers greatly.
The square suffered so much damage in the fusillades that it retreats back down the reverse slope of the hill.  In the continuing firefight on the lower slopes, casualties are mounting as both sides are suffering much disorder.
Against the Bolivian held Officia, the stalwart Chileans continue pressing on and short range firefights erupt.
As the Chileans bring up the cavalry, the Peruvian general makes a most crucial decision.  Rather than continue to rally the infantry and guns on the left of his command as the two armies pound each other in the center, he rides over to the right to rally the square before the enemy cavalry arrive.  The Chileans continue to pour a withering fire into the square.  In the commotion, the Peruvian general is wounded and flees the field.  The Peruvians have been abandoned!
From the Officia attacks, reports are arriving that the fighting is heavy.  Assaults are going in against the complex.  Casualties are high but the Chileans fight on. 
Several Chilean battalions are repulsed but hope is not lost.  Bring up the artillery!
The Peruvian flank has been turned!  On the ridgeline, Chileans are enfilading the Peruvians as a cavalry charge is prepared.   
The rightmost Peruvian battalion on the ridge turns to face its foe just in time to see the square below it wavering...
and just in time to find itself the target of the cavalry charge.
The square, below, dissolves and flees to the rear as the cavalry hits its target on the ridge.  Holding the advantage, the cavalry forces the Peruvians off the hill in disarray.  On the opposite end of the hill, casualties mount quickly.  With no general to rally the weakened and badly disordered troops, the Peruvians are forced to retreat. 
The Peruvian Army has broken!
The battle has not been won, however.  The Bolivians hold the Officia and are beginning to push back their Chilean attackers.  As night falls, the outcome is declared a draw.
This contest was an enjoyable action, perfectly suited for four players.  Had the battle lasted a few more turns, I wager that the Chilean left could have turned toward the Bolivians and the Officia and given them a little indigestion in attempting to hold this objective.  But, we will never know.

Having only played It's Getting a Bit Chile three times now, much is still fuzzy in my mind.  I am starting to get the hang of the various mechanisms, though, and learning more with each game.  Tactics are beginning to formulate in my mind and plans of action becoming more obvious.  We probably need to get this into a more regular gaming rotation so that my play improves. 

Thanks to Graham and my field-general compadres for a fun gaming session!

Saturday, June 19, 2021

Spring Cycling on the Palouse

Bowl and Pitcher

Posting on my cycling exploits on the Palouse has been absent.  A lack of cycling posts does not signify a lack of cycling.  Quite the contrary. Cycling continues and mileage increases as the temperatures warm.  The fall-off in cycling posts is likely a direct result of the increase in gaming posts.  One only has so many hours in a day.

The monthly mileage chart below reinforces the notion that mileage increases as temperatures climb.  With June slipping passed half over and almost reaching 500 miles for the month, there is still time to surpass May's totals of 776 miles in the legs. 

Mileage Chart 2021
On the Palouse, it is said that summer really does not begin until after July 4. July, August, and September are pleasant months for cycling with good weather throughout and not much chance of rain.

To provide a sense of the terrain variety present on the Palouse, following are some snapshots from my Spring rides.


Deer crossing!


And finally, the back yard crabapple in bloom.
Back to gaming next time.