Showing posts with label Montcalm & Wolfe. Show all posts

Sunday, August 12, 2018

Montcalm & Wolfe: Capitulation!

Battle of Oswegatchie from Gridded Wargames
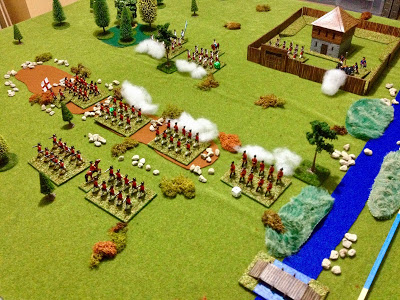
With the severe mauling of the French at the battle of Oswegatchie and the death of Rigaud from wounds suffered during the battle, the remnants of Rigaud's force retreat into the woods.  Unfortunately, the militia having sustained heavy casualties have had enough and disband.  For details on this hot engagement, please visit Peter's Gridded Wargames, FIW Campaign Game 20

Still reeling from the heavy losses at Oswegatchie, the French choose to roll on the Command Table to set their forces into motion.  The result?  No French activations!  A band of Algonquin join the French cause and move to join the retreating Regulars from Oswegatchie but no French forces respond.  The loss of Rigaud and Oswegatchie must have been a hard blow for the French.  A hasty retreat back to Montreal seems the only option for the defeated survivors of Rigaud's force.  
Heavy French losses at Oswegatchie
June 1759
The loss of any French activations provides the British with a chance to take a double move.  The British could play it safely and opt for a guaranteed single activation or choose to roll on the Command Table.  The British choose the latter and roll three activations for June.
British maneuvers in June
With those three activations, Monckton, Abercrombie, and two Regular regiments depart Fort Carillon and march on Fort Isle aux Noix; one Regular regiment marches to Fort Presque Isle to join Braddock; and Loudoun and his victorious force embark in bateaux and travel upriver to Montreal.  Loudoun finds Montreal without a significant military garrison and Montreal surrenders without much resistance.  The French are in trouble!

With Braddock threatening Fort Niagara in the west, Amherst blocking any attempts to gain access to the Mohawk Valley at Fort Stanwix, Fort Isle aux Noix under threat, and both Quebec and Montreal under British control, the French government sees the writing on the wall and seeks terms of surrender.  Of course, the British accept.  The war is over.

Well!  This campaign game has yielded much more enjoyment and many more interesting battles than I imagined when first conceived back in February.  In February, I never expected the campaign to command six months activity.  In that time, Peter has fought 20 battles on his gridded gaming table while the operational situations were conjured up by me using Rob Markham's DTP game, Montcalm & Wolfe.  While I became very familiar with Markham's operational design, Peter honed his own gridded, tactical rules.  I enjoyed seeing Peter's rules evolve over the course of the campaign.  Seeing his troops battle it out on the table was always a joy.   

What began as a response to Peter's desire for campaign context for his gridded battles, this Montcalm & Wolfe campaign blossomed to develop an interesting and captivating narrative punctuated by Peter's tabletop battles.  While the campaign would draw up the forces and location for each battle, Peter crafted the terrain and tactical situation to reflect the context of the campaign.  Sometimes the battle outcome was expected; sometimes it was not.

Montcalm & Wolfe presents difficult challenges for the campaigner.  Due the nature of the terrain and harsh attrition rules, movement is channeled through only a few corridors protected by forts within one month's march.  Those few corridors such as the Mohawk and Hudson Valley drainages saw much action during the campaign.  How many times were battles fought over Forts William-Henry, Stanwix, or Oswego?  Many!  Those landscapes became quite familiar territory to the follower of this campaign as the reader was treated to Peter's tabletop renditions of the terrain. 

The French have a difficult time in Montcalm & Wolfe.  A war of attrition cannot be won with the uneven reinforcement schedule.  To do well, the French must strike early and often before British troops begin pouring into America.  When the balance of power changes, the French must adapt quickly.  Having played through one complete campaign game, I have a very good feel for the play and design of Markham's game.  Perhaps a review and thoughts on the game, itself, will follow at a later time?  

Until then, tremendous thanks go out to Peter for diligently tackling every battle thrown up against him.  His battle resolution gave an extra dimension to the game and added tension as I awaited publication of each battle's outcome.  Twenty games played out on the table for a campaign is a feat not easily duplicated.  Peter, I hope you enjoyed this experiment as much as I.  Chapeau to you!     

Saturday, August 4, 2018

Montcalm & Wolfe: French Gain a Major Victory

Battle for Fort Oswego
As set up in the last Montcalm & Wolfe post, Contrecoeur and Drucour converge upon Fort Oswego in an attempt to wrest control of this key outpost from British hands.  To follow the action of this Major Battle, please visit Peter's Grid Based Wargaming.  In the action, Contrecoeur was wounded and carried from the field.  In the end, the French persevered but it was a near run thing.  The French Irregulars were destroyed but the fort fell.  Defeated in battle, Amherst's militia had enough and disbanded.  With the Cayuga eliminated in battle, only Amherst and one regiment of Regulars escape.  With a French Major Victory, the Political Track shifts two spaces to the left in favor of the French.  With winter approaching, all Natives disband and return to their settlements.  
Winter 1 1758
With snow blanketing the ground, campaigning slows to prevent severe deprivations.  Britain rolls on the Command Table receiving one CP.  Amherst and his one regiment of Regulars slips past the French at Fort Oswego and returns to the lightly garrisoned Fort Stanwix.  Overpowering the garrison, Amherst prepares for winter within the safety of the fort.  The French move Drucour and one regiment of Regulars back to Fort Niagara before Braddock can respond.
Winter 2 1758
In the second winter turn, the British roll on the Command Table and the French get to interrupt with one activation.  With that, the militia in Fort Frontenac travels by bateaux to Oswegatchie to join Rigaud.

Rolling on the Command Table a second time, the British receive four activations.  With four activations, one Regular regiment moves from Albany to Fort Stanwix to join Amherst, Johnson moves to Fort William-Henry, one Regular regiment moves from Fort Edward to Fort William-Henry, and finally, the lone regiment of Regulars stationed at Fort Cumberland for most of the war marches to Baltimore.  The French remain inactive. 
Strategic Phase
Winter is mild and neither attritional losses nor militia disbandments are seen.  French receive one militia as a reinforcement and Contrecoeur returns to the field.  Both make their way to Fort Oswego.  The British receive one militia and Abercromby.  Both of these reinforcements march to Fort Carillon.

May 1759
With the end of winter, fresh reinforcement arrive.  One more colonial militia marches to Fort Stanwix to bolster Amherst.  The French receive two regiments of Regulars; one marches to Trois Rivieres to augment Montcalm's garrison while the other arrives at Fort Oswego.  Contrecoeur is amassing a sizable force on the banks of Lake Ontario.

To begin the campaign year, the British choose to roll on the Command Table.  Three CPs are received.  One Regular regiment marches from Fort Duquesne to Fort Le Boeuf; the Regular regiment in Baltimore is shipped to Quebec; and Loudoun and two regiments of Regulars converge upon Oswegatchie to attack Rigaud.  The British strike north in an attempt to isolate Montreal!
The Battle at Oswegatchie
OB:
British: Loudoun (A0D1), 2 x 5-6 Regulars
French: Rigaud (A0D1), 1 x 5-6 Regular, 1 x 3-5 Militia

With a river to his back, Rigaud must defend the settlement of Oswegatchie from Loudoun's bold attack out of the wilderness.  A British victory here could threaten Montreal from a second front.

Saturday, July 21, 2018

Montcalm & Wolfe: French Take Stanwix

French attack Fort Stanwix
In the latest action of the long-running Montcalm & Wolfe campaign, Peter resolved the battle at Fort Stanwix where the French under Drucour attacked the British garrison held up in the fort.  After two attacks, the fort fell to the French.  Please visit Peter's, Grid Based Wargaming blog for details of the action.

September 1758
With winter approaching and the loss of Fort Stanwix, the British want to accomplish more than task so opt to roll on the Command Table.  The resulting die roll allows the French to interrupt British maneuvers and activate one command themselves.  The French use this opportunity(?) to abandon Fort Niagara and march east.  Contrecoeur, Bouganville, and two regiments of Regulars march out from the fort.  Is Niagara no longer worthy of holding?  Perhaps the French are more interested in consolidating their positions in hopes of salvaging the war?

After the French interruption, the British once again roll on the Command Table.  No activations is the result!  Wanting to put pressure on Fort Oswego, the French choose to roll on the Command Table.  This time, turn about is fair play.  The results yields one activation to interrupt the French turn.  With that one CP, Wolfe and his one Regular regiment returns to Quebec.  Using Naval Transport, one militia from Trenton is shipped to Quebec.  

After the British finish their interrupting move, the French, once again, roll on the Command Table.  This time five activations are secured.  With that, Rigaud and one Regular comes out of the wilderness and returns to Oswegatchie while both Contrecoeur and Drucour march on Fort Oswego. Both Montcalm and Dieskau are placed in Reserve.  A leader and force placed in Reserve may move during their opponents turn automatically. 
Movements in September 1758
With Contrecoeur and Drucour descending upon Amherst and his garrison at Oswego, a Major Battle will be fought since each side fields at least four units.

Battle of Fort Oswego:
OB:
British: Amherst (A3D1), 1 x 5-6 Regular, 2 x 3-5 Militia, 1 x 3-8 Cayuga
French: Contrecoeur (A2D2), 3 x 5-6 Regulars, 1 x 4-7 Irregular 

On defense, Amherst can boost one unit one level.  On attack, Contecoeur can boost two units one level each or one unit two levels.  The French will be attacking the fort from both the west and south.

Should be an interesting and important fight.

Thursday, July 12, 2018

Montcalm & Wolfe: Blood Along the St. Lawrence

Situation August 1758
On the banks of the St. Lawrence River at the confluence with the St. Maurice, Wolfe is handed a bloody repulse by Montcalm and his stoic French troops.  While Montcalm suffered heavy losses in the British attack at Trois Rivieres, Wolfe was driven back with very heavy loss.  Wolfe's command lost two regiments of Regulars out of the three regiments present for the battle.  For details on this epic struggle, see Peter's Grid Based Wargaming as he recounts the 17th action in the campaign. 

With the repulse of Wolfe at Trois Rivieres, Montcalm has time to regroup.  Montreal, for now, is in no immediate threat of attack.  Rather than falling back to ready the defenses of Montreal, Montcalm can remain at Trois Rivieres as fall approaches.

As expected in their situation, the French want to attempt more than one action in August and roll on the Command Table.  The outcome results in only one Command Point anyway.  With that one Command Point, Drucour's force to the southwest of Fort Oswego marches on Fort Stanwix.  Having a more effective commander as Contrecoeur lead the attack would have been preferred but that is not to be.  Garrisoned by one regiment of Regulars, Fort Stanwix must hold out against Drucour's superior force of two regiments.  With the 1758 campaigning season drawing to a close, Fort Stanwix in French hands would be a welcome relief in an otherwise, hard year.  

Battle of Fort Stanwix
OB:
British: 1 x 5-6 Regular regiment
French: Drucour (A0D1), 1 x 5-6 Regular regiment, 1 x 4-7 Irregular regiment.

Having fought over this ground before, Drucour is very well familiar with how to most efficiently attack the fort. 

Friday, July 6, 2018

Montcalm & Wolfe: Wolfe Hunts Down the French

Wolfe attacks Montcalm's hasty defenses
Montcalm, having been given the boot from Quebec by Wolfe and his regulars, was hotly pursued by the same after receiving safe passage.  Calculating that his force would be unable to outrun his pursuing adversary, Montcalm turned and offered battle.  After a heated exchange, Montcalm gathered his forces and made good an escape.  The French militia having tasted two recent defeats, melted away into the woods on the retreat.  For details of this action, please visit Peter’s Grid Based Wargaming.

After being interrupted by an unexpected British activation, play returns to the French.  Still needing to accomplish more than one activation, the French tempt fate and roll on the Command Table.  This time, the French receive three activations.  

With these activations, Montcalm and his remaining Regulars march to Trois Rivieres and prepare for the inevitable British attack.  One regiment of Regulars travels by bateaux to Trois Rivieres to lend some strength to Moncalm's defense while Drucour marches his force towards Fort Stanwix.

During July attrition, Rigaud's regiment of Irregulars disbands leaving Rigaud with one regiment of Regulars.  During this season, the French lose two regiments to the ravages of hard campaigning.  With only a few viable forces left in the field, the French may have to change their strategy for conducting the war.  Really, only Contrecoeur's isolated force at Fort Niagara remains a threat.  
French Movements July 1758
August 1758
Wanting to hit Montcalm before any more reinforcements arrive and to capture a supply base to avoid attrition in the heat of summer, the British opt for the one automatic Command Point to set Wolfe in motion.  That he does.  With three regiments of Regulars, Wolfe attacks Montcalm at the settlement of Trois Rivieres.

Battle of Trois Rivieres
OB:
British: Wolfe (A4D4), 3 x 5-6 Regular regiments
French: Montcalm (A4D4), 2 x 5-6 Regular regiments.

The settlement of Trois Rivieres is situated on the banks of the St Lawrence and St Maurice rivers.  Hasty works have been erected by Montcalm.  Will combat favor the defense?

Wednesday, June 27, 2018

Montcalm & Wolfe: Quebec Falls!

British storm Quebec Fortress
Wolfe's ambitious siege of Quebec successfully breached the fortress walls and Montcalm capitulated.  Montcalm and the survivors were allowed the honors of war and marched out of the fallen fortress.  For details on the attack and capitulation, please visit Peter's Grid Based Wargaming blog.  Peter's recounting of the siege operations is a fine example of conducting a siege in the mid-18th Century.

With the loss of Quebec, Montcalm, one regiment of Regulars and one regiment of Militia march out from the city.  The Cayuga are recruited to the British cause and move to Fort Oswego to join Amherst.
For the French portion of June 1758 turn, more than one activation is needed to reposition forces after the loss of Quebec.  Rolling on the Command Table, an '8' is rolled giving the British one additional activation and preempting French activations.  When it rains it pours!  Faced with more than one option, the British decide to pursue Montcalm in an attempt to destroy his force before it can reach the relative safety of Trois Rivieres.  Not wanting to risk his entire force to the potential ravages of attrition, Wolfe leaves one regiment of Regulars to garrison Quebec.  Realizing his militia cannot outrun Wolfe and his party of regulars, Montcalm turns to face his pursuers.  Game 16 in the series will be the pursuit and catching of Montcalm in the woods west of Quebec. 

Pursuit of Montcalm:
OB:
British: Wolfe (A4D4), 3 x 5-6 Regulars
French: Montcalm (A4D4), 1 x 5-6 Regular, 1 x 3-5 Militia
Terrain: woods with clearings.

Will Montcalm make good his escape?

Sunday, June 10, 2018

Montcalm & Wolfe: Ambush & Amphibious Assault

Ambush!
The trap is sprung!  Caught on the march through the mountains, a regiment of British Regulars is surprised by Rigaud and his mixed force of militia and Regulars.  Peter details the battle account of the French ambuscade at Grid Based Wargaming FIW Game 14. 
Rigaud ambushes British Regulars in mountains
With a BMU multiplier of four for this battle, each regiment on the boardgame translated into four stands on Peter's gaming table.  The British regiment, caught in ambush, lost three of its four stands in the action.  The only stand to escape destruction was the light infantry stand.  In the campaign, regiments not completely destroyed in the tactical combat are assumed to come back up to full strength in the next turn.  What this means is the the British infantry cadre of one stand, having suffered 75% casualties, returns to full strength when play returns to the campaign map.  Perhaps a unit losing more than 50% of its strength should be eliminated instead?  Something to think about. 

NB:  Having given it some thought, I propose the following amendment for consideration:
A BMU having retired from battle must pass a cohesion test.  To pass, a BMU that has lost component stands must roll less than or equal to the percentage of stands remaining from the original BMU.  For example, a BMU with four component stands, having sustained three stand losses in combat and retiring, has a one in four change of returning to battle next turn at full strength.  If the roll is failed then the BMU is removed from play permanently.  

June 1758
There was a good reason why Wolfe was gathering a large force of Regulars at Trenton.  That reason?  Wolfe has gathered his force for an amphibious assault on Quebec!  Loading the ships with five regiments of British Regulars, Wolfe sets sail for the hub of New France.
With the British fleet packed with troops preparing to disembark its holds, the French under Montcalm has some tough choices to make.  Does he sally forth from the citadel and confront Wolfe and his army or remain inside the citadel and subject himself to a siege?  Choices that Peter will make when he sets up and plans the battle.  The Battle for Quebec provides Peter his first chance to bring his mighty fortress into the game and give his siege rules a test.  The two best leaders of the war face off against one another.   Should be an interesting battle.
Battle of Quebec:
OB:
British: Wolfe (A4D4), 5 x 5-6 Regular Infantry Regiments
French: Montcalm (A4D4), 2 x 5-6 Regular Infantry Regiments, 1 x 3-5 Militia Regiment

Could this be the deciding moment of the war?

Wednesday, May 23, 2018

Montcalm & Wolfe: French Lose Oswego

British May Reinforcements
After losing Fort Oswego to Amherst, Drucour and his regiment of Regulars are given the Honors of War and march out from the fort.  For details on how the French lost Fort Oswego, see Peter's account of the battle at Grid Based Wargaming.  Peter continues to modify the tactical combat rules with refinement in the use of leader ratings.  I think his modifications work well and more closely incorporate the spirit of the boardgame.

If the victory on the battlefield is not enough to sway opinion in favor of the British, May 1758 sees a large influx of reinforcements into the colonies.  Six regiments of Regulars arrive and are allocated as 1 x 5-6 Regular to Fort Stanwix to thwart any thought of Drucour making an attack against the undefended fort, 2 x 5-6 Regulars to New York joining Wolfe, 2 x 5-6 Regulars to Trenton, and 1 x 5-6 Regular to New Haven. 

May 1758 French:
The French opt to take no chances and choose the automatic one Command Point.  With that one CP, Rigaud and the 1 x 4-7 regiment of Irregulars travel by bateaux from Montreal to Oswegatchie.  The arrival of a garrison to the settlement of Oswegatchie trumps the British from slipping into the settlement without much of a fight.  Now if the British want the settlement, they will be forced to fight for it.  In addition, the Oneida ally with the French and move against the lightly garrisoned Fort Le Boeuf.  The fort falls to the Natives.  For May reinforcements, the French receive two regiments: one Regular and one Irregular.  The Regulars are sent to Oswegatchie while the Irregulars are sent to Fort Niagara.
French Maneuvers May 1758
June 1758:
The British roll on the Command Table receiving only one Command Point.  With that one point, Wolfe, 2 x 5-6 Regulars and 1 x 3-5 Militia march to Trenton.  Trenton now has a force under Wolfe's command of four regiments of Regulars and one regiment of Colonial Militia.  What are the British planning?  The Seneca near Fort Niagara rally to the British flag.
French Maneuvers June 1758
The French choose to roll on the Command Table as well.  They have better luck scoring three Command Points.  With these, Drucour and his regiment of Regulars march toward Fort Niagara.  With the Seneca blocking the main line of advance, Drucour attacks.  From Fort Niagara, Contrecoeur sends out the regiment of Irregulars to join Drucour in his attack against the Seneca settlement.  From Oswegatchie, Rigaud and his newly gathered force of one Irregular and one Regular attacks the British Regulars in a mountain ambuscade to the south of the settlement.  The French have returned to the offensive with two battles in June!

Drucour's Attack Against the Seneca:
OB:
British: 1 x 3-8 Seneca Warband 
French: Drucour (A0D1), 1 x 5-6 Regular, 1 x 4-7 Militia
In defense of their settlements, the Seneca are prepared to fight savagely despite being attacked on two fronts.

Rigaud's Ambush of the British Regulars in the Mountains Near Oswegatchie:
OB:
British: 1 x 5-6 Regular regiment 
French: Rigaud (A0D1), 1 x 5-6 Regular, 1 x 4-7 Militia
Caught on the march through unfamiliar mountains, the British are surprised by the French attack.

Two more interesting battles for Peter to resolve.

Saturday, May 12, 2018

Montcalm & Wolfe: Braddock Reaches Lake Erie

The French fort on the banks of Lake Erie falls to a coordinated attack of British and Native allies.  Losses were high for the French losing two regiments in the battle.  The French commander of the garrison, Contrecoeur, is allowed to march from the fort having surrendered.  For details of the battle, see Peter's BatRep at Battle of Fort Presque Isle.

This is a tough loss for the French and their war effort as their hold on the Great Lakes is greatly hampered.  While still holding onto forts Niagara and Oswego, British forces are tightening the noose with Braddock advancing from the west while Loudoun can threaten from the east.  The loss of the fort advances the Political Track one place to the right and back to '0'.  Recall that only a short time ago, the Political Track was pegged at '5' in French favor.  For the French, the Year 1757 cannot come to a close quick enough.

September 1757 Continued
French roll on the Command Table and receive two activations.  Contrecoeur and remnants from the Presque Isle garrison make a path back to the relative safety of Fort Niagara while Rigaud, one regiment of irregulars, and a militia regiment travel to Montreal.  All Native warbands disband as winter approaches.
September 1757 maneuvers
Winter 1 1757
To avoid taxing limited resources, one regiment of British Regulars marches from Fort Carillon to Fort William-Henry.  For attrition, one militia of British militia disbands.

Winter 2 1757
Johnson moves to take up command of Fort Edwards but is yet to reach the comfort of the fort.  Winter attrition is harsh.  The British lose two regiments of militia (Fort Edwards and Albany) while the French militia in Montreal disbands.  

1757 Strategic Phase
Reinforcements
In the year-ending Strategic Phase, the British receive four milita regiments with Wolfe and Amherst sailing to take up commands in the colonies.  Amherst and two militia travel to Fort Stanwix.  Wolfe and two militia arrive in New York City.

For the French only one militia is recruited and Montcalm arrive.  Both take up residence in Quebec.

May 1758
The British begin the 1758 campaigning season by rolling on the Command Table.  The British receive three activations.  One regiment of Regulars marches off into the wilderness from Fort Carillon.  Loudoun sets off from Fort Stanwix to rendezvous with the Regulars marching north.  Finally, Amherst with one regiment of Regulars and two regiments of militia march to attack Fort Oswego.  Fort Oswego once again finds itself under the gun.  If Fort Oswego falls, Fort Niagara will become even more isolated.
British maneuvers May 1758
Battle of Fort Oswego
OB:
British: Amherst (A3D1), 1 x 5-6 Regular, 2 x 3-5 Militia
French: Drucour (A0D1), 1 x 5-6 Regular
  

Friday, April 27, 2018

Montcalm & Wolfe: Capture of Fort Oswego

French assault Fort Oswego
Peter fought out the French assault against Fort Oswego (See: French Campaign Game #10).  The French under the command of Drucour took the fort but at a high cost.  One unit of French Regulars was lost in the battle against the destruction of the fort's militia.  At least this important outpost on the shores of Lake Ontario is back under French control.  If an objective is successfully taken, casualties suffered are quickly forgotten.

Loudoun, in the wilderness with his defeated Regulars, was forced to forage having been repulsed from Fort Stanwix.  In the mid-summer heat, two of his three regiments wilted and succumbed to deprivations.  Loudoun learns a painful lesson about warfare in the wilderness.  Failure to capture a supply base can be as costly as taking one.
August 1757
Needing to accomplish more than one task, the British opt to roll on the Command Table hoping for the best possible outcome.  The chance at the Command Table yields three Command Points.  With three CPs, Loudoun and his regiment of Regulars slip into the now lightly garrisoned Fort Stanwix and a regiment of Regulars beats the Illini to Fort Duquesne.  The Cayuga make their way towards Fort Presque Isle.  The Oneida ally with the British.
British maneuvers AUG 1757
In response to British maneuvers, the French also opt for a roll on the Command Table.  The French receive two Command Points.  With two activations, Contrecoeur marches with one regiment of Coeur d bois to Fort Presque Isle while Bougainville travels to Fort Niagara to take over command of the fort.
Bougainville and Contrecoeur swap places
September 1757
With winter approaching, the British launch one more offensive.  Although recently reinforced by Contrecoeur, Fort Presque Isle is the target of British aggression.  Braddock and two regiments of Regulars march out from Fort le Boeuf and attack the fort from the south while the native warbands of Cayuga and Oneida attack from the east.  
Attack on Fort Presque Isle
Battle of Fort Presque Isle
OB
British: Braddock (A0D1), 2 x 5-6 Regulars, 2 x 3-8 Native Warbands
French: Contrecoeur (A2D2), 2 x 5-6 Regulars, 1 x 4-7 Irregulars

Can Braddock succeed in capturing the fort or will Contrecoeur successfully repulse the British attack?  Only Peter can provide that answer!

Thursday, April 19, 2018

Montcalm & Wolfe: Win Some, Lose Some

French flank turned at Fort Carillon
from Grid Based Wargaming
While the British July offensive has run its course (see Peter's accounts of the Battle for Fort Stanwix and Battle for Fort Carillon), the French are not done for yet.  In the Battle for Fort Stanwix, the Loudoun led British are repulsed with the loss of one regiment of British Regulars.  Loudoun withdraws back into the woods to reconsider his options.  At Fort Carillon, the battle is a bloody affair as the British under Monckton outflank the French defensive works and capture the fort.  Each combatant loses one regiment of Regulars.  Dieskau withdraws into the woods. 
British July campaign results
Since the combat at Carillon involved at least four units each and a leader, the fall of Fort Carillon represented a Major Victory for the British.  With the Major Victory and the loss of Fort Carillon, the Political Track is shifted three spaces to the right in favor of the British. 
For the French July operations, more than one activation is needed pressuring the French to take a chance by rolling on the Command Table.  The result is two activations.  That is enough to take care of immediate needs.  To avoid having to forage in the wilderness, Dieskau, as expected, leads his defeated force back to the safety and food of Fort Isle aux Noix.

While Loudoun ponders his next move, Drucour takes the initiative and marches his force of two regiments of Regulars on an attack against the lightly garrisoned Fort Oswego.  Abandoning Fort Stanwix will likely lead to its recapture by the British.  For the French, eliminating British influence on the shores of Lake Ontario seemed a better gambit.  History will be the judge of Drucour's decision.
French maneuvers July 1757
The Illini are successfully recruited to the French cause and advance upon the ungarrisoned Fort Duquesne.

Battle of Fort Oswego
OB:
British: 1 x 3-5 Militia
French: Drucour (A0D1), 2 x 5-6 Regular regiments

Can Drucour wrest control of Oswego from the militia?

Tuesday, April 3, 2018

Montcalm & Wolfe - The July Offensive

Braddock attacks le Boeuf
Grid Based Wargaming
Peter resolved the battle of Fort Le Boeuf and Bougainville could not hold off Braddock.  The fort falls and Bougainville marches out to Fort Presque Isle.  See Peter's account of the battle at Battle of Le Beouf.

May 1757 sees a large number of British troops arrive from England.  Reinforcements from England include six regiments of Regulars and one regiment of militia is raised.  Two regiments of Regulars go to Fort Cumberland, two Regiments of Regulars go to Fort Edward, two regiments of Regulars travel to Fort Oswego, and the militia marches to Albany.
British Reinforcements
The French receive reinforcements too but not in the quantity that their opponents called up.  The French muster two regiments of Regulars and one regiment of Irregulars.  One Regular travels to Fort Presque Isle to bolster Bougainville's garrison and discourage Braddock.  The second regiment of Regulars and the Irregulars travel to Isle aux Noix.  Dieskau, seeing the build up at Fort Edward, abandons William-Henry and retires to Fort Carillon.
French Reinforcements
June 1757
With Fort William-Henry abandoned by Dieskau, Monckton marches his large force to garrison the fort.  Only one regiment of militia is left behind to garrison Fort Edward.  Johnson successfully recruits the Cayuga to the British cause.  The Cayuga warband immediately sets off toward Lake Ontario.  For the early summer maneuvers, the French are content to ferry one regiment of Regulars from Isle aux Noix to Fort Carillon. 
June 1757
July 1757
With a fresh batch of reinforcements in the right place at the right time, the British go on a July offensive.  In an attempt to hit strength with strength, Loudoun attacks Fort Stanwix while Monckton attacks Fort Carillon.  A reinforcing regiment of Regulars marches out from Fort Cumberland. 
Double British Attack
Battle of Fort Stanwix OB:
British: Loudoun (A0D1), 4 x 5-6 Regulars
French: Drucour (A0D1), 2 x 5-6 Regulars

Battle of Fort Carillon OB:
British: Monckton (A2D1), 5 x 5-6 Regulars
French: Dieskau (A2D2), 3 x 5-6 Regulars, 1 x militia 

Two important battles for the summer '57.  The battle at Carillon is a Major Battle which means the Political Track will shift two in the winner's favor.  These twin battles have the possibility of changing the outcome of the war.  I anxiously await the results.

Over to you, Peter!

Thursday, March 29, 2018

Montcalm & Wolfe - Out With the Old; In With the New (Year)

Situation Strategic Phase 1756
Following Monckton's defeat at the Third Battle of Fort William-Henry, the British withdraw back to Fort Edward to lick their wounds and prepare for another campaign year.  See Peter's account of the battle at French Indian War Campaign - Game 6.

Winter attrition is again harsh as the French lose a regiment of Regulars in Quebec and a regiment of militia in Fort Stanwix.  The British see the Rangers disband after the defeat at Fort William-Henry and one regiment of militia disbands at Fort Oswego.  With conditions not fit for campaigning, the winter of 17565 comes to a close.  

With a new year comes new reinforcements.  Having experienced success on the battlefield, the French find themselves pegged against the far left of the Political Track at (+2) DRM.  Given that situation, the British find themselves at a (-2) DRM.  Rolling on the Reinforcement Table, the French receive one militia and Bougainville.  Bougainville travels to Fort Le Boeuf while the militia travel to Fort Frontenac.  The British receive one militia and General Loudon.  Both make their way to reinforce Fort Oswego.

If the Political Track remains in this position at the end of 1757, the French can declare an automatic victory and bring the war in New France to a close.  The British will be forced to show some grit and determination in the New Year to keep the British government interested in continuing this losing war.
May 1757
Not wanting to risk either an interruption by the French or no activation at all, the British opt for the automatic one activation.  With that, Braddock marches out from Fort Duquesne to attack Bougainville at Fort Le Boeuf.
Braddock attacks Bougainville
Battle of Fort Le Boeuf OB:
British: Braddock (A0D1), 2 x 5-6 Regular regiments
French: Bougainville (A0D1), 1 x 5-6 Regular regiment

Small forces but a strategic point for both parties.  If the French hold the fort, the line of forts back to Fort Niagara remains intact.  If Braddock succeeds, the British gain a toe-hold out of the wilderness with the ability to threaten French settlements on the Great Lakes.

Peter, over to you!

Wednesday, March 21, 2018

Montcalm & Wolfe: The Winter of '56

Attrition is harsh during the early stages of winter
After the fall of Fort Stanwix to French assault (see: Peter's Battle of Fort Stanwix), the defeated British Regulars were allowed to march out of the fort and into the wilderness.  Without resources, the Regulars would face foraging during winter.

In Montcalm & Wolfe, winter is especially hard on troops.  In addition to each turn's Supply Phase where units not on a Supply Source forage, winter has its own Attrition Phase.  In winter, even stationed on a Supply Source is no guarantee of making it through winter.  In winter, settlements can only exempt one non-militia from foraging while a fort or port can guarantee that two, non-militia units will not have to forage.  Militia have a special demobilization roll where every militia must make this roll regardless of location.

With those preliminaries out of the way, how did the armies far during the 1756 Winter 1 Attrition Phase?  The British Regulars marching out of Fort Stanwix were successful but one Regular in Fort Edward and one Regular in the Cumberland Wilderness succumbed to the ardors of winter foraging.  No British militia demobilized.  For the French, two militia demobilize and head back home.  Those militia were garrisoned in Fort William-Henry and Quebec. 
Winter 2 Movements
For the second winter turn of 1756, the British roll on the Command Table.  Again, the British CinC rolls one activation for the French!  The French use this single activation to march one Regular regiment from Fort William-Henry toward Fort Stanwix.  It appears the French prefer reinforcing and holding Fort Stanwix than garrisoning William-Henry in strength.  After the French complete their interruption of the British player's turn, the British again roll on the Command Table.  This time three Command Points are drawn.  With these three activations, the Regulars on the march to Fort Oswego reach the fort, Shirley returns to Albany, and Monckton, seeing the garrison drawn down, once more descends upon Fort William-Henry.  Yes, Fort William-Henry is the site for another conflict.

Battle of Fort William-Henry
OB:
British: Monckton (A2D1), 2 x 5-6 Regulars, 1 x 3-8 Ranger, and 1 x 3-5 Militia
French: Dieskau (A2D2), 2 x 5-6 Regulars

Can the French hold the fort or will it change hands once again?