Showing posts with label Battle Commander. Show all posts

Monday, July 18, 2022

Battle of Neville's Cross 1346

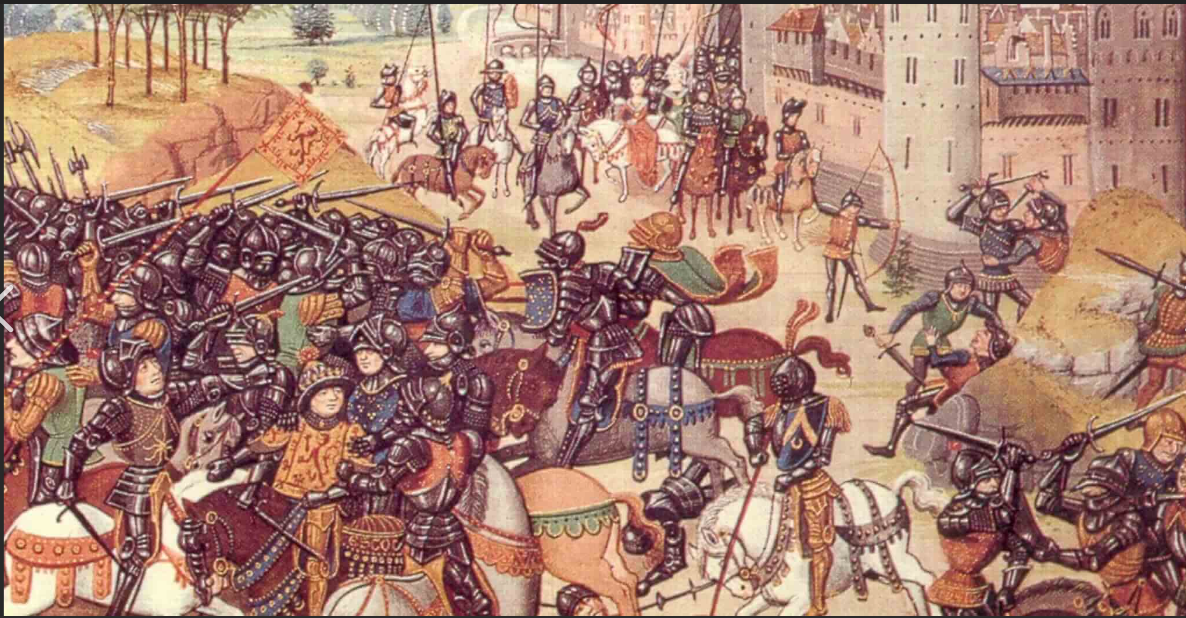
Two weeks ago, Richard hosted a hybrid game in which half of the participants were in his game room and the other half were joining in remotely. The battle under consideration on this day was the 1346 Battle of Neville's Cross. 

Before game day, Richard assigned overall commanders.  I would play the role of Robert, positioned with the King, in the Scottish army.  Each commander received a battle briefing and I assume a battle sketch map.  My briefing suggested that,

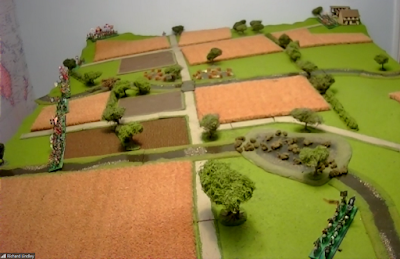
Your scouts have produced the following map. The Scots have been camped in the Prince Bishop's manor park of Beaurepaire, or Bearpark, from where they have been collecting payments in return for agreeing not to plunder surrounding towns and villages. The English have appeared from the south and face them across a fairly narrow ridge with steep scarps on both sides.

The previous day, Scottish scouts were surprised to come across the vanguard of the English army and were beaten off with significant casualties. This was a shock to the young Scottish King, but the army facing him is smaller than is own and is made up from those King Edward left behind when he sailed for France.
Neville's Cross
map courtesy and copyright Richard Lindley
Robert's address to the Scottish army before the battle was,

Gentlemen,

I suggest we allow the English to advance upon our positions.  We can attack after the enemy has been softened and constrained by the narrowness of the ridge. 

With that, the Battles deployed behind the hedge offer up a steady missile fire upon approaching English while Steward advances cautiously toward the narrow ridgeline while keeping his left secured to the scarp.  Once lead elements of English reach the narrow ridge and attempt to emerge, Steward should attack vigorously.  Moray and Robert will follow-up in support to drive the English from the field.

If only two of the three English battles remain in the fields to our front, then expect treachery against our right.  If all three dare not oblige by moving toward our positions via the plateau then a defensive battle must be fought.  In this case, Moray to move to his right taking up position in the hedge along the road to cover the road and discourage attacks against our right.  Be vigilant of the possibility of flanking maneuver against our right from the road on the escarpment.  Robert and Steward to take up defensive positions behind the hedge and wait for the English.  Attack if numbers are favorable.      

Well, Robert's battle plan was torn asunder from the start when the King ordered the Scots to advance across the hedge and engage the English.  Sigh.

On to Battle!
Chris dressed in his finest for the occasion.
He commands the Scottish right.
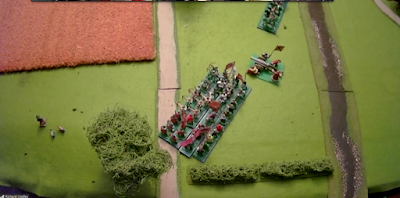
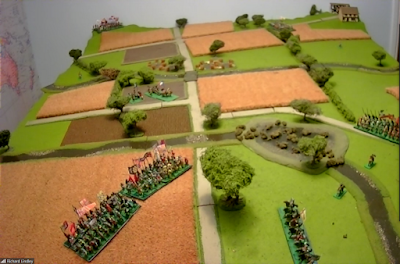
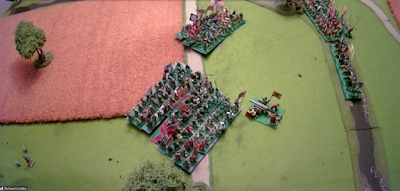
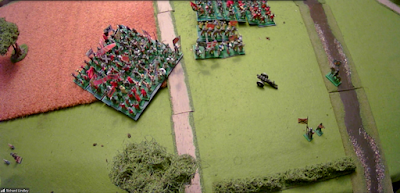
The two armies begin the advance.
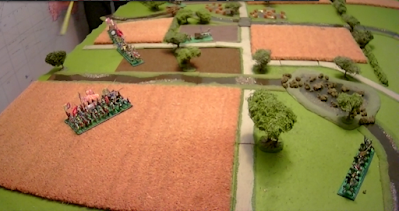
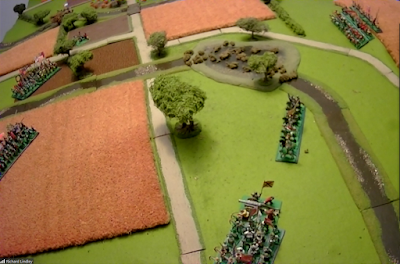
Steward, on the Scottish left, pushes forward as the
English quickly move up along the narrow plateau.
Steward's good shooting softens up his adversary.
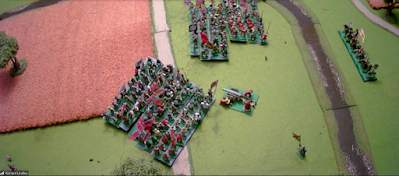
Steward continues pushing forward to close range.
He is determined to carry out the orders as given.
Forwards!
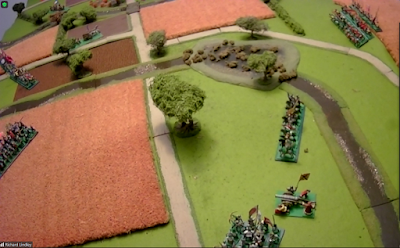
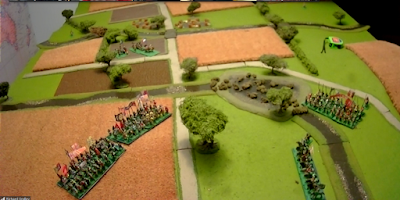
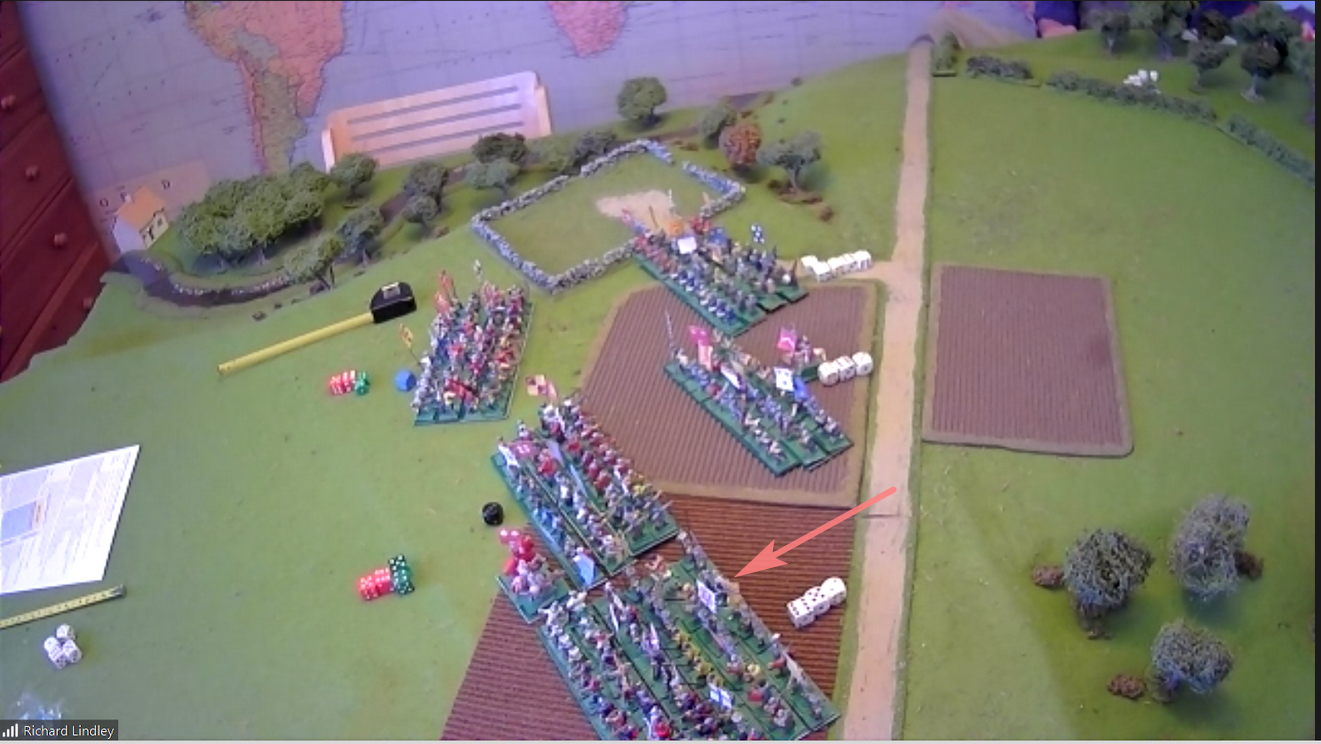
Robert moves up in the center and begins
 to harass York with missile fire.
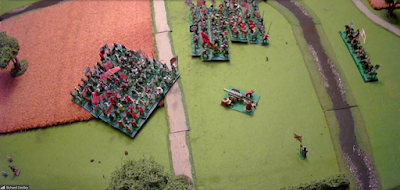
Rather than being shot to pieces by Steward's
devasting fire, Neville charges in.
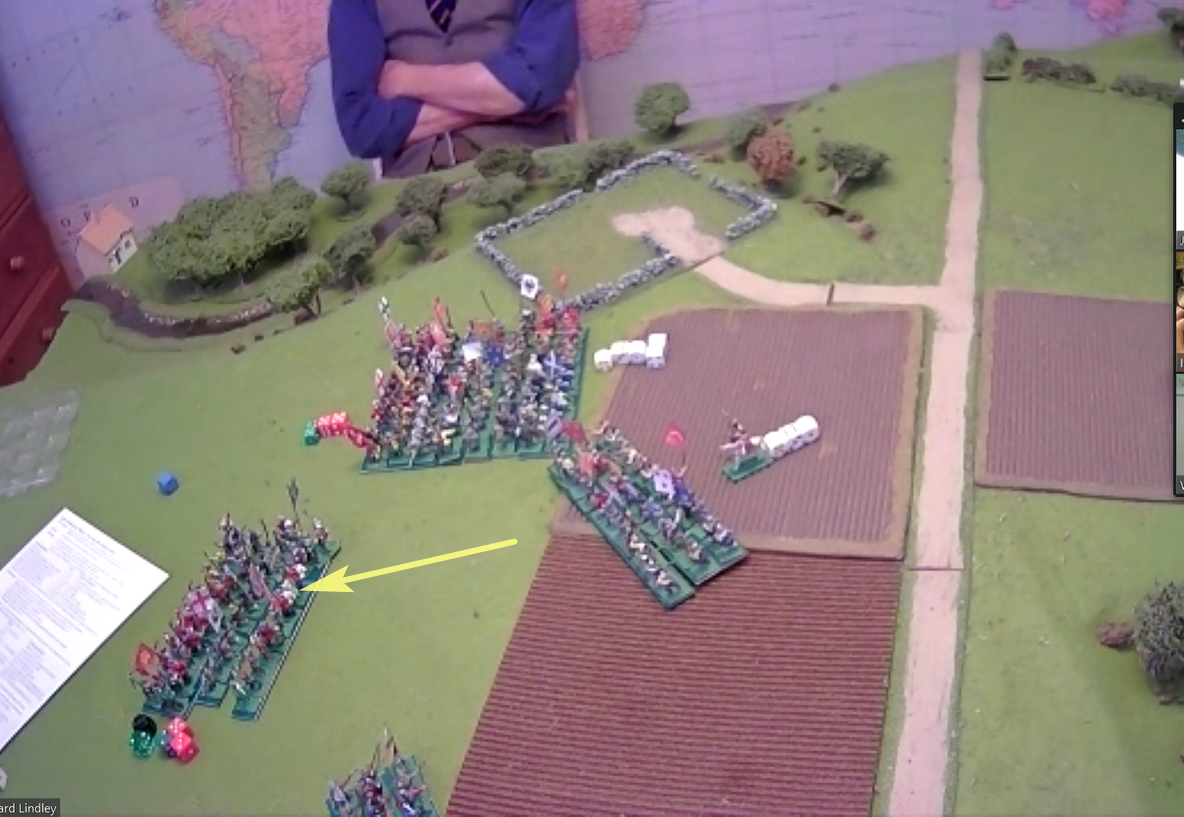
Neville's archers rout and his battle line recoils.
Hooray!
Neville breaks and heads for the rear.
Steward is in hot pursuit.
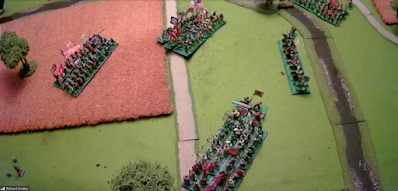
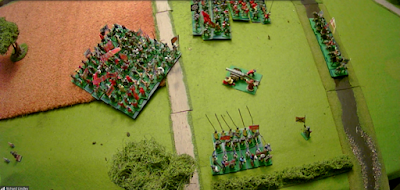
Seeing the English break in front of Steward,
Robert charges in against York.
Robert and York battle back and forth trying
to gain an upper hand.
Finally, York has had enough. 
His Battle breaks for the rear.
The battle is over.
A Glorious Victory to the Scots and history is reversed!

The battle offered up a quick and sharp action with the battle decided in relatively short order.  The key to battle was Steward's actions on the Scottish left.  He advanced quickly as planned and delivered devastating blows to Neville.  I am not sure Neville knew what hit him.  Steward saw some incredible luck with the dice but I say it is better to be lucky than good.

Great fun and thanks to Richard for hosting!

Thursday, January 27, 2022

Battle of Bosworth Redux

William Stanley - Kingmaker

Following the Battle of Bosworth played three weeks' ago (See Battle of Bosworth), there was discussion and much interest in a refight.  On Tuesday, Richard presented an encore presentation of his Battle of Bosworth game. 

In the first game, I took the role of Henry Tudor.  I would not be reprising that role in the second battle.  For this battle, Richard (the host) appointed to me the role of Richard III.  Richard III met an untimely fate in the first battle at the hands of an ambush by a French and Welsh rabble.  I would try to avoid that demise and attempt to reverse history.

Richard (the host, not the King), offered several pre-battle decisions that Richard (the King not the host) needed to weigh.  He opted to keep Lord Strange alive as a bargaining chip and to fight dismounted with his Household MAAs in conjunction with his Battle.  Henry would have choices to make too.  Having played Henry in Game 1, I was curious to see which course the new Henry would take.

On to battle!

In the van, Norfolk marches to meet the enemy.
Henry crosses the stream to join Stanley.
Richard's army marches on to battle.
Oxford arrives as Henry pushes on.
Henry's artillery splashes across the stream.
Henry seems to be trying to escape!
Richard moves to cut him off.
Norfolk closes in on Oxford's rear.
Seeing Oxford form up,
 Henry countermarches back across the stream.
Norfolk forms up as Richard maneuvers
 to cut Henry's route to Stanley.
Oxford's archers let loose into Norfolk.
Richard's artillery finds Henry as he recrosses the stream.
Norfolk and Oxford exchange volleys of arrows. 
Henry's guns open up against Richard
 as the battle escalates.
Henry's Battle suffers heavy casualties
and is forced to withdraw.
William Stanley remains motionless.
Oxford and Norfolk collide as Stanley moves off the hill.
Henry returns to the fray.
As Norfolk and Oxford clash,
Henry's Battle again absorbs great casualties.
Richard takes artillery fire too
but the Tudor guns are not so sharp today.
The bombardment against Henry continues.
Richard and Stanley crash into one another.
The fight is on!
Melees continue as losses climb.
Henry wheels as he prepares to aid Stanley against Richard.
Will Henry arrive before battle is decided?
As Henry swings around, more artillery pounds his Battle.
Tudor counterbattery reduces
 the effectiveness of Richard's guns. 
With heavy losses, Stanley is driven back up the hill.
Richard pursues.
Henry wades into the marsh to relieve Stanley.
Henry continues taking artillery fire.
Leading from the front,
Richard is surrounded and captured.
Oh No!
Watching helplessly as Stanley has their King executed,
 Richard's troops lay down their arms, demoralized.

With Richard dead, the battle ends.  Henry will be king.

Wow!  That was an exciting contest.

While Norfolk was holding his own against Oxford, Richard was beating the stuffing out of Stanley.  Northumberland never made it into the fight.  Had it not been for two very low probability die rolls, Richard could have been King.  

History is not reversed and Richard still winds up in a car park.  

Tuesday, January 4, 2022

Battle of Bosworth

Bosworth Field is quiet

Back to the gaming table after the holidays!

For a return to remote gaming, Richard offered up the Battle of Bosworth using his Battle Commander rules.  One really interesting aspect of this game and Richard's interpretation is that both Henry and Richard III had a number of stratagems to consider prior to game day.  As Henry, commanding the Tudor Army, I faced two decisions.  I suspected my counterpart, Graham, as Richard III, faced similar decisions to make.  Neither commander saw the battlefield before play began so much was left to my imagination as to what exactly I faced.

On to battle!

Henry draws up Oxford on his left with guns in between.
Norfolk leads the Yorkist army as it approaches
Henry's position.
Richard follows closely in column.
William orders his battle to move to join Henry
 but he hesitates to commit.
Richard deploys into Battle and moves to come
 up alongside Norfolk.
Yorkist guns send balls into the ranks of
Henry's mounted MAAs.
Norfolk and Richard advance toward Henry.
Lord Stanley gets word that his son has been executed.
He sends message to W. Stanley and then marches out.
Henry continues taking fire from distant artillery
 but William Stanley moves to protect Henry.
Richard advances as Yorkist artillery and
archery pound Henry.
On the left, Oxford and Norfolk exchange archery fire
as they slowly close upon one another.
Tudor guns target Norfolk.
Norfolk strikes first sending his Battle into Oxford.
Lodged in melee, both fight furiously
 to gain an upper hand.
Lord Stanley, in the distance,
marches to the sound of battle.
Northumberland remains inactive.
While Oxford and Norfolk battle, 
Stanley attacks Richard.  Richard is wounded.
Tudor gunners abandon their pieces.
Norfolk falters and falls back with Oxford in pursuit.
The trap is sprung!
French pikemen and handgunners emerge
from ambush and head for Richard's flank.
Both Oxford and Stanley fight desperately in
hand-to-hand against the Yorkists as the French close.
Henry and his entourage break from artillery fire and retire.
Norfolk can take no more.
 His command breaks for the rear.
The French slam into Richard's flank
while Stanley hammers his front.
Wounded, Richard's courage cannot affect
 the outcome of battle.
Henry returns in time to see Richard defeated.
Richard will not remain king.
Henry will be King!  Long live the King!

Great start to the New Year!

Richard presented an engaging scenario with the ramifications of the decisions made and their consequences discussed long after the game ended.  Very entertaining and a big thank you to Richard for hosting.

Next Tuesday, I step up to the plate with a look at Samurai armies at the Battle of Second Azukizaka, 1548.

Friday, December 18, 2020

Battle of Blore Heath

In my second gaming session of the week, I participated in a remote battle via Skype to refight the Battle of Blore Heath during the War of the Roses.  Richard hosted the battle and five players convened to fight it out.  Rules used were Richard's own Battle Commander rules.  This is my second game with these rules and there is a lot to like.

Each commander takes on leadership of one Battle consisting of three lines of troops.  While three maneuver elements may not seem like much to command, the rules offer much in tactical nuance between each of the lines and decisions are aplenty.  Casualties and morale levels are tracked via a roster.  Each roster is arranged in such a manner that everything needed for the commander is at-hand and available at a glance.  

Without further adieu, on to the battle.  Battle commentary is embedded within each game photo and arrows signify movement (white), attacks (red), and retreats (yellow). 


Again, even in defeat, this battle was great fun.  The interplay between the different arms and battle lines produces a very interesting and nail-biting game.

Thanks to Richard for hosting such a fine presentation and to the group for an enjoyable gaming experience!  WotR is suddenly becoming even more tempting...

For another battle perspective, please visit Graham's battle report, The Battle of Blor-e Heath