Monday, November 28, 2022

On The Table Today Is...

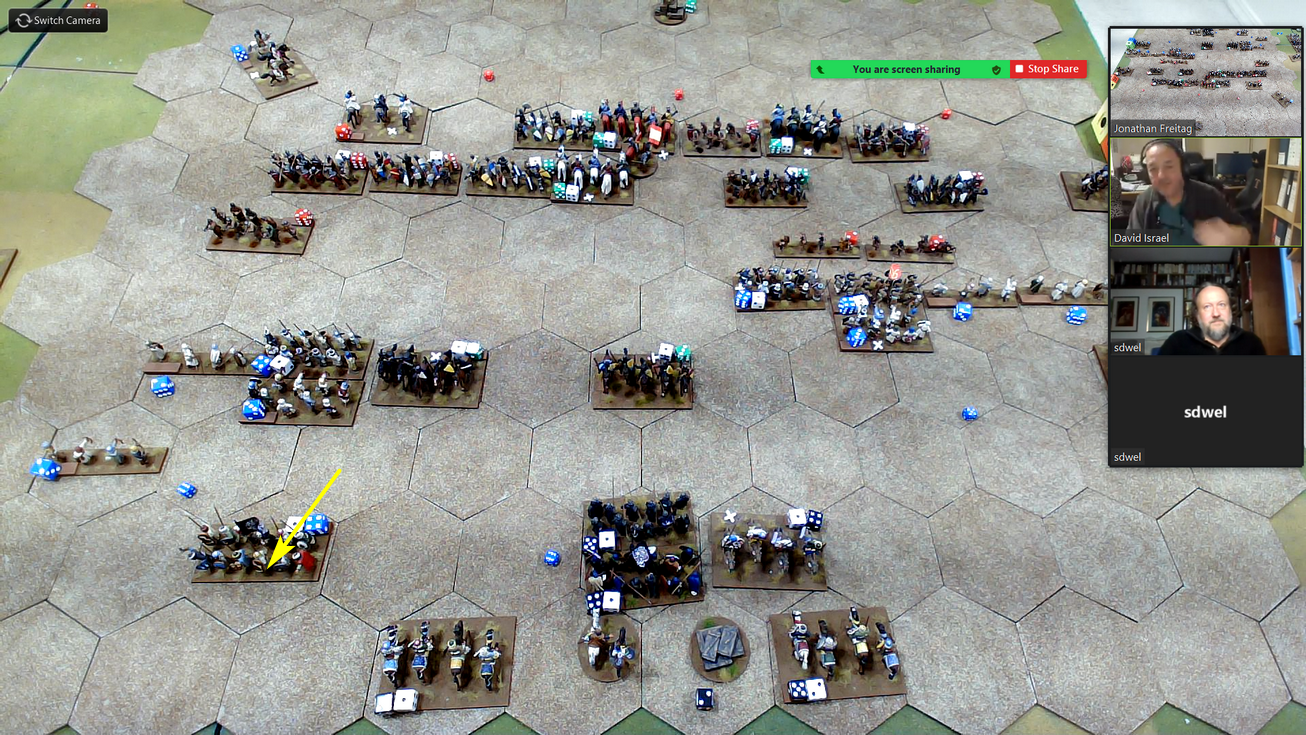
View from Bourton Hill
the Battle of Cropredy Bridge.  Well, my interpretation of this notable battle, that is.

Later today, four gamers from the UK join me in a remote game to battle it out for control of Cropredy and Hays bridges as my 30mm ECW collection takes to the field.  The contest will be waged across 6' x 8' feet of my gaming table.

Defending Hays Bridge

Each player was provided a Battle Briefing with my brief synopsis of events leading up to battle, QRS, and OB.

Battle Briefing
The Battle of Cropredy Bridge, 29 June 1644

The King’s army, nearly starved to death while trapped in Oxford.  Breaking out of Oxford in early June, the king was on the march. Waller’s army maintained contact with the King’s Army.  The king and Waller have been marching and counter-marching in attempt to gain a positional advantage over the other.  By 28 June, Waller was at Hanwell near Banbury.  The king, at Brackley, was warned of Waller’s movements and marched on Banbury.  Arriving on the 29th, The Charles spotted Waller’s Army deployed near Hanwell Castle about two miles west of River Cherwell.  Both armies set in motion heading for the high ground at Couch (Crouch?) Hill.  Waller got there first. Deeming Waller’s position too strong to attack, Charles marched north toward Daventry.  The King’s Army marched north along the east bank of the River Cherwell while Waller shadowed the king by marching north along the west bank of the river.
View from the north
Rear elements (about one-third) of the King’s Army became separated from the van of the column when the van moved quickly to intercept reported Parliamentarian horse moving south to join Waller.  This activity went unnoticed by Cleveland and the rear of the column.  While the van was about 1-1/2 miles north of Hays Bridge, the remainder of the army found itself almost two miles behind on the south side of the river.  Sensing an opportunity to defeat part of the Royalist Army before it could be reinforced, Waller struck.  Crossing over the River Cherwell at both Slat Ford and Cropredy Bridge, Waller aimed to isolate a portion of the King’s Army.  To accomplish this task, Middleton would drive toward Hays Bridge to prevent Cleveland’s escape and thwart Charles’ attempts to reinforce from the north while Waller attacked from the south.  Waller’s ambition was to catch Cleveland in a pincer movement between himself and Middleton and destroy it in detail before the King could intervene.

The stage is set.

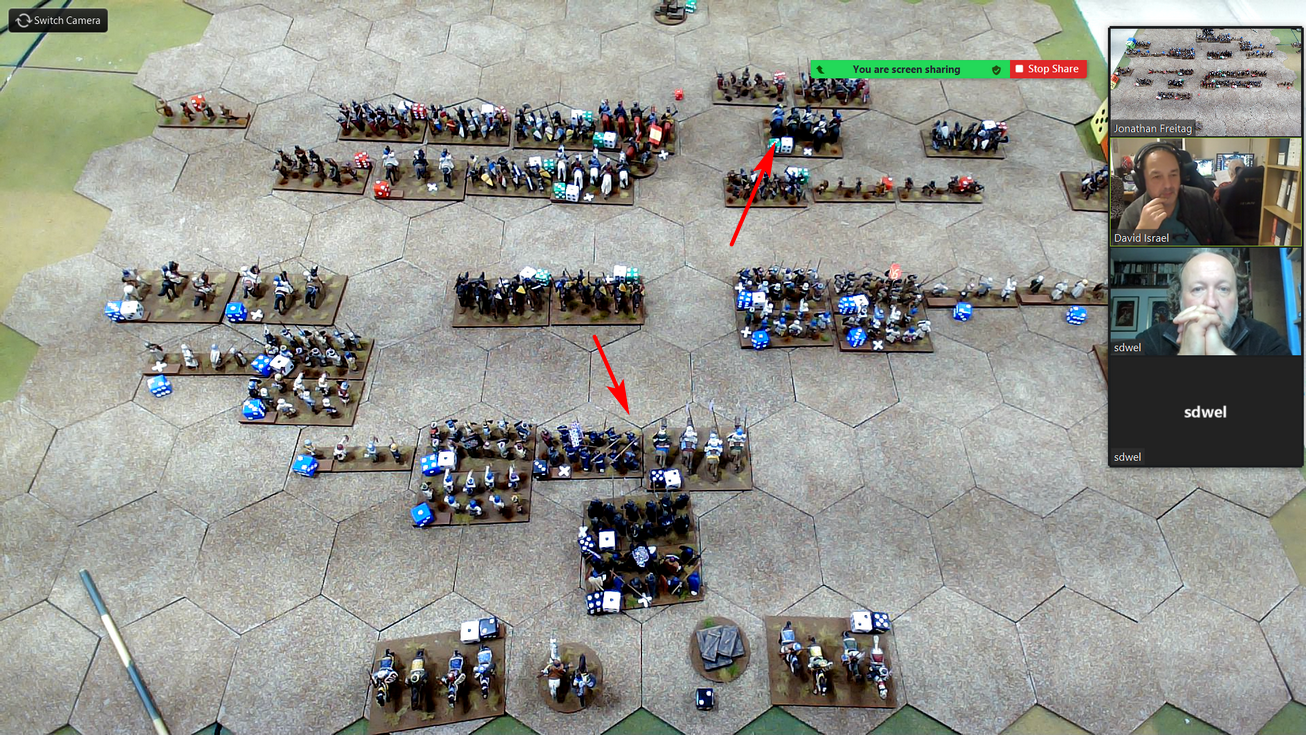
Initial dispositions

Rules
A Reign Cut Short

Game Duration
The battle begins at the 12pm turn and ends on the 3pm turn.  By 3pm, the King’s van would be arriving back onto the battlefield.  If Waller wants to defeat Wilmot, he must do so before 3pm.  The battle will last ten turns unless a time limit set.
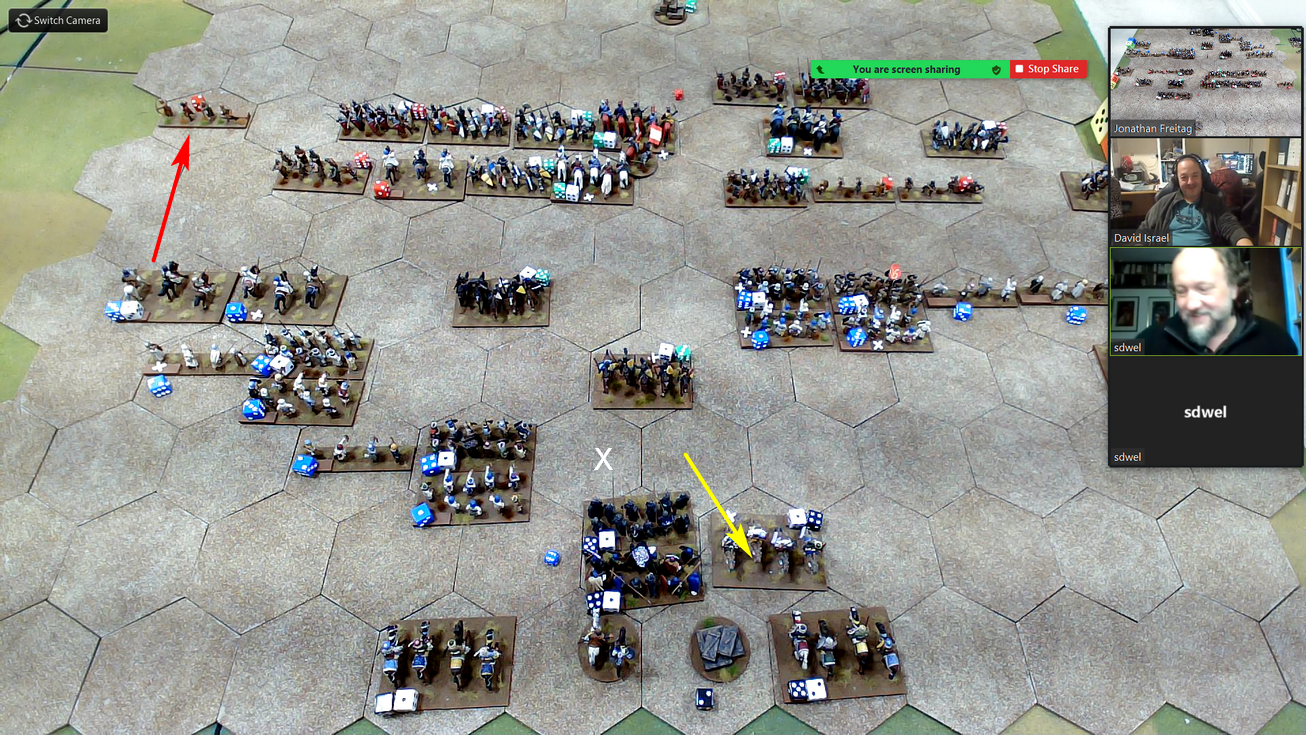
Parliamentarian Army deployed along the Cherwell
Victory, Sudden Death
Break the enemy army.  Parliament’s ABC=10.  Royalist’s ABC=8.

Victory with Turn Limit (10) or with Time Limit (3 hours?)
Set max playing turns or time.  When either turn or time limit reached assess victory as,
ABC differential:
0-1 Draw
2-4 Minor
5+ Major
View behind Cropredy Bridge
Terrain
River Cherwell is in flood and only crossable at Slat Ford, Cropredy Bridge, and Hays Bridge.

Barricades have been put in place at Hays Bridge.  The barricades count as a linear obstacle when charging and cover in fire.
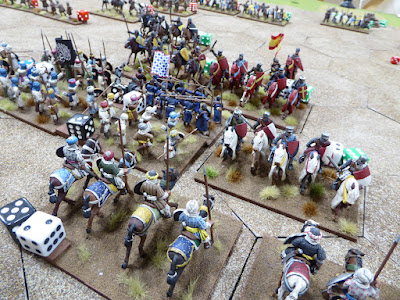
Royalist Center
Terrain Objectives
Hays Bridge is a Royalist held objective.  If lost -2 points from Royalist ABC. Recapture cancels this loss to ABC.

Cropredy Bridge is a Roundhead held objective.  If lost -2 points from Roundhead ABC.  Recapture cancels this loss to ABC.

If Waller’s Army reaches the Ash tree and the tree is within his lines, Waller concludes that the Royalists will be beaten and he releases his reserves.  The two auxiliary foote regiments at Bourton Hill may cross the Cherwell.

Who will be victorious?

Friday, November 25, 2022

Another Plastic Distraction

Following my recent diversion into 1/72 soft plastics (here), I pushed another batch of plastic figures into the painting queue.

This time, I return to a fledging Star Wars Legion project meant as an occasional distraction for my nine year-old grandson.  He has a keen interest in all things Star Wars so we thought this might offer up a chance to try out some simple and small miniatures games together.  We have yet to attempt such a challenge but now, at least, I can field opposition for a couple of handfuls of Stormtroopers.

Off the painting desk today are 15 Rebel fighters broken into two groups of seven with Luke Skywalker leading the way.

Unlike the Strelet's WSS dragoons in the link above, these figures are about 40mm and molded in hard plastic.  Great figures that my grandson was excited to show-off to a friend this week.

As a reminder, figures mustering out earlier include,


It is probably time I begin looking at simple Rules of Engagement for this small collection of figures.

On the gaming table this week is my interpretation of the ECW Battle of Cropredy Bridge.  Next battle outing is scheduled for Monday.
Mustering out from the painting desk next ought to be some Sumerians.  

Tuesday, November 22, 2022

Down But Not Out

October saw a regular circulation of the Battle of Ucles out on the table.  By my recollection, four battles were fought over several weeks.  The four games were fought with three different sets of players.

Today's episode looks at Game #4 in the series pitting a rematch between Steve and David.  In Game #3, Steve and David faced off.  In Game #4, they meet again.  This time, they switch sides.  Steve commands the Christians.  David commands the Muslims.

Sometimes, the battle is never over until it is over.  This is one such instance.

Let's see how the battle played out. (Arrows: White=move; Yellow=retreat; Red=melee).

The battle lines are drawn.

Battle opens with both armies advancing.
Christian knights throw caution to the wind
and charge into the Muslim center.
The knights crash into the Muslim line.
The shock of impact sends Muslim cavalry to the rear.
Pursuit is only stopped by intervention of heavy foot.
The white knights are put to flight
as the camel lancers move up.
While the Muslims attack on the left,
two more Christian knights prepare to attack.
Two bodies of knights ready the charge.
The knights charge into the heavy Muslim foot
 and the infantry are pushed back. 
The knight's momentum is stopped by Muslim camel
lancers moving to protect their brethren.
The continuing Christian pursuit carries it into the camels.
The leftmost knight is repulsed when it charges
a steady large unit of heavy infantry. 
The camel lancers are driven off.
The Christian right comes under attack from light cavalry.
While the Christian knights continue to dominate
the center of the battle, Muslim light cavalry cut down
    skirmishers and sweep around the flank. 
Two knights head to the rear!
Still, the knights continue their rampage
 deep into the enemy center.
Scattering the enemy in pursuit,
the knights are wreaking great destruction.
Another Muslim cavalry units meets it ends.
Victory looks within Christian grasp.
The only concern for the Christians is that their left is
weakening.  Units are wearing down from hard fighting.
A closer look reveals that the Christian left
is in flight save for a few skirmishers. 
Like the rise of Phoenix, the Muslims strike back.
Brushing aside the Christian skirmishers, the two units of horse archers attack the rear of the retreating Christians.  In quick succession, three units of retreating Christians are cut down and their baggage sacked.  

The Muslims have snatched victory from the jaws of defeat!

What a miraculous comeback!  Only a breath away from almost certain defeat, the Muslims capitalize upon the crumbling Christian left and sweep it away while capturing the baggage.  History repeats itself.

Wow!  What an exciting finish.

Congratulations to David on a last-minute victory.  Steve and I watched, stunned, as David pulled this one out of the fire.

Well done!

Friday, November 18, 2022

Revisiting Soft Plastics in 1/72?

Into the category of What am I doing? falls this next post.

Like many of my age cohort, I came into the miniatures wargaming hobby via Airfix 1/72 scale soft plastic figures.  Later, ESCI and Italeri figures were added for a variety of periods.  Those were the early days.  Once I discovered metal figures, I set off in a new direction and, really, rarely looked back.  Long gone are several large boxes of plastic Napoleonics and Zulus.  Until recently, that is.
A return to plastics (hard plastics, that is) began with a recent dabble into Perry Miniatures' War of the Roses figures.  By now, I have built up enough to field two standard armies for the period.  These armies still await their first battle.

OK. That dipped my toe back into the plastic ocean.  
Having fought a number of battles over the last two years hosted by a HUGE advocate for soft plastic toy soldiers (Graham, I am talking to you), I figured it time to head out on a small diversionary expedition of my own.  If nothing else, I can see what the figures look like up close when the view from the webcam is small and fuzzy.

With a semi-regular foray into gaming the War of Spanish Succession remotely, the WSS seemed a reasonable test ground.  At Graham's encouragement, I ordered three boxes of Strelets French dragoons in both mounted (two boxes) and dismounted (one box).  From three boxes, I could field two dragoon regiments of twelve figures each in both mounted and dismounted formation.
Reviews for these figures can be found at Plastic Soldier Review for

As the reviews illustrate, the figures are quite nice and posing good.  There is some flash and trim-up required but the figures look good to my eye.  I am especially impressed by the dismounted dragoon set of figures.  Excellent variety of poses and the horse holder with three horses is a superb addition.
After consultation with another blogger (thanks, Tony!) on uniform details for several potential dragoon regiments, I settled upon painting Regiment Villegagnon for the first of two regiments.  The figures paint up easily and I am happy with the results.

Is this the start of a new project? Unlikely, but one should never say never... 

Tuesday, November 15, 2022

Bloody Bound Brook BatRep

Bound Brook Table
photo courtesy wargamesinthedungeon

Matt and I returned on Sunday to our long-running AWI campaign using Rebels & Patriots.  This campaign has been in action for two years running.  On the docket for this day was a recreation of the action at Bound Brook in 1777.  Matt provided a battle briefing showing the situation and the initial Rebel dispositions.  The action opens with the Rebels guarding Queen's Bridge and the Old Stone Bridge from British advances.  The main British advance is across the causeway through the marsh to Old Stone Bridge.  Hessian Grenadiers approach across the Raritan River forcing their way across Queen's Bridge.  The Rebel objective is to prevent being overrun and giving up this strategic position.  Matt pointed out that, historically, once the Hessian grenadiers were seen storming across Queen's Bridge, the colonials panicked and fled.  Battle over in a few minutes.  Looking at my situation as the American commander, I felt my chances were equally slim.

With two skirmish units, one guarding at each bridge, they may only offer speed bumps to the superior Crown Forces once the enemy come onto the table.  Having to overcome two narrow avenues of approach, the Americans would need to contain the enemy while not sustaining too many casualties.  I asked if the Americans only needed to hold out for three turns to declare victory.  Matt laughed but warned that I ought to be careful in not allowing my skirmishers to be overrun on Turn 1.  Noted! 

Let's see how the battle played out.

Shadow animals or battle briefing?
British column arrives marching on Old Stone Bridge.
American skirmishers fall back from Queen's Bridge
while the Rebels shift their positions near the crossroad.
Rebel reinforcements arrive!
Skirmishing at both bridges
Hessian grenadiers cross Queen's Bridge under
skirmish fire from the Rebels.
American reinforcements fan out as militia
reinforce the skirmishers at Queen's Bridge. 
At Queen's Bridge, skirmishers fire and fall back as the
 grenadiers are caught in a crossfire from both cannon and musket.
Casualties are heavy.
Compelled to take a morale check from all of the fire,
the Hessians break and run!
I recall the Hessians rolled a double one! Rout!
Coming up in support, a second Hessian
grenadier unit crosses Queen's Bridge.
It, too, is welcomed by a hail of cannon and musketry!
At the Old Stone Bridge, the skirmishers fire
and retire as the odds against them mount.
In all of the commotion and traffic jam at Old Stone Bridge,
 the Jaegers take friendly fire (double one) from the rear!
The jaegers are forced to retire. 
The British guard charges over the Old Stone Bridge
 but comes up short of the skirmishers.
Stopped short from reaching the skirmishers,
 the guard falls to intense fire from multiple directions. 
In an attempt to relieve pressure, Hessians charge over
 Queen's Bridge toward the skirmishers.
They, too, are caught in a murderous crossfire.
Both must make morale checks.

Double ones!  Again!
The guard in no-man's land on the Rebel side of
 Old Stone Bridge routs

The Hessian grenadiers fare no better.
They turn tail and run away!
The victorious rebels scatter the opposition
photo courtesy wargamesinthedungeon
After only a few turns, the British commander 
throws in the towel and calls off the attack.

A major American victory!

Another fantastic game packed with lots of action.  Unfortunately, Matt picked up where we last left off with handfuls of terrible morale check dice rolling.

And, the Americans actually did only need to hold on for three turns although the outcome was not the expected result.

Stay tuned for Matt’s version of the action with loads of close up photos.