Showing posts with label Bloody Iberia. Show all posts

Monday, April 4, 2022

Foz d'Arouce, A Second Time

Following up on the Combat at Foz d'Arouce played on Tuesday, Matt agreed to give the scenario a whirl on Sunday.  Being the fair-minded gamer that he is, he opted not to read the battle report from Tuesday's game in order to not bias his decision-making.  

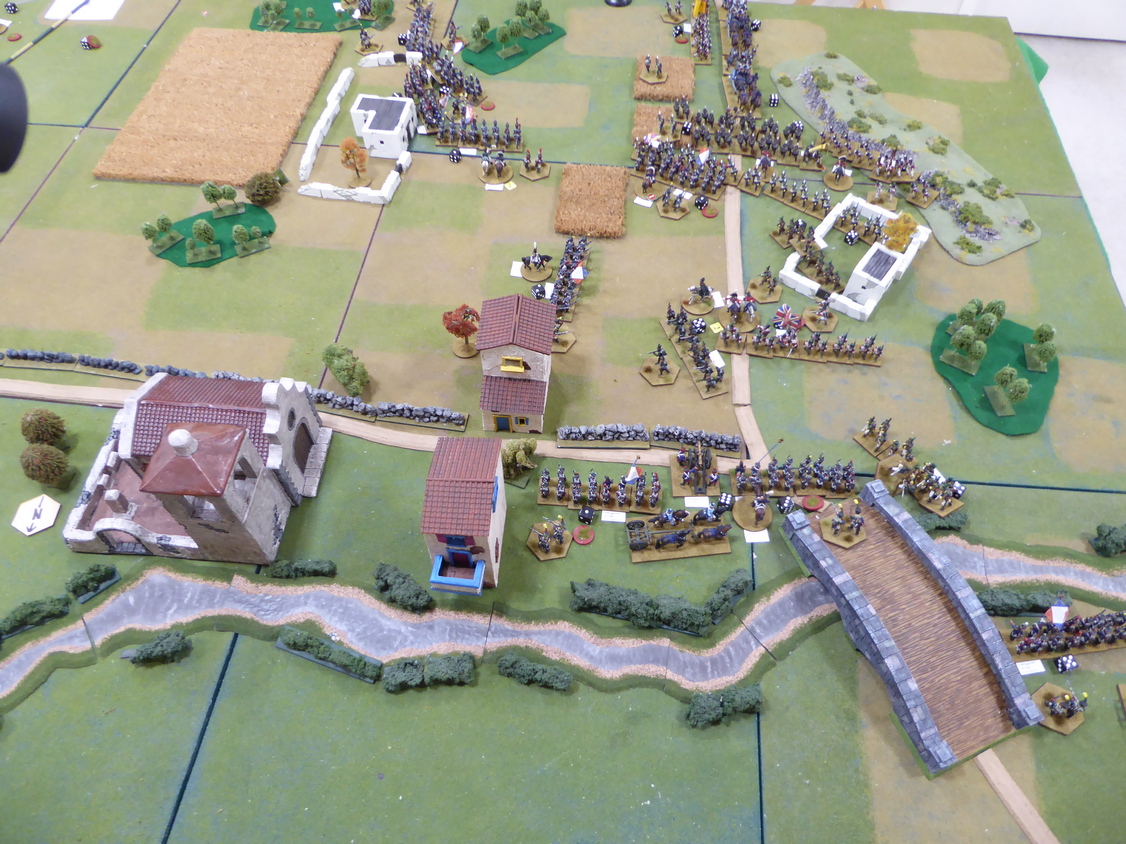
As a brief refresher on troop deployments, the armies are positioned as they were in Game 1.  French deployed in and around Foz d'Arouce and the Anglo-Portuguese deployed along the bottom of the map (see game photo below).  Matt would command the Anglo-Portuguese and I would command the French.  After witnessing the French scrape out a victory in Game 1, I hoped to repeat this feat.

Initial deployments
In Game 1, Picton, leading the Anglo-Portuguese army, planned to swing around the French right in attempt to cut the bridge with a general advance across the battlefield elsewhere.  For the French, I wanted to counter this threat but stick with the French plan from Game 1 that produced a victory.

Would history (on the game table) repeat?

The French wait
while the British advance.

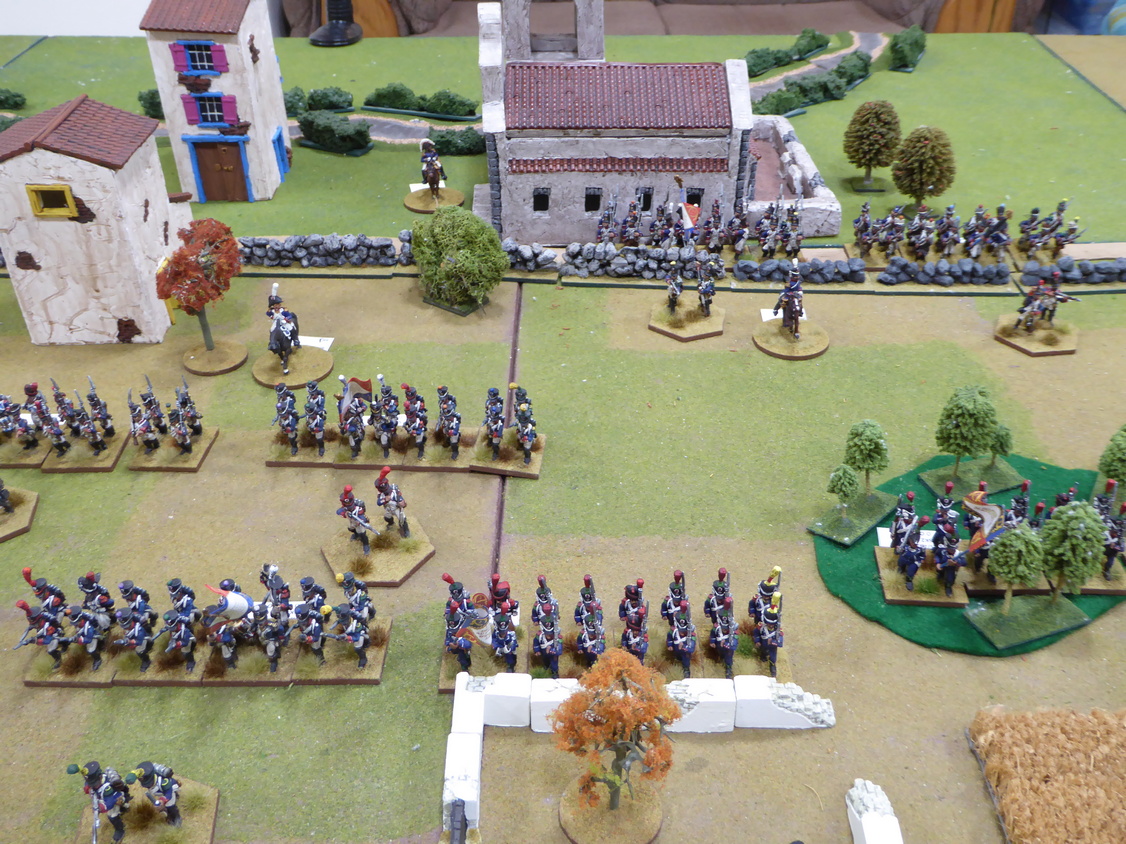
View from behind French lines.
The action begins as both combatants race forward to secure and control the center.  In a repeat of Game 1, Mernard's Brigade advances quickly to garrison the farm to his front and threaten the allied right.  MacKinnon advances on the Allied right more cautiously and the French seem to have gained a march on their adversary.    
No time is wasted to gain the center.
In the center, both armies step forward to contest the ground while Beckwith and his light brigade move quickly to envelope Poisao.  Colville quickly reaches Poisao with the 94th and is targeted by both artillery and musketry.  The British do not waver.
Maucine brings over the 69th Ligne.
Seeing the growing threat to the defenders in Poisao, Maucine orders the 69th Ligne to move over the Ceira River to the south bank and join the rest of his brigade.  With Beckwith's light troops working their away around Poisao, only one battalion of the 6h Legere blocks the way to the crucial bridge.  While stout, the 6th Legere will require support when facing such odds.
Firefights erupt all along the front.
The Allies reach Poisao.
69th Ligne marches over the Foz d'Arouce bridge.
Beckwith works to encircle Poisao.
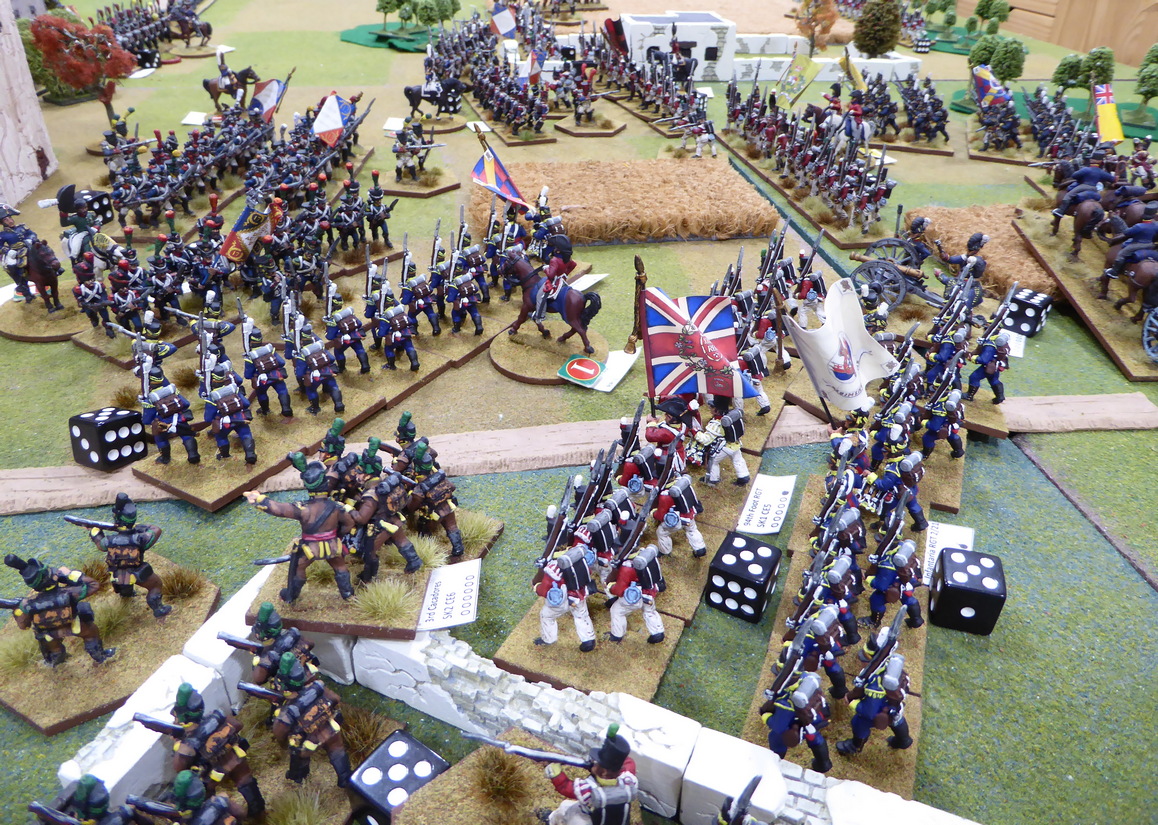
With the firefight in the woods to the west of Poisao intensifying, the 1st Cacadores pick off French gunners manning the artillery in Poisao.  Sensing opportunity, the Cacadores charge into the depleted gunners.  The result was never in doubt.  The Portuguese overrun the guns and drive off the surviving gunners.  Poisao is in allied hands!
Cacadores attack the guns in Poisao.
Firefight in the Poisao Woods.
Away in the distance, MacKinnon and the British right have been augmented by a battery of horse artillery.  The French attack upon this flank has been stopped in its tracks.  MacKinnon has also succeeded in evicting French legere from the farm as the French are last seen fleeing the compound pell-mell.  They are finished for the day.  The 88th Foot draws up on the western approach to the farm to prevent 74th from becoming isolated.  Fighting in the center intensifies as casualties rise uniformly across all combatants.  Both sides are taking a pounding but stubbornly holding ground.  
MacKinnon evicts French from the farm (in background).
With the situation on the Allied right stabilized by first halting the French advance and then counterattacking, Powers' Portuguese infantry brigade is directed toward Foz d'Arouce, itself.  Four Portuguese infantry battalions come up in support of Colville.  Ney wonders how he can stem this tide before it washes over him and carries him away. 
Portuguese arrive!
French are pressed on all fronts.
With Colville and Powers' brigades forming up along the main road and a second battery racing up in support, Picton prepares to deliver what he expects to be the final attack.  A quick stab toward the bridge could seal off the French escape route and bag what remains of Ney's command. 

Taking a severe pounding from Beckwith's Brigade, Maucine is forced to retire.  Two battalions cover the withdrawal but two battalions make their retreat over the bridge and to safety.
Allies prepare to attack.
French infantry waver as pressure mounts.
Two of Maucine's badly beaten battalions
slip over to the north side of the Ceira.
Trying to slow the inevitable, Ney joins the rearguard to bolster their resolve.  Outnumbered, Ney's position looks futile.  With more than enough infantry to cut the escape over the bridge, Picton diverts two Portuguese infantry battalions to reinforce the center.  Will Ney make good his escape?  
Ney joins the rearguard.
Portuguese attack!
Portuguese reinforce the center.
Having played six turns and now seeing little chance of stemming the Allied tide, Ney concedes the battle.

Victory to Picton and the Anglo-Portuguese!

While this action saw hard fighting, the casualty count at the end of the day fell decidedly in favor of the Anglo-Portuguese.  How this happened?  I know not but the French lost two battalions to unexpected routs that did not help the situation.

In this contest, the Anglo-Portuguese (Matt) was able to outlast, outwit, and outplay the French (me!).

Congratulations on the victory, Matt!  Maybe I can get you next time?

Thursday, March 31, 2022

Combat at Foz d'Arouce BatRep

In the previous post, I presented a teaser for the weekly UK remote game.  As noted, it was my turn at the hosting helm and I chose to bring 28mm Napoleonics back to the table.  Turnout was excellent with six remote players taking commands.  The players were split evenly between the Anglo-Portuguese and French.  Chris, as Picton, took command of the Anglo-Portuguese with Will and Richard as subordinates.  Graham settled into his role as Ney with Ian and Phil picking up brigadier commands.  Each subordinate commander on the field had at his disposal at least one infantry brigade.

As is becoming commonplace in some of my recent hosting efforts, the number of in-game photos is quickly approaching zero.  Moving units and game adjudication leave little time for respite to snap a quick pic.  I need to work on that and make an effort to allow some time to chronicle the action.  I did manage to jump around the table to grab a screenshot or three during the game but not really enough to suit my tastes.  Even without a sufficient photo record, the game is still fresh in memory.

Off to battle. 

Initial dispositions and battle plans
As the attacker, Picton could activate one brigade first before the other commands were selected by lot.  Picton chooses to activate Beckwith's Light Brigade and it swings into action by a brisk advance along the British left under cover of a rocky outcropping. 

After Beckwith activates, each command's activation sequence is governed by a random die draw from a tin. 

Beckwith advances on the British left while
Mermet attacks out from Foz d' Arouce.
As the British advance slowly in the center, Mermet wastes little time in advancing quickly upon the enemy.  Menard on the French left occupies the farm before the enemy can do so while Taupin garrisons the center.  On the French right, Maucine holds Poisao preparing for the attack that he knows is inbound.

The French do not wait long.

Both Beckwith and Colville pounce upon the French deployed in and around Poisao and the fight is on.  Close range firefights erupt as Poisao is immediately under heavy pressure.  The French guns in Poisao fire but cannot discourage the attackers.  Lining up along the outer walls of the village, the redcoats pour fire into the town.  Isolated, the gunners limber-up and quickly evacuate the village while they still can flee.

The 1/6 Legere deployed in the woods on the French right are under stress too.  Harassed by fire from both the 95th Rifles and the 1st Cacadores, the 1/6 wavers.  After sending a volley into the legere, the 43rd Lights charge.  The already wavering leger are forced out of the woods and back toward the bridge.  

The British attack!
In the center, the crack 5th Foot hits the 1/50th Ligne.  Casualties are heavy and the 1/50 is forced to retire.  Coming up in support of 1/50 but a little too late, the 2/6 Legere engages the 5th Foot.  The 5th Foot is forced back but the 2/6 Leger suffers heavily too.  Maucine is in great peril but has he stabilized the French right?  The contest on the French right still holds in the balance.  For now. 

Fighting intensifies near Poisao.
On the French left, however, Menard is attempting to thrust deep into the British positions and turn their right.  Fighting escalates at the farm as each commander commits more troops into the fire fight.  Casualties mount as the combatants clash in close quarters inside the farm compound.  If MacKinnon can hold, Beckwith may gain the bridge and cut off Mermet's Division.  Ney could be bagged!

Powers arrives and Beckwith races toward the bridge.
Maucine's position on the French right collapses suddenly.  Beckwith's brigade nearly reaches the bridge before Maucine's 69th Ligne can deploy.  Is the bridge lost and Ney's command cut off?  

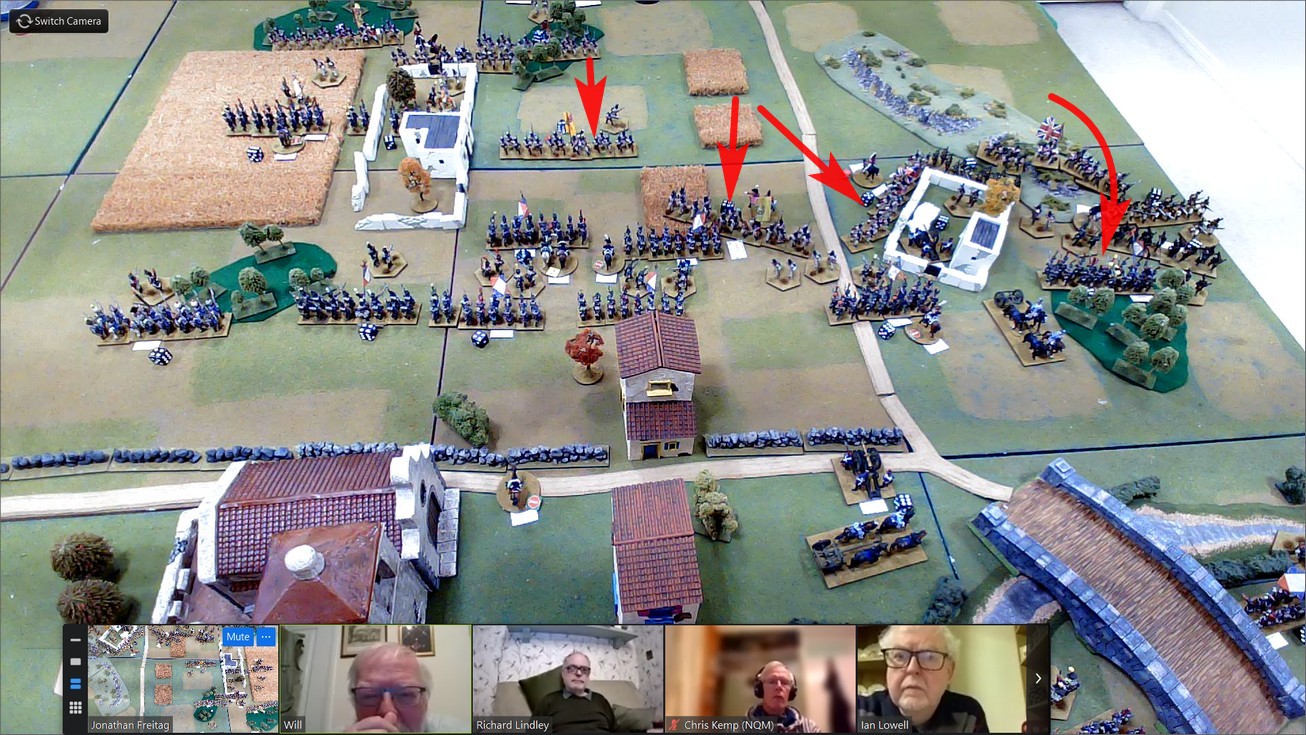
Through the smoke, Ney spots a dense enemy formation on the main road to Foz d'Arouce.  The English have been reinforced by a brigade of Portuguese.  The situation is worse than it seems.  Time cannot be wasted!  Ney leads one of his battalions in against the enemy to his front.  In the chaos, Ney goes down.  He does not rise.

Mermet attacks!
Seeing Ney fall, Taupin realizes he must delay the Portuguese attacks until Menard can push on into the British right flank.  If he does not hold the center, he will be overrun and the bridge taken.

Taupin heroically holds the center.

Hearing reports that Ney has fallen, Menard redoubles his efforts.  A fourth battalion is sent into the fight at the farm.  This edge in manpower tips the balance.  The 88th Foot is driven from the field as it defends the woods while both the 45th and 74th Foot are ejected from the farm.  In hot pursuit, both battalions scatter.  The British right has been turned!

The British right collapses!
Back at the bridge, the 1/69 Ligne fans out into line just before the 43rd Light attacks.  With support from the gun at the wall, the redcoats are driven back. 

Battered but not yet broken, the French hold the bridge as Picton begins to worry about the disintegration of his right.  With MacKinnon's brigade destroyed, Colville's brigade broken, and night enveloping the battlefield, Picton orders a withdrawal.  Today's fight is over but what will tomorrow hold?

French hold the bridge.
Whew!  That was a hard-fought battle.  After a little over three hours of fighting the armies and host are exhausted. 

In the final tally, despite the loss of Ney (and the loss of many a general on this day), the French gained a victory at Foz d'Arouce.  The French maintained control of Foz d'Arouce and the bridge while suffering fewer casualties than they gave.  That was a good day's effort.  Ney fought a successful rearguard action even though he disobeyed Massena's orders.  Fortunately for Ney, he will not need to defend his actions.

With darkness on the battlefield, Massena arrives to order the bridge blown after overseeing all surviving French moved over to the north bank of the Ceira River. 

The battle's end.
As always, the players gave me much to contemplate post-game. I may put together a retrospective on the game and rules another time. In the meantime, another playing may be in the cards.

Sunday, March 27, 2022

On the Table Today is...

a Napoleonic battle.

With last week's Biblical battle in the books, I clear the decks and prepare for the next game.  Notes and photos from the latest playtest of Rein-Bow Warriors still require a review and report but moss does grow on this rolling stone that is my gaming table.  Table turn-over seems to be picking up pace.

On deck for hosting this week's MNG remote game, boxes of Napoleonics were pulled from storage and a battle set up for the session.  Last seen in December in the pair of Maida Battles, (see Rock of Maida and Maida Six, the Hard Way), the 28mm Napoleonics collection hits the gaming table again.  For a collection that has not seen much action over recent years, seeing two battles within three months strikes me as a regular rotation. Maybe I can keep this up?
I digress.
The battle for Tuesday's outing is a recreation of the Combat at Foz d'Arouce in Portugal, March 1811.  I am missing the battle anniversary be two weeks.  Close.  I ought to keep better tabs on such events.

Battle Briefing
In Massena's retreat from Spain, the French Army of Portugal made a night march on the 14-15 March 1811 to place a flooding river between itself and the pursuing Anglo-Portuguese Army under Wellington. Having safely crossed to the north bank of the flooding Ceira River, Massena allowed his troops to rest on the heights overlooking the small village of Foz de Arouce.

Ney, commanding the French rear guard, had been ordered to destroy the bridge at Foz de Arouce after having passed his troops over to the north bank of the river. With little regard for Massena, Ney disobeyed orders and kept three brigades on the south bank of the Ceira.

Held up by fog and the burning town of Miranda de Corvo, the 3rd and Light Divisions did not reach French positions near Foz de Arouce until four in the afternoon. Thinking it too late in the day for the British to launch a successful attack, Ney remained on the south bank of the Ceira. Hoping to surprise the French, Wellington launched his attack at 5:00pm.
Scenario Details
Ney's rearguard is situated on the ground south of Foz d’Arouce with Mermet drawn up in front of the village while Marchand has taken up positions in and around Poisao. Wellington has deployed Picton opposite Mermet while the Light Division advances upon the French right.

The combat begins at 5:00pm with a game length of eight turns with a variable length extension.

Only the Anglo-Portuguese Army receives reinforcements (both guns and Portuguese 9th and 21st Infantry Regiments) at Turn 3 in this scenario and no French having crossed over to the north bank of the Ceira River may re-cross. The Ceira River, swollen by recent rains may only be crossed at the bridge. Woods are light. Rocky outcropping on French right is rough.

Battlefield and deployments
Order of Battle
Order of Battle

Victory Conditions
At the conclusion of the final turn, Victory Points are awarded as follows:

  • 2 VPs each for control of Poisao, Foz de Arouce, the Cathedral, north bank of the bridge, and south bank of the bridge.
  • 2 VPs each for each enemy infantry or artillery BMU destroyed, routing, or forced to retreat into the Ciera River.
  • 2 VPs for each officer killed.
  • 1 VP for each officer wounded.
  • 1 VP for each French BMU remaining on the battlefield at game end.
  • 5 VPs if no French BMUs are on the south bank of the Ceira River at game end (Anglo-Portuguese only).
  • 5 VPs for each Anglo-Portuguese BMU in good order on the north bank of the Ceira River at game end.
The player scoring 7 or more points than his opponent wins the day. Otherwise, the battle is a draw.

Examining the situation and OB, several strategies emerge for attempting to secure victory.  Which strategy will the players choose?

Will Ney be able to withstand Wellington's attacks in the fleeting Portuguese light of day?

Friday, December 24, 2021

Maida Six, the Hard Way

After Sunday's Maida fight against Matt (see: Rock of Maida), I returned units to their starting positions and prepared to host a refight.

The second battle was fought on Tuesday with the remote UK group.  Hard to believe that I have been participating in remote games for more than one year now with these fine fellows.

At game time, I had six players online.  The quick of hand grabbed the three British commanders.  Graham volunteered to take a French commander.  The remaining two French slots were filled by default.

The players and commands were:

British

  • Ian - Major General Stuart, Acland's 2nd Brigade
  • Will - Cole's 1st Brigade, Oswald's 3rd Brigade, 20th Foot
  • Chris - Kempt's Advance Guard
French
  • Graham - General de Division Reynier, Peyri's Brigade 
  • Steve - Compere'e Brigade
  • Richard - Digonet's Brigade
With players assigned, the battle could begin.
Table ready for action.
First, a word about this battle report.  Unlike many of the games I host, I try to take game photos at regular intervals and at key moments of battle.  Umpiring six players in this game, I found myself caught up in the action with moving troops and adjudicating results, nonstop.  I am afraid that I was so busy in game coordination that I did not capture as many photos as usual at the critical time.  With what I have, I try to recreate a coherent narrative.  For another battle perspective, visit Graham's report at I might have Maida mistake.  

Anyway, off we go!

1st Legere investigates the Lamato River scrub
As Reynier orders a general advance, Compere's 1st Legere uncover the Corsican Rangers lurking in the scrub along the Lamato River.  Those enemy light troops must be dealt with to secure the French left before the attack goes in against Kempt's Combined Light Infantry Battalion.
Kempt's Combined Light Infantry Battalion
As the 1/1 Legere wheels left to address the threat in the scrub, the 42nd Ligne advances toward Kempt.  Within moments, artillery fire from a four-pound section crashes into the 2/42 sending it reeling back to its starting line.  Not an encouraging omen to the start of the French attack.
2/42 heads toward the rear
 while 1/1 Legere prepares to attack!
Players seemingly deep in thought as the battle begins
(or simply bored?)
In the center, Peyri's Brigade of foreigners steps off toward the British line.  On the right, Digonet repositions the 23rd Legere as his artillery opens up.  All of Reynier's artillery (four guns) and cavalry are placed within Digonet's Brigade out on the French right.  Does Reynier plan to hammer the right to turn the British left?
Digonet redeploys the 23rd Legere before his advance. 
Digonet's artillery and cavalry in front line
Not content to allow the battle to come to him, Cole on the British left advances 1/27th Foot and the Combined Grenadiers.  His two guns limber up and move to keep pace with the advance.  With his flank secured by the 20th Foot firmly ensconced in the scrub, Cole marches boldly forward.  Cole expects Acland to move up as well to cover his right linking his own brigade in a continuous line to Kempt positioned against the Lamato.  Nervous of the cavalry facing him, the 1/27th forms into square. 
Cole takes the fight to the enemy.
Back on the French left, with Compere leading the way, 1/1 Legere gives a volley and then storms across the Lamato River crashing into the Corsicans.  The Corsicans do not give ground easily.  What was planned to bring about a quick brushing aside of the rangers devolves into a protracted firefight among the scrub along the Lamato.  Casualties mount.
1/1/ Legere storms across the Lamato
Digonet attacks!  Sending 2/23rd Legere in against the 20th Foot who were content holding the scrub line on the British left, the two formations collide.  To its left, 1/23rd Legere attacks Cole's guns. Taking the guns but at great cost, the 1/23rd falls back to regroup.
Digonet attacks!
With the 1/27th Foot in square, Digonet's four guns open up and pound the densely packed infantrymen until they can take no more.  The 1/27th breaks!  Seeing the 1/27th break for the rear and passing through the ranks of the Combined Grenadiers, the 9th Chasseurs charge.  Having little regard for forming square, the grenadiers let loose a volley into the hard-charging cavalry.  Undaunted, the chasseurs press on.  In the chaos, of intermixed combat, losses are high.  Still, the grenadiers remain firm and drive off the chasseurs.   
French guns pound the square.
Cole's grenadiers hang on
after repulsing a cavalry charge.
1/27 the driven from scrub
while Digonet sees success on the right.
In the center, Acland moves up to plug the gap between Kempt and Cole.  Peyri marches on toward the British line with the Swiss and one Polish battalion in line supported by the second Pole in column.
Peyri marches up in the center
Acland moves up to plug the gap.
Back on the French left, the 1/1 Legere evicts the Corsicans from the scrub along the Lamato.  The Corsicans have seen enough.  They retire quickly toward safety.  Having recovered from its earlier, unplanned retirement, 2/42 returns to battle.  With its sister battalion drawn up on its left, the 42nd advances under heavy artillery fire. 
Compere advances
Going in against Kempt's light infantry, the 1/42nd takes horrific casualties.  The 2/42 is faring not much better.  The British gunners keep up a steady fire as chunks are taken out of the 2/42nd.  Can the 42nd reach the British lines?  No!  The 2/42nd breaks, carrying the already wavering 1/42nd along with it.  The regiment is in flight to the rear!
The 42nd takes a pounding in the advance.
Seeing the 42nd turn tail and run after enduring sustained volleys, Kempt orders the lights to give chase.  They obey and off they go in pursuit.  The only obstacle in their way is the 2/1st Legere.
42nd runs while the Lights give chase.
Returning to the action in the center, Peyri continues his attack with his foreign troops.  Of dubious quality, the Poles advance upon Acland's equally suspect troops.  Peyri's Swiss take a stab at capturing the second British gun section of the day but are repulsed with heavy, very heavy losses.  The Swiss, while gallant, are likely done for the day.  Reynier joins the Swiss to rally them.     
Peyri attacks!
Shifting back to the left, the 1st Legere, having dispatched the Corsicans, turn attention to Kempt's Lights.  With 1/1st Legere in its rear and the 2/1st Legere to its front, can Kempt extricate himself from this vise?
Kempt caught in a vise?
We will never know.  With the hour getting late, we concluded the game to the agreement of all.  The French players figured their attack had just about run out of steam.  While opportunities may still present themselves, the French conceded that they were likely beaten.

Losses were lighter than in the previous Maida battle.  At the end of battle, each army had only lost two units.  Many of the French units remaining on table, though, were in tatters.  Those wavering units, to see action, would require time to regroup. 
Battle lines at end of the day.
Coordinating a large, remote game with six players, all having active and meaningful commands can be a challenge.  Certainly, well worth the effort and I enjoyed the game immensely.

I made it with six players, the hard way, and loved every minute of it.  Perhaps, I captured more photos than I thought?

On that note, I hope readers enjoy this battle report and I wish everyone Happy Holidays and a
Merry Christmas!