Friday, March 31, 2023

Back to the Revolution!

After a series of poundings on the fields of Ancient Sumeria, I cleared the table of terrain, figures, and haunting memories in order to change the scenery.  With a few encouragements, I opted for an AWI battle in 15mm.  Needing a short turn-around, I chose a scenario fought two years ago as part of the Battle of Long Island.

Today's battle would explore Cornwallis' flank march against the Americans in Brooklyn.  Fresh off his victory in Sumeria, my opponent would be Mark from Mud, Blood, and Steel blog.

The map shows the route of the flanking march as the British approach Brooklyn from the east thereby bypassing the passes through the Brooklyn Heights. The road passes over the stream at Shoemaker’s Bridge. The passage over the bridge is controlled by the high ground around Shoemaker’s Farm and the farm on the knoll to the east along the road.
The Battlefield
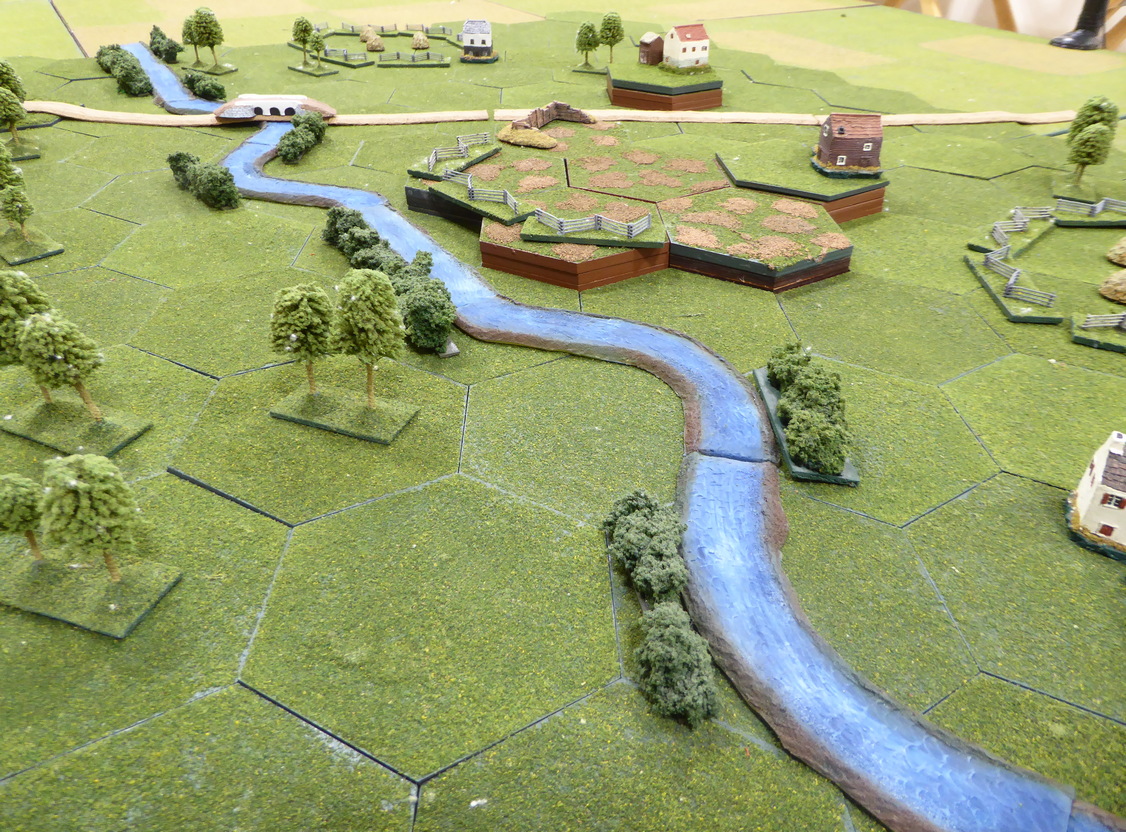
For now, all is quiet
until lead elements of Rebel army
arrive to take up positions.
Mark chose to command the British.  I would command the Rebels.  The British Army under Lord Percy has four infantry brigades facing three Rebel infantry brigades.  The British hold both a quantitative and qualitative advantage over colonists but the Rebels are positioned on the defense.  The Rebels want to trade space for time without having their army destroyed in the process.

Let's see how the battle played-out.  

Brigadier General Heard's Brigade had taken up positions on the high ground at Shoemaker's Farm overlooking the bridge crucial to any flanking maneuver by Cornwallis.  For now, all that stood between Cornwallis and the road to Brooklyn were his four regiments of militia, a battalion of Continental Rifles, and a section of 6lbrs.  More American reinforcements were rumored to be on the way to stiffen this defense.

Heard need not wait long.  As Percy and his force appears on the battlefield on the west side of the stream, lead elements of BG Nixon's command are seen marching to Heard's aid.  Heard sends the Rifles up to the stream to harass the enemy's approach while one of his militia takes up a position along the stream below the heights.
The Red Thick Lines
While the Redcoats form magnificent and orderly lines along the stream bank, Nixon begins deploying his brigade for action fanning out to the north of the main road.  Rebel guns open up but fire is ineffective.  As the Redcoats approach the stream, BG Matthews' two regiments of Guards open up against the Rifles deployed along the east bank of the stream.  The Guardsmen's initial volleys tear through the riflemen.  They are drive back with heavy casualties.  The militia guarding the southern end of the bridge suffer a similar fate as the Rebels fall back from the stream.
Rebels are pushed back from the bridge.
Opposite Shoemaker's Hill, BG Smith's British brigade splashes across the stream.  The Redcoats let loose a volley in preparation for their assault.  The fire from the 63rd Foot rips through the militia directly to their front.  Casualties are heavy.  The 22nd's volley does not show the same effect.

Back near the bridge, both Matthews and Pigot lead their brigades across the stream as BG Jones comes up in support along the road.  Pigot, having just crossed the stream, finds himself in a hot place.  The 5th Foot takes heavy casualties from both gun and musket.  The 5th falls back through the 28th Foot. The 28th returns the favor with a volley put into the Continentals astride the road.
Matthews and Pigot cross the stream
 driving back the Rebels.
Back at Shoemaker's Hill, Smith attacks!  The 63rd with the 54th in support climbs up the slope to attack the militia.  Still reeling from the devastating volley received moments before, the militia break and run.  The 63rd gains the heights.  To its left, the second assault with the 22nd in the lead does not fare as well.  As the 22nd reaches the crest, it is sent tumbling back down the slope, shattered.  Lead elements of Parson's Brigade reaches Shoemaker's farm after its long march to the battlefield.  Figuring he would have time to deploy before under threat, Parson's leaves his Continentals in column.
Smith attacks!
63rd gains the heights!
Battle overview
Seeing Smith's attack against the Rebels stalling, Pigot orders his brigade to attack the guns on the heights.  With the 28th Foot leading the way, the Redcoats scale the heights and pour over the breastworks.  The Rebels guns are overwhelmed and destroyed.  If Pigot can secure this foothold before the Rebels counterattack, part of Heard's Brigade will be trapped. 
Pigot attacks the guns!
The guns are destroyed.
Militia reoccupies the breastworks
as Jones brings his brigade across the stream.
Sensing the danger to his rear, Heard falls back to occupy the breastworks.  Not a moment too soon as Smith's Brigade attacks the Continentals at Shoemaker's Farm in force.  Having suffered mightily from musketry while still in column, the Continentals form line only to be driven out of the farm.  Before the British can occupy this real estate, Parsons brings up militia to seize the farm.

In heavy fighting at the farm, the 54th Foot is scattered while the 63rd takes heavy casualties.  To their left, Pigot's 28th pushes the militia out of the breastworks as it retires down the hill.
Firefight at Shoemaker's Farm and breastworks. 
Casualties mount!
Back on the British left, Jones advances upon the enemy.  The Rebel militia look shaky as the British lines bear down upon them.  Volleys are exchanged.  The Redcoats give better than they get.  Within minutes, this entire flank of the Rebel army collapses as men stream to the rear.  For them, the battle is done.  
Jones advances upon the enemy right.
Back at Shoemaker's Farm, having witnessed the destruction of the 54th Foot in attacks against the farmhouse, the 43rd steps forward to take its place.  With the militia already wavering, one last shove is all that is needed to send the Rebels running toward the rear.  Shoemaker's Farm falls to the British! 
43rd comes up from reserve 
to lead the attack.
Shoemaker's Farm falls!
With the collapse of the Rebel right and now the loss of Shoemaker's Farm, the severely mauled Rebel Army begins its withdrawal back toward the safety of the Brooklyn defenses.  Will these Rebel remnants find solace when they return to Brooklyn or will they find themselves trapped and prisoners or war?

It may not matter.  For them, their battle is over.

Well!  A fine and convincing victory for Mark and his British army.  While the Rebels suffered greatly, the Redcoats did not pass through the fire unscorched.  Three regiments were dead on the field and another three were only just clinging to life.

Great fun to see the AWI troops back into battle and double fun to face Mark in another exciting contest.

Super job, Mark!  Well played! 

Expect to see this battle in a multiplayer, remote game next week.  With any luck, that is.

Tuesday, March 28, 2023

Going Down for the Last Time

After going down to defeat in three straight, remote games, a new opponent arose from the crowd to try his hand at maneuvering battle carts on the plains of battle.  My new opponent was Mark from the Mud, Blood, and Steel blog.

Could this be the opportunity I needed to turn my fortunes around?

Let's find out!

Mark commands the Blue Army while I command the Red Army.
Armies arrayed for battle.
Once the two armies close to within charge range, Mark strikes with his left battle cart as it trots forward from Blue's battle line.  The cart's target is a massed archer unit on the enemy right.  Blue moves up a skirmisher to distract the enemy's skirmisher.

As the cart reaches the enemy line, the archers test to shoot.  The brave bowmen succeed and let loose a devastating volley.  The battle cart suffers heavy casualties, loses its Impetus bonus and becomes disordered.  Still, the cart plows ahead.
Blue cart plunges into Red's battle line.
In the initial clash, the archers have seen enough and break for the rear having suffered heavy casualties.  The cart breaches the enemy battle line.  Will it pursue?
Breakthrough!
Of course!

As the cart trundles forward, it catches the fleeing bowmen.  They are cut down to the man.  While the driver of the cart encourages his animals on, they fail to continue the pursuit.
Pursuit and destruction!
Graced with winning the initiative, Blue continues from where it left off from last turn.  First, archers in the battle line shoot into Red's battle line trying to disorder the enemy before launching an attack.  All missiles fail to bother the enemy so attacks are called off. 

Second, the victorious battle cart running amok in the enemy's backfield, although showing heavy damage, continues its rampage.  Next target?  The rear of an enemy spear block.
Attacked from the rear!
Surprised by the attack from its rear, the heavy spearmen scatter as the cart crashes into its formation.  Disaster!  Having ripped through the heavy infantry, the jubilant cart crashes into the rear of a body of massed archers.

The crash is really a whimper, and the cart is turned back before it can do further damage.
Another one bites the dust before being turned away.
Seeing its right collapsing and the destruction of one of its spear blocks, Red Army attacks before all is lost.  Better to die fighting than to be cut to pieces where you stand.  Red's heavy spear block alongside steps off toward the enemy.

The battle cart on the right of the line charges forward into the enemy's heavy infantry.  After a couple of rounds of poking and hacking, the cart is driven off having suffered very heavy casualties.
Red's cart is repulsed after heavy losses.
As Red's heavy spear clash with the enemy's heavy spear in a prolonged shoving match, casualties mount.  Both combatants suffer mightily.  Each loses one stand in the fighting.  No longer mustering enough soldiers for a large unit, Red's spearmen fall back.  Blue spear pursue, hit them again, and Red continues its retreat.
Red's heavy infantry loses the melee and retires.
Huge hole in Red's battle line.
In an attempt to stabilize the dire situation, Red's Lugal moves up and through his own battle line.  On the far right of Red's line, the second battle cart dispatches enemy skirmishers and then wheels about.
Red Lugal moves up.
With the battlefield stripped of troops through attrition and large gaps opening up everywhere, the battle carts are free to roam.  Red's Lugal scatters the archers to his front while Blue's carts bear down on weakened enemy units ripe for the picking.
Sweeping cart maneuvers across the plain.
Blue's Lugal strikes first.  A skirmisher is run over and then Red's massed archers are cut down from the rear.  Red's army, save for its Lugal and a few scattered remnants, is destroyed.  

The battle is over.
Blue's Lugal smashes the enemy to win the day!
Congratulations to Mark on mounting a complete defeat of my Red Army in an impressive manner.  Really impressive.

One consolation for me is that at least my Lugal remained on the field, alive, in this battle.  Still, my army winds up on the receiving end of a crushing defeat.  

Mark's breakthrough of his cart, early on, through my battle line and its seemingly unending rampage through my ranks sealed my fate.  With that destruction, Red's Army never regained its footing.

Well played and great fun!

Having lost four of these remote battles all at the hands of different opponents, time to consider another era.  Perhaps my luck will improve?   

Saturday, March 25, 2023

Sumerians In Action

The Sumerian armies regrouped to fight another battle on Thursday.  The setup is the same as the prior two battles with each army fielding 12 BMUs.  For a refresher, see Sumerians in Action Again and A Loss of Pre-Biblical Proportion.  Yep. In both battles I suffer serious defeats.  Can I turn it around in this next game?

In this contest, I face off against Peter from Grid Based Wargaming.  His battle account can be read at Sumerian Remote Wargame.

Without further delay, on to battle.
Battle lines drawn.
Red Army (Jon)
Blue Army (Peter)
As the battle opens, the two armies slowly begin to close the distance.  While Blue keeps his battle cars stationary, Red swings both of his battle cars off to the right.  Perhaps, one flank can be overwhelmed by the powerful carts?  The two armies are within striking distance.  
Red swings battle carts to the right.
The two armies close.
Already, one of Red's skirmishers is driven back.
The armies are within striking distance.
Winning initiative, Blue strikes first.

Preceded by a hail of arrows to soften the enemy spear block, Blue marches forward into the disordered spear block to its front.  Red's disordered spearmen fail to stand and take flight having suffered a casualty.  The momentum of Blue's spear block carries it into a unit of Red's massed archers.  Blue suffers hits as it closes but continues to bear down on the archers.  The archers buckle and run for the rear.  
Blue attacks!
Red spear are driven back as Blue pursues.
Seeing the middle of Red's battle line breached, Blue's second spear block advances into contact.  Before it reaches the enemy spear block, a volley of arrows leads the way.  Seeing friendly troops in flight, the spearmen, having suffered heavy casualties, break for the rear.  The entire Red center is gone!  Swept away in a matter of minutes.
Hard attack in the center by Blue spearmen.
Red's center is in flight!
In an attempt to salvage the situation, Red Army sends its battle carts into the fray.

The battle cart on the right drives off two enemy skirmishers and pursues into an ongoing enemy battle cart.  The Red battle car, disordered from its efforts, is defeated and wheels around to return toward its lines.

Red's Lugal at the reins of the second battle car, aims for the massed archers to his front and trots ahead.  Expecting the archers to collapse in the face of such a threat, the archers stand firm and deliver a punishing volley.  Stunned by the damage suffered, the Lugal carries into the archers.  The archers repulse the Lugal and he wheels his cart about.
Red cart drives off enemy skirmishers.
Red Lugal attacks massed archers.
A short melee ends with...
the Lugal in flight!
Following Red's quick collapse in the center, Red's center begins to stabilize as the retreating spear blocks halt, reorder and turn about.  As it prepares to take back lost ground, it sees more activity out on its right.  Watching Red's Lugal wheel around and head for the rear, Blue pursues with one of its battle cars.  Catching Red's Lugal in the rear, the Lugal is quickly dispatched. 

The battle is over.
Red's Lugal is pursued,
quickly caught, and destroyed.
With Red's center in disarray and its Lugal dead on the field, Red Army has no option but to withdraw from battle.

Massive victory for Peter and his Blue Army.  Congratulations, Peter!

Where did I go awry in leading the Red Army?  Well, I will not need to worry about chronicling those failings since my Lugal is dead on the field and the victor writes the history.

Well played, Peter!

Tuesday, March 21, 2023

Sumerians in Action Again!

Fresh off a stinging defeat (see A Loss of Pre-Biblical Proportions) followed by a marginal victory (sorry no report), the paired Sumerians armies take to the field for a third battle.  This time, I face Matt in a head-to-head match-up.  Matt briefly notes the battle here but he does not tell the whole story.

As in the prior two contests, two evenly matched Sumerian armiess face off on a featureless plain.  Each army has twelve units distributed as,
2 x Battle Carts
2 x Heavy Spear Foot
3 x Massed Bow
1 x Skirmisher, Bow
2 x Skirmishers, Javelin
2 x Skirmishers, Slinger
Rules in use are my variant of Basic Impetvs on a grid. 

Matt commanded the Blue Army.  I took the reins of the Red Army.
Let's see how the battle evolved.
Armies drawn up for battle.
Jon's Red Army
Matt's Blue Army
Steady boys!
Steady...
Winning the initiative, Red Army steps off toward the enemy battle line.  Keeping the Lugal in his battle cart behind the center, the second battle cart heads out to the left.  Blue counters by peeling off both battle carts and swinging them out to the right.  Is Blue attempting a flanking maneuver? 
Red advances its battle line.
Blue swings both battle carts out to the right.
As Blue battle cars move off to the right, the battle begins.  With skirmishing ineffective at range against skirmishers, Blue closes in with slingers.  In a quick clash, the enemy is dispatched and scattered.  Seeing this unexpected success, Blue sends one of the heavy infantry forward.  The remainder of the battle line follows suit.
A quick clash scatters a Red skirmisher
as Blue's battle line steps forward.
Tension mounts as both lines are poised to strike!
And strike they do!

The Blue skirmisher, closest to the enemy, slips into the gap in the enemy line while the Blue Lugal, in his battle car smashes into the enemy skirmishers to his front.  Failing to evade in the face of these asses, the skirmishers are sent reeling back though their lines.  Fortunately for Red, the Lugal fails to pursue.  Failure to pursue would be a common thread throughout this battle.  

While Blue archers disorder a Red spear block, Red's other spear block in the center advances.  Red's heavy spear pushes into the enemy to its front.  Blue's supporting archers fail to loose a volley before the enemy closes.  Both Blue's heavy spear and supporting archers are sent backwards from the impact and clash.
Blue Lugal drives enemy skirmishers off.
Having seen the setback on its right and with the enemy spearmen to its front in disorder, Blue's second block of heavy spear advances in an attempt to stabilize the line.
Blue spear and archers are, likewise, driven back in disorder.
It works!

Although the supporting archers get off a volley, they do no harm.  The Blue spear block closes upon the enemy.  As a counter to Red's successful attack in sending archers and spearmen running to the rear, Blue's attack is just as effective.  Both of Red's defending infantry flee to the rear.  Now, only Red's Lugal stands in the way.  Red's Lugal remains firm and repulses the attack. 
Blue spearmen open up the enemy center
but Red's Lugal stops any pursuit!
Back on Red's left, the Lugal trots into action.  The first target in his sights is an enemy skirmisher.  It is dispatched with little effort.  Red's Lugal pursues.  Pursuit carries it into the enemy Lugal's battle cart.  In a quick clash, Red Lugal breaks off.  Neither Lugal has damaged the other but the seeds of destruction have been sown. 
An enemy skirmisher falls at the hands of the Lugal.
Caught in tight quarters, the Red Lugal wheels right in an attempt to evade.  He realizes his mistake too late.  A wheel to the left may have provided more room to maneuver but now he may be trapped.
Red Lugal veers off to the right.
Like a hawk on its prey, Blue Lugal swings his battle car onto the rear of the enemy Lugal.  Hemmed in, Red's Lugal is trapped!  In an attempt to provide succor to its king, the archers ready their bows but fail to react.  They watch on in horror as their Lugal is ridden down.
Onto the rear!
In his flight, Red's Lugal pushes back the spear block while the archers take to their heels.  To add insult to this terrible situation, the other Red battle car is repulsed in its attack against the enemy spear block.  The entire army is collapsing!
Red Lugal drives into his own troops as he is ridden down.
The death of the Red Lugal!
The Day is Lost!
Congratulations to Matt on his stunning victory!

In under four turns, Matt turned a seemingly equal contest onto its head.  I made a few critical mistakes and Matt capitalized on every single one of them!  A double turn may have sped up my army's collapse but I found myself on the back hoof in my battle cart early on.  

One more contest with these armies on Thursday when I face Peter from Down Under.  Can I redeem myself?  We will see.