Having seen the battle report from the San Martino game with the Rejects, Mike (Dieroll Volleys) threw his hat into the ring to give the battle and remote gaming a try.Assessing the situation, Mike thought the Sardinians were the underdogs in this engagement and offered to take command of the Sardinians. I would command the Austrians in a two-player game. Mike's friend, David, would watch in. For battle briefing, please visit,
On the Table Today.
Let's see how the battle played out.
As the battle opens, Sardinian division commander, Mollard, holds San Martino and clings to the Heights with his reconnaissance column. Two Bersaglieri battalions hold Ortaglia and San Martino while one battalion of the 7th IR holds the villa of Contracania on the Sardinian right.
 |
| Mollard holds San Martino |
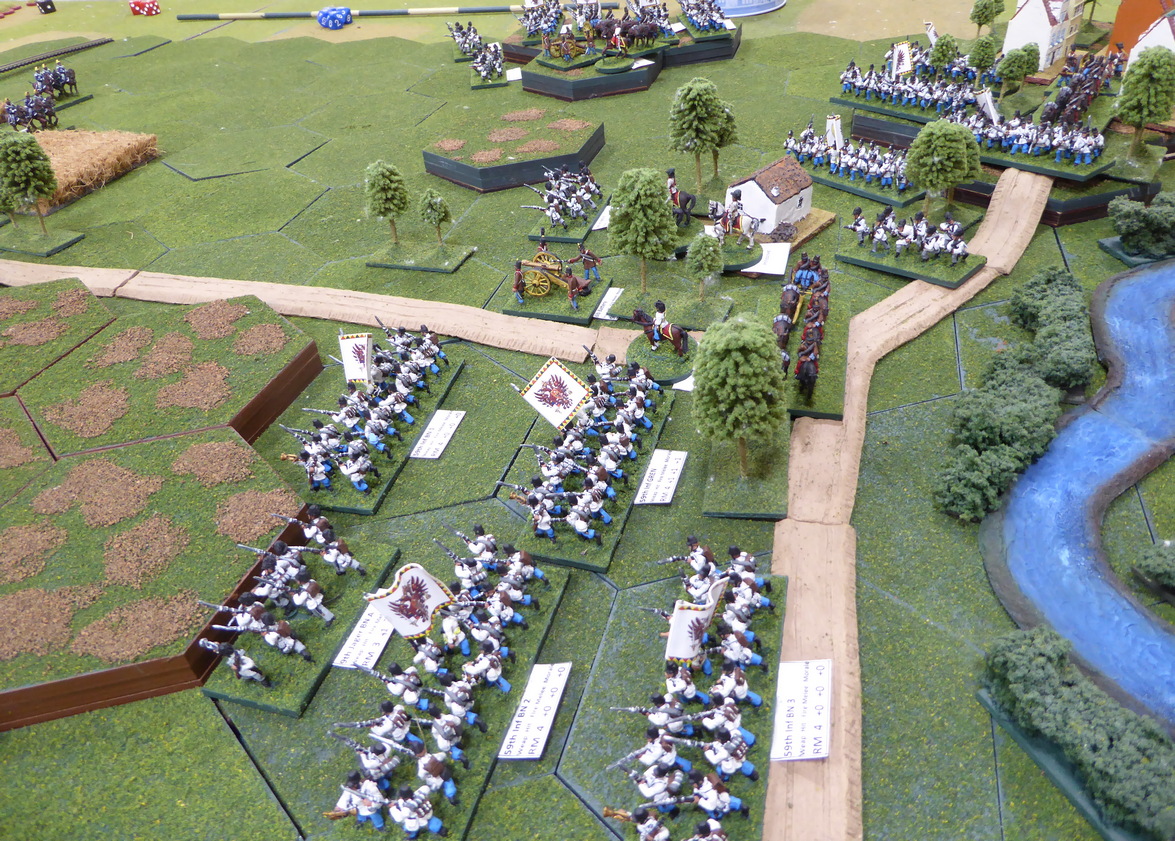
Facing Mollard is the might of Benedek's Austrian Corps of three brigades. Spread out along the banks of the Fossa Redone, Lippert's Brigade is on the left, Philippovic's Brigade is in the center, and Watervliet's Brigade holds the right. |
| Mollard outnumbered as the battle opens. |
 |
| Benedek deploys for battle. |
Benedek sets his corps quickly into motion in an attempt to engage Mollard before Sardinian reinforcements arrive. Lippert advances, concentrating his attack upon Mollard with an eye toward taking Contracania. Lippert sends one battalion of the 59th to cover San Donnino while the rest of the brigade moves smartly toward Contracania.Philippovic and Wavervliet look toward pinning Mollard at San Martino while turning Mollard's left. Before these maneuvers can be carried out, Sardinian reinforcements arrive. Arnaldi advances astride the road toward San Martino to support Mollard with part of his brigade fanning out to the east. Skirmishing with Watervliet begins as the two opposing brigades close upon one another.
 |
| The two armies close. |
On the Sardinian right, Morozzo wastes little time in bringing up his large brigade. Lippert is driven back from Contracania relinquishing his advanced position on the heights as Morozzo covers Contracania from the west. Lippert's 59th takes heavy casualties in the exchange as Sardinian guns and long range musketry pepper the Austrians as they cross the open ground. The Sardinian defenders of both Contracania and Ortaglia prove too stout to dislodge even with supporting fire from Philoppovic and Watervliet. Two Austrian battalions are lost before Benedek can bring up his reserve artillery. |
| Morozzo on the attack! |
With Lippert's attacks on the center repulsed, Mollard holds the San Martino Heights, Ortaglia, San Martino, and Contracania. Having Morozzo shoring up the Sardinian right, the Austrians may make little progress on this front although fighting over Contracania remains heated. Pressure is mounting from the Austrians on the Sardinian left, however. |
| Austrians work to outflank the Sardinian position. |
 |
| Situation Turn 5. |
Arnaldi's pre-emptive attacks only buy a little time and wreck his brigade. Arnaldi orders his brigade to retire back toward the main road covering San Martino. Having advanced beyond San Martino, Watervliet turns his brigade west toward the objective. In desperation, Monferrato launches cavalry charges into the advancing Austrians. While the jagers are scattered, Monferrato's cavalry is spent for the day.
 |
| Monferrato's desperate cavalry charge. |
With Arnaldi retiring, the way opens for Watervliet to drive upon San Martino from the east. Philippovic, for his part, is still embroiled in a firefight with elements of Mollard's recon column. The defenders of both San Martino and Ortalgia are proving very stubborn. Even when a Sardinian battalion is thrown out of Ortaglia, Mollard cycles a fresher battalion into its place.  |
| Watervliet turns the Sardinian left. |
Morozzo, having stabilized the Sardinian right, begins shifting battalions to support Mollard on San Martino Heights. Lippert, with his brigade wrecked, can only look on as the enemy shifts away from his depleted defenders. |
Austrian hussars watch on as
Morozzo redeploys to the Heights. |
On the Sardinian left, losses are high with many battalions scattered. Yet, the Sardinians still cling to Contracania and San Martino. The Austrian army is in not much better shape. Lippert is wrecked and both Philippovic and Watervliet have sustained heavy casualties. Many of the Austrian battalions are only one hit away from collapse. |
| Austrian casualties are high. |
 |
Sardinians hold Contracania and Ortaglia on the Heights. |
 |
| Sardinians cling to San Martino. |
At the end of eight turns, we agree that the Austrians will have a difficult time taking San Martino. Contracania is well out of reach for the Austrians and the capture of San Martino looks unlikely in the time given and Austrian casualties suffered.
With that, we declare that the Sardinians have hung on to win another minor victory. Congratulations to Mike. Well played!
After we closed out the session, I noticed that Mollard's Brigade had broken on Turn 8. With two brigades broken, the Sardinians would have been compelled to withdraw from the field. Still, Mike deserves a hard-fought victory given the state of Benedek's decimated Austrian Corps.
Hopefully, Mike, we meet on the field of battle another day so that I may even the score.
Great fun and thank you!


Another great game there Jon. A somehwat Pyrrhic victory for the Benedek's Corps ( as noted post game), given with that even with the Sardinian's retreating, they would be in no fit state to peruse etc
ReplyDeleteThanks, Steve! I give the victory to the Sardinians in this game. Mollard only broke on the last turn after agreeing to play "just one more turn." Mike did not likely know how close this brigade was to breaking. Had he known, he may have played the final turn slightly differently.
DeleteAnother great battlereport. The Sardinians gamely hung on at a heavy cost to both sides
ReplyDeleteGlad you enjoyed it, Neil! This was a tough fight. Body count was high to both.
DeleteYes , another great report. Your narrative and photos provided a pleasant read this morning. Great looking troops and table, an under played conflict brought to our attention.
ReplyDeleteJoe! You always provide me terrific motivation to continue hammering-out these battle report. Thank you!
DeleteDoing a grand job with the remote gaming, another good report.
ReplyDeleteMuch appreciated, George!
DeleteIt seems after two games with different commanders, the Austrians are finding the Sardinians a hard nut to crack Jon! As Steve says, a Pyrrhic victory for them......
ReplyDeleteThe Sardinians can be a tough nut to crack even though they are at a disadvantage in weapons and strength. With the Austrians, God is on the side with the larger battalions, mostly.
DeletePyrrhic victory? See my reply to Steve above. Mike and the Sardinians may be the ones claiming a Pyrrhic victory.
Good point, seems like a battle both sides would have been better to avoid fighting in the first place!
DeleteHi Keith, keep in mind that this scenario takes a slice of the main battle to maintain a reasonable battle scope for a remote game. There were more Sardinians marching Converging upon San Martino and other troops marching to the west. The Austrians had more brigades in the area too.
DeleteGenerally, I think most battles fought are better avoided.
Excellent battle report Jonathan. It was fascinating to see the game played by someone else. Well done Mike and his stubborn defenders. He made it hard for the more aggressive Austrians. Super stuff.
ReplyDeleteThank you, Richard!
DeleteYes, I played the Austrians more aggressively and the Sardinian Dead Pile was HUGE. Still, the Sardinians clung to the important objectives and the Austrian Corps was much worse for the wear.
Seeing Mike keep Morozzo together on the right has me reflecting more on Ian's splitting of that command in your game.
Fantastic battle report as always Jonathan!
ReplyDeleteGlad you enjoyed it!
DeleteLooks like fun times around the gaming table. Is the battle still set up and ready for round 3? 😀
ReplyDeleteYes, Round #3 is scheduled for Tuesday. Will there be other rounds after that? Probably not unless I drum up enough interest. May be time to clear the table and put something else out. But that???
DeleteA nice refight and AAR. How long did the eight turns take to play out in real time, and does the internet connection hold for the duration? I find even half-hour zoom meetings can be frustrating at times.
ReplyDeleteThanks, Lawrence. Yes, internet connectivity stayed in place for the duration. Impressive when you consider that Mike and David are out in the Med. on the island of Malta. Technology is amazing. I think we played for about 4 hours with only one five-minute break. We may have talked for 15-20 minutes before we actually began. Game time flies by and I never feel any frustration. I love it! I do feel some fatigue the next day, though, since I am on my feet and moving around the table for the entire game.
DeleteAmazing interactive technology. Really enjoyed the game thanks for hosting
DeleteYou are welcome, David! Glad you could join in.
DeleteWonderful looking game and a fine job running it!
ReplyDeleteChristopher
Thanks!
DeleteAnother titanic tussle there Jonathan.
ReplyDeleteIt sure was. Good fun too!
DeleteAnother inspiring battle report for this "in between" period (which is growing in popularity, justifiably so).
ReplyDeleteThank you, Ed! Perhaps we keep this period flame alight?
DeleteHi Jon, sorry for my late comment but I’m always a bit of a lazy reader! First of all it was an excellently organised game thanks to your expertise. I’m sorry for making you walk all that distance around the table though!
ReplyDeleteWhat can I say? The plan was to hold the outnumbered and outgunned left and centre as long as possible while pushing hard on the right. The plan more or less worked but I admit I got more than my fair share of luck with my defensive throws. I would be more inclined to call the game a draw although in the grand scheme of things the Sardinians would have successfully prevented Lippert & co from joining the main encounter at Solferino. So from a strategic point of view, I would say yes, the Sardinians pulled it off.
One thing worthy of note, it was impressive how Morozzo’s troops were rapidly cut down by Austrian artillery - testament to how deadly later 18th century weaponry had become while still using essentially napoleonic tactics.
Mike, never too late to put in your commentary!
DeleteAs King Victor Emmanuele, you managed the situation expertly in accomplishing what needed to be done. You assimilated the rules quickly and your tactics developed equally efficiently.
Morozzo certainly made short work of Lippert which surprised me greatly. Your defense of the Heights was also very well played. The Austrians could make little headway there.
Once the three Austrians batteries got into action in front of San Donnino, you are correct, the guns delivered punishing blows. Advancing across open ground, the destruction seems appropriate.
For me, the game was great fun. Thank you!
Impressive gaming as always, Jonathan. All the more so being remotely gamed!
ReplyDeleteThanks, Dean!
DeleteExcellent looking game, looks like the Sardinian game plan worked, albeit with considerable loses on both sides!
ReplyDeleteBest Iain
Thanks, Ian. Mike's plan was solid and well executed. Casualties were very high.
DeleteWhat a grind! Interesting to see how this plays out over multiple engagements.
ReplyDeleteIt sure was a grind. Replaying the same scenario is a useful exercise in my book.
Delete