Thursday, December 29, 2022

Another Batch of Sumerians

As 2022 winds down, one last tranche of 28mm Sumerians musters out from the painting desk.  Following rapidly upon the heels of their brethren in the previous post, today sees 2 x 12-figure units of heavy spearmen march out.
The figures are all Wargames Foundry Sumerians and these are the last spearmen in The Lead Pile.  Actually, only two more battle carts and a handful of skirmishers remain unpainted for this project.
With 19 units completed in 2022, the project nearly doubled in size.  The project, only begun in June of 2021, now fields 44 units in the collection.  The collection has even seen battle two or three times in 2022.
As it stands now, the Sumerian collection has six battle carts and about 300 infantry.  Enough figures and equipment to field two equally matched armies.  
Should I remain satisfied that enough BMUs are present under arms for a game or look toward continued, moderate expansion in the New Year?

With the traditional Newline Design's annual January sale on the horizon, perhaps I could use a few more units?  

While I ponder that decision, clearing the table for a parade may be warranted.

Meic, if you are reading, a little more temptation for you.

Monday, December 26, 2022

Sumerians and a Game Not Played

First, I hope everyone is enjoying a holiday break.

Second, with a steady stream of games and battle reports of late, few figures have shown up on the blog.

In an effort to clear some of the logjam at the photo booth, up today are more Sumerians in 28mm.  All figures are Newline Designs.  With The Lead Pile running low of Newline Design figures, one New Year's wish is that we see another January sale so that I can replenish the coffers.
First up are two, four-figure stands of Sumerian archers skirmishing.  As always, these are based for Impetvs or To the Strongest!.
Next up is a nine-figure stand of massed archers.  These will classify as 'T' missile under Impetvs.  Accounting shows I can field seven such massed bow units.  

Two more, 12-figure heavy spear units are waiting in the wings for a chance at a photo op.

The gaming slate has lightened during the holidays.  I have a remote game scheduled for Tuesday in which Chris is hosting his first remote game (hooray!).  The game looks to see action in the AWI using Loose Files and American Scramble.  Not a ruleset to which I am familiar but sure to pick it up quickly.  Having played British Grenadier, the concepts are not foreign.  A return to recreating Samurai battles is back on the front burner again after a long hiatus.

Unfortunately, I had to cancel last week's pre-Christmas game due to an aching back.  The action was to see a return to Old West gunfights with a collection having seen no action in more than 20 years.  Hopefully, I can get this one rescheduled.  The table was laid out, character cards drawn up, and a scenario in place.
Adobe Wells
Sample of player character cards
Until next time...

Friday, December 23, 2022

Merry Christmas!

To all readers who visit on purpose or by accident, regularly or irregularly, in silence or with comment, I wish you all
a
 Very Merry Christmas!

Wednesday, December 21, 2022

Plataea, My Way

photo courtesy wargamesinthedungeon
Matt drew up the Battle of Plataea to fight out on his table recently.  We used a hex grid and my Basic Impetvs variant.  Having fought gridded battles in other periods, Matt was ready to take the fight to the Greco-Persian Wars.  Matt tells his side of the story at, Battle of Plataea, 479BC Time to tell the battle account from the Persian perspective.

The battle begins with both armies deployed across the 6' x 4' table.  Each army is arrayed into three distinct wings.  I would command the Persian Army.  For the Persians, Theban Hoplites are deployed on the right wing.  Persian Immortals and much of the cavalry are deployed on the left.  The Persian center is occupied by an assortment of light troops.  The battlefield is effectively split by the Asopus Ridge.  Reinforcing one wing from the other will be impossible.  
Initial deployments
photo courtesy wargamesinthedungeon
On to battle!
Matt points out the pride of the Spartan Army.
Would they rise to the challenge?
Battle begins on the Persian left.
Having won the initiative, the Immortals advance.
The Spartans counter.
Seizing the initiative, the Spartans attack!
Persian arrows cause some discomfort before the clash.
You win some; you lose some
but the Persians are winning more!
Two Spartan Hoplites are destroyed
as Persians splinter the Spartan line.
The Spartan right is tattered. 
The Immortals drive on!
With the battle seemingly decided on the Persian left,
 focus shifts to the right.  The armies advance.
Now within striking distance, the Greeks win
initiative and charge into the Thebans.
The Thebans fold like a cheap tunic!
With destruction everywhere, the Thebans take to flight.
Carnage continues on the Persian right.
Back against the Spartans,
mopping-up actions continue.
the Immortals know not what is befalling their right.
In a last ditch effort, Pausanius drives
 Persian horse back across the river
but the Spartan wing is destroyed.
Thebans are driven back.
With Spartans nowhere, Persians head for the ridge.
In hot pursuit of the fleeing Thebans,
the Greeks give no quarter. 
Hardly a Theban remains...
With the battle hanging in balance,
one attack will destroy a Great Army.
The Theban cavalry attacks a Hoplite rear!
The Thebans are repulsed,
 and a Great Army is destroyed.

Matt and his Spartans are victorious but only by a hair.

With the Battle Clock down to one point apiece, one more loss or retreat would bring either victory or defeat.  Unfortunately for my Persians, it brought defeat but only by the narrowest of margins.

This refight of Plataea resulted in one of the most closely contested fights I have seen in ages.  Victorious on the left, the Persians sensed victory could be theirs on this day.  The Greeks had other ideas, though.  Thoroughly dismantling the Thebans on the Persian right, the destruction was complete.

Congratulations to Matt for a well-played hand and a superb game.

One day, I would enjoy a rematch.    

Sunday, December 18, 2022

Battle of Auberoche, 1345

Following my Jacobite Rebellion game with Peter using his OHW's D3 variant (see: D3 or Not D3), we returned to his table for another remote game using another D3 variant.  This time, we explore his Medieval D3 OHW variant.  Really, I think it insincere to label this an OHW variant as not much is left from the original.

As mentioned, today's battle featured Peter's Medieval D3 rules with his 25mm Minifig HYW armies out on the table.  The battle considered for today's contest is the Battle of Auberoche in 1345.  The scenario for Auberoche is based upon Thomas' OHW's Scenario 22 AMBUSH.  For battle and scenario details, please visit Peter's blog at Battle of Auberoche, 1345.  Essentially, the French army has been caught unprepared and encamped besieging a castle as the English fall upon them.    
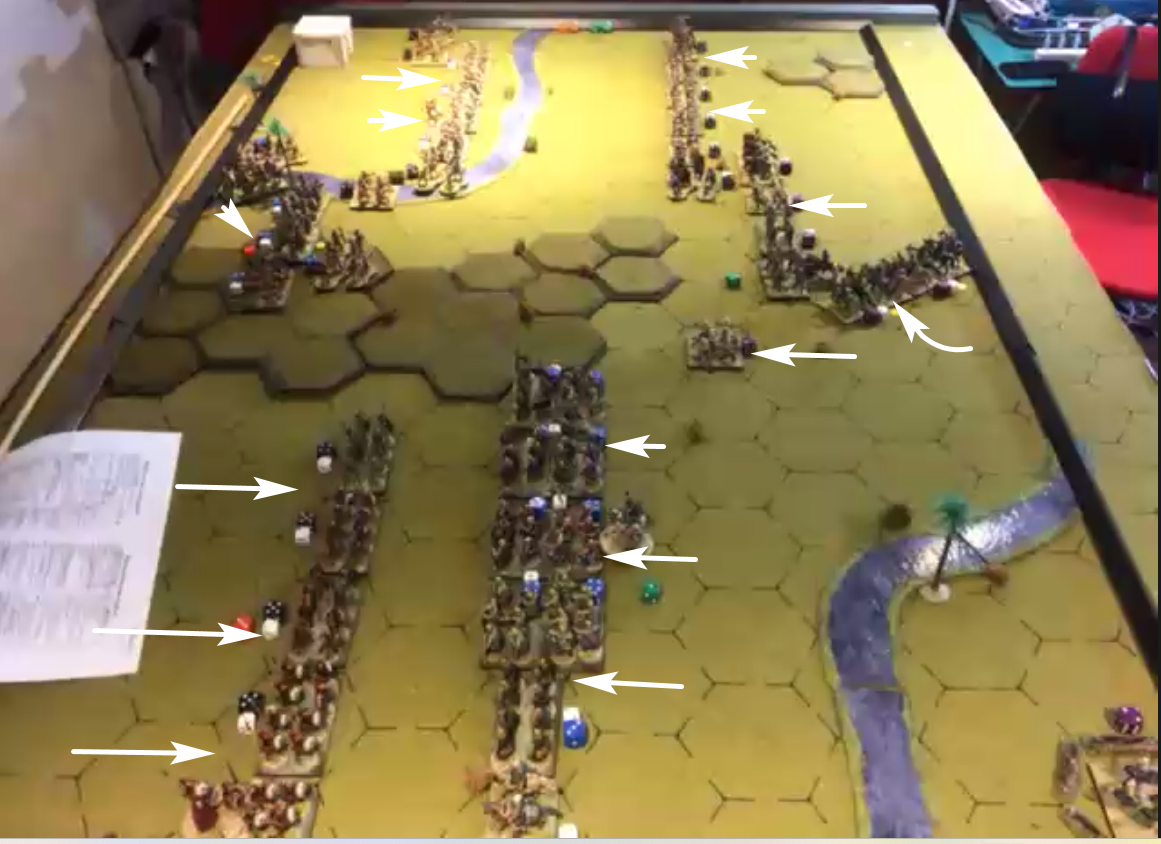
Battlefield

French deployment zone

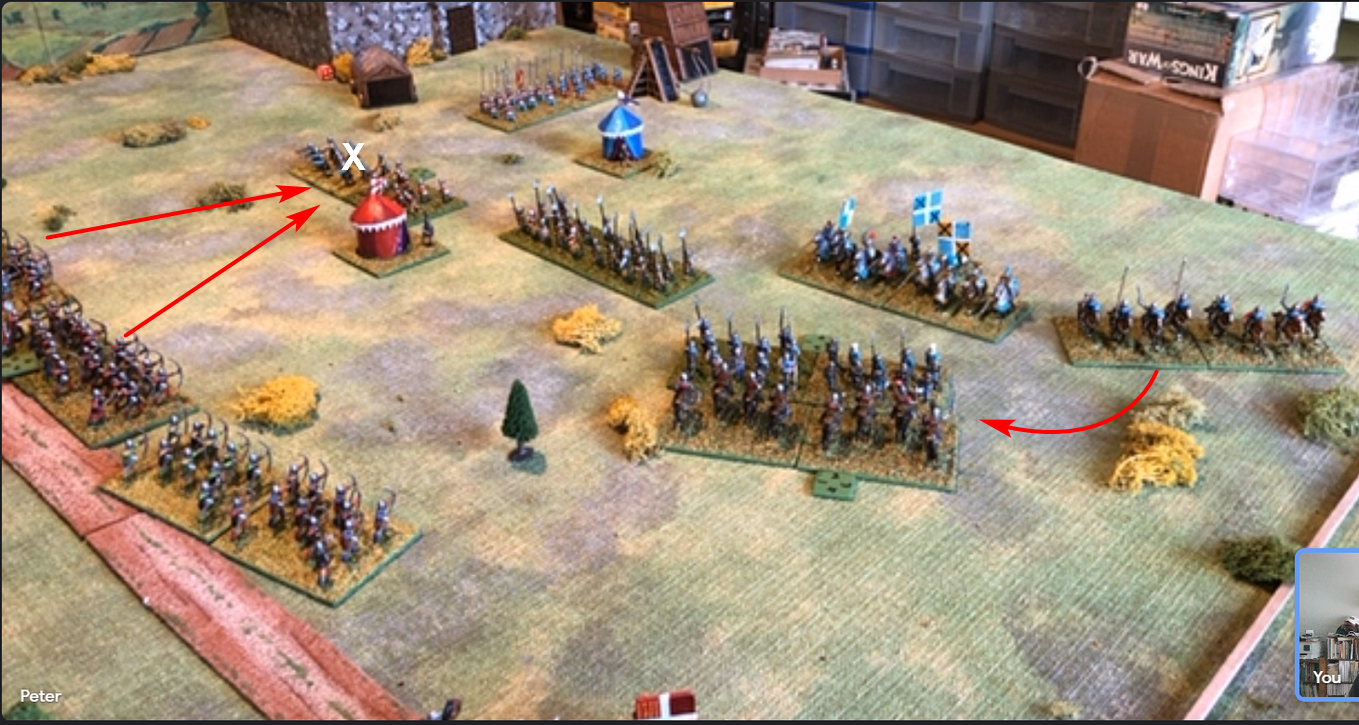
The battle begins with French deploying around the encampments on the table.  The French begin with a 9 BMU to 6 BMU advantage but may not activate until Turn 3.  That means the English enjoy three turns to move and fight before the French may respond.  Before the battle began, Peter's solo play resulted in one win apiece for the combatants.

Let's see how the battle played out.

I deploy the French with two levy units closest to the English occupied woods with the third levy overseeing the castle.  On Turn 6, English cavalry may sally forth from the castle so the French need a speed bump on this front. 

In the second line, both crossbow units are deployed.  MAA follow up in the third line.  The two knights are placed in the fourth line.

French deployment begins.
French deployed for battle!
Knowing that the English will enjoy three turns of uninterrupted firing from their longbows before the French can react, the first three turns will be tense for the French.  I expect to take a pounding early on.  With a unit only able to sustain about three volleys, on average, before being destroyed, heavy casualties are expected.  If all three English longbow units fire for three turns, three French units could be hors de combat before there is any chance to respond. 

Like clockwork, by Turn 3, two French levy units have been destroyed by English fire.  Two units of French crossbow are destroyed by Turn 4 as the French army begins to respond.  Already, the French are down four units and the battle (for the French) has only begun. 

Two quick levy losses for the French.
One French crossbow lost as the French begin to respond.
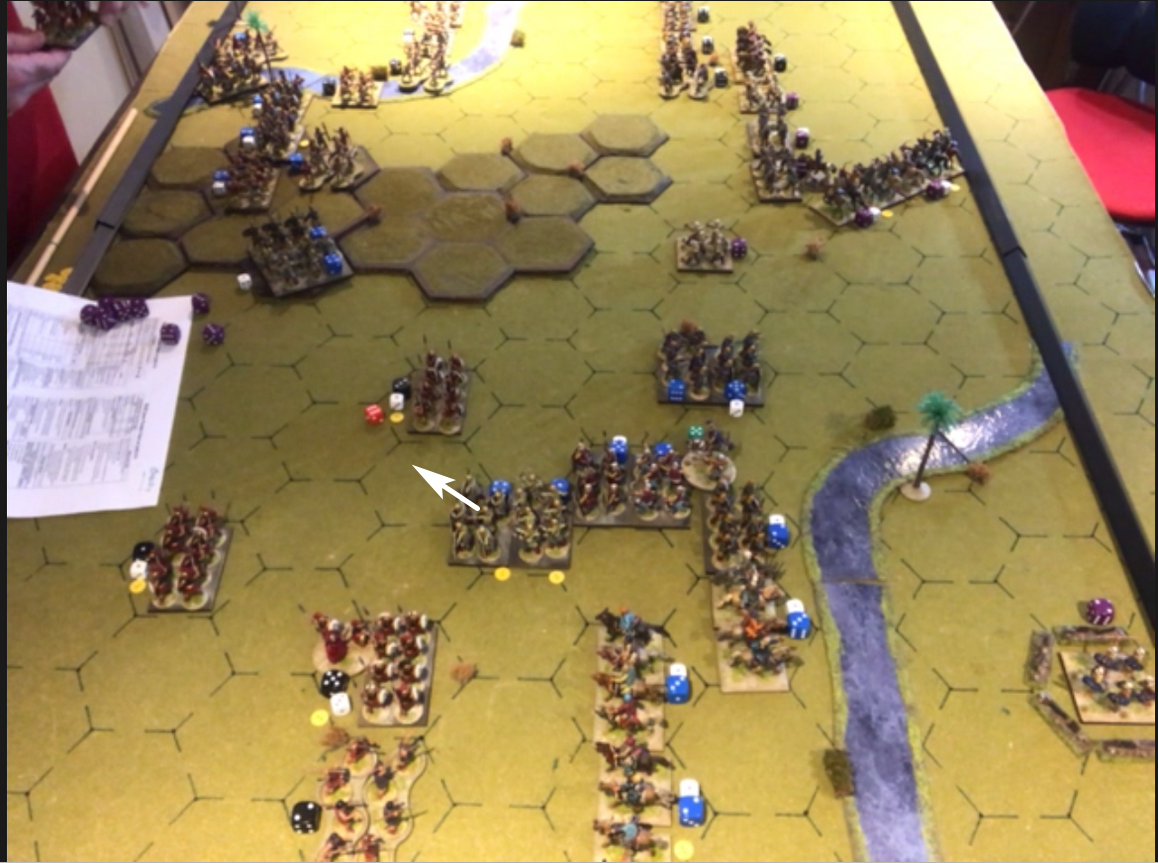
The second French crossbow is lost from archery 
as English knights charge into the French MAAs. 
English knights charge into the French MAAs as the English longbowmen move forward.  Having destroyed all French within range, the English are forced to move up to close the range.  The French swing their cavalry out to the left.  One French knight unit joins into the melee.  In the melee, the French MAAs and the English knights are both destroyed. 
MAD in the center.
By Turn 6, the English knights sally forth from the castle and engage the French levy.  The remaining French MAAs fall back to protect the French right and increase distance from the English longbowmen.  With the French left open, the French cavalry advance.
English knights emerge from the castle
 while the French redeploy.
While the English knights take some heavy punishment at the hands of the levy in front of the castle, the levy are beaten.  The levy scatter opening up the French right.  The French MAAs continue to retrograde to cover the French flank and try to remain out of range of the deadly English longbow.
French levy is destroyed in front of the castle.
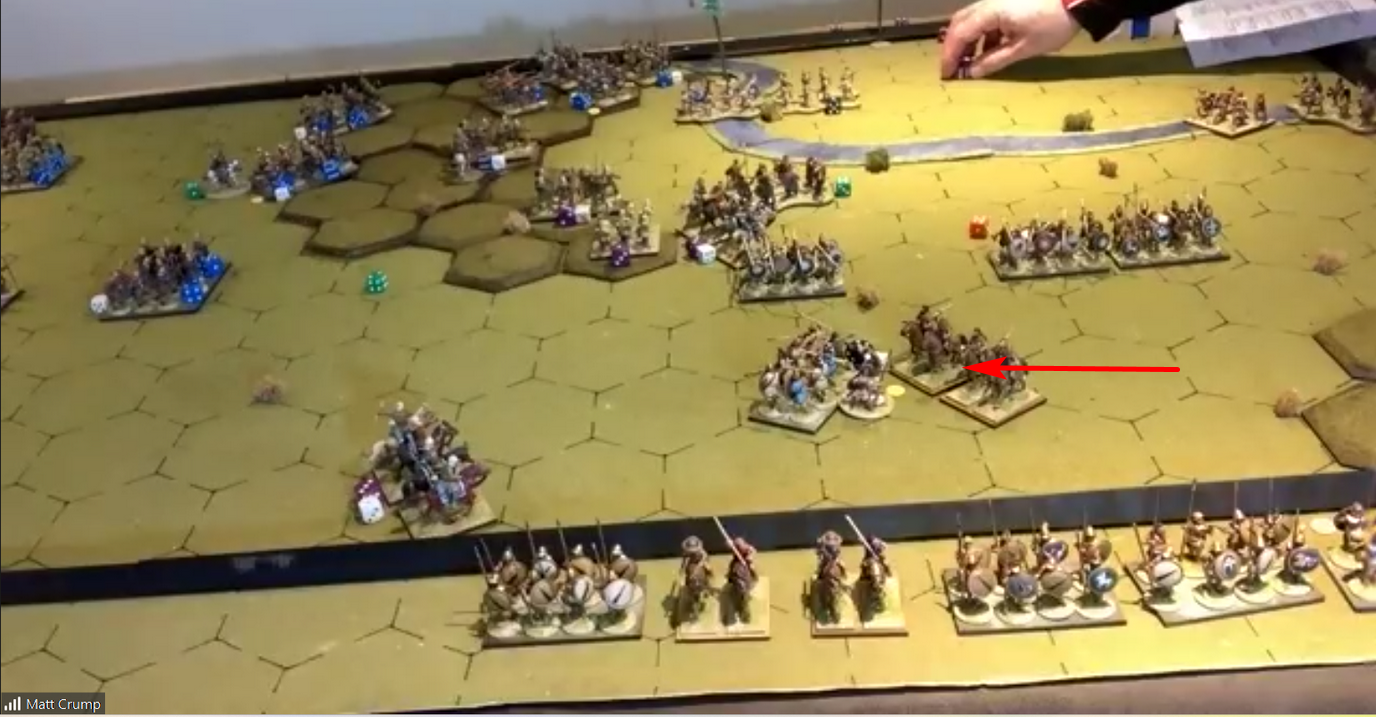
The French MAA give the English the slip again as the English advance.  On the French left, the two French knights take on the English knights.  One unit of French knights is destroyed.  The English commander falls with the destruction of the English knights.  At this point, the French are down to only two of their nine units remaining on the field.  One more French loss and the battle is over.  Grim.
Cavalry clash on the English right.
With their commander lost and casualties mounting, the English are having trouble activating.  At the head of his remaining knights, the French commander swings around to take the English longbow in flank. They are cut down where they stand.  Encouraged by this success, the French knights continue.  A second English longbow unit is hit in the rear.  It is likewise destroyed.   
One English longbow destroyed!
A second English longbow destroyed!
With their blood lust up, the French knights continue the rampage as the English fail to react.  The last English longbow is hit in the rear as it fights the French MAAs to its front.  The remaining English cavalry join into the fray.  Having suffered heavy casualties earlier in its fight with the levy at the castle, the English knights are destroyed.  The battle is over and the French have won!
One more English longbow in sight.
The remaining English cavalry goes down swinging.
The battle is over.
That was a close contest.  With the French teetering on the verge of loss, the French knights rampaged through the English army sowing destruction wherever they went.

The key to the battle was the loss of the English commander.  When he went down, most of the English units showed heavy casualties.  With heavy casualties and the penalty for leader loss, the English simply could not react to the French attacks.

A great fight and one in which I thought the French had little chance for success.

Thank you, Peter!

Thursday, December 15, 2022

Four Battles in Four Days!

This has been a busy week at the gaming table.  I managed a mini marathon of four battles in four successive days. Four hosts presenting four battles from four different periods provide great variety in scope.  While I published a battle report on one of the four (Cropredy Bridge), three more are yet be chronicled here.  In the meantime, below is a recap of the gaming activities with links to battle reports where available.

MONDAY:  Battle of Cropredy Bridge, 1644.

The week kicked off with a replay of ECW Battle of Cropredy Bridge.  In this edition, the Royalists pulled out a decisive victory.

Jon's Battle Report at: Cropredy Bridge Redux

TUESDAY: Battle on Moncontour, 1569

Tuesday's game saw players fighting it out in France during the French Wars of Religion.  The battle was closely contested until the internet went out at the host site.  We may have to draw our own conclusions on the outcome since the battle was cut short. 

Graham's Battle Report at: Battle of Moncontour 1569 

WEDNESDAY: Battle on Plataea, 479BCE

Wednesday saw Matt and I punch it out over the fields of Plataea in a hotly contested and very exciting battle.

Matt's Battle Report at: The Battle of Plataea

THURSDAY: Battle on Auberoche 1345

Thursday saw Peter and I lock horns on the fields of Auberoche as the French are caught in ambush by the English.  Another battle that came down to the wire.

Peter's Battle Report at: Battle of Auberoche 

Whew!

I could use a rest.