Tuesday, May 31, 2022

San Martino BatRep - Don't Throw a One!

After a week's intermission, I was back to the table with the Rejects to resolve the final act in the Battle of San Martino.  For a battle refresher, please visit, Battle of San Martino - Part 1

For the battle's concluding session, we lost Ian and David but gained Ray.  David even made a brief appearance from a pub during his travels.  Now, that is dedication!  Ray picked up Ian's Sardinian command.  Lee took over command of David's brigade.  Having grasped the rules quickly in the first session, I was curious to see if strategy and tactics may have evolved over the weeklong hiatus. 

We pick up the action at the start of Turn 6.  

When we left the battle, the Austrians were advancing cautiously upon San Martino and the heights.  Having dispatched the Sardinian light cavalry causing havoc on the Austrian left, Lippert orders his brigade to bypass the heights and concentrate on covering the vital bridge near San Donnino.  Morozzo still maintains four battalions of the 13th Infantry Regiment protecting the Sardinian right.  Would Morozzo drive on the Austrian positions at San Donnino or remain content to screen the Sardinian right?  With a change of commanders from Ian to Ray, a change of approach may be forthcoming. 

Start of the action on Turn 6.
On the Austrian right, Philippovic and Watervliet continue their cautious approach toward San Martino.  Knowing that a small chance exists to end the battle abruptly at the end of Turn 8, the Austrians may need to press on if the objectives are to be in Austrian hands before battle ends.

Austrians advance on the right toward San Martino.

Facing the white-coated juggernaut on the Sardinian left is King Victor Emmanuele, himself, leading the 14th Infantry Regiment.  Knowing the 14th IR suffered monstrous casualties in the opening stages of battle, its combat effectiveness may be in question.

With a cautious approach upon San Martino, Mollard is allowed time to ready defenses for the attacks he expects to come.  Having his recon column cover the central position astride the main road and defend the heights, Mollard orders Arnaldi to deploy half of his brigade into the vineyards to the east of San Martino while supporting Mollard's Bersaglieri in Contracania and Ortaglia upon the heights.

Mollard consolidates the central position.
Lippert completes his redeployment to protect the bridge by covering its approaches by three of his four battalions. Benedek, near San Donnino, oversees this maneuver while bringing up the reserve artillery and hussars.  Morozzo slowly advances south toward Lippert's position with skirmish fire breaking out in places. With the longer range of the Austrians rifled muskets, Morozzo is hard-pressed to win this uneven contest.

Lippert shifts left.
Skirmish fire, likewise, breaks out across the battlefield as Philoppovic and Watervliet move on the enemy.  Still, progress is slow and methodical.  With an advantage in both quality and quantity, a quick drive by Watervliet upon the Sardinian left may see that flank collapse under the weight.

View behind Austrian lines, Turn 7.
Having primarily deployed to the east of the road, Philoppovic moves off to the west to pin the Sardinians on the heights.  Is Philoppovic the anvil to Watervliet's hammer?  Still, skirmish fire and artillery bombardments intensify on this front as two Austrian batteries pound Sardinian positions at Ortaglia and San Martino.  One of Morozzo's batteries deployed in front of San Martino is driven off by artillery fire.  The path to San Martino could be opening up.

Philoppovic presses on in the center.
In the center, Philoppovic advances up onto the heights to support Lippert's guns and challenge the defenders of the fortified farms.  In a dashing charge, the 1st Hussars scatter the Bersaglieri below Contracania.  With Austrian small arms' greater range and a cautious approach, Austrian casualties are light.

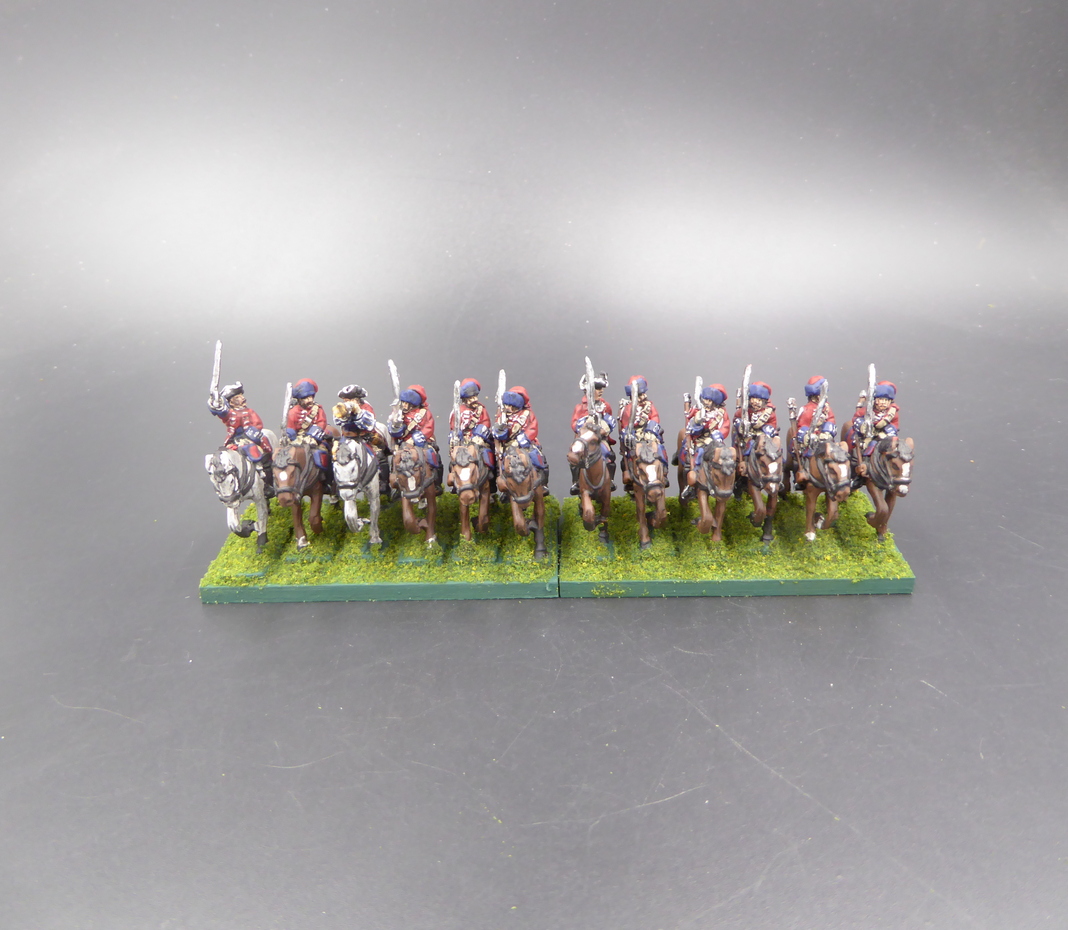
Hussars scatter Sardinian Bersaglieri
near Contracania.
As noted earlier, the battle has a variable number of turns.  With a one-in-ten chance, the game may last only eight turns.  Probability of ending increases on each successive turn.  At the beginning of turn 8, I roll one D10.  On a '1' the battle will end with the conclusion of Turn 8.  Holding onto the objectives of Contracania and San Martino, the Sardinian players are hoping for a '1'.  For the methodical Austrians, they hope to see anything but a '1' to continue their systematic advance.

Dispositions beginning of turn 8.

To use Ray's blog name, the Austrians hope I "Don't Throw a One!"  I make the roll.  It comes up a

'1'!  

The Sardinians are elated.  The Austrians not so much.

The Austrians advance toward San Martino
Despite the deflation of hopes to securing the objectives, the Austrians press on for the final turn.  Fighting intensifies on the heights while vigorous attacks go into the vineyards in front of San Martino.

Close combat at the vineyards.
In last ditch efforts to take the vineyards and almost reach the outskirts of San Martino, the Austrians are bloodily repulsed.  The Sardinians have hung on to claim a minor victory.  Hooray for the Sardinians in their quest for throwing off the Austrian yoke of oppression!

Sardinians hold San Martino for victory
For the Sardinians, this was a jubilant resolution to battle.  For the Austrians, they really required a few more turns to bring their might to bear given their battle plan.  Well played by all. 

That was good fun and a terrific way to meet wargamers whose blogs I have followed for a long time.  A good discussion followed the session with more thoughts and comments coming in via email.

The Rejects unanimously and generously agree to tackle another Franco-Austrian war battle another day.  Much to consider for another game.  The rules seemed to work well with little ambiguity, I think.  Players caught on to most game attributes very quickly.  A game, decision-making, and rules retrospective I leave for another day.

For a superb, full battle account of the two-session game of San Martino told from the Austrian commander's perspective, please visit Richard's blog at,

The Battle of San Martino

Thanks to all players participating over the two-session game.

Sunday, May 29, 2022

Sumerian Bowmen

No, this lead photo is not of Sumerians lurking in the garden.  The photo above is from our two flowering crabapple trees in the back yard.  Probably a few days before peak color.  These two, late bloomers with their colorful blossoms are a sure sign that spring is well underway.  While spring on the Palouse has been wet and cool, weather looks to be improving.  Well, that is, perhaps after today's downpour stops.  On the topic of cool spring weather, Spokane set a record this week for the latest in the year to reach 70F.  The old mark was recorded in 1896.

Painting has been slow in May.  Actually, painting output was low in April too.  I may need to crank it up a notch.  Painting totals for May come in at 55 figures.  Eighteen of those figures cross the finish line just before the end of the month.  Even having 31 days in the month did not seem to help much.  

Anyway, today's parade shows off eighteen Sumerian bowmen in two stands of nine.  Having been painting a number of French SYW cavalry in 18mm (some will be coming up for parade soon), it was nice to switch gears to something a little bigger.  Figures are 28mm Newline Designs. 
For June, I hope to push through some more SYW French cavalry and perhaps a few more guns and infantry.  Also, I see two dozen Sumerian javelinmen on the side table awaiting their turn with the brush.  Maybe I can get those into the June queue too?  We will see how these plans work out.  Reaching 500 painted figures for first half of 2022 is still possible.

Wednesday, May 25, 2022

Battle of San Martino - Part 1

As planned, the San Martino battle kicked off on Monday at 6:00pm GMT with five of the six Rejects taking their positions around the remote gaming table.  Ray, due to work commitments, could not make Monday's game.  With a little luck, perhaps, we will see Ray when the battle continues.

The Austrians had three players (Richard, Lee, David) commanding 26 BMUs.  The Sardinians, with two players (Steve, Ian), took command of 30 BMUs.  Both armies have opportunities to attack and defend.  The Austrians are slightly outnumbered but looks can be deceiving.  Austrian infantry battalions carry rifled muskets and field more manpower than their Sardinian counterparts.  The Sardinians mostly muster out with smoothbore muskets.  Cavalry contingents for each are small and artillery is not too numerous.

To win the battle, the Sardinians must hold at least two of the three objectives of Contracania, San Martino, and the bridge near San Donnino.  If the Sardinians also take Pozzolengo, they score a major victory.  

For the Austrians, they must hold Pozzolengo and hold at least two of the three objectives of  Contracania, San Martino, and the bridge near San Donnino.  Possess all four objectives by battle's end and the Austrians score a major victory.  As suggested by the victory conditions, the San Martino Heights which dominate the central position, figures to see heavy fighting.   

Battlefield and initial dispositions
The two teams had about one week to prepare their battle plans.  The Rejects quickly chose up sides and began to prepare.  Both teams got into the spirit of the battle planning phase by asking a number of very good questions about scenario and rules.  From the questions asked, I gained a sense of what each army might be planning.

The Battle Begins!

Let's see how the battle developed...

Armies converge.
Benedek's Austrian Corps begins the action by moving sharply toward the San Martino Heights.  Lippert, on the Austrian left, scales the heights and encounters the Sardinian Bersaglieri defending Contracania and Ortaglia. Lippert's men suffer some casualties from these long-range exchanges.  In the Austrian center, Philoppovic advances to keep pace with Lippert sending his jaegers out as a screen.  Watervliet, holding the high ground on the right, maintains his position.  Is Watervliet being held in reserve to discourage an attack toward Pozzolengo?  

Austrian move on San Martino.
With only Mollard's reconnaissance column on the battlefield when the shooting starts, Mollard is relieved to see Arnaldi and Morozzo's brigades come up in support on turns one and two.

Jockeying for position.
Lippert advances upon the heights while Philoppovic and Watervliet throw jaegers out in front of their two brigades.  King Victor Emmanuele reaches the battlefield with Arnaldi as Arnaldi advances along the main road.  Morozzo, however, splits his command.  Morozzo, along with half of his cavalry and the 13th Infantry Regiment, swings around to the west of San Martino making an apparent push toward San Donnino and the bridge to Madonna del Scoperta.  Interesting!  The King, himself, takes command of the 14th Infantry Regiment and two squadrons of cavalry and advances to the east of San Martino.  Anxious for action, the two squadrons of Monferrato's cavalry accompanying the King strike out toward the Austrian lines.  Is he attacking to delay the Austrian advance?  Monferrato's light cavalry, unsupported, are driven off by Austrian jaegers but not before inflicting light casualties.   

Monferrato Cavalry attack!
In a surprise to all players and umpire (well, except for Ian), Morozzo (Ian), releases two squadrons of the Monferrato cavalry from reserve and attacks IR 59/3 near San Donnino. The Sardinian light cavalry swings around the Austrian infantry and hits them before they can effectively respond. The 59th suffers heavy casualties before falling back into the village of San Donnino.

Attacks at San Donnino.
Seeing the threat to San Donnino and the vital bridge to Madonna del Scoperta, FML Benedek brings up the Reserve Artillery.  The heavy battery he orders to San Donnino while the medium battery he positions covering the gap between San Donnino and San Martino Heights.  The Austrian 1st Hussars are brought up in support for good measure.

Heavy fighting on the heights and near San Martino.
As fighting intensifies on the heights, casualties mount.  The Bersaglieri defenders of Contracania, suffering heavily from the fighting, are replaced by one of Mollard's infantry battalions.  The Sardinians stand firm. 
Sardinian cavalry overrun the guns!

Neither the heavy guns nor the 59th IR at San Donnino can drive off the Sardinian cavalry.  In fact, these actions may have annoyed the horsemen to the point of attacking!  Attack they do!  The two squadrons attack the heavy guns.  Despite valiant efforts, the Austrian guns are overrun before the Sardinian cavalry can be driven off by the Austrian hussars.

Sardinians broadly advance.
With casualties climbing in the advance upon Contracania and Ortalia, Lippert has seen enough.  He orders his brigade to fall back to safety.  Is he more concerned about casualties suffered or threat to his flank?

Philoppovic maintains steady pressure against the defenders positioned in front of San Martino.  The lengthy firefights are taking a toll.  One Sardinian battalion is destroyed defending the vineyard while the guns in front of San Martino are wavering.  The Austrians seem content to keep the Sardinians at a distance and attack from afar.  The Austrians must take the high ground.  When will the inevitable attack come?  

Austrians poised to attack.
Mollard still holds San Martino and the Heights.
After five turns of play, the battle is still undecided.  With the outcome still contested and time for only one more turn in session 1, players agree to continue battle in a second session rather than press-on for one more turn.  The follow-up session with be on 30 May.  Stay tuned for the conclusion of the San Martino battle.

Battle lines as seen from the east.
Players have been issued troops dispositions and casualty returns to plan for the battle's conclusion.

With the situation as given at end of play, how would you tackle the challenge of gaining a victory on this field of battle? 

Until next time...

Saturday, May 21, 2022

On the Table Today is...

the Battle of San Martino, 1859.  The table is set and the guns are silent, for now.

In a twist of irony, I have been accepted by the Rejects to host a remote game for their group.  At least three of the Rejects are active bloggers and in commentary I suggested that we might have a go at a remote game.  Well, they accepted.  On Monday, I expect six players to fill the roles of brigadiers and CiCs to refight the action at the southern end of Lake Garda.  

I know both teams of three are making battle plans for the day and questions have been drifting in from parts unknown.  Almost unknown.  I believe the Rejects are based in the London Kent area of the UK.  

Battle Briefing

The Battle of San Martino comprised the northern portion of the larger Battle of Solferino on 24 June 1859 fought simultaneously to the south.

The battle began as the Sardinians sent out a number of reconnaissance forces to probe southeast from Lonato and Rivoltella towards Pozzolengo. Rather than fielding an integrated advance guard to act as the recon force, the Sardinians drew off battalions and squadrons from each division and sent them on their way.

One of the largest of these recon contingents was drawn from Mollard's 3rd Division. Not expecting Austrian resistance on the west bank of the Mincio River, Mollard was surprised to run into Austrian forces at Ponticello. What was initially thought to be only Austrian screening elements turned out to be Benedek's VIII Corps centered on Pozzolengo. Benedek, likewise, was surprised to discover the Sardinians bearing down on his corps in force.
The battlefield
Mollard realized his miscalculation and fell back to the heights around San Martino. While Sardinian columns continued streaming towards Mollard's positions at San Martino, Mollard prepared for a defensive action until sufficient force could be gathered to push Benedek back onto the Mincio. Not waiting for the Sardinian storm to gather over San Martino, Benedek counterattacked to prevent the Sardinians from compromising the Austrian line of communication over the Mincio.
Brigade deployment zones
The scenario picks up where my narrative ends. That is, elements of Mollard's recon column hold the San Martino heights while reinforcements continue their march to San Martino. Benedek has several brigades from two divisions poised to attack the heights. The Sardinian objective is to cut the Austrian line of communication across the Mincio by taking Pozzolengo directly. Indirectly, an attack toward Madonna del Scorpeta may turn Benedek’s left and separate Benedek from the bulk of the Austrian army engaged at Solferino. Since Benedek's force anchors the far right of the Austrian army and protects the army's line of communication, the Austrian VIII Corps is tasked with holding the Pozzolengo position until ordered otherwise. Falling back behind the Mincio too early would allow the Sardinians to reinforce the French at Solferino.
Armies deployed
With the table set, armies deployed, and instructions delivered, the table lays in wait of battle.

Thursday, May 19, 2022

Men at Arms Arrive First

The way in which the Perry Miniatures' War of the Roses boxes are configured, I can field one Battle's worth of bill and bow from one box. To complete a Battle, 13 figures from the Men-at-Arms' box are needed.  As the number of Battles grows and my suboptimal planning kicks in, I end up with a surplus of Men-at-Arms figures.

What to do?

Typically, each 52 figure Battle is fielded at one time.  Rather than wait until the next order from Perry arrives, I crack on with the MAA components.  The bill and bow complement will straggle in at a later date. Until those stragglers arrive, work goes forward.

Off the painting desk today are 26 Men-at-Arms figures for two Battles.  These are MAA for Somerset and Clifford.  Flags are Pete's Flags.   

Somerset
Clifford
On the gaming front, Friday sees a return of Commands & Colors Ancients action in 6mm with a revisit to the Battle of Caralis.  Previous battles have been closely contested.  Kevin wants a rematch.  Who am I to say no?

On deck for Monday is the Franco-Austrian War battle of San Martino in 15mm.  While this northern part of the Battle of Solferino has seen action before, I have never hosted it remotely nor on a grid.  There have been some revisions to the rules and scenario to fit the number of players, remote gaming, and a grid.  Actually, a new ruleset will be in play for this action.  More details on the game setup before Monday.

Monday, May 16, 2022

First French Cavalry

Gaming and planning for games are consuming much of my hobby time of late.  Two games (possibly even a third) are scheduled for this week, and I am making preparations to host a remote game on the 23rd.  Given these demands, meaningful painting sessions continue to be few.     
Progress is being made, however.  Off the painting desk is the first French cavalry contingent for the 18mm SYW project.  Mustering out today are two squadrons of French dragoon regiment, La Reine.  Figures are from Eureka Miniatures.  Several more French cavalry units are in work and slowly making their way through the painting queue.
With sights set on getting enough French together to field a viable force for some smaller WAS battles, I still have much work to accomplish.  One battle in mind requires seven cavalry units.  Having only one completed, I need to pick up the pace. 

The Alamo battle mentioned in the previous post, we fought on Saturday.  Scott and I took command of the Mexicans while Tim and Jeff hunkered down behind the palisades of the Alamo.  As seen in the photo below, the Mexicans stormed the defenses early in the second wave and few Texicans escaped.  Bowie and Crockett fell early in the fight. 

WoFun Mexicans clear the Alamo
With several days of rain combined with spring snowpack melt, the Spokane River is swollen with water.  Last week, I made a short stroll along the Lower Falls to see the action.  In the photo below, a torrent of water passes over the Monroe Street Dam and down the Lower Falls.  The volume and power of water flowing through town is impressive.  To get a sense of scale, the gondolas dangling near the bridge each holds four passengers. 
Water rushing over Lower Falls
Time to put together a battle plan for Tuesday's game as I take command of the Scottish army at Falkirk. If I can call upon the Gods of fortune, perhaps, I can reverse history?  Probably not but it will be fun to try.

Thursday, May 12, 2022

Cycling the Palouse + Games

Weather finally warmed-up and dried-out enough to get back outside on the bike yesterday.  After spending most of April and May indoors on the trainer, unhooking the bike from the indoor torture device was a welcome task.  

Wednesday's route took me 40 miles over hill and dale to the south of Spokane.  Wind was light to moderate and temperatures were cool especially under the ever-present cloud cover.  Elevation gained over the route totaled about 2,500 ft.
With weather expected to see more of the same today, I plan to be out and back before the possibility of afternoon showers returns.
On the gaming front, the Tuesday remote game saw a return to the Russian Civil War and Graham's playtesting.  The focus of Tuesday's game was appearance of an armored train.  Being White commander in this clash, I would be faced with dealing with such a monster.

It was a bloody affair.  The battle was salvaged by a fortuitous White bombing run against the train.  The pilots hit their mark causing the train to withdraw.  Full battle account at Graham's blog,

Armored Train-ing Wheels 

RCW game. 
Whites v Armored Train.
The game generated some good post-game commentary discussing the finer points of armored trains and how to deal with them.  Rules' details will be forthcoming from Graham's keyboard soon.

For Saturday, a second game is on the docket.

Saturday's game sees a return to the Alamo in what is becoming an annual event to celebrate Kevin's birthday. 
Alamo with WoFun
The game is played using WoFun plexiglass 18mm figures on a gridded board.  Rules in use are a variation of Commands & Colors.  Last year, I recall that the attacking Mexicans wiped out the Texican defenders and the birthday boy fell in defeat.  Will the historical result hold up on Saturday?
Alamo with WoFun
The result does not matter much.  We will enjoy good company, BBQ, and birthday cake.  What could be a better way to spend a Saturday?  

Sunday, May 8, 2022

SYW French Artillery


With the Las Guasimas game taking up a lot of my time this past week (preparation before Tuesday, game on Tuesday, battle report on Wednesday), hobby activities seemed to wane the remainder of the week.  Well, I did revisit the hidden movement process present in Tuesday's game and overhauled that procedure.  A few trials suggest that I am satisfied with the direction and effect of the improvements.  We will see what others think next time I spring a SAW game on them.  Not sure I am ready for that.  Regardless, I save those discussions for another time.  In the meantime, I plan to run through the scenario at least once more.

Today sees the latest results from the painting desk.  Off the workbench are six French guns and 24 crew for the SYW project.  Rather than the usual Eureka guns and crew, I opted to field a bag of Old Glory artillery.  I picked up a bag of artillery when I made the year-end order to load The Lead Pile up with Old Glory French infantry.  Again, an Old Glory infantry choice is unusual for this project.  Most infantry are Eureka augmented with Blue Moon and a few Lancashire Games figures.  I did not care much for the poses of the Eureka French so went with the Old Glory French which are excellent.  Good choice, I think.

The painting desk is still showing SYW French activity.  Cavalry are moving through the production line.  Perhaps a bit too slowly.  A few units will be emerging soon.  Cavalry figures are Eureka.

Also on the workbench is the completion of a box of Perry WotR' Men at Arms figures.  When I completed the six Battles, enough MAA figures remained to field two more MAA Battle components of thirteen figures each.  The two additions will be for Somerset and Clifford.  I suppose I ought to place an order with Perry to field the bill and bow components for these two Battles.  What I originally thought would comprise a collection of six Battles may expand to include eight Battles in total.  Sigh.  It never ends.