Friday, July 30, 2021

Chess Match on a Chessboard

Bob Cordery's latest publication contains two sets of rules.  One of the rules included is a version of his The Portable Wargame adapted for use in the Spanish Civil War.  While I have The Portable Wargame, The Portable Spanish Civil War Wargame is new to me. 

Graham wanted to give the rules a run-through during this week's remote gaming session.  That is what we did.  For Graham's post-game battle reports, please visit, Portable Spanish Civil Wargaming.  Since Graham's battle reports are comprehensive and offer a good summary of the action in both play-throughs, I focus on the Republican strategies for Scenario 1 for which I was placed in command.

Scenario 1 Attack of the Columns (1936)

In scenario 1, the Republicans set up their forces first.  The Nationalists enter the table at E on Turn 1.  The victory conditions seem unclear but we assumed that the Nationalists must get at least one unit to the top of the map to win. 

Scenario Map

With only six BMUs and a lot of board to cover, this could be a tough task for the defenders.  In the defender's favor, entering an EZOC stops movement for the turn and a few hexes of covering terrain are scattered around the map.  With four infantry units, one artillery battery, and one commander, how should this meager force be deployed to optimize a chance for success?  Played on a grid, this seems like a Chess puzzle to me. 

Given the force compositions and victory conditions, I chose the initial deployments illustrated below. 

Republican deployment
Why choose this deployment?  First, the main road leading north off-map is protected and ZOCs will temporarily halt any attempts at a rapid advance upon the objective.  Second, the artillery is placed on higher ground allowing it to fire directly into most hexes on the board.  With the commander attached to the artillery, he can help direct fire.  Finally, both flanks are protected from a quick end-around by the infantry mounted in the fast-moving trucks. 

What is the plan after initial deployment and the enemy arrives on board?  Will this plan survive contact with the enemy?  This deployment provides a number of options as seen in the diagram below.

Covering all of the bases
As seen by the arrows on the diagram above, the Republicans are centrally positioned to address any attack the Nationalists may muster.  The Republicans positioned in the woods nearest the enemy, may either hold or conduct a fighting withdrawal by moving from cover to cover.  The infantry positioned in the town may reinforce either the left or right as needed.  These redeployments should allow time to interdict or at least challenge any move to the top of the map.  Its positioning also allows for reinforcing any friendly unit.

In Game 1, the Nationalists opted for a flanking plan on the Republican right.  One twist to the game was that the Republicans won the initiative on Turn 1.  With no Nationalists on table, this meant that initiative actually passed over to the Nationalists as there was nothing the Republicans could do.  In effect, winning the initiative gives the initiative to your opponent.  To compound this oddity, winning the initiative opens up the chance that the enemy will get a double move by winning the initiative on Turn 2.  Yep.  This is exactly what happened!

How did this plan work in practice?

Nationalists begin a left hook
Republicans call in an airstrike.
Transport destroyed and commander pinned.
With a double turn, the trucks race for the map edge. 
Not so fast!  Another airstrike.
With transports blown-up and enemy pinned,
 the Asaltos attack. 
With the Asaltos successfully close assaulting the Nationalists on the hill, the Nationalists have reached their Exhaustion Point.  Game over!

In Game 2, the Republicans only altered one unit's position.  That change was to move the Asaltos one hex to the NW to thwart a left hook drive off map.  The Nationalists countered with a right hook attack.  Same result.  The Nationalists reached their Exhaustion Point before any units could approach the top map edge.  Of course, the Nationalist defeat was aided by the elimination of its commander as he rallied his troops.

With few units, the Republicans have few viable options as to where to place their troops initially.  This deployment takes into account all enemy avenues of approach and allows a good chance to defeat the enemy before it can race off map.

Maybe next time we examine optimal play for checkers?

Tuesday, July 27, 2021

Shoemaker's Bridge, AUG 1776

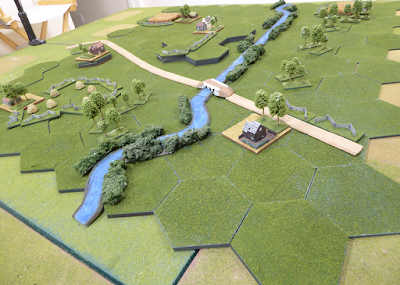
My planned AWI Battle of Shoemaker's Bridge for today's remote game was bumped in favor of a review test of the recently released rules, ¡Arriba EspaƱa! containing the Portable Spanish Civil War Wargame by Bob Cordery.  My game will be back on the slate for next week's remote session.

In anticipation of my return to the hosting role, I offer up the scenario specifics for the Battle of Shoemaker's Bridge.  This action looks at the fighting on the American left as one of the British columns approaches in an effort to outflank the Americans deployed in front of Brooklyn.

Battle of Long Island: Action at Shoemaker’s Bridge, August 27, 1776
The Map:
The map shows the route of the flanking march as the British approach Brooklyn from the east thereby bypassing the passes through the Brooklyn Heights. The road passes over the stream at Shoemaker’s Bridge. The passage over the bridge is controlled by the high ground around Shoemaker’s Farm and the farm on the knoll to the east along the road.
The Battlefield
Background:
The American Army, under the command of Greene, has fortified Brooklyn and is prepared for the threat of assault from the converging British under Howe. The plan is to remain behind the protection of the fortifications and stand their ground. After becoming ill, Greene is replaced by Sullivan. Confident of the defendability of the passes through the Guan Heights, Sullivan orders many of his troops to redeploy to hold the passes. With Grant attacking at Red Lion Inn on the American right and von Heister attacking the passes at Flatbush Pass, the Americans will be pinned in their forward positions. Cornwallis will conduct a flanking march on the American left and attack to turn the American left. Once defeated, Brooklyn can be captured.

While Grant and von Heister launch their attacks, Cornwallis’ main body is stopped by American forces deployed on the high ground beyond the stream at Shoemaker’s Bridge. The British main body is commanded by LtG Lord Percy. His objective is to brush aside these annoying Rebels in order to continue his flank march on the American positions situated upon the Guan Heights in front of Brooklyn.

Rules: Fields of Honor AWI amended for using miniatures on a hex grid with clarifications.
Figures: 15mm Frontier Miniatures and Jeff Valent Miniatures.
Battlefield: 4 inch hexes on a roughly 4’ x 4’ grid.
Reinforcements:
  • All British units enter on Turn 1. British first player.
  • Nixon’s Brigade enters on Turn 1 along road from east side of table.
  • Parson’s Brigade enters on Turn 2 along road from east side of table.
  • Heard, artillery and rifles set up on table on the east side of stream.
Order of Battle

American forces present

American forces present

British forces present

British forces present

OBJECTIVES:

American:
Strategic Victory: No British units present on east side of stream.

British:
Strategic Victory: No American units remain on table and at least three British units exited east side of table.

Otherwise:
+5 VPs for controlling Shoemaker’s Bridge hex.
+1 VPs for each farm hex controlled.
+1 VP for controlling each hex of Shoemaker’s Farm Hill (6 hexes).
+2 VP for each enemy unit destroyed.
+2 VP for each British unit exiting east table edge along road.
+1 VP for each American unit exiting east table edge along road.

Total points for each. Larger point total wins a tactical victory.

In addition to the remote game next Tuesday, plans are brewing to host a two-player remote encounter in order to play the scenario more than once.

Saturday, July 24, 2021

More 10mm ACW Federals

After pushing 120 x 10mm Zouaves through the painting queue recently (see: ACW Zouaves in 10mm), that little momentum provided the motivation to press on with another batch of 10mm figures.  Out from the painting desk today are more Federal infantry for the 10mm ACW project.  This time, five regiments of infantry muster out.  With 30 figure regiments, total count in this tranche is 150 figures.  Figures are Old Glory.
To date, this project tallies about painted 3,500 figures.  Looking back at the Painting Log, not much work has been accomplished into expanding this project for about two years.  That is, not much work prior to the Zouaves hitting the ledger.  With enough figures present to field for most battles, motivation to paint has been lagging.  That situation may change especially with plenty of unpainted lead in the pile.  The project could use more dismounted cavalry for a starter. 
Having new recruits answer the call to arms is prompting thoughts of getting the collection back out onto the gaming table.  So is my recent work on developing an AWI scenario on the British flanking march at Long Island using Norm's Action at Mill Creek scenario map in his Two Flags - One Nation ACW rules as inspiration.  While Norm's latest scenario and map go gridless, my scenario returns to a grid-based game. 

The Long Island battle (Action at Shoemaker's Farm) will be presented in the standing Tuesday remote UK gaming session as I host the battle from my game room.  Scenario details on this battle will be provided in the next post.  Rules to be used will be an amended version of Fields of Honor.

Wednesday, July 21, 2021

Rome v Carthage - To the Strongest!

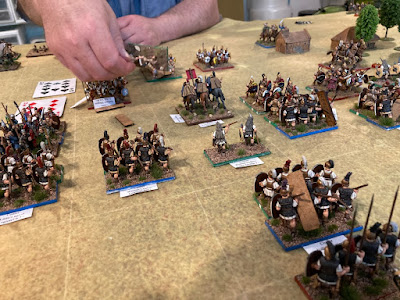
Two weeks ago, Kevin and I reconvened at Scott's to refight a Second Punic War battle fought the month before.  In that first match, Rome defeated Carthage handily.  Kevin, as the Carthaginian general figured his outnumbering army ought to be able to defeat the smaller, Roman army on the field.  To test his theory, Kevin took command of the Carthaginians in an encore presentation while I returned to my role as the Roman general.  The Carthaginian Army being larger must lose 12 tokens before the army breaks.  The smaller Roman Army may only lose 9 tokens before breaking. 

Let's see how the battle played out. 
Kevin surveys his Carthaginian Army
Carthage moves first and the army advances
The Roman legion in the center advances
 to meet the enemy
The Carthaginians advance all across the battlefield
Rome attempts to outflank the Carthaginian right
 but is broken in the process.
A broken wing can no longer attack... 
The Roman right attempts to turn
the Carthaginian battleline. 
Heavy fighting in the center as the two armies collide.
Casualties are heavy but the Romans hold on.
Whoa-ho!  The Roman cavalry commander, on the left wing,
 seizes the unoccupied enemy camp!
That, despite not being able to attack.
Ground is gained as stands disperse.
With several successful 2-to-1 attacks,
the Carthaginian Army breaks 
Well! Carthage falls to defeat a second time with a score of 12 tokens to 5.  Another fun came with non-stop action throughout.  Always a pleasure pushing Scott’s beautiful troops across the table.  Early on, the Romans were very unlucky to lose their left cavalry wing at the hands of lowly Numidian cavalry.  Embarrassing.  The Roman cavalry general saved his reputation by fighting a cagey battle of maneuver to capture the Carthaginian camp.  I think that in itself yielded either three or four tokens and honors for the day.

In the final throes of battle, the Romans managed to maneuver into position to attack the enemy from both front and flank destroying their opposition.  Not once but twice!

Kevin thought the battle could have gone the other way.  Maybe next time?

Saturday, July 17, 2021

Urring on the Side of Caution?

When finally taking the step to embark upon a new project, do you buy only enough figures to field a test-unit or two or do you tend to throw caution to the wind and buy enough figures to field an army (or two?)  Having made my tendencies public via this blog for approaching nine years, my answer ought to be obvious.  Right?  Right.  I tend to make a large purchase and throw it onto The Lead Pile to tackle later.  Sometimes, project tackling comes later.  In this case, a year later.     
Off the painting desk today is the first stand for a new project.  The first dozen figures form a heavy spear unit.  The stand has shield bearers with javelin in the front rank protecting infantry with long spear in the second rank.  The spearmen in the back rank are outfitted in the fashionable, bossed cloak.  Figures are from the excellent line of Sumerians available from Newline Designs. 
These Newline Designs figures were purchased a year ago during the anniversary sale.  Only now am I turning attention to this project.  A pair of Sumerian armies was on the plan for 2021 but I got sidetracked by an interest in War of the Roses.  Work continues slowly on the WotR project with my fourth battle beginning construction. 

Did I purchase enough Sumerians to field two armies?  Yes but likely only enough for a pair of starter armies.  These two armies will tend toward the smallish size for now.  Besides a large tranche of Newline Designs figures, I also ordered a sizable array of Wargames Foundry Sumerians.

With gaming frequency up and painting output down, I do not expect to make quick progress on the Sumerian project soon.  As noted above I have a WotR battle on the workbench along with more 10mm ACW.   Thoughts are returning to expanding the 15mm SYW project.  A barrage of 2021 Summer Sales was too much to resist and more 15mm SYW lead is on its way from a trio of manufacturers.

Wednesday, July 14, 2021

The Prestonpans Fullcourt Press

Richard seemingly praying for victory

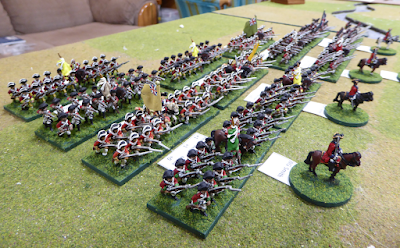
The Tuesday remote group game saw only two players taking up arms while Graham set out a recreation of the Battle of Prestonpans for a play test of his rules.  Richard would command the Government Army while I took command of the Highlanders under Bonnie Prince Charles.  While the historical battle may have concluded in about 30 minutes, this refight lasted considerably longer.

On to battle! 

The Highlander advance begins
Government artillery fires once and the gunners flee!
Cavalry on the British left charge.
they are met by Highlanders.
The cavalry is repulsed with great casualties
as the Highlanders march on.
Platoon fire erupts along the line.
Casualties among the Highlanders are withering.
Two Highland charges go in.
One gets stuck in and the second is repulsed
as the Highlanders rout.
Highlanders charge the disordered cavalry
 and drive them off.
A second Highland regiment breaks and runs 
while the Highlanders in the distance
are caught in the rear.
Fighting fore and aft, the cavalry are driven off.
Government forces figure the best defense
is an offense.  They advance.
Highlanders charge the Government left
 with two regiments.  2-to-1!
Two Government regiments are put to flight
 as a third Highland charge goes in.
They, too, break, as the British are in flight.
In hot pursuit, the British are cut down as they run.
The British Army has collapsed!
When the Government forces let loose their first fire, Charles' army was staggered as the platoon-fire volleys were devastating.  Note: I hate being on the receiving end of platoon fire!  Really, I thought the battle lost at this point.  With nothing to lose, the Highlanders went in with reckless abandon to press the British all along the line in attempts to turn a flank.  This aggression paid off as the defenders wavered and then broke under the weight and ferocity of the many attacks.  Both flanks were turned and the British army collapsed in a sudden succession of routs.  A glorious victory had been won by the Rebels!  Hoorah!