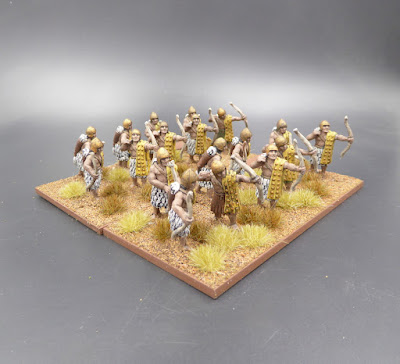

Today sees two, nine figure units of Sumerian archers emerge. These two stands of massed archers will be classified as 'T' missile troops in Impetvs. To the Strongest! likely has an equivalent classification for massed archers. Figures are from Newline Designs.

Also finished and awaiting a turn for a photo shoot are four regiments of Spanish infantry and two regiments of Reichsarmee infantry for the SYW/WAS 18mm project.
On the gaming table, Cropredy Bridge lingers. My goal I to get at least one or two more playings from the scenario before packing it all away and moving onto another battle. I am tempted to have a go at it solo and see if the Royalists can triumph after seeing two tabletop losses. With the rules fresh in minds, perhaps another ECW battle should be given consideration? We will see if there is interest for a follow-up battle.
Besides the Cropredy Bridge remote fight on Monday, Tuesday saw me participating in a WWII tactical action on the Western Front. As German platoon commander, I faced an attacking American company. The German objective was to defend two vital points: a bridge and a crossroads. Funny that the only American at the table commanded the Germans while all British players commanded American platoons. Facing 3:1 odds against, how did my Germans fare? While I did not take many screenshots, I may be able to piece together some semblance of a BatRep. Good fun!
 |
| On the Western Front |
On Thursday, Peter (of Grid Based Wargaming) invited me to participate in a remote game using his D3 Horse and Musket rules and his 40mm paper soldiers. Of course, I jumped at the opportunity.
In another post, I will follow-up with a brief recap of the Jacobite battle to demonstrate how the D3 rules work, first impressions, and how my Highlanders fared.
As a glimpse of possible battle outcome, the screenshot below shows my Highlanders maneuvering onto the government army's left flank.
 |
| Highlanders flank the enemy! |


