Following my Jacobite Rebellion game with Peter using his OHW's D3 variant (see: D3 or Not D3), we returned to his table for another remote game using another D3 variant. This time, we explore his Medieval D3 OHW variant. Really, I think it insincere to label this an OHW variant as not much is left from the original.
As mentioned, today's battle featured Peter's Medieval D3 rules with his 25mm Minifig HYW armies out on the table. The battle considered for today's contest is the Battle of Auberoche in 1345. The scenario for Auberoche is based upon Thomas' OHW's Scenario 22 AMBUSH. For battle and scenario details, please visit Peter's blog at Battle of Auberoche, 1345. Essentially, the French army has been caught unprepared and encamped besieging a castle as the English fall upon them.
 |
| Battlefield |
 |
| French deployment zone |
The battle begins with French deploying around the encampments on the table. The French begin with a 9 BMU to 6 BMU advantage but may not activate until Turn 3. That means the English enjoy three turns to move and fight before the French may respond. Before the battle began, Peter's solo play resulted in one win apiece for the combatants.
Let's see how the battle played out.
I deploy the French with two levy units closest to the English occupied woods with the third levy overseeing the castle. On Turn 6, English cavalry may sally forth from the castle so the French need a speed bump on this front.
In the second line, both crossbow units are deployed. MAA follow up in the third line. The two knights are placed in the fourth line.
 |
| French deployment begins. |
 |
| French deployed for battle! |
Knowing that the English will enjoy three turns of uninterrupted firing from their longbows before the French can react, the first three turns will be tense for the French. I expect to take a pounding early on. With a unit only able to sustain about three volleys, on average, before being destroyed, heavy casualties are expected. If all three English longbow units fire for three turns, three French units could be hors de combat before there is any chance to respond. Like clockwork, by Turn 3, two French levy units have been destroyed by English fire. Two units of French crossbow are destroyed by Turn 4 as the French army begins to respond. Already, the French are down four units and the battle (for the French) has only begun.
 |
| Two quick levy losses for the French. |
 |
| One French crossbow lost as the French begin to respond. |
 |
The second French crossbow is lost from archery
as English knights charge into the French MAAs. |
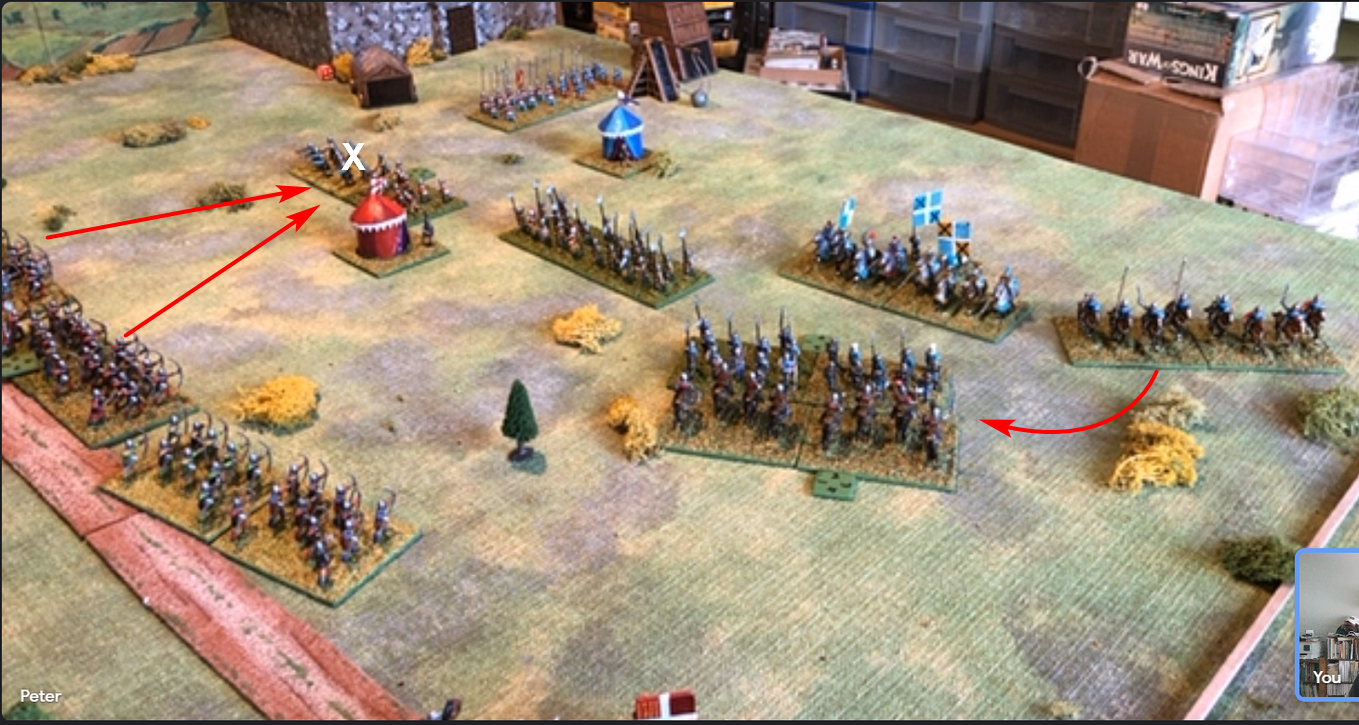
English knights charge into the French MAAs as the English longbowmen move forward. Having destroyed all French within range, the English are forced to move up to close the range. The French swing their cavalry out to the left. One French knight unit joins into the melee. In the melee, the French MAAs and the English knights are both destroyed.  |
| MAD in the center. |
By Turn 6, the English knights sally forth from the castle and engage the French levy. The remaining French MAAs fall back to protect the French right and increase distance from the English longbowmen. With the French left open, the French cavalry advance. |
English knights emerge from the castle
while the French redeploy. |
While the English knights take some heavy punishment at the hands of the levy in front of the castle, the levy are beaten. The levy scatter opening up the French right. The French MAAs continue to retrograde to cover the French flank and try to remain out of range of the deadly English longbow. |
| French levy is destroyed in front of the castle. |
The French MAA give the English the slip again as the English advance. On the French left, the two French knights take on the English knights. One unit of French knights is destroyed. The English commander falls with the destruction of the English knights. At this point, the French are down to only two of their nine units remaining on the field. One more French loss and the battle is over. Grim. |
| Cavalry clash on the English right. |
With their commander lost and casualties mounting, the English are having trouble activating. At the head of his remaining knights, the French commander swings around to take the English longbow in flank. They are cut down where they stand. Encouraged by this success, the French knights continue. A second English longbow unit is hit in the rear. It is likewise destroyed.  |
| One English longbow destroyed! |
 |
| A second English longbow destroyed! |
With their blood lust up, the French knights continue the rampage as the English fail to react. The last English longbow is hit in the rear as it fights the French MAAs to its front. The remaining English cavalry join into the fray. Having suffered heavy casualties earlier in its fight with the levy at the castle, the English knights are destroyed. The battle is over and the French have won! |
| One more English longbow in sight. |
 |
| The remaining English cavalry goes down swinging. |
 |
| The battle is over. |
That was a close contest. With the French teetering on the verge of loss, the French knights rampaged through the English army sowing destruction wherever they went.The key to the battle was the loss of the English commander. When he went down, most of the English units showed heavy casualties. With heavy casualties and the penalty for leader loss, the English simply could not react to the French attacks.
A great fight and one in which I thought the French had little chance for success.
Thank you, Peter!