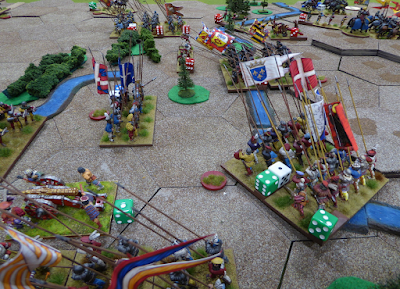
Game #4 in the series of 1509 Battle of Agnadello refights took place a week ago and saw a rematch with the players of Game #1 (see BatRep: Agnadello 1509). In Game #4, players switch sides with Tony (Carpi) and David B. (Alviano) commanding the Venetian Army while Mark (King Louis XII) and Chris (Chamont) taking command of the French Army. On Turn 5, David C. joins in to take over Tremoille's reinforcing column. 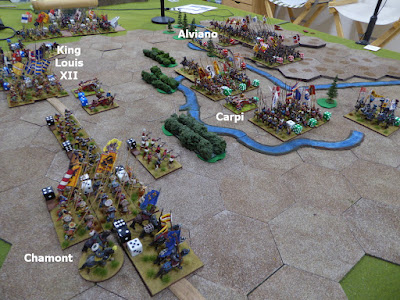 |
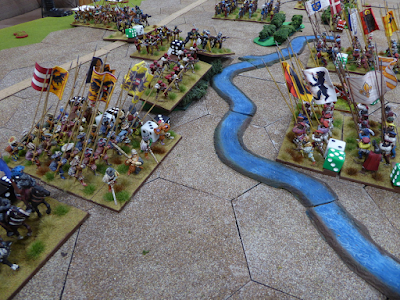
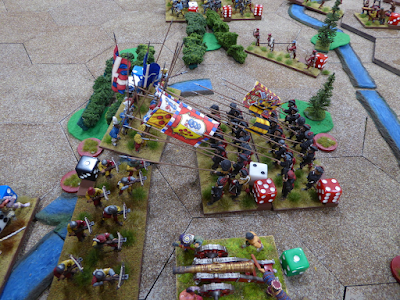
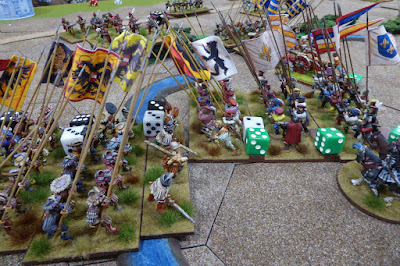
| Armies arrayed for battle. |
Recall that in Game#1, the battle ended in Tony and David B. scoring a decisive French victory. Would game #4 even the score? Read on to find out!
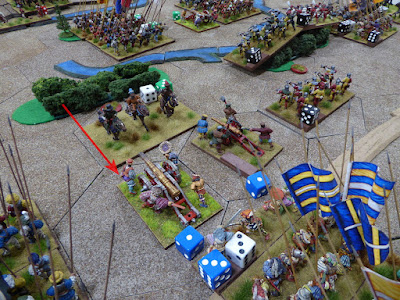
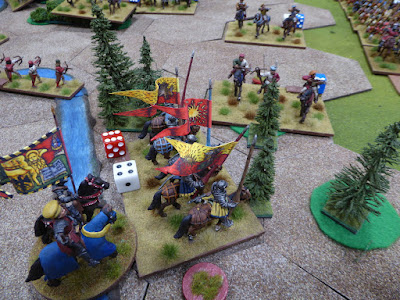
As both armies advance toward one another, Carpi moves his light cavalry forward in a charge against the King's exposed guns. As an aside, in my two games with Richard, this ploy worked for Richard when he led the Venetians but failed for me when I was at the Venetian helm. For Tony, this day sees the Stradiots sweep away both guns without hardly breaking a sweat! The Venetians are off to a solid start. Carpi's two pike blocks hold their positions behind the irrigation ditch as Chamont brings his troops forward. Gascon crossbowmen take up positions in the vineyards and harass the Italian pikemen.
 |
| Stradiots attack! |
 |
| Both of the King's guns are destroyed! |
 |
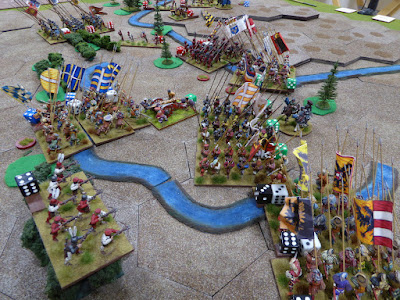
| The French Right Wing advances against the Venetian Left. |
 |
| Venetians come under fire. |
Annoyed by losing his guns at the start of battle, King Louis orders his wing forward. Having overrun the French guns, the Stradiots briefly tangle with the Swiss before retiring in search of a way out of the bind in which they find themselves. These horsemen make a long ride behind enemy lines!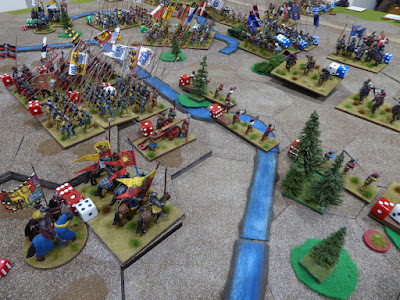 |
| The King sets his wing into motion. |
 |
| Stradiots' long ride behind enemy lines! |
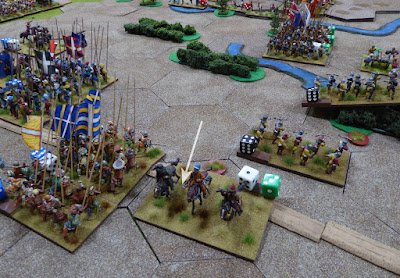
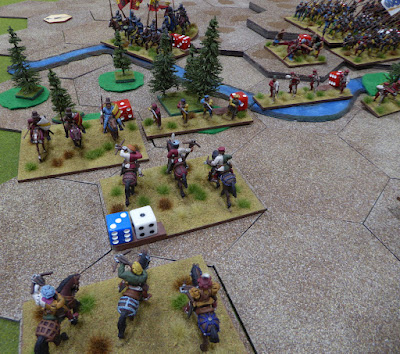
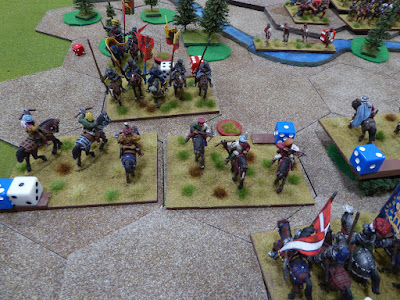
In an effort to counter the King's movements against the Venetian Right, Alviano begins the laborious process of bringing his cavalry across the ditch. Having successfully brought his light cavalry over the obstacle and while making its way through the woods, Alviano's light cavalry come up against enemy cavalry. Before clearing the woods, the Venetian horsemen are attacked by the King's mounted crossbow and driven back. Sticking with them, the crossbowmen scatter the enemy when pursuit leads to rout.
Having dispatched the Venetian light cavalry, headlong pursuit brings the pursuers face to face with Alviano leading his MAA over the ditch. Still disordered from their fight with the terrain, Alviano easily sees the light cavalry off. The French light cavalry retreat after having suffered heavy casualties. Alviano takes up pursuit of the pursuers and continues forward into more French light cavalry. By now, Alviano's attacks have run out of momentum, and he orders his MAA back into the woods to recover.
 |
| Light cavalry clash in the woods... |
 |
| the French pursue... |
 |
| but are thrown back when Alviano brings his MAA up. |
 |
| Exhausted, Alviano retires back to the safety of the woods. |
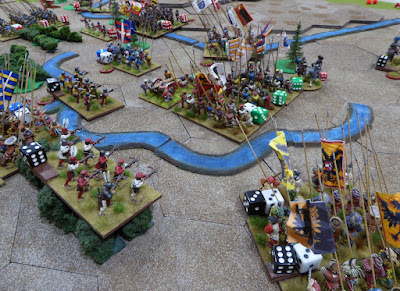
Carpi's Italian pike blocks continue taking crossbow fire as the rightmost block turns to face a potential threat from the King's French pikemen. Carpi keeps his heavy gun in action by pounding the Gascons in the vineyard. Neither army is anxious to cross the ditch to bring the fight to the enemy. |
| Looks like a stand-off in the center. |
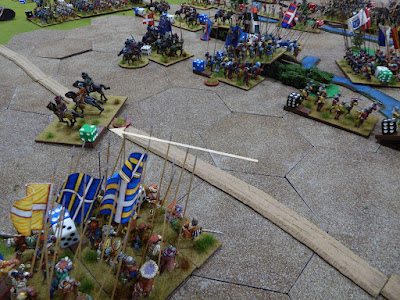
Back on the French Left, the King takes advantage of Alviano's reluctance to emerge from the woods. If the Italians will not come out, the King will go in! Given the difficulty of the ground, the odds are about even as the French Gendarmes move into the woods. In a brief clash, Alviano is sent backwards into the ditch. At the head of his Gendarmes, King Louis sets off in pursuit, but the nature of the ground prevents him from catching the fleeing Italians. In fact, the King completely misjudges the direction of retreat and completely bypasses the enemy in the woods!
 |
| Alviano attacked... |
 |
| and driven off by the King! |
 |
| In the confusion, King Louis pursues past Alviano. |
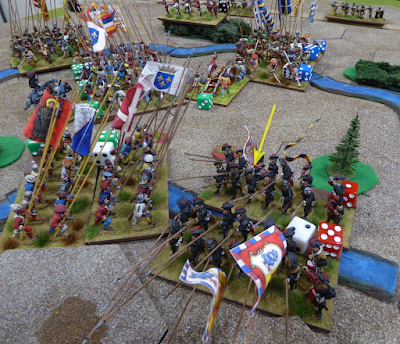
After peppering the central Italian pike block with missile fire, the French pikemen enter the ditch to take the fight to the Italians. In a lengthy pike scrum, the Italians are pushed back. Losses mount. 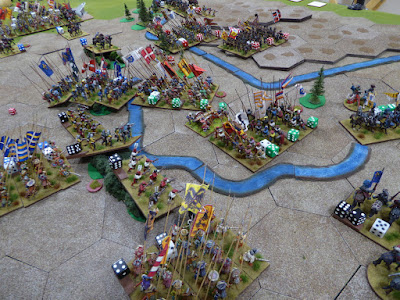 |
| Over the ditch... |
 |
| and into the Italians! |
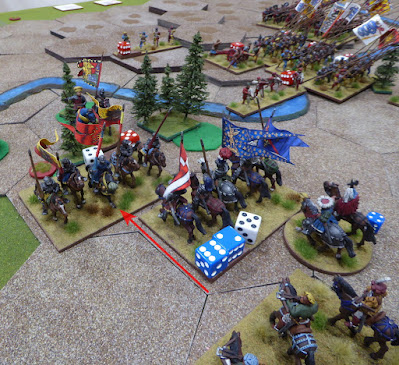
Like the King's heavy cavalry attack against Alviano on the Venetian Right, on the French Right, Chamont leads his Gendarmes against the Venetian Left into an attack on Carpi and his MAA. In the swirling melee, Carpi and his Italians are driven off with Chamont in pursuit. Both bodies of Italian heavy cavalry are in retreat! The security of Alviano's flanks is crumbling.  |
| Chamont vs Carpi |
 |
| Carpi is defeated and retreats! |
Back in the center, the French victory against Carpi's pike block is short-lived. Having finally come down from the high ground and crossed the ditch, one of Alviano's own pike blocks smacks into the French pikemen. While the French suffer heavy losses, they stubbornly maintain their ground. Alviano's Italians are tossed back into the ditch! 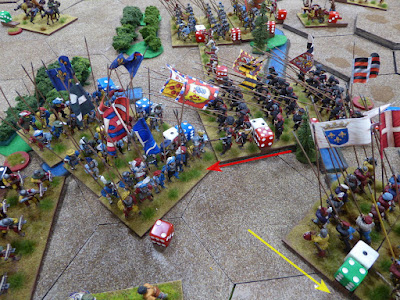 |
| Italian pike block attacks... |
 |
| and are repulsed! |
 |
| French pikemen hold their ground, worse for the wear, |
 |
| much worse for the wear. |
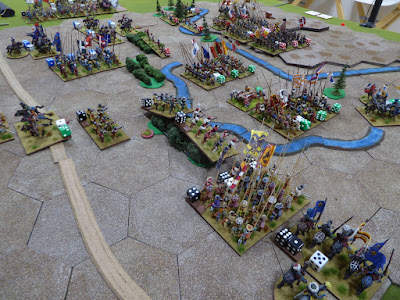
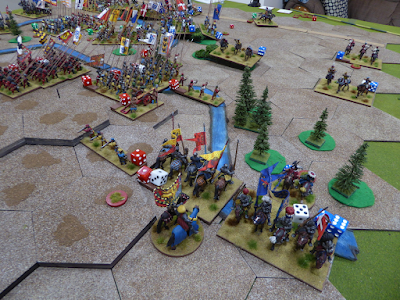
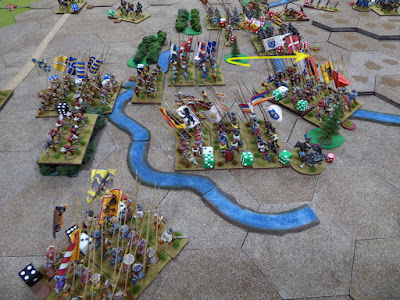
As the rain begins to fall with more determination, and the ground is getting heavy, the third French Battle of Tremoille arrives onto the battlefield. On the Venetian Left, Carpi is coming under increasing pressure as missile fire is concentrated upon his pike block that remains positioned defending the ditch. With Italian MAA dispatched and Chamont leading his Gendarmes off to the Italian rear, these pikemen could be in serious jeopardy. 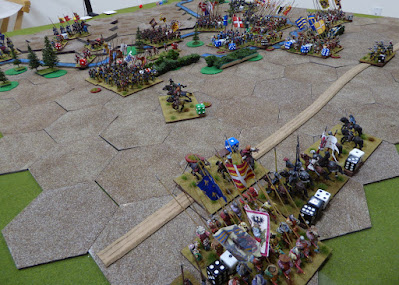 |
| Tremoille and the rain arrives. |
 |
| The noose tightens. |
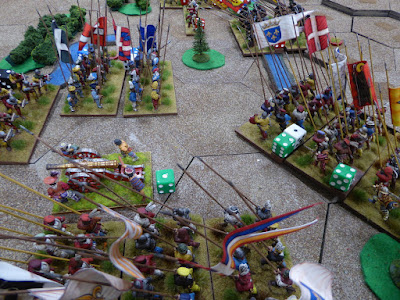
To relieve pressure on Carpi, Alviano's Provisionati pike block crosses the ditch and crashes into the remnants of the French pike block. The French are pushed back to the ditch with the Italians in hot pursuit. Not only are the French dispatched but an adjacent body of Gascon crossbow are driven back as well. Immediate results are promising but success is fleeting. The King's Swiss erupt out of the ditch and drive the Italian pikemen off.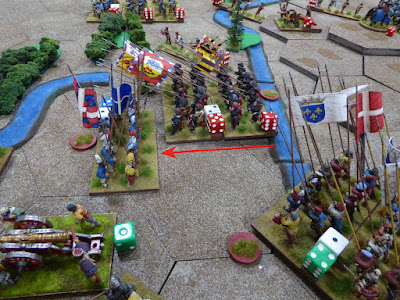 |
| Into the French... |
 |
| scattering them before they can escape. |
 |
| Swiss drive off the Italians! |
The Venetian Army is wavering from setbacks all across the battlefield. In rapid succession, the French decisively turn the tide of battle. First Tremoille's Gendarmes ride down the Venetian light cavalry marauding in the rear. Then, the King dispatches Alviano's MAA before they can get out of harm's way. Finally, Chamont's Swiss come up out of the ditch to push the Italians back. These final acts are just enough to break the Venetian Army. 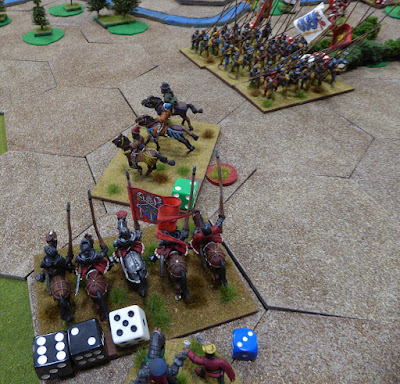 |
| Finishing off the renegade light cavalry. |
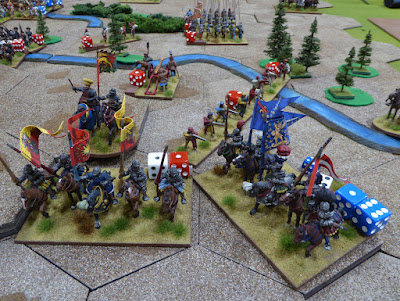 |
| Scattering Alviano's MAA. |
 |
| Swiss attacking out from the ditch. |
 |
| Venetian Army ready to break! |
This battle is over and Alviano must extract what is left of his army from the battlefield.
Victory to the French, Mark, Chris, David C.!
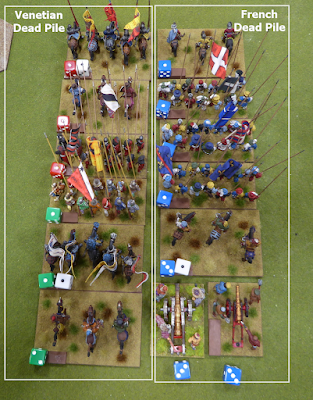 |
| Butcher's Bill |
A glance at the Dead Pile shows that in terms of stands lost, casualties were about even. What really cost the Venetians was the loss of both units of MAA. Without losing the Venetian heavy cavalry, the battle may have lasted a turn or two more. Alviano may have actually been able to hold on long enough to run out the clock before Tremoille could get his Battle firmly into the fight. With rain coming down, getting Tremoille into battle would be no easy task.
Great job guys in a battle well-fought. Midgame, it looked like the Venetians had a solid chance to overturn the historical result, but it was just not to be.
Very exciting battle to watch unfold. As the Italian Wars armies are cleared from the table, next time, something completely different will show up for a few games.


Jonathan,
ReplyDeleteI've lost track; what's the final score? I'm thinking the Venetians haven't won a game, just got very close?
Neil
Neil, the score is 4-0 to France. The Venetians have come close but unable to finish the task.
DeleteWhen I first saw the layout I thought this may have been a challenging scenario for the French as it looks to be a decent defensive position for the Venetians, but that is without factoring in the French artillery. As it has transpired it is a very difficult scenario for them. I make it 4-0 to the French.
ReplyDeleteThe French artillery has not played a big role. In two of the battles, the French lost both guns to cavalry attacks within the first two turns. This is a tough challenge for the Venetians just as it should be.
DeleteYes 4 0 to Les Bleus! Without a lot of luck, it's hard to see how the Venetians could win this one ......
ReplyDeleteThe Venetians need some luck, no doubt, but I still think a victory is within reach.
DeleteRejoicing in Paris with the news. Great fun to read, hopefully all players had fun.
ReplyDeleteThank you, Joe! Yeah, hopefully all players had fun.
DeleteThat was an intriguing game to take part in Jon. It’s a perfect illustration of the contrasting approaches Mark and myself. It worked in this instance, although it was a close run thing as the Iron Duke would say. Dave C’s arrival was perfectly timed.
ReplyDeleteThanks once again.
Chris
Intriguing and fun, I hope! When I put together the Dead Pile photo, I was astounded to see that all of the French losses were in Mark's command. You had no lost units in the Dead Pile! Great job in husbanding your troops, Chris!
DeleteWell we won…but looking at my casualties post match it didn’t feel like it. An excellent and stalwart defence from Tony and Dave B. If Dave C hadn’t turned up with our reinforcements I hate to think what would’ve happened. An initial Venetian spoiling attack seems the way forward but how to capitalise on that still escapes me. Great game as always and great company too.
ReplyDeleteYes, the French came away victorious. with your command melting away, I really thought the Venetians had a shot at victory by midgame. I agree that an early Venetian spoiling attack seems the best route to victory but Tony's defense seemed a viable option as well. Thank you, Mark! The games offer great fun in great company.
DeleteAnother great game Jon and yet once more a fleeting chance for the Venetians, only to suddenly disappear like early morning mist!
ReplyDeleteThank you, Steve! Another fleeting chance at victory for the Venetians. I suppose, maybe that is all we can ask?
DeleteAnother great looking game Jonathan!
ReplyDeleteThanks, Michal!
DeleteIt's obvious that you love large flags. ;-) So many flags and I love how they are waving in the wind. Great photos.
ReplyDeleteLarge flags carried by colorful armies make this a pleasing sight on the wargaming table. Glad you enjoyed the game photos!
DeleteA very hard fought win for the French, swung back and fore a bit and the Venetians looked like they might pull it off but not to be, good report a very enjoyable read.
ReplyDeleteDonnie, I thought it hard fight too! From my vantage point, the Venetians had a good chance...until they didn't! Glad you enjoyed the report!
DeleteBeautiful looking game Jonathan and an enjoyable AAR! I guess the French are just too strong for the Italians in this scenario, but it's fun playing the underdog and see if you can change history.
ReplyDeleteChristopher
Much appreciated, Christopher! While the French are strong, the thought of overturning history is a strong calling too.
DeleteAnother great encounter. Those poor Venetians will be sick of the sight of Frenchmen
ReplyDeleteThank you, Neil! Don't be surprised if you see the French and Venetians at it again in a new battle.
DeleteA stirling effort by the Venetians but it appears history will out yet again.
ReplyDeleteHistory rose to the top, once again.
DeleteThat was quite a struggle. The Venetian plan of making the French come on to them looked promising for a while. However, the heavy cavalry seemed to decide the deadlock again. Certainly a big casualty count.
ReplyDeleteRight, the Venetian defensive plan nearly worked. Losing both heavy cavalry units spells defeat once again. Been there, done that!
DeleteWhat a feast for the eyes, Jonathan. Inspiring and beautiful gaming.
ReplyDeleteThanks, Dean!
DeleteAnother great report. Interesting the French are 4-0, does that look like the Venetians can't win?
ReplyDeleteThank you! While the Venetians have yet to see victory, they are not without hope and options. Given the historical result, there are still possibilities for the Italians to do better than their historical counterparts.
DeleteA splendid game indeed…
ReplyDeleteI certainly thought the Venetians had it at the half way mark….
But alas it wasn’t to be…
All the best. Aly
Thanks, Aly! I thought the Venetians were going for the win at the halfway point too.
DeleteI was gonna say that Italian wars armies have too many banners. But of course, that is crazy talk bc it's so pretty.
ReplyDeletenice table and miniatures as the usual. 😁
Thank you, Stew! The banners are one of the attractions to the period. Hey, welcome back!
DeleteSplendid game, the Venetians are on a hiding to nothing with the quality difference between French gendarmes and Italian Men at arms and of course Swiss pike but it's been a fun four games!
ReplyDeleteBest Iain caveadsum1471
Thank you, Iain! The Venetians have a very road to victory but I still believe that they have possibility for going for a win. They have been a fun four games.
DeleteGreat report, Jon, and many thanks for hosting an excellent game! Very kind of you to use "By now, Alviano's attacks have run out of momentum" to describe my MAA's 'eleven dice to one, no hits' incident, ha ha!
ReplyDeletePsychology played a big part, I feel. I was so resigned to Venice not being able to win, I never looked at the 'countdown clock' situation, and it seems that we were actually quite close to possible victory, If only I had launched Alviano's pikes to counter-attack more strongly. And as you say, then losing the MAA units was crucial - a big lesson learned for the future, pull your depleted units back to safety.
David, glad you enjoyed both report and game! The game was great fun. At midgame, victory looked within your grasp. Your eleven dice with no hits was a bad bit of luck. I try to leave the dice rolling and game mechanisms out of the narrative so that it reads as a battle account but, perhaps, I should include them? I reckon we were all surprised at that result. Still those things happen in battle although seemingly more often than not to you! Had you still had Tony's "Last Stand" Ace in the Hole card to play, you may have been able to pass your Cohesion Test and fight another round of melee. That result was a crucial moment in battle. Pulling badly damaged units back out of harm's way is good tactic to save some pips on the Breakpoint Clock. I am still amazed that Chris managed to not lose one unit during the game. Incredible!
DeleteGame #4: Battle of Agnadello 1509 Refight – The stakes are higher as the players switch sides! Tony and David B. lead the Venetians while Mark and Chris take the reins of the French Army. 🛡️🔥 The addition of David C. on Turn 5 as Tremoille brings even more tactical depth to this thrilling rematch. Who will emerge victorious in this epic clash of strategy? 🏆✨
ReplyDelete🌊 After the battlefield, take a break and dive into hungry shark mod apk 2024 ! 🦈 Rule the ocean, devour everything in sight, and unleash some underwater chaos!
Impressive AI driven SPAM!
DeleteGreat Italian Wars Jon! I still love those pike blocks!!
ReplyDeleteThanks, John!
DeleteStunning looking game Jonathan, and a great read. Love the Italian Wars, though I'm managing to resist the urge to promote mine up the painting queue, only just!
ReplyDeleteThank you, Meic! Your Italian Wars project ought to see a promotion up the painting queue!
DeleteI think the battle was pretty much decided by the time I belatedly joined, so I can't claim to exactly have been a deus ex machina (or even a Dave-us ex machina, ho ho). Still, it felt good to lead that overpowering charge into the left rear of those Venetian light cavalry. Atthough rolling 15 dice, I felt very much the breath of that 11-dice disaster of Dave B on the back of my neck. Great game as always Jon, looking forward to the gunfight at Adobe Wells Station. Cheers, Dave C
ReplyDeleteThe battle may have been decided by the time you stepped in but it was sure great to see you at the game! No hits with 11 dice was a tough blow to DB. The outcome of battle may have hinged on that one dismal roll.
Delete