Last week saw two replays of the Battle of Bassignana. The first game, on Monday (Bassignana with the Rejects), saw the Franco-Spanish Army defeat the Austro-Piedmontese Army using a series of relentless attacks to drive the Piedmontese back from Bassignana. The second game, on Thursday, gathered a different group of five players to try their hand at the scenario. |
| The defense of Chiesa de San Germano |
The Austro-Piedmontese Army was commanded by Tony and Mark. Tony and Mark played the battle with yet another group of players in an earlier game. So, they both were seasoned veterans of what lay ahead. The Franco-Spanish (Gallispan) Army saw Chris, Dave B. and Dave C. take command. While the Gallispan commanders have played the rules (Fields of Honor), they have yet to tackle this scenario. Commands were assigned as shown on the battle diagram below:
 |
| Deployments and commands |
De Gage's Spanish holds the initiative at the beginning of battle so the Gallipsan Right Wing will be first to see action. King Emanuele III's Austro-Piedmontese Army awaits the attacks he knows will come. The King needs not wait long.
Immediately, the Spanish advance against the enemy. Two regiments reach the bridge spanning the Tanaro River. The King does not hesitate to see what comes. Leading his cavalry against the Spanish at the bridge, the King attacks with support from Piedmontese light infantry popping up alongside the Tanaro. Surprised by this action, the lead Spanish regiments waver as musketry rips through their ranks. Before they can steady themselves, the King's cavalry splashes into the river and into the Spanish. One regiment is destroyed as the second falls back having suffered heavily. De Gage goes down. The King holds the bridge. As Arambou steadies the Spanish from this unexpected upset, Maillebois orders his French in the center and on the left into battle. Maillebois quickly rides over to assume direct command of de Gage's, now leaderless, brigade. This is an inauspicious start.
 |
| Spanish initial attacks repulsed! |
 |
| The Spanish Wing regroups after being stopped at the bridge. |
The French Left and Center step forward toward the Tanaro. The defenders positioned on the high ground overlooking the approach wait. As the French move forward, the only Gallispan heavy artillery on the field targets the Piedmontese infantry outside of Rivarone. Tasked with supporting their own light artillery, the Piedmontese take a pounding from enemy bombardment.
In an attempt to silence the Piedmontese guns on the heights, French cavalry splashes across the Tanaro to put the gunners under the blade. Caught in an artillery crossfire from two batteries, the first body of French cavalry fails to make it across the river. The horsemen scatter, not to be seen again.
 |
French infantry advance while French cavalry
move against enemy guns on the heights. |
 |
| French cavalry blasted by enemy guns! |
As the French reach the Tanaro, the Piedmontese, watching patiently at their enemy's methodical approach, march down from the heights. Lining the bank of the Tanaro, the Piedmontese brigade of d'Aix pours volleys into the French at close range. Casualties are frightful. The advance stalls as a firefight breaks out.
 |
| French battle line reaches the Tanaro. |
 |
| d'Aix's Brigade comes down to greet them! |
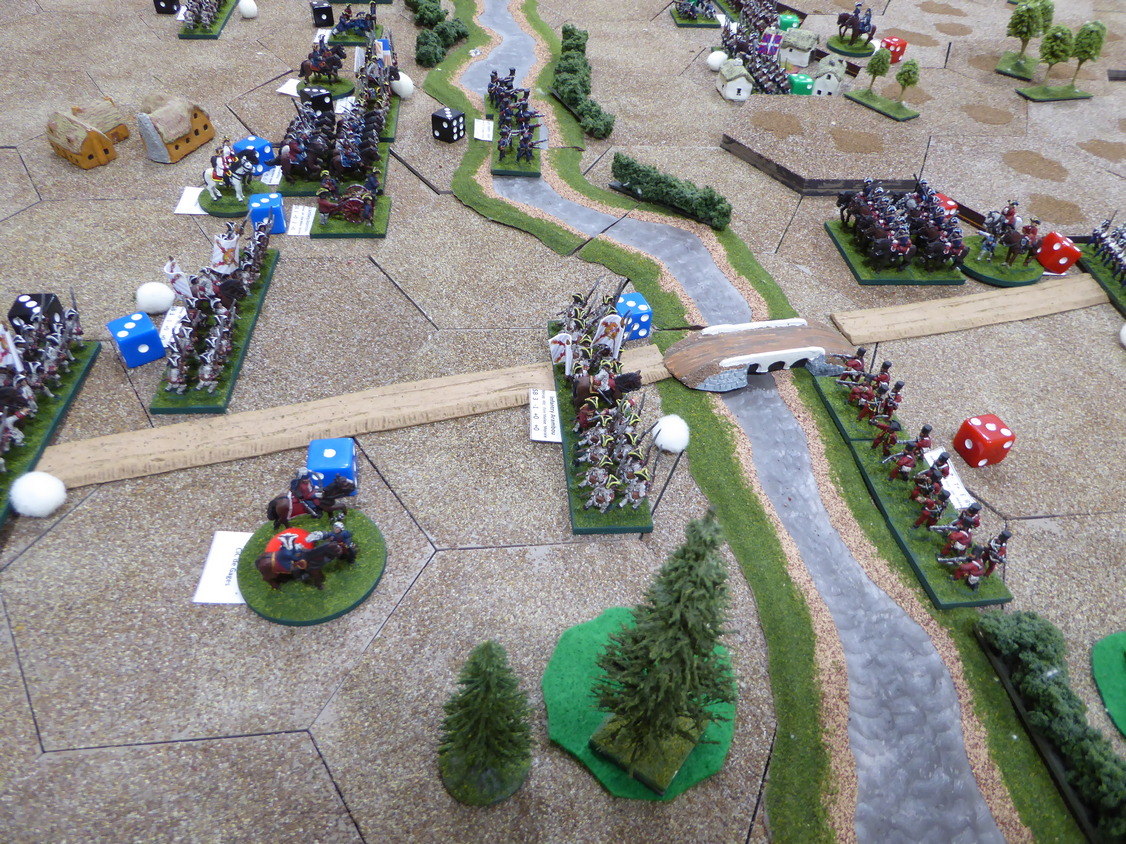
Returning to the action at the bridge, Maillebois, having regained order in his lines, resumes the advance against the bridge. The King orders his cavalry back from the bridge as the enemy approaches. The Piedmontese light infantry are vigorously attacked as they try to hold their position on the river bank. Overwhelmed in close combat, the light infantry scatter as the Spanish cross the Tanaro in force. De Montal's light infantry cross over the river to harass the King's cavalry while Arambou brings up his two cavalry regiments to prepare a crossing. |
| Piedmontese cross the Tanaro. |
 |
| View from the west. |
Having dispatched the enemy to its front, the grenadiers turn to take on a new foe. Caught in a firefight with the Piedmontese Guards, de Grammont's infantry is pinned when the grenadiers slam into them from the flank. The outcome is never in doubt and the French buckle under the pressure and dissolve. On the French Left, both Senneterre and de Grammont's attacks have stalled. Both brigades are badly battered but not broken. Not only that, the Piedmontese are actively attacking across the Tanaro.  |
| de Grammont's French under pressure. |
 |
| Piedmontese control their Right flank of the battlefield. |
The carnage does not stop there. D'aix continues to push his troops forward. Senneterre's guns are overrun by the grenadiers as de Grammont's second infantry line is engaged in a devastating firefight. Both sides are bleeding themselves white. The French flinch first as both Senneterre and de Grammont's Brigade reach the breaking point.  |
| Piedmontese form up and press on! |
 |
de Grammont's reserve dwindles
as French guns are overrun. |
The situation is looking dire for the French on the Left but the Piedmontese are tiring as well. For victory, the Gallispans must use the Spanish to plow through to Bassignana. That is the next phase of battle!
Returning to the action along the road to Bassignana, the Spanish continue to push toward the town. In their path is one, lone Austrian infantry regiment. While under great pressure from the more numerous Spanish, the Austrians give ground slowly as they fall back to the high ground in front of Bassignana. To help relieve some of this pressure, Liguane and his dragoons arrive and form up on the high ground to the west. Immediately, Liguane and his dragoons are attacked by two regiments of Spanish cavalry. Liguane is driven back and then destroyed.
 |
| The King leads a fighting withdrawal back... |
 |
| to Bassignana. |
 |
| Liguane is attacked and driven off. |
 |
Overhead view from the east.
Austrian cuirassiers are arriving over the pontoon bridge. |
With word that Schulenburg's Austrian are crossing over the Po River via the pontoon bridge, the King makes a desperate stand within the defenses of Bassignana. The Spanish assault the town in force and drive the King and the remnants of the defenders out of Bassignana. Not thinking of his own safety, the King leads an attack back into the town. In the chaos of close combat, the King falls. He does not get up.  |
| Assault on Bassignana. |
 |
| The King falls in attempting to regain Bassignana. |
Word of the King's demise spreads quickly. d'Aix and the remnants of de la Chiesa's Brigade at Rivarone break off contact with the French and retire to the northwest leaving the field to the French in front of him. Schulenburg, upon hearing the news, retraces his path back across the Po. The battle is over.
Congratulations to Chris and the Two Dave's for persevering through the carnage on the Gallispan Left to turn the table on the Piedmontese at Bassignana. My condolences to Mark and Tony for coming so very close to seeing victory.
On the French Left, d'Aix's Piedmontese went on the attack after seeing the effects of their volleys early in the battle. These actions crippled the French Left and nearly knocked the Gallispans out of the battle before a comeback had a chance. With two brigades broken, one more broken brigade would spell defeat to the Gallispan army. Rather than back off for fear of collapse, Chris led the Spanish in frontal attacks with superior odds to cut apart the Piedmontese Left. Well executed!
Now, had the King not gone down, could Schulenburg's Austrian reinforcements stem the Spanish progress and in the process break one more Gallispan brigade? We will never know but it sure seems a possibility. Not counting the loss of the King, the situation on the table reflected the historical battle where the Piedmontese were forced to give up the field and Bassignana.
Great game guys and thank you once again!


Another cracking game and by the look of it, quite a high number of officer casualties. I thought the Austrians might just hold out, but with the King going down, 'twas not to be.
ReplyDeleteThe game was a good one, Steve! Officer casualties were higher for the Gallispans but the Piedmontese lost their King. With Schulenburg's arrival, I thought the Piedmontese might hold on too.
DeleteAnother entertaining installment Jonathan. Losing the King seemed to be the decisive blow against the Austro Piedmontese. What are the effects under Fields of Honor - does it force a morale check on all the units, or is it automatically game over?
ReplyDeleteThe King's loss was the decisive blow. Not only did the King go down but his loss counted as a broken brigade which pushed the Austro-Piedmontese Army over the breakpoint.
DeleteMore impressive battles Jon 👍
ReplyDeleteThank you, Matt!
DeleteA most impressive tale told so well. The battle does lend itself to revisit games. Thanks for the work on the report,the armies, the terrain.a great stop as usual.
ReplyDeleteYou are too kind, Joe. Thank you!
DeleteAnother great report, and it was certainly a gripping game. These battles are very absorbing - I'm still thinking about this one, a week later! Pictures bring it all to life nicely. I am still hatching a suitable sanction for my battery on the hill which was unable to hit a cow in the a** with a banjo.
ReplyDeleteThanks, Tony! Great to have you at the table and commanding the Piedmontese Right. I thought you played a splendid hand and really gave the French a run for their money. Your battery on the hill really had a tough time hitting anything beyond its early success against those cavalrymen crossing the river.
DeleteThat was a tough game. We Gallispans got a very bloody nose. Tony’s attack across the Tanaro on our left was executed perfectly. If he’d had any reserves at that point we’d have been cooked. Winning by killing the King was a bit of a shock. At that stage we were just looking to gain an objective.
ReplyDeleteThank you for another enjoyable game.
Chris
You got a bloody nose but you gave one as well. Yes, that was a skillful and punishing attack by Tony against the French. He was beat up at the end of battle too and momentum was ebbing. You saved the battle!
DeleteLovely looking game Jonathan with a great narrative!
ReplyDeleteChristopher
Thanks, Christopher!
DeleteWell played and thrillingly reported. I was on the edge of my seat.
ReplyDeleteExcellent! Glad you enjoyed the report.
DeleteLovely looking game again Jonathan!
ReplyDeleteThanks!
DeleteAnother really interesting rematch, I had thought that the Piedmontese would win but not to be, a good win for the French/Spanish forces when it looked dodgy at times.
ReplyDeleteI thought the game quite interesting too. It was a near-run thing if not for the untimely demise of the King.
DeleteAnother entertaining battle report Jon. It was a very close game. Well done to the winners!
ReplyDeleteThanks, Ray! I have no doubt that your upcoming game will prove just as entertaining.
DeleteGreat game and interesting to play it from the other side. If I’d got the king out of harms way one turn earlier it might have resulted in a very bloody draw - with that said I think the outcome was a well deserved win for Chris and the two Dave’s. They definitely had the best of it overall.
ReplyDeleteSeeing and thinking about a battle from both sides of the table offers unique benefits and insights, I think. Casualties were high, no doubt. I wonder would have been if the King had slipped out of Bassignana before it was stormed??? Despite your early thump to Chris, Chris recovered and made an excellent show of himself. Quit fun...but then aren't they all?
DeleteBloody Austrians, always seem to turn up late! I was rooting for the Piedmontese and thought they might do it this time - the French certainly took a pasting and only survived thanks to a late comeback by the Spaniards!
ReplyDeleteAt least the Austrians arrived! There have been games in which Schulenburg failed to arrive at all.
DeleteYes indeed...bloody useless....and I am playing them in a Napoleonic game tomorrow!!
DeleteGood game. It’s cool that your hex set up allows for 5 players to engage in not too large a space for remote play. 😀
ReplyDeleteOne benefit of remote play is that there is need to physically squeeze everyone around the table.
DeleteThe king is dead! Long live the king!
ReplyDeleteWell, the King went down in today's battle too.
DeleteFinally I managed to read your report. The king of Piedmont acted agressively - I never crossed the Tanaro with my troops. It's a good attempt to win the battle.
ReplyDeleteGlad you got a chance to catch up on the battle reporting! When you play a scenario repeatedly with a number of different players, different strategies and tactics are bound to emerge.
DeleteWith apologies for lateness of my comment, thanks again Jon for a great game! It was nail-biting stuff, our early attacks seemed to fall apart straight away and then Tony's counter-attack on the left gave us quite a shock, we only just held him. Well done to Chris for 'keeping on keeping on' and pushing the King back, it seemed our best bet was to keep attacking there to make up for what was going on over on the other flank, and fortune smiled on us with the last roll of the game! Thanks again to you and all the players, a great game.
ReplyDeleteNo need for apology, David! Happy to have your comments whenever they roll in. Tony's attack against the French was a good one and Chris carried the day under your fine leadership on the other flank. Glad you enjoyed the game. It was another good one.
Delete