Saturday, June 29, 2024

Are Wargamers Competitive?

Referencing the 2020 survey is no typographical error.  I am revisiting the Wargames, Soldiers, and Strategy's 2020 Great Wargaming Survey (GWS).  Why?  Well, the 2020 edition of the GWS contained a battery of additional questions to support academic research by Robert Körner and Astrid Schütz from University of Bamberg.   Their paper was published in 2021 with summary results shared on WSS' blog at Personality and Motivations.
 
The study uses psychometrics to examine a collection of personality traits as a driver for engagement in miniature wargaming.  Six types of motivators are considered.  They are, socializers, completionists, competitors, escapists, story-driven, and smarty-pants.  In this exercise, I explore only the Competitor trait.

Why single out the competitor trait to begin this analysis?  Curiosity mainly.  I am interested to see the motivation behind competition and why we game.  The survey includes three questions addressing the competitor trait.  The three questions are:
  1. Winning is a big reason for me to play miniature wargames.
  2. It is important to me to be the strongest and most skilled person playing the game.
  3. I play to win.
All responses are on a seven-point scale from (1) Strongly agree to (7) Strongly disagree.  Let's see what the survey data suggest. 

The first two questions (as shown in Figures 1 and 2) show a decidedly skewed response profile with much of the response weight collecting into the “Disagree” categories.  Broadly, winning and being the best player at the table are not so important to the majority of respondents. 
Figure 1

Figure 2
Question 3, relating to playing to win, produces a much different profile (see Figure 3).  Here, responses are evenly distributed across all choices with the exception of Agree strongly
Figure 3
These results suggest that while wargaming in a “play to win” contest runs the entire gamut of degrees of agreement, actually securing victory and being the most skilled player are distant or even discouraged considerations.

A refreshing and encouraging result to which I agree and endorse.  While we may give our best efforts in an attempt to gain victory by playing to win, seeing success on the table takes a backseat to the camaraderie that social wargaming offers.  A result I see frequently reinforced at the gaming table among a wide cross-section of wargamers from all over the globe.

While this analysis focuses only on the overall assessment, are there differences between age groups or wargaming genres?  Do historical and non-historical wargamers present a different competition profile?  What about possible differences between gamer location or game type?  I leave these questions for another time.

What about you?

Wednesday, June 26, 2024

Sumer Time!

After a long engagement of the War of Austrian Succession battle of Bassignana,  I cleared the gaming table and rolled out the Sumerian armies for a few games.

The first, of what may be several games, featured four, remote players in a balanced introductory scenario.  With equal forces, the four players were divided into two armies with random player assignments.  Doug and Colin (Lugal) would command the Blue Army while Stephen (Lugal) and Alan would step into command of the Red Army.  After recently gaming in both WAS and Great Italians Wars, players asked if I could bring the Sumerians to the table.  I was happy to oblige! 
Initial dispositions.
Since this contest would be an introduction into chariot warfare (well, battle cars), the terms of victory were simple.  Break the opposing army!

Let's see how the players made out in this first clash.

Both armies step off toward the enemy.  Blue Army (blue and black VBU dice) gets its battle cars in motion early while Red Army (red and green VBU dice) holds back some of its battle cars in reserve.  A few shots are exchanged as the two lines close.  Skirmisher on skirmisher fire is ineffective but some of the skirmishers rush into the fighting in an effort to displace the enemy skirmishing screen. 
Battle lines close.
Skirmishing from afar.
Hidden behind his own troops and by the oasis surrounding the pond, Colin whips his equids as fast they will go and plunges into the enemy.  Colin is wasting little time in thrusting himself into the fray.  Probably in shock, Alan's archers fail to get off a volley of arrows as the battle car attacks.  The clash is decisive.  Alan's archers retreat having suffered heavy casualties.  While Alan's supporting skirmishers run clear of Colin's battle car, his massed archers are not as fortunate.  The archers are caught in pursuit and scattered.  The battle is not beginning well for Alan!   
Contact!
Pursuit and destruction!
With his right bending already under the weight of attack, Stephen whips his Left Wing battle car into action in an attempt to stabilize the situation.  Massed archers are brought up in the center in range of the enemy as Alan moves his spearmen forward.  Skirmishers fall back.  Stephen also puts his Lugal's battle car into motion perhaps to be utilized as a mobile fire brigade.

Stephen's Left Wing battle car trots in to hit Doug's massed archers.  Doug's archers coolly let loose a volley of arrows into the battle car.  Taking damage and disordered from the volley, Stephen plows on!  In the clash, the archers actually manage to stand their ground and see the battle car off.  With his left blocked with friendly infantry, the car is forced to wheel right and head back toward the center of the line in retreat.  A cheer goes up from Doug's line!   
Heavy infantry to the front!
Skirmishers to the rear!
Stephen's battle car attacks...
and is repulsed!
Stephen's battle car slowly turns back toward the center.
Back on the Blue Army's Left, Colin is not finished with his mad dash into the enemy's line.  Winning initiative, Colin continues where he left off.  That is, causing havoc upon the Red Army's Right.

With Alan's car offering up a flank attack, Colin gleefully accepts and plows into the side of the enemy car.  In an uncharacteristic turn-around in fortune, Alan actually repels Colin's attack after two rounds of melee.  Choosing to pursue, Alan catches the enemy battle car and dispatches it!  Cheers go up from the Red Army!        
A tasty flank attack...
turns sour!
Seeing the enemy car wheel about and offer up a rear, Doug whips his equids to pick up the pace.  Passing through his battle line, Doug strikes Stephen's car in the rear.  I am not sure Stephen even saw what was coming.  Red Army's battle car is destroyed.  Doug fails to press on as his car refuses to pursue.  In the center, Alan's spearmen take a pounding from Colin's archers.  Alan's rear stand of spearmen is about to dissolve.    
Doug dispatches an enemy car...
while Colin makes the enemy pay on the approach.
Sensing that now may be the crucial point in the battle, Red Army's Lugal crashes into Doug's car in the middle of the field.  Doug's car is driven off as it veers to the right.  Stephen, in the Lugal's car, presses on to his front.  First the Lugal overruns an unfortunate skirmisher before crashing into Doug's Right Wing.  Worn down by its exertions, Stephen's Lugal cannot break through.  Instead, he is forced to veer off to the left bringing him upon the rear of Doug's battle car.  

Fortunately for Doug, a retreat is no pursuit so Stephen's Lugal cannot attack.  With an end of turn, there is much gnashing of teeth as initiative is rolled...and rerolled.  The Red Army wins initiative!  Stephen uses this chance to put his Lugal in motion and finish off Doug's car.  Hoorah!     
Red's Lugal attacks and drives off the enemy car!
In pursuit, Red Lugal is stopped...
but delivers a fatal blow to Doug's car in the next turn.
Uncertain as how the combat on either wing would play out, Blue Army's Lugal (Colin) strikes straight up the middle.  Charging straight into two bodies of massed enemy archers at the junction between the two wings, Colin drives the enemy back with great casualties.  In pursuit, Colin's Lugal scatters two enemy formations and wheels into the center of the enemy's rear.
Blue Lugal attacks!
The Red Army's battle line is split!
Blue Lugal breaks through into the enemy's rear!
While Stephen's rampage with his Lugal manages to even the Army Breakpoint Clock, Colin's attack in the center brings the Red Army teetering upon the brink of collapse.  One more successful attack ought to do the trick but one more unsuccessful attack could spell doom for his army too.

Advancing out of the woods, Colin attacks Alan's badly damaged battle car in one last push.  Who was victorious?  Colin, Doug, and their Blue Army, of course!   
Spearmen attack out of the woods...
breaking the enemy's will to fight.
Fantastic game with each army and player getting in a few hard licks and taking a few as well.  Terrific action throughout with fortunes seemingly changing with each passing activation.  Players came to grips with the rules and battle car operations quickly to produce a very enjoyable game for the host (me!).  Hopefully, they enjoyed the contest as much as I.

Congratulations to Colin and Doug in victory.  My condolences to Stephen and Alan in defeat.  The outcome really could have gone either way and it was refreshing to see Alan's dice make somewhat of a turn-around in this game.

Thanks fellas, that was great fun!

Please visit Colin's (Remote Wargame in the Sumer(ian) Time) and Alan's (Biting the Bullet) blogs for their impressions of the game.

Saturday, June 22, 2024

Back to the Brushes

With game reports seemingly monopolizing blog posts in June, high time to return to featuring some of the units crossing over the painting desk of late.  While productivity with the brush began the month with a bang, as the days of June tick by, time at the workbench has dropped.  Some of this loss of productivity is within my control.  Some of it not.  Of course, gaming and reporting on gaming consumes my limited time but as the weather heats up cycling moves up the priority list as the mileage increases.

One local highlight is that the Post Street Bridge has finally reopened after a four-year reconstruction project.  Long delayed by COVID interruptions, the bridge is finally back in service.  The original, 1917 bridge has been converted primarily into a pedestrian and cycling friendly crossing of the Spokane River.  The vantage point from the bridge is one we have not seen in, well, four years.  That is, a handsome view of the upper falls and the two foot bridges connecting Canada Island to the north and south banks of the river.  If you look closely, a tiny person can be seen on the footbridge to offer a sense of scale.
Upper Falls from "New" Post Street Bridge
Whoops, I digress.  Back to the painting table.
Off the painting desk today are two, nine figure stands of Swiss crossbow for the 28mm Great Italian Wars project.  Discovering that more crossbow were needed after fighting Fornovo, I placed an order to bring in more crossbowmen.  Figures are Wargames Foundry.  I have an equal number of Swiss arquebusiers to push into the painting queue at some point.  Not yet, though. 

Finally, I received a package this week from Ray of Postie's Rejects fame.  Having recently sent off a CARE package to Richard with some "spare" FRW figures that Ray may be able to press into service as well, in the post was a soft package from England containing the item below and a nice note from Ray.
How about that?

The Rejects have graciously accepted me as a full-standing member of Postie's Rejects (American Chapter, of course).

How cool is this?

Thanks guys!

Wednesday, June 19, 2024

The Plataea Half-Dozen

In the lead photo above, Scott uses his highly refined psyops skills against a weaker opponent (me!) to instill indecision at which card to play next.  
At Scott's invitation, I made the 40-minute drive to Coeur d'Alene for a midmorning start to a half-dozen games of Platea using Scott's beautifully painted Greek and Persian armies and Commands & Colors Ancients.  
We managed to play six games in two, one-and-a-half hour sessions with a long break for lunch at a local Thai restaurant.  All six games were fast and furious.  Of course, throughout, much discussion centered upon the current state of the world and our reasoned assessments.
The Greeks won all six battles with Scott and I winning three games apiece.
With five banners needed to win, the games and scores broke down as,
  1. 5-3 to Scott
  2. 5-3 to Jon
  3. 5-3 to Jon
  4. 5-1 to Scott
  5. 5-2 to Jon
  6. 5-3 to Scott
In the overall banner count summed across all six games, Scott edged me by one point.  Very close!
Fun day out for me with good gaming, good food, and good company.

Saturday, June 15, 2024

Last Stand at Bassignana

Postie's Rejects return for an encore performance at Bassignana (see earlier battle report at Road to Bassignana).  Rather than a three-player game as in the first playing, Ray joined Richard to fill out a four-player game.  Richard and Ray took command of the Austro-Piedmontese Army while Steve and Lee headed up the Franco-Spanish Armies (Gallispans).  Commands are illustrated in the table-shot below:
Initial dispositions
For Richard's account of the action, please visit The King is Dead...and so is his dice rolling.

How did I see the battle unfold?  Please read on.

Having chronicled a handful of Bassignana battles, the ground and situation are likely familiar to regular readers.  Given that familiarity, we jump straight into the action.

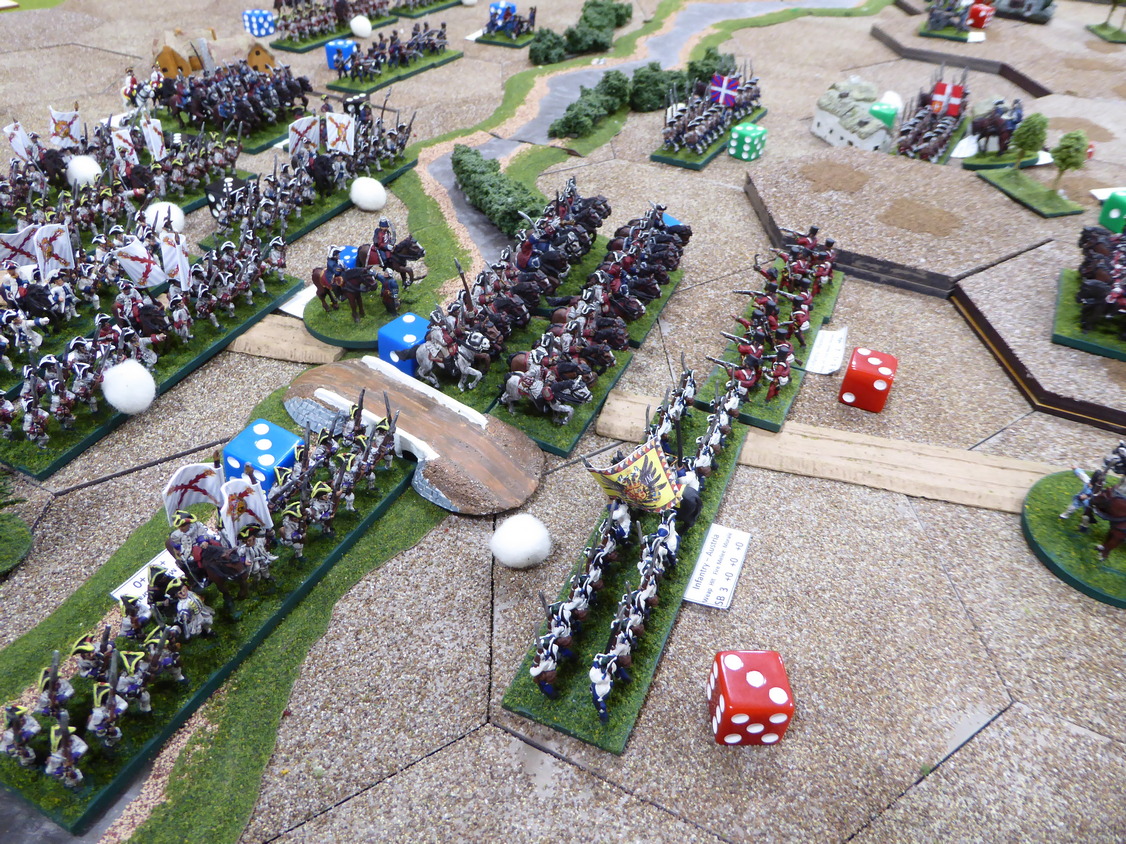
The battle opens with the Spanish stepping off toward the bridge spanning the Tanaro River.  The Spanish come on in densely packed formations with General de Gages at the head.  King Emanuele III sends the Austrian defenders of Bassignana forward to contest the crossing.  On the Gallispan Left, the French advance against Chiesa de San Germano and the Piedmontese defenders on the heights.  The Piedmontese Right keeps a watchful eye on the advancing Frenchmen. 
Spanish advance toward Bassignana.
The French advance on the Piedmontese positions
 at Chiesa de San Germano.
d'Aix' Piedmontese watch from Chiesa de San Germano.
Back on the Gallispan Right, de Gages pushes his Spaniards into the Tanaro.  As cavalry emerge to the west of the bridge and infantry climb the banks to the east of the bridge, they are met by musketry.  Piedmontese light infantry pop up from the brush along the river and their fire rips through the Spanish horse.  A number of horsemen fall but the Spanish press on and into the light infantry.  The light infantry are no match for the cavalry as the horsemen charge out of the river.  The light infantry suffer heavy casualties as they retreat back toward Bassignana.

Following closely behind the Spanish cavalry are Spanish infantry.  One regiment crosses the Tanaro in column and then deploys into line under the watchful eye of the King and his cavalry perched on the hill and de la Chiesa's guns.  The Spaniards deliver a first fire into the King's horsemen before they, in turn, are raked by canister.  Bodies fall in both formations.

In an attempt to slow the attack and encourage the light infantry, King Emanuele joins the light infantry on the road while his wavering Piedmontese cavalry charge into the similarly wavering Spanish infantry.  Battered and shaken from their earlier exertions, both formations disintegrate in the melee.  

Facing odds of three to one against, the Austrians lining the Tanaro are overwhelmed by the masses of Spanish crashing into them.  First softened up from a devastating volley delivered by Spanish infantry in the woods, the Austrians face waves of Spanish infantry.  Unable to withstand this tsunami, the Austrians scatter.  
Defense at the bridge.
Spanish form a bridgehead on the north bank of the Tanaro.
Piedmontese driven back from the Tanaro.
Only the King and a few light infantry
 stand in the way to Bassignana.
Is all quiet on the western front of the battle?  No!

General Maillebois sends his two brigades on the left forward while de Montal demonstrates in the center against the defenders of the village Rivarone.  As de Grammont's two cavalry regiments splash into the Tanaro, Liguane moves his two Piedmontese dragoon regiments up to contest the crossing.  De Grammont's cavalry charge out of the river and into the Piedmontese.  Suffering heavy casualties, the French are sent back from whence they came!  

Under constant harassment from Piedmontese guns outside of Montecastelle, Senneterre sends one infantry regiment across the Tanaro to deal with these pests.  A second French regiment follows up in column.  Perhaps not seeing the Piedmontese grenadiers supporting the guns, the French in column are caught off-guard when the grenadiers charge down from the heights and smash into the column.  Not surprisingly, the French regiment scatters to the wind. 

Seeing de Grammont's cavalry streaming back through his own cavalry, Senneterre orders his two cavalry regiments forward.  In the second charge out of the river, Senneterre's cavalry are repulsed.  Again, casualties are heavy but this time, Liguane's Piedmontese are broken.  While the cavalry are locked in combat to their left, French infantry line the Tanaro and attempt to shoot the enemy out of San Germano.  They make little headway against the Piedmontese Guards barricaded in the church.   
As de Grammont brings his cavalry forward...
Liguane counters with his own cavalry.
de Grammont's cavalry are sent reeling back!
French sent to deal with d'Aix' guns.
Senneterre attacks Liguane's dragoons
Piedmontese grenadiers destroy French infantry
 as the Frenchmen cross the Tanaro!
Liguane's Brigade of Piedmontese dragoons is broken.
French try to blast the enemy from the church.
Pinning de la Chiesa's Piedmontese at Rivarone with de Montal's Frenchmen, de Gages clears the heights overlooking the main road by overrunning a battery and destroying the Piedmontese militia.  With two of his three formations scattered, de la Chiesa's Brigade is broken.  With two of his three brigades broken and no sign of Schulenburg's Austrians, the King tries to buy a little time.  Time, he does not have.  In coordinated attacks, the light infantry to which he is attached breaks.  In the confusion, the King falls.     
The Piedmontese position collapses!
With the King dead on the field and his army broken, survivors retreat to the northwest to salvage what is left of the Piedmontese Army.  Where were the Austrians?  On this day, they never made it to the battle.

The result of today's battle was not unlike the first Reject game.  That is, the Piedmontese fell to the Gallispans.  Still, the game returned another historical result with the exception that the King fell again.

Congratulations to Lee and Steve for a well-played game.  They attacked early, often, and kept the pressure up throughout.  Ray, commanding the Piedmontese Right made a remarkable stand against the attacking waves of Frenchmen.  His efforts were not enough to turn the tide of battle.  My condolences to Richard and Ray in a tough loss.  They, too, played equally well but fortune was not in Richard's court (again) on this day.

Great game fellas and thank you!     

This is the Last Stand at Bassignana, for now.  Next up?  I think we may return to battles in Ancient Sumeria.