 |
| Bound Brook Table photo courtesy wargamesinthedungeon |
Matt and I returned on Sunday to our long-running AWI campaign using Rebels & Patriots. This campaign has been in action for two years running. On the docket for this day was a recreation of the action at Bound Brook in 1777. Matt provided a battle briefing showing the situation and the initial Rebel dispositions. The action opens with the Rebels guarding Queen's Bridge and the Old Stone Bridge from British advances. The main British advance is across the causeway through the marsh to Old Stone Bridge. Hessian Grenadiers approach across the Raritan River forcing their way across Queen's Bridge. The Rebel objective is to prevent being overrun and giving up this strategic position. Matt pointed out that, historically, once the Hessian grenadiers were seen storming across Queen's Bridge, the colonials panicked and fled. Battle over in a few minutes. Looking at my situation as the American commander, I felt my chances were equally slim.
With two skirmish units, one guarding at each bridge, they may only offer speed bumps to the superior Crown Forces once the enemy come onto the table. Having to overcome two narrow avenues of approach, the Americans would need to contain the enemy while not sustaining too many casualties. I asked if the Americans only needed to hold out for three turns to declare victory. Matt laughed but warned that I ought to be careful in not allowing my skirmishers to be overrun on Turn 1. Noted!
Let's see how the battle played out.
 |
| Shadow animals or battle briefing? |
 |
| British column arrives marching on Old Stone Bridge. American skirmishers fall back from Queen's Bridge while the Rebels shift their positions near the crossroad. |
 |
| Rebel reinforcements arrive! |
 |
| Skirmishing at both bridges |
 |
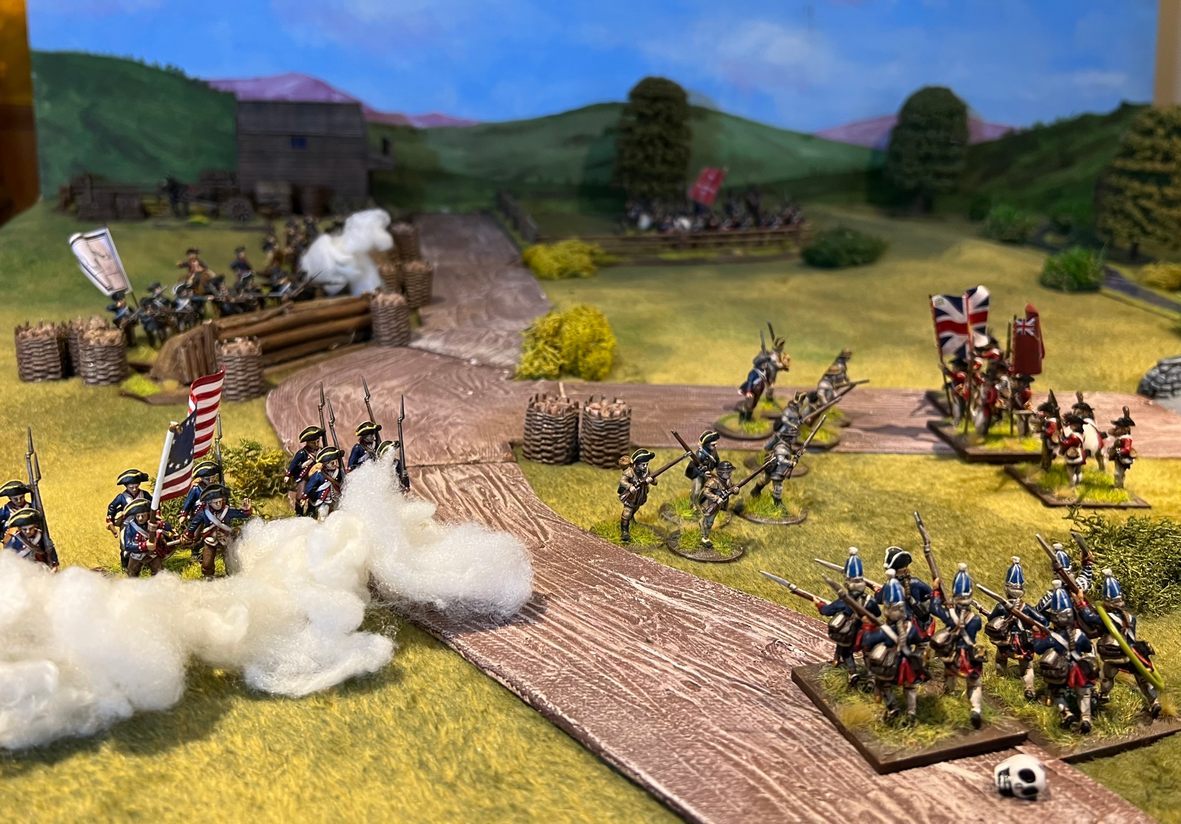
| Hessian grenadiers cross Queen's Bridge under skirmish fire from the Rebels. American reinforcements fan out as militia reinforce the skirmishers at Queen's Bridge. |
 |
| At Queen's Bridge, skirmishers fire and fall back as the grenadiers are caught in a crossfire from both cannon and musket. Casualties are heavy. |
 |
| Compelled to take a morale check from all of the fire, the Hessians break and run! I recall the Hessians rolled a double one! Rout! |
 |
| Coming up in support, a second Hessian grenadier unit crosses Queen's Bridge. It, too, is welcomed by a hail of cannon and musketry! |
 |
| At the Old Stone Bridge, the skirmishers fire and retire as the odds against them mount. |
 |
| In all of the commotion and traffic jam at Old Stone Bridge, the Jaegers take friendly fire (double one) from the rear! The jaegers are forced to retire. |
 |
| The British guard charges over the Old Stone Bridge but comes up short of the skirmishers. |
 |
| Stopped short from reaching the skirmishers, the guard falls to intense fire from multiple directions. In an attempt to relieve pressure, Hessians charge over Queen's Bridge toward the skirmishers. They, too, are caught in a murderous crossfire. Both must make morale checks. |
 |
| Double ones! Again! |
 |
| The guard in no-man's land on the Rebel side of Old Stone Bridge routs! The Hessian grenadiers fare no better. They turn tail and run away! |
 |
| The victorious rebels scatter the opposition photo courtesy wargamesinthedungeon |
A major American victory!
Another fantastic game packed with lots of action. Unfortunately, Matt picked up where we last left off with handfuls of terrible morale check dice rolling.
And, the Americans actually did only need to hold on for three turns although the outcome was not the expected result.
Stay tuned for Matt’s version of the action with loads of close up photos.
Nice looking game. Bad luck on morale checks can wildly change games....
ReplyDeleteMatt's tables are always nice. Lots of extreme rolling on the Crown's Morale Checks in this one. Almost none of them good!
DeleteJohnathan, Im always impressed by your battle accounts, especially how you are able to achieve the add ons such as those arrows. Being a Luddite Im just pleased if I can type, well done.
ReplyDeleteGlad you approve of the battle accounts, Robbie! Adding arrows and text is not much work with suitable software. You could do it, no trouble.
DeleteDear me, Matt really must just enjoy the game, win or lose, because he seems to have as much luck with the AWI British as I do with Napoleonic Austrians....almost every battle report starts out with how poor the American position is....yet in a few turns, the Crown forces are being obliterated.....I would have lost heart by now, I think! Table and figures look great, as always, and it will be interesting to read Matts account in due course!
ReplyDeleteMy thoughts are along the lines of yours Keith. Really poor old Matt is having no luck with the dice. Time for a change on that front?
DeleteKeith, it really is not a matter of winning or losing. We both enjoy each other's company across the remote gaming table.
DeleteIf you go back and re-examine some of our later battles, I think you will find results are evening out. The Americans lost a string of battles as I recall.
In this skirmish, the Americans would have been done for if the British could have closed. With very restricted avenues of approach, the Rebels could concentrate fire on each lead unit and knock them back before the Crown could gain any local superiority. My first volley against the grenadiers at Queen's Bridge was crushing. Having First Fire at Close Range, I could not miss. I didn't!
Steve, Matt's morale checks were truly abysmal. Adding insult to injury, he rolled up a friendly fire incident.
DeleteGreat looking game.
ReplyDeleteFew do it better than Matt!
DeleteCracking game, though Matt seemed to have terrible luck with his morale rolls
ReplyDeleteIt was a cracking game. Short and sweet (for the Rebels!).
DeleteA fine looking game there, I shall await to hear the excuses of the Crown forces in due course🙂
ReplyDeleteMatt's tables (like yours) are works of art. My tables are like primitive stick drawings on cave walls.
DeleteOh deary me Jon, I told you the British tend to take a hammering in these games! ;). Well I struggle to see how things could have been much worse for the British, with some friendly fire thrown in as well. Really those 3 double one's put pay to any chance of a British success.
ReplyDeleteAs always though the game looks great and another interesting AWI scenario. I'm certainly looking forward to seeing what Matt thought...
Steve, the British certainly got a hammering in this one. I figured if the British and Germans cleared the bridges, the Rebels would be in big trouble. Fortunately, the Crown had to attack across a narrow front and I could concentrate all fire only against one or two units a turn. As we well know by now, attacking in R&P is a very perilous undertaking.
DeleteI look forward to seeing what Matt thought too!
Very nice visually and a great account with lots of running away - good dice or no, they are essential to good story telling and it sounds like you both had a great time.
DeleteNorm, I may have enjoyed the contest more than Matt...
DeleteYou are right in that the extremes make for good storytelling. The "normal" often gets overlooked.
Another great looking game sir!
ReplyDeleteThank you, Michal! The game is all the work of Matt.
DeleteI enjoy the format of these AARs with the screen shots of the remote games. Easier to do I suppose with a smaller action like this. I must admit I started reading this report wondering if and when the double-ones would come up for Matt.
ReplyDeleteThanks, Lawrence! Happy to see you enjoy the format. Keeping the narrative primarily to captioned photos makes for a quick read. I tend to mix and match BatRep formats, though, depending upon the situation and my mood.
DeleteYou need not wait long before Matt conjured up a double one! He started the game off by rolling two double sixes on activations before reverting to the other end of the probability tail.
That read as though every colonial skirmisher was a crack sharpshooter with a Hawken Rifle (Still to this day a crazy accurate black powder gun.). Those poor Hessians and Brit corpses must have some expertly made holes in their heads from such amazing shots!
ReplyDeleteThe Rebels only had one unit that was marked as Good Shots. While the Rebels let loose some good volleys, it was the failed morale checks that caused the greatest harm. If I can keep fire up, Matt will fail a morale check eventually.
DeleteFantastic looking game Jonathan!
ReplyDeleteIt is! Mike, the look of the game is all of Matt's fine work.
DeleteThanks Jon I will of course get round to blogging the British view in due course. I have checked the black dice and discovered some of them only have 1’s !!!!!! I need to be more careful which ones I roll next time. As you have alluded to above this campaign is not about winning, more an opportunity to explore the history of the AWI through wargaming. The wonderful challenge is taking the historical elements and creating a battle which has some narrative and fun. It felt balanced although that wasn’t the outcome. No one would deem to play the battle in it historical setup of course with the British so vastly outnumbering the Americans. We move on and look forward to the next battle 👍
ReplyDeleteHa! Yes, you need to check your dice!
DeleteYou nailed it on why we game. We game to explore history, hopefully gain a little insight into the historical decisions made, have some fun with friends, and see our efforts at the painting desk materialize on the gaming table.
This game was great fun and well-presented as you always do.
Lovely looking game and the bad guys win, again!
ReplyDeleteBest Iain
Bad guys?
DeleteI believe he is referencing those disloyal colonists. Terrorists really. Ought to be hung the lot of them.
DeleteOne man's terrorist is another man's Freedom Fighter.
DeleteSometimes, it's good to be the underdog--low expectations and no pressure. Having said that, I think opposed river crossings often have a way of levelling the odds. Give credit where it is due: you deployed to maximize the advantages. Not sure what else the Hessians and British could have done: bull across and hope that troop quality carries the day--and that General Dice is with you (not on this day, apparently).
ReplyDeleteOpposed river crossings can be very tough. The Rebels were positioned such that the avenue of approach was funneled and converging crossfire lanes were possible. Both bridges were covered by converging fire from at least three units each. Deadly!
DeleteExcellent report Jonathan.
ReplyDeleteMuch appreciated, Richard!
DeletePoor Matt, looks and sounds like a disaster! Good stats for you though Jon.
ReplyDeleteRay, for the Crown, this was a disaster and not at all like history had promised.
DeleteExcellent photos and report. I really much love the terrain.
ReplyDeleteGlad you enjoyed the report, André. The fab terrain is Matt's doing.
DeleteBrilliant report and fantastic table and minis. Congratulations on a hard-fought victory Jon!
ReplyDeleteThanks, Mike, on the report and victory! Matt gets full credit for the table presentation.
DeleteGreat narrative and a victory for the Patriots (or rebels, depending upon your viewpoint!).
ReplyDeleteThanks, Peter! Yes, it was a great victory.
Delete