
Francois draws first Player and sets to work advancing the French army to engage the army of Charles V. The French advance begins across the breadth of their battle line. The Imperials, under the eye of Charles V, push the deeply ranked arquebusiers ahead of their main line.
 |
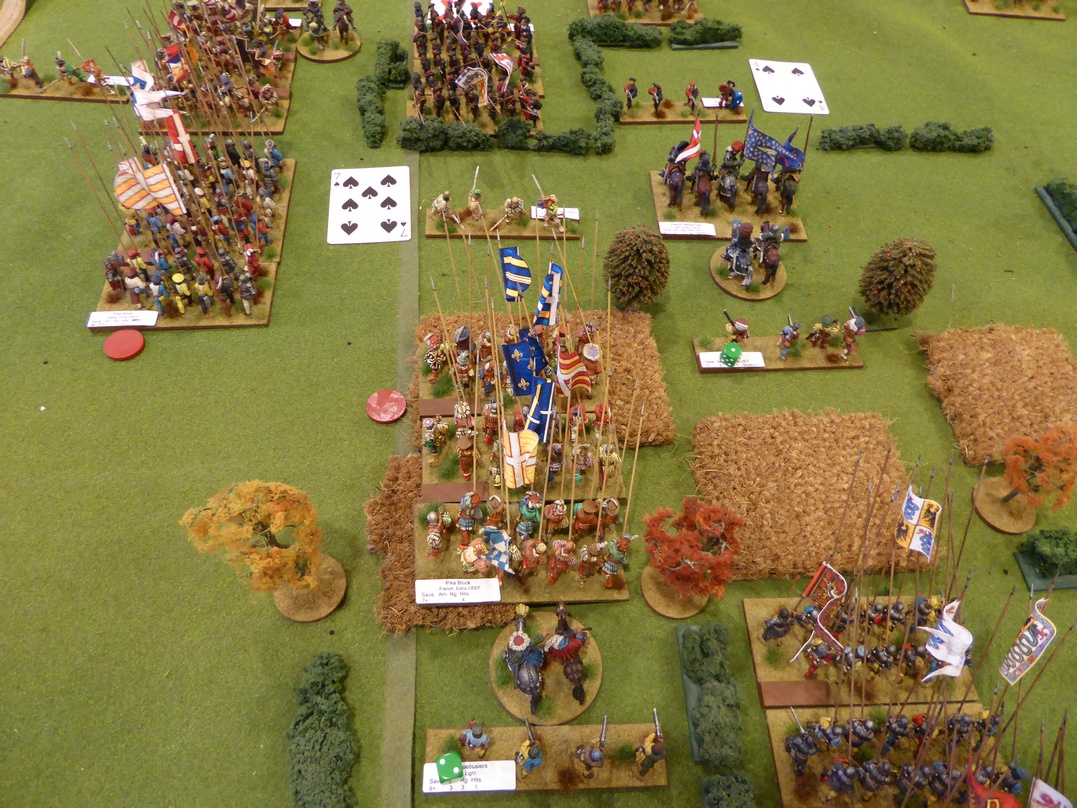
| French army advances in foreground |
 |
| The three French pike blocks |
 |
| French pikemen |
 |
| Looking down the battle lines. (French on left, Spanish on right) |
 |
| Imperial pikes advance |
 |
| Imperial Men-at-Arms advance on the Imperial left |
 |
| French heavy infantry continues the advance |
 |
| French cavalry on the right advance |
 |
| Gendarmes attack the Zweihanders |
 |
| Zweihanders cut down by Genadarmes |
 |
| French cavalry charge into the Imperial left |
 |
| Cavalry clash on the French right |
 |
| Push of pike |
 |
| Battle for control of the center |
 |
| Two French pike blocks, gone! |
 |
| Charles V victorious |
The game lasted longer than the previous two contests due primarily to the length of each of the pike melees. Each of these pike scrums battled back and forth over several turns with neither player able to exact the deciding blow. Misses were plenty as were saves.
Witnessing a seemingly, above average number of Aces pulled on initial brigade activations in the previous two games, we implemented Peter's suggestion of redrawing an initial brigade activation failure. While we had not tallied the number of initial activation Aces drawn in the first two contests, the number seemed large. In this battle, we counted initial brigade activation failures. The count was twelve. Twelve! Included in that lot were two double Ace draws. Fortunately, brigade failures seemed to be evenly distributed between the two players. This change worked well and allowed the game to move along with continuity. This is a change we will likely keep.
The Battle of Maisnon will see one more action before the troops retire back to their storage boxes.
Great looking game - lovely terrain and figures Jonathan. You seem to be enjoying the "To the Strongest" rule set too!
ReplyDeleteThanks, Keith!
DeleteTtS! brings a fast-play game to the table with few headaches caused by complicated processes or computations. The whole process is straightforward and quick to resolve. For completing a game in a couple of hours, TtS! works well.
A nice-looking AAR, and it seems you have found a much better balance with those activation cards Jonathan.
ReplyDeleteGlad you liked the AAR, Lawrence! With the change to replaying initial failed brigade activations, the game had a smoother flow. The herky-jerky nature of prior games was almost eliminated.
DeleteThis seemed to flow a bit better, would that be right? Lovely to see the pike blocks close up.
ReplyDeleteNorm, this game did have a better flow. Without constant activation interruptions, the game was more enjoyable by providing a more plausible outcome.
DeleteA great looking game and excellent battle report!
ReplyDeleteThank you so much, Andy!
Deleteamazing sight of pike blocks the painted miniatures/units look stunning.. I also have a copy "To the Strongest" rule set haven't play tested them yet..after reading reviews online seems To the Strongest rules are quick/with easy to follow sequence of play and battle games usually last 2 or 3 hours?
ReplyDeleteThanks, Phil! You should recognize one or two of the pike blocks.
DeleteYour reviews match my views in that TtS! is fast-play with easy mechanisms that can be fought to conclusion in about two hours.
Like all of your AARs: very detailed and nicely laid out.
ReplyDeleteThanks!
Much appreciated!
DeleteGreat looking game!The flags really add to the overall effect, It all seemed to work better to?
ReplyDeleteBest Iain
Thank you! The flags really make the collection pop on the table and provide a great attraction to the the period.
DeleteThe activation change was an improvement in my mind.
Lovely looking game and models. Those pike blocks look very purposeful!
ReplyDeleteThanks! The pike blocks are purposeful and dangerous to both opponent and player alike. Ouch!
DeleteThat sounds like a really close game. I like the back and forth with the Pike Block melees and also the lighter infantry screening the pike blocks to make them harder for the guns to hit
ReplyDeleteHi Oli. The game was very close and could have gone either way. The first player to lose that second pike block would likely be done for.
DeleteIt was quite an interesting game, and the changes almost made up for our appalling ability to draw aces. I would be curious to see if we buffed up the pike blocks (need two hits to disorder) if we could get a more decisive outcome. That or perhaps discounting the loss of 'attached' light units (Zweihanders and Arquebus associated with a pike block) when calculating victory totals.
ReplyDeleteI am not sure any mechanism can compensate for the rotten luck we tend to display in our games!
DeleteIn this scenario, losing two of three pike blocks seemed like defeat to me regardless of the light units lost beforehand. That is an interesting idea to not count a pike block's "attached" light units against Victory Medals. Since the extra deep pike formations are worth four VMs alone, that just might be the ticket. Good idea!
These really have been lovely looking games.
ReplyDeleteGlad you have been enjoying this series, Markus!
DeleteThose pike blocks are really something.
ReplyDeleteThey really are...
DeleteLooks really great, and it seems like you're hitting your stride with TTS! I thought the French were going to win, until they proved unable to make the best of their outstanding gendarmes. Without any of the the awesome Swiss to give their pikes an edge, that usually means defeat for the French. the VM value of the one hit units is low, but not negligible. I'd suggest leaving them at 1 VM as written, but you certainly could experiment with having all 1 hit units costing no VM when "lost" (and also contributing 0 VM to the army total in that case).
ReplyDeleteIt looks like you made better use of skirmishers to screen your pikes, and pulling back damaged units to Rally where possible.
Why not replay a scenario similar to this with Impetus before clearing the tabletop?
Thank you, Peter. Jake and I have discussed just such an Impetvs replay. The limiting factor always seems to be schedule coordination.
DeleteYes, pulling back damaged units to rally played a factor in this game that was not invoked as often in the prior two. Perhaps, we are developing tactics as we come to grips with TtS?
One of my favourite conflict. Fantastic battle with beautiful minis and terrain!
ReplyDeleteThanks, Michal! This is becoming one of my favorites too.
DeleteIt looks as though the annoyance of drawing aces has surpassed the annoyance of rolling ones! Great AAR and great looking table.
ReplyDeleteThanks, Mark! Yes, you are quite right!
DeleteAwesome! With an incremental interest watching this set of battles. I like Renaissance epoch and you did a great show. Miniatures and terrain look wonderful.
ReplyDeleteDid the Zweihanders act apart from pike blocks as a separate unit?
Very good to see that you are enjoying this series of engagements, Dmitry!
DeleteThe Zweihanders did act as a separate unit but maintained contact with their parent pike block.
Another lovely looking game Jonathan!
ReplyDeleteChristopher
Glad you like it, Christopher!
DeleteSounds like fun. Seems like you got a good suggestion for the aces problem. Could just remove a couple from the deck but that might have other effects on hits and saves.
ReplyDeleteI agree that all the flags really make the tabletop look great. 😀
Ignoring the first brigade activation helped the game a lot, I think. We were both satisfied with this change.
DeleteIt does look like a lot of fun, Jon. How on earth are you getting so many aces?! You could always just not count an ace as an activation failure. That way every brigade can activate at least once.
ReplyDeleteScott, you should know well my luck. Chock it up to bad luck...
Deletegreat Battle report
ReplyDeleteThank you!
Delete