After last week's game, consensus formed to give the Battle of Montgomery one more run-out on the table. This Wednesday's game again saw three players with two Royalists and one Parliamentarian. Two of the three players from the game before showed up for an encore performance. Chris (Horse and Musket Gaming) and David (The Ragged Soldier) shared command of Byron's Royalist Army. Mark (Mud, Blood, and Steel) commanded Meldrum's Parliamentarian Army. Please visit the The Battle of Montgomery 1644 for the prior battle report and brief battle background. Last week, the battle ended in an inclusive draw although there was discussion on both sides making good points to tip the outcome toward one army. Still, a draw seemed a reasonable conclusion. Would the result be similar this time out?As a refresher, the two armies array for battle as shown in the photo below. Meldrum is outnumbered but is expecting a cavalry foraging party to return at some point in battle.
 |
| Initial dispositions |
 |
| Royalist Left |
 |
| Royalist Right |
 |
| Parliamentarian Left |
 |
| Parliamentarian Right |
On to battle!
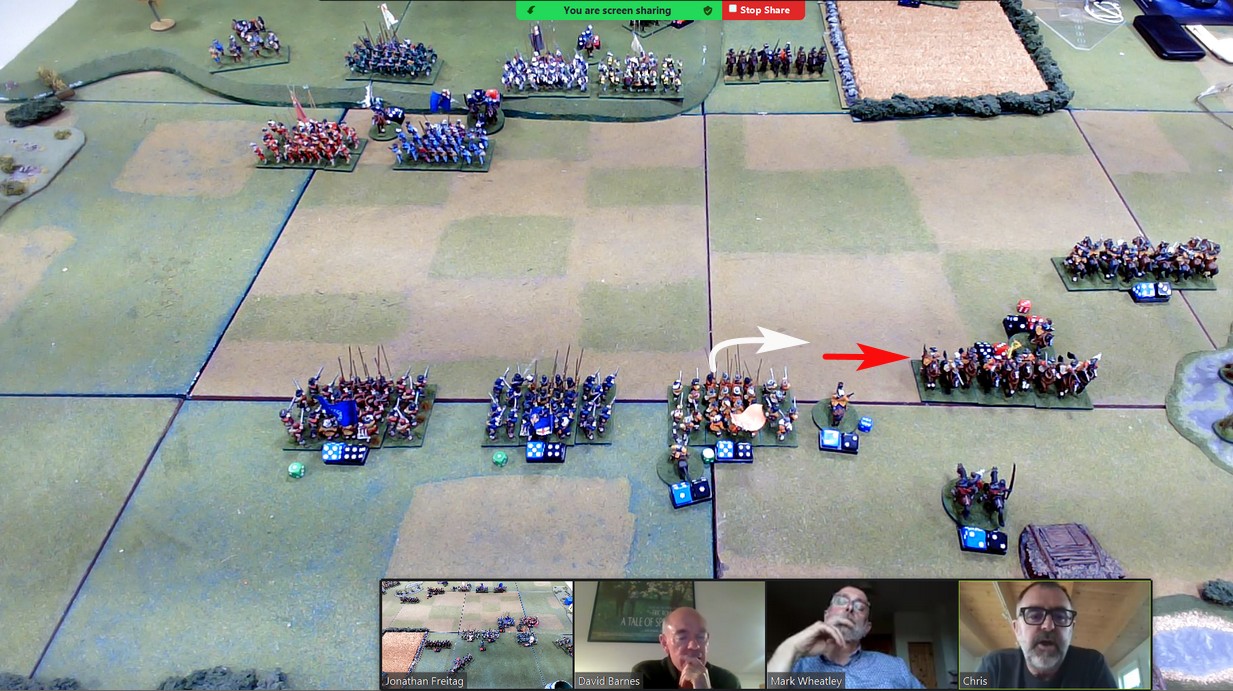
Constricted by the hedges and enclosures, Byron sends his cavalry forward. Not too far forward. The Royalist horsemen advance into the open in preparation for action. Fairfax brings his cavalry, deployed in front of Salt Bridge slightly forward so that he has room to maneuver. Byron holds a four-to-three advantage in numbers.
Without hesitation, the two armies' cavalry strike in a series of charges and counter charges. Could the battle be decided from the first blows?
Leading with the horse regiment on the left, Tyldesley attacks! Fairfax counters! In a ferocious clash of man and beast, Fairfax's rightmost regiment is driven back with Royalist cavalry in hot pursuit. The chase brings the Cavaliers nearly to Salt Bridge, itself, as the enemy disintegrates. Fairfax has a breach in his line.
Tyldesley's right regiment of horse charges forward too. As before, Fairfax responds in counter charge. This time, Tyldesley's horsemen suffer a reverse and are seen scurrying back to their lines. Pausing to regroup, Fairfax is hit by a second wave of galloping Royalists.
Tyldesley's cavalry looks to be gaining the upper hand when catastrophe strikes. Weakened from the heavy fighting, the Royalist horsemen have seen enough fighting and break for the rear. Fairfax's horsemen follow, close on their hooves. Over enclosures they ride trying to shake their pursuers. With Tyldesley already engaged in pursuit near Salt Bridge, no general is close at hand to rally these Cavaliers.
In the initial clash of cavalry on the Royalist left, two Roundhead cavalry regiments are wrecked. One Royalist horse regiment is wrecked while two other regiments head toward the rear to regroup.
 |
| Cavalry clash! |
 |
| Destruction and pursuit sees Fairfax's command in tatters. |
Despite these successes, all is not going perfectly for Byron, however.
Having witnessed the destruction of friendly cavalry to its right and the route of escape under threat, Lothian's rightmost infantry regiment turns to bring Tyldesley's over-extended and pursuing cavalry under fire.
The Roundhead infantry wheels right and gives the horsemen a salvo. Already exhausted from the fighting and pursuit, Tyldesley and his horsemen buckle and gallop away. For Meldrum, disaster averted for now. For Byron, disaster strikes!
 |
| Meldrum's infantry turns to give Royalist cavalry a blast. |
 |
Tyldesley breaks and gallops away.
Tyldesley looks on in disbelief.
The other two players enjoy the sight. |
 |
| Tyldesley falls back to regroup. |
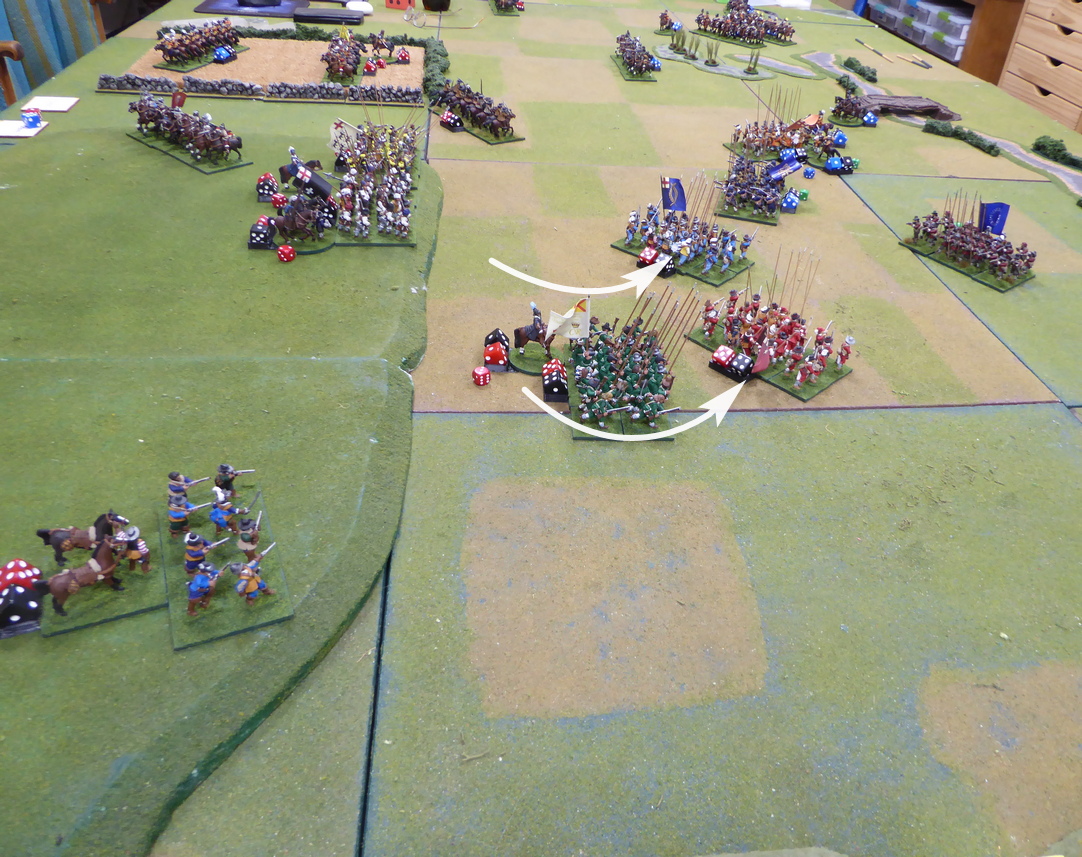
With the opening cavalry actions seemingly settled, Byron orders his foot forward. Woodhouse's two infantry regiments remain stationary on the heights while Broughton sends his brigade forward. They cautiously descend the hill then swing about to confront enemy infantry to their front.
Meldrum sees the return of Myddleton's foraging party as the two cavalry regiments cross the enclosures. The first regiment strikes Tyldesley's fleeing cavalry in flank and scatters it for good. Tyldesley, himself, barely makes good his escape. Now, it is the Royalist left that may be in trouble! |
| Myddleton returns and turns the Royalist Left. |
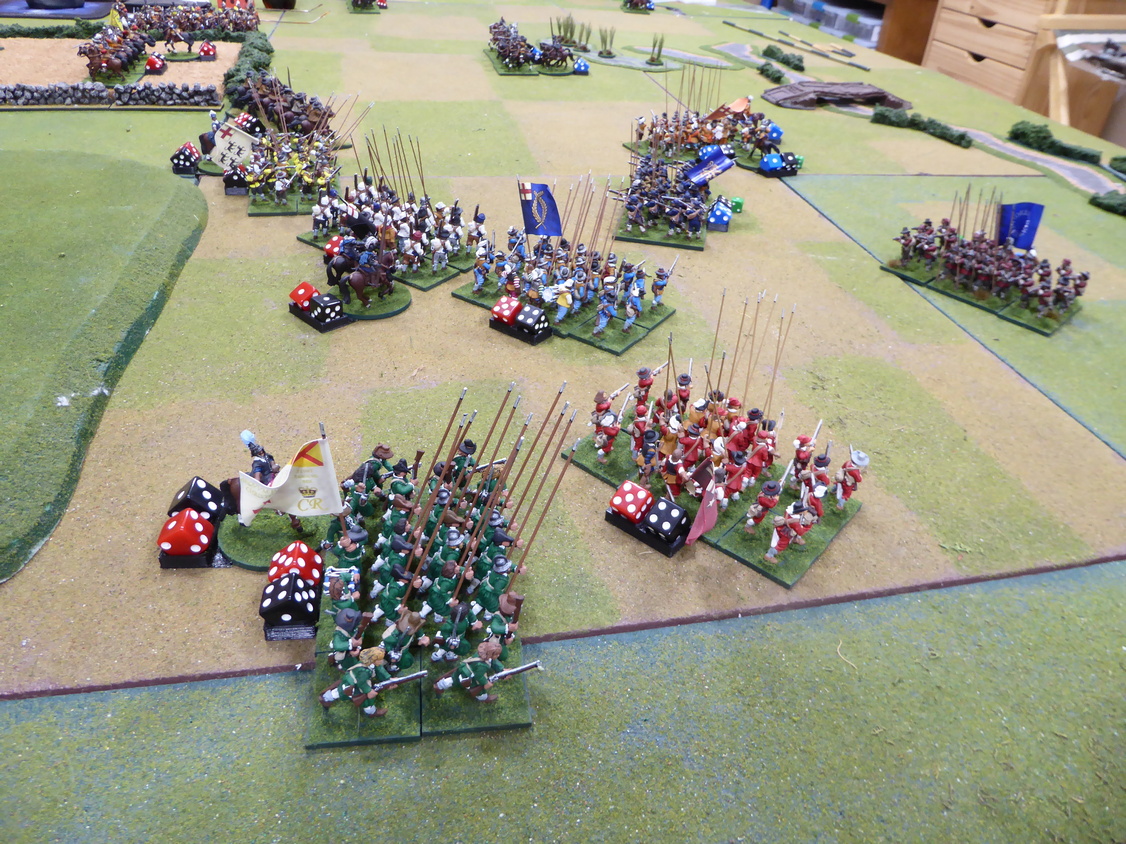
Back to the plain below the heights, Broughton presses forward. Perhaps showing overconfidence, Broughton's redcoats are repulsed in their first attack although the enemy is weakened. Leading from the front, Broughton attacks with a second regiment. This time, the Roundheads are scattered. With two of his three infantry regiments destroyed, Lothian's remaining regiment heads back to the bridge. Every man for himself!  |
| Broughton's first attack repulsed |
 |
| but the second attack finishes the job! |
 |
| Lothian scrambles over Salt Bridge. |
While Lothian has a change of heart and brings his infantry back to the north side of the bridge and Myddleton's cavalry could present some interesting issues for the Byron and his Royalists as the left is turned, Meldrum concedes victory to Byron. The Battle of Montgomery ends in a Royalist victory.
Thanks to the three combatants. Congratulations to Chris and David. Condolences to Mark.
Could the battle have been waged differently yielding a different outcome? Perhaps. Those discussions may be reserved for another time.
No matter the outcome, I thought the game great fun. All three played well and fought hard.


 Without hesitation, the two armies' cavalry strike in a series of charges and counter charges. Could the battle be decided from the first blows?


Excellent looking game Jonathan!
ReplyDeleteFun is higher than victory :-)
I agree! Winning is secondary.
DeleteGreat looking game
ReplyDeleteThank you! Hopefully the narrative was interesting too.
DeleteA great rematch, shame the Parliamentarian cavalry did not show up a bit earlier though!
ReplyDeleteMark was hoping for an earlier arrival too and in a different place.
DeleteAnother fine game there, very engaging for all involved from reading the account.
ReplyDeleteMuch appreciated! I try to make the account engaging. With luck, the players agree.
DeleteSmashing game, though I’d have preferred my cavalry to have come on anywhere but next to those darned enclosures. The surprise of their arrival quickly dissipated as they struggled to manoeuvre their way over the hedges and walls. The weight of numbers soon overcame my cavalry’s positional advantage. Kudos to my two worthy opponents. There’s a definite extra element of fun in playing the same battle from the other side. Not something I’ve had the luxury of time or resources to do before. Cheers Jon for hosting these battles.
ReplyDeleteThanks, Mark! When you revealed Myddleton’s location, I thought the positioning perfect. You destroyed one horse regiment on entry and caused much worry for the Royalists.
DeletePlaying each side offers some useful insights. I recommend it!
Definitely worth a re-run, and I wish we did more of that in our gaming. It would be fun to play a game from both sides. It's great seeing your ECW collection in action and I was going to do a few more WWII ships this morning, but seeing this has pushed me back on to ECW.
ReplyDeleteReplaying the same battle provides many benefits and opportunities.
DeleteHappy to provide painting inspiration!
Excellent looking ECW game Jonathan!
ReplyDeleteThank you!
DeleteGreat looking ECW game, Jonathan. I like the 3-figures per base for the shot. I may rebase my units like this.
ReplyDeleteThanks, Dean! Glad you enjoyed both battle report and basing.
DeleteThis comment has been removed by the author.
ReplyDeleteThanks, Valentine! Most of my games are refighting historical battles. This battle recreates the ECW Battle of Montgomery in 1644. Troop composition and terrain are modeled after the historical event.
DeleteAnd the course of the battle itself, its sequence - are you repeating it or is it an alternative battle?
DeleteThe game begins from the historical positions of both armies. From there, the battle may follow the historical fight or diverge depending upon the decisions made by the player-generals and combat resolution.
DeleteThe Parliamentary forces always seemed to be on the back foot, but an interesting game none the less.
ReplyDeleteParliament may have been on the back foot but it certainly had opportunities within the battle. I agree. Still an interesting game. Battles and games often do not follow expectations,
DeleteAnother fine game there Jon and despite another Parliamentarian loss, fun seemed to have been had by all.
ReplyDeleteThanks, Steve! Yes, I hope all enjoyed themselves.
DeleteExcellent write up of a thoroughly enjoyable game Jon. I was so wrapped up in the game, thinking about what to do next, that I was taken aback when Meldrum (Mark) conceded. A close run thing.
ReplyDeleteThanks for hosting again, and hat tip to Mark and David.
Chris/Nundanket
Glad you enjoyed both game and battle report.
DeleteWhile surprised at Mark’s concession, I thought possibilities remained for mayhem with his cavalry on your flank. Understandable though since the Roundhead Army Breakpoint had only two points remaining. Could Mark have retired back over the bridge before his clock ran out? We will never know.
You and David played the Royalist hand very well.
You certainly get a good bit of mileage from your games Jonathan, another good run out.
ReplyDeleteI do get good mileage out of my games. After developing a scenario, pulling out the armies, and setting up the table, it makes sense to see the battle out for a few performances.
DeleteMany thanks Jon, it was a super game and a lovely table! Thanks so much for organising it ,and thanks to Chris and Mark. I too was actually quite surprised when Mark conceded, I thought his cavalry was going give us big problems! It's quite a finely-balanced scenario in many ways.
ReplyDeleteYou are welcome, David! Great to see you at the table again. Did Mark concede prematurely? We will never know, will we. Glad you enjoyed the scenario and the fighting among friends.
DeleteVery wise to squeeze as many games as possible from your set ups, Jon. This is obviously one any side can win, with luck. Altogether a very enjoyable series of games!
ReplyDeleteHi David. Yes, I am a model of efficiency...
DeleteBy my count, the Montgomery scorecard shows 3-2-1 in favor of the Royalists. Glad you enjoyed the latest pair of Montgomery games!
Super report and excellent game.
ReplyDeleteThanks, Richard! We need to work on getting you back to the table.
DeleteA very fine looking game!
ReplyDeleteChristopher
Thanks!
DeleteYou guys are having great fun with this battle. 3rd time a charm? Or onto the next genre?
ReplyDelete😀
Next time, something new! I think it may be your favorite period…
DeleteI love a nice Pike & Shot game and here you are. Great report as always. I remember that I tried to play ECW many years ago.
ReplyDeleteThanks, André! Next time armies hit the gaming table, we will see something different.
DeleteGreat to see a rerun , lovely pike and shot game pity about the result!
ReplyDeleteBest Iain
Thanks, Iain! Glad you have no aversion to seeing a battle replayed.
DeleteAnother great game from Jon's table!
ReplyDeleteSeems to me being so heavily outnumbered, roundhead fortunes are firmly in Myddleton's hands, or rather hooves.......
Thank you! I think you are correct on Myddleton’s importance.
DeleteA cracking rerun Jonathan…
ReplyDeleteAll the best. Aly
Thanks, Aly!
DeleteCan't fit your dice into those holder things either, huh? I need some more.
ReplyDeleteExactly right! The Chinese dice and the Chinese dice holders do not conform to the same tolerances.
DeleteIf only those cavalry regiments would have arrived sooner...
ReplyDeleteGreat replay of a good looking set up Jon.
If only...
DeleteGlad you enjoyed the fight, Dai!