Game 1 of the planned Shoemaker's Bridge battle trilogy kicked off on Tuesday in the weekly MNG remote game. Being a UK based gaming group, I had some difficulty finding a volunteer for the American command. Gladly, Richard stepped forward to take command of the Rebels. With only three players in attendance, Richard would command the Rebels alone. It is a lonely fight, for sure. Ian and Will took charge of the British forces on the day of battle.
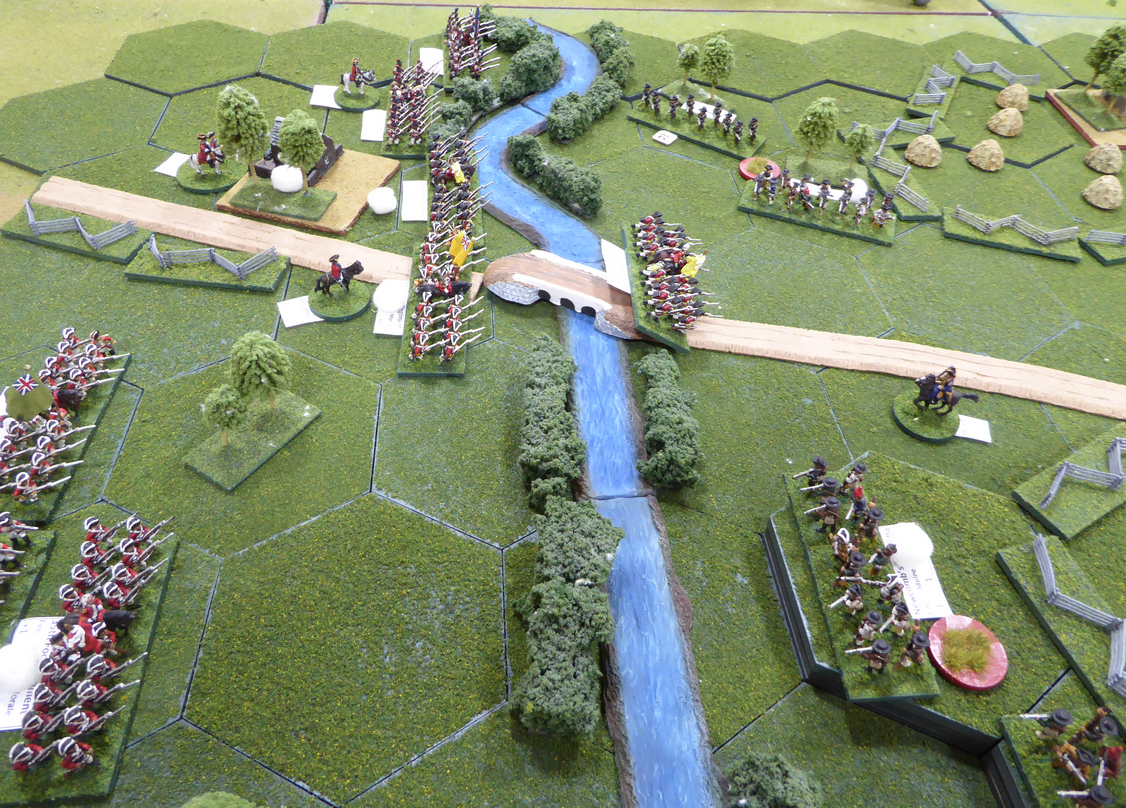
The battle began innocently enough with the Americans deployed to cover the approaches to Shoemaker's Bridge. Heard's Brigade of militia, a regiment of Continental Rifles, and a section of guns were the only speed bump to the numerous, oncoming Redcoats. Help would be on the way or so Heard hoped.
The white cotton ball denotes First Fire capability while the red disk identifies a unit as being on HOLD orders. Units under HOLD orders may respond during the enemy's turn.
 |
| The Rebels wait |
 |
| and wait for what they expect to see advancing up the road. |
The Rebels need not wait long.
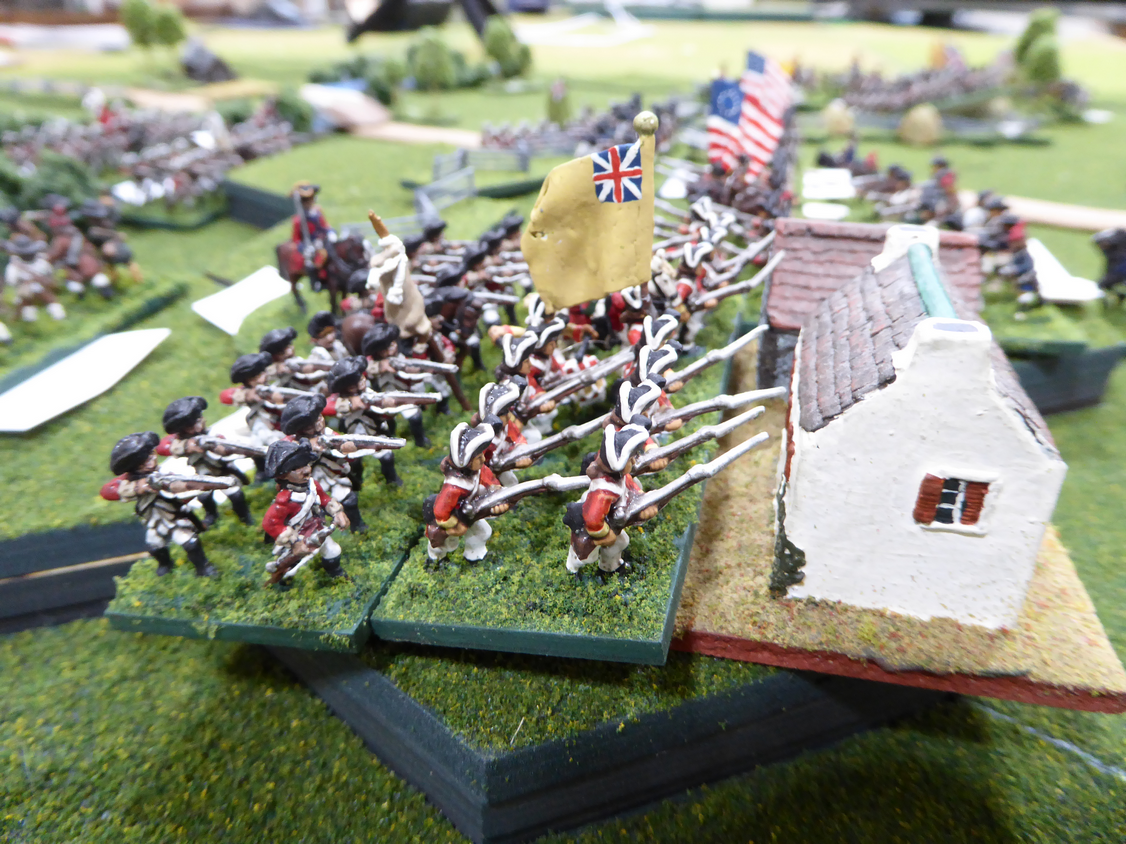
Matthews leading the two Guard battalions and Jones leading the 10th, 37th, and 38th foot, deploy into line and press on to the stream covering the bridge (Ian's commands). Pigott and Smith deploy and advance toward Shoemaker's Farm (Will's command).
For the Americans, Nixon and Parson's Brigades begin streaming onto the field of battle from the direction of Brooklyn.
 |
| The British army approaches the stream |
 |
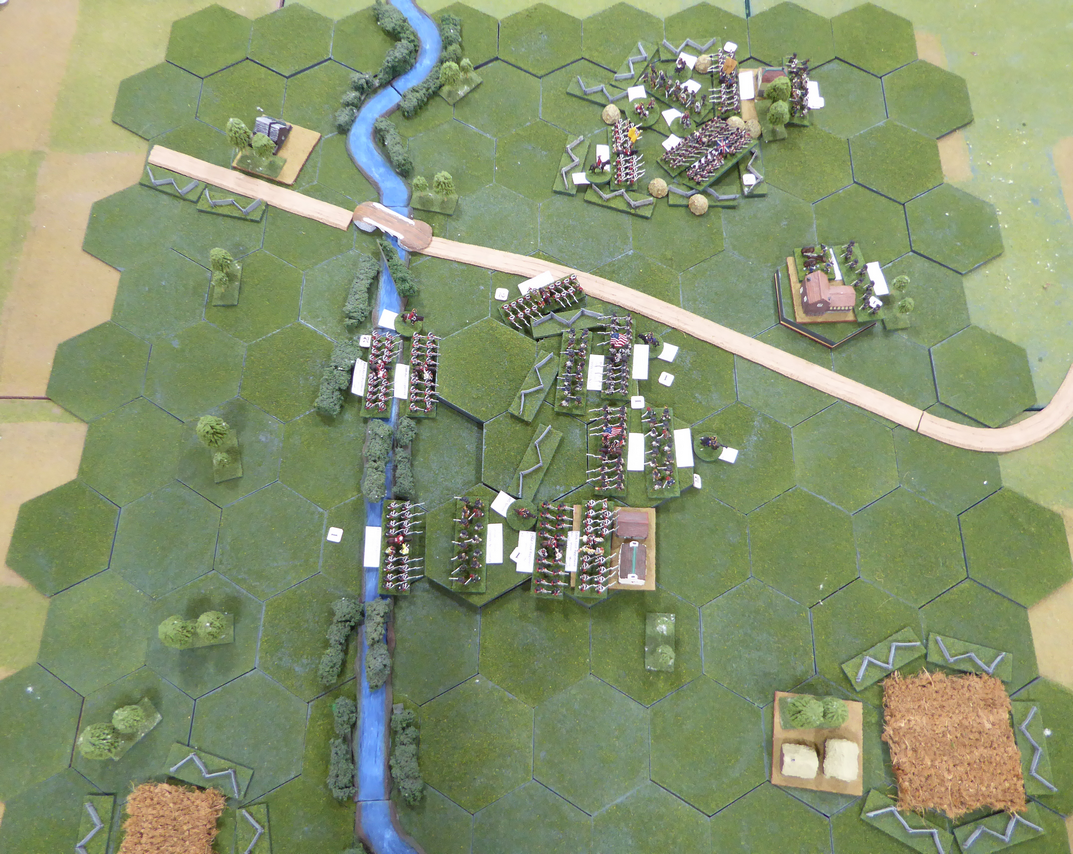
| Positions at end of game |
Clearly, with two separate British commands, the battle divided into almost two separate battles. On the American right, the position was collapsing quickly once the Guard made its presence felt. On the American left, the rebels still maintained a defensible position upon the heights. For how long? We will never know.
At the end of battle, the Butcher's Bill showed,
 |
| Butcher's Bill |
Heavy casualties, for sure. The British lost three regiments to the American's five regiments. Many more regiments were only one hit away from destruction. This was a costly battle but one the British may claim as a victory.
For Victory Points, The British tallied 19 points against 13. A tactical victory for the British. Congratulations to Ian and Will!
Shoemaker's Bridge was a good introduction to Fields of Honor. The players picked up the mechanisms quickly and play moved along at a respectable pace. I could see tactics developing as the game progressed. There was talk about a rematch.


Good looking game and sounds like it was fun to play out,I will remain non partisan on the result!
ReplyDeleteBest Iain
Thanks, Iain! The game was fun to watch develop, for sure. I reckon I know where allegiances lay...
DeleteSorry I missed it. Hopefully I'll be about for round 2!
ReplyDeleteNext time!
DeleteHey! New t-shirt!
DeleteYup. From my very own shop: https://www.redbubble.com/people/Trebian-GDE/shop?asc=u
Delete"Let's do it again." Best kind of game.
ReplyDeleteI agree! When the players want to tackle the game a second time. That is a good sign.
DeleteA nice game and scenario Jonathan and a rather bloody win for the British. Will this form the first part of a mini-campaign?
ReplyDeleteThank you, Steve! Not likely to become a mini-campaign but who knows? With multiple replays of this scenario, I may never move beyond Shoemaker's Bridge.
DeleteA good read and an excellent way to game.
ReplyDeleteGlad you enjoyed it, George! This is a fun way to play and umpire.
DeleteNow that is an interesting fight. Great to see that it worked so well. The pickup nature of the game, in terms of focusing on the fight rather than flicking through rules, is coming through very clearly too Jon. Great work.
ReplyDeleteWhat is really interesting to me is seeing how different players tackle the same tactical challenge. Your game with Steve was different from this approach but still very similar. I am pleased that you find the game-play clean and effortless. Removing some of the overhead from the gamers' plate opens up new gaming opportunities and focus. I have a friend who says this type of game allows one to focus on the 'X's and 'O's and the objective rather than on the game system minutiae. Thank you.
DeleteInteresting gaming, Jonathan. I wonder if the sole American player was at a disadvantage having to "generals" to contend with at the same time. I suppose, it could also be favorable having one single overall commander too, though.
ReplyDeleteGood question, Dean! No other commander to coordinate with but twice as many regiments to command. Which is better?
DeleteVery interesting to see the ‘Butcher’s Bill’ shot and also to see that the system allows two units in a hex. Does it make the front unit the ‘lead’ unit from which morale and casualties are managed, with the second unit just counting as a support, but sharing retreats etc?
ReplyDeleteA quick glance shows which commands were doing the real fighting. Jones' command was nearly wiped out.
DeleteFor multiple units in one hex, you are exactly right. Lead unit takes the Morale Check but both units contribute to the fighting. The downside is that such a target hex takes a penalty when fired into as a dense hex. One does not want to stack units in one hext unless prepared to assault. It worked well, I thought.
Yes, I like those ideas, though from experience I know that it puts a squeeze on terrain and figures c0-existing in the same hex.
DeleteTwo units in one hex can put a squeeze on but I can fit two infantry plus terrain in the hex.
DeleteGreat looking game as always Jonathan!
ReplyDeleteYours reports are pure eye's candies :)
You are very kind, Michal!
DeleteGreat to see that was a success and that everyone was up for a re-match. I like your 15mm approach to AWI as you can see the formations but without the field becoming overly-cluttered.
ReplyDeleteIf the players are willing to give the game another try, that is usually a good sign. Glad you enjoy the look of the game!
DeleteVery interesting and enjoyable battle report
ReplyDeleteGlad you enjoyed it, Neil!
DeleteGreat to see the other battle Jon and compare the approaches. As you say the rules work well providing a stimulating battle without focussing too much on the detail. Perhaps there is something in this hex thing ?
ReplyDeleteMatt, it was interesting seeing how different players approached the game differently. Quite fascinating, really. There is always more than one way to skin a cat or be skinned.
DeleteHexes? You?
Great read very interesting to be able to compare with the game Matt and I played. Agree with Matt the rules are ideal and the hex approach is really suited to games via Zoom both for play and communicating with the host regards movement etc.
ReplyDeleteComparison is fun and useful, isn't it? Once I make it through summarizing each action, I may collect my thoughts and compare/contrast the different approaches seen in these battles. Hexes seem to work very well for this type of gaming with players not only in different rooms but on different continents!
DeleteA great looking game Jon and seems like everyone had a share of success at various points . I was going to make the same point as Dean....it can be an advantage to be one player against two, as long as the forces aren't too large...which these dud not seem to be. What dud you think, as umpire, was the American player disadvantaged by flying solo?
ReplyDeleteThanks, Keith! Everyone had a chance to attack and defend although the British were typically doing more attacking and the Americans were doing more defending.
DeleteAs for your question on having an advantage/disadvantage based upon number of units or number of commanders, I will ask the American player his thoughts. The American player seemed comfortable moving his 16 units and not once mentioned being overloaded with work. Two players per side would have worked very well, I think.
Reads and looks like a good game. Pardon me for being a bit nosy and peering at the pics but do I see some Frontier figs there? Hmm .... after asking, I'm having a bit of daja vue...
ReplyDeleteIt was a good game, Ross. You have a good eye! Yes, many of those figures are Frontier Miniatures. The bulk of the remainder are Jeff Valent Miniatures.
DeleteThat's a really good looking battle and the hex style sounds like it's far better suited to a video-game than a measuring-tape style.
ReplyDeleteO and, up the Brits!
Thanks! The hexes made movement and firing much quicker and eliminated the fiddly bits of measuring.
DeleteYes, on this day the Brits were victorious.
Must of been a good game since I see it on blogs all OVER the internet. 😀
ReplyDeleteNice job! You’ve gotten real good at virtual game hosting.
Thank you! There were three games last week. I have two more battles for which to tell a tale.
DeleteA nicely looking game! Interesting to see the rematch :)
ReplyDeleteThank you!
DeleteIt's a shame that I didn't had the time to write a comment. Great game. I love such games with an army devided between two commanders as here with the British. I love the discussions around the table. Great report as always.
ReplyDeleteAndrè, you are never too late to leave a comment. Each comment is welcome regardless of when it arrives.
DeleteThank you for your continued support.
'Off the blog's for the better part of a couple of months and you have given me loads to catch up on Jonathan! A fine looking first version in what I know, with the benefit of history, was a series!
ReplyDeleteRegards, James
James, great to see you return and with conviction! I appreciate your effort in going back through old posts and especially reading through all of the Shoemaker’s Bridge posts. Yes, this was a fun series. I will likely do something similar again. With so many remote candidates, I expect I could easily fill a few game tables.
Delete