 |
| Redcoats on the march. photo courtesy wargemsinthedungeon.blogspot.com |
Matt and I return to our long-running AWI campaign as we fight our way through the war. After the battles of Trenton and Princeton, combats center on small skirmish actions while both armies are in Winter Quarters. Up this time is one of the actions from the Forage War. For historical background and Matt's excellent battle account, please visit,
The Forage War, 1777: Battle of Millstone
While Matt presents his version of the action with superb battle photos, I attempt to recount my rendition of the action from the Rebel perspective and from afar.
Let's take a look at this battle from the American chroniclers.
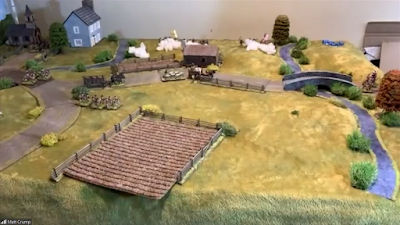
| The battlefield with the long British column marching toward Millstone River Bridge. A Hessian detachment guards the bridge. photo courtesy wargemsinthedungeon.blogspot.com |
 |
| British column marches toward the bridge. |
 |
| The Rebels arrive out of nowhere to challenge the column but the Rebels fail to attack both flanks. |
 |
| Gunshots ring out as contact is made at the rear of the column. |
 |
| Threatened from beyond the mill and from the town, itself, the Redcoats are forced to split their command to deal with each threat. |
 |
| The Rebels advance upon the lead elements of the column while the rear guard is attacked from both directions. The baggage train stalls. |
 |
| A withering opening volley from the town sends the British back toward the bridge. |
 |
| Surprised by seeing enemy both fore and aft, the British unit scatters. Hoorah! |
 |
| British infantry line the fence as the Rebels close in. |
 |
| The firefight intensifies as the Hessian jaegers scurry across the Millstone Bridge to aid their comrades. Musketry from the Americans drives off the Hessian gun. |
 |
| The Hessian jaegers arrive to thwart the Rebel attack. photo courtesy wargemsinthedungeon.blogspot.com |
 |
| One Rebel skirmisher has seen enough and disperses. The baggage train is making little progress. |
 |
| In the firefight, first the lead British regiment breaks taking Abercrombie away with it. They scamper toward the bridge pell mell. Seeing their commander carried away in flight, the second British regiment breaks. |
 |
| First one Hessian jaeger company is destroyed |
 |
| and then the second disperses. |
 |
| As the Americans close in on the column, not much remains to protect the train. |
 |
| The lead wagon is attacked as the British rear-guard continues suffering casualties at the hands of their pursuers. |
 |
| With the route to the bridge blocked and the baggage train under heavy attack, the remaining British infantry skedaddle. The rebels are victorious! |
The Rebels attacked quickly and gave the British a very bloody nose. Crown forces experienced a spate of untimely and unseemly Morale and Rally tests. So many catastrophic morale failures occurred, the likes of which are not often seen. If it were not for bad luck, the British may have had no luck at all.
While there will be fewer places set at the British mess tent this night, the Rebels will be eating well with lamb on the menu.
Great game and great victory to the Rebels!
Great game, love to see these types of small scale actions
ReplyDeleteYeah, it was great little skirmish action!
DeleteWow, the Continentals must have double shotted their muskets! Nice to see an ambush work. Was the plan to be on both flanks?
ReplyDeleteGood quick AAR,I'm off to Matt's site to see his version.
As Rebel commander, I would have preferred being able to attack from both sides of the table in order to envelop the British column. As luck had it, all but one of my regiments came on the far side of the table.
DeleteGlad you enjoyed the BatRep!
Well done Jon! The Brits took a battering. Nice looking table as usual with Matt.
ReplyDeleteThanks! Much of the Rebel success was due to the British collapse.
DeleteMatt certainly sets a very fine table.
Another great game from you chaps, but boy oh boy did the British take a real beating in this one!
ReplyDeleteI agree! Very fun especially watching the British force dissolve one by one. The British took a hard pounding in this one.
DeleteOh dear......
ReplyDeleteI think you meant, HOORAH!
DeleteNo ….oh dear !
DeleteRoss?
DeleteThe table sets a lovely scene / frame for the game, so that everything that follows is enjoyable.
ReplyDeleteMatt produces a visual treat, doesn't he? Every. Single. Time.
Deletesplendid battle Jon and the scale perfect for R&P. These games often seem so close and balanced and then everything goes horribly wrong. How can we keep recreating history so accurately I wonder, I genuinely felt the American force was at one point on the edge of collapsing !
ReplyDeleteThe scenario was perfectly constructed, Matt. You are right. We keep producing historical results no matter how hard we try to reverse history. Perhaps the outcome is pre-ordained by fate?
DeleteWith all of the Green Rebels, I figured it would be a tough row to hoe to score a Rebel victory. Had the British not run away, I suspect the Rebels would have turned tail and run.
Great fun, again!
A fantastic looking game, both terrain and figures are outstanding. Abercrombie must be concerned for his future employment!
ReplyDeleteMatt gets all credit for the look of the game. I am sure Matt would agree that Abercrombie’s early departure was an embarrassment.
DeleteThat was an excellent report and a great gorgeous looking game. Nice to see the attacker win too, even if they were filthy Rebs. ;)
ReplyDeleteThank you!
DeleteMatt’s layouts are gorgeous, indeed. It was good to see the attackers prevail but it really was a case of defenders failing than the attackers succeeding.
Splendid stuff and Matt goes one step further to losing us the colonies 🙂
ReplyDeleteHa! Yes, Matt gives the extra effort every game!
DeleteVery well played Jonathan, but Matt doesn't have a lot of luck, does he? I think if you guys had have been in charge of the actual forces it would have been over by 1776.
ReplyDeleteThanks! No, we did not wait long for Matt to throw a double one. I had at least one double one but mine was on activation and not a morale check. I recall my double one allowed Matt to get off an off-table volley into the unit of his choice.
DeleteYes, with Matt and I in command, the war would have been over by now.
That's excellent looking table with great terrains and minis of course :-)
ReplyDeleteThanks! All Matt’s handiwork.
DeleteOUCH!- great looking game- Washington would be proud! A very quick and decisive result for the Continentals!
ReplyDeleteYep. The rebels will not go hungry tonight!
DeleteA lovely little game Jonathan…
ReplyDeleteIt’s nice to see it from both sides of the table…
All the best. Aly
Very lovely little game! Matt's photos are much better since mine are taken as screenshots from afar.
DeleteA super looking game Jonathan!
ReplyDeleteChristopher
Indeed it is!
DeletePoor British just didn’t have the gumption to stand up to the gloriously brave continentals! 😀😀
ReplyDeleteThey did not!
DeleteInteresting. A very different scale of battle from Moys! I doin't know how you manage to juggle so many different games and periods. Good for brain flexibility no doubt! :-)
ReplyDeleteCheers,
David.
Very different scale from Moys, for sure.
DeleteFor this battle, these are all Matt's toys and he umpires the game. I simply show up, issue commands, roll dice, and talk trash. OK, I really don't talk trash...
Lovely AWI skirmish gaming, Jonathan. Inspiring as always.
ReplyDelete