Showing posts sorted by relevance for query shoemaker. Sort by date Show all posts

Monday, August 9, 2021

Shoemaker's Bridge: Game 1

Game 1 of the planned Shoemaker's Bridge battle trilogy kicked off on Tuesday in the weekly MNG remote game.  Being a UK based gaming group, I had some difficulty finding a volunteer for the American command.  Gladly, Richard stepped forward to take command of the Rebels.  With only three players in attendance, Richard would command the Rebels alone.  It is a lonely fight, for sure.  Ian and Will took charge of the British forces on the day of battle.

The battle began innocently enough with the Americans deployed to cover the approaches to Shoemaker's Bridge.  Heard's Brigade of militia, a regiment of Continental Rifles, and a section of guns were the only speed bump to the numerous, oncoming Redcoats.  Help would be on the way or so Heard hoped.

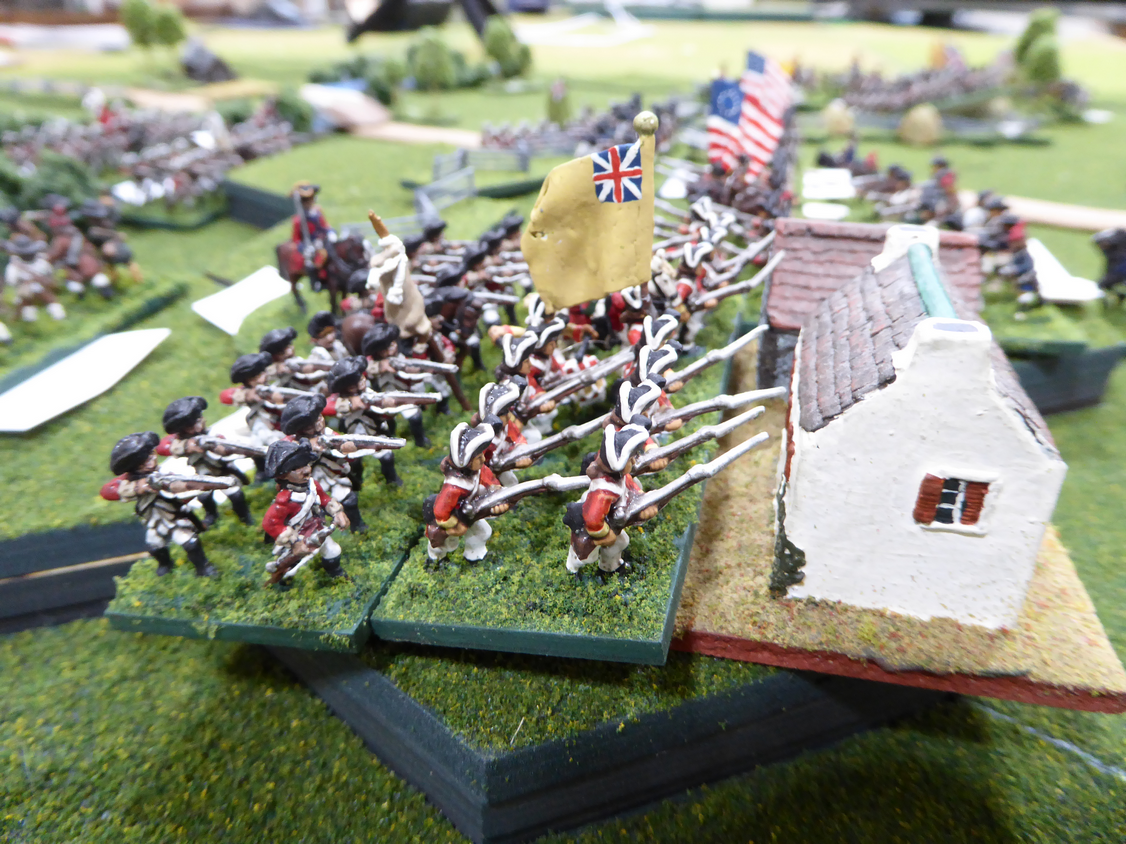
The white cotton ball denotes First Fire capability while the red disk identifies a unit as being on HOLD orders.  Units under HOLD orders may respond during the enemy's turn. 

The Rebels wait
and wait for what they expect to see advancing up the road.

The Rebels need not wait long.

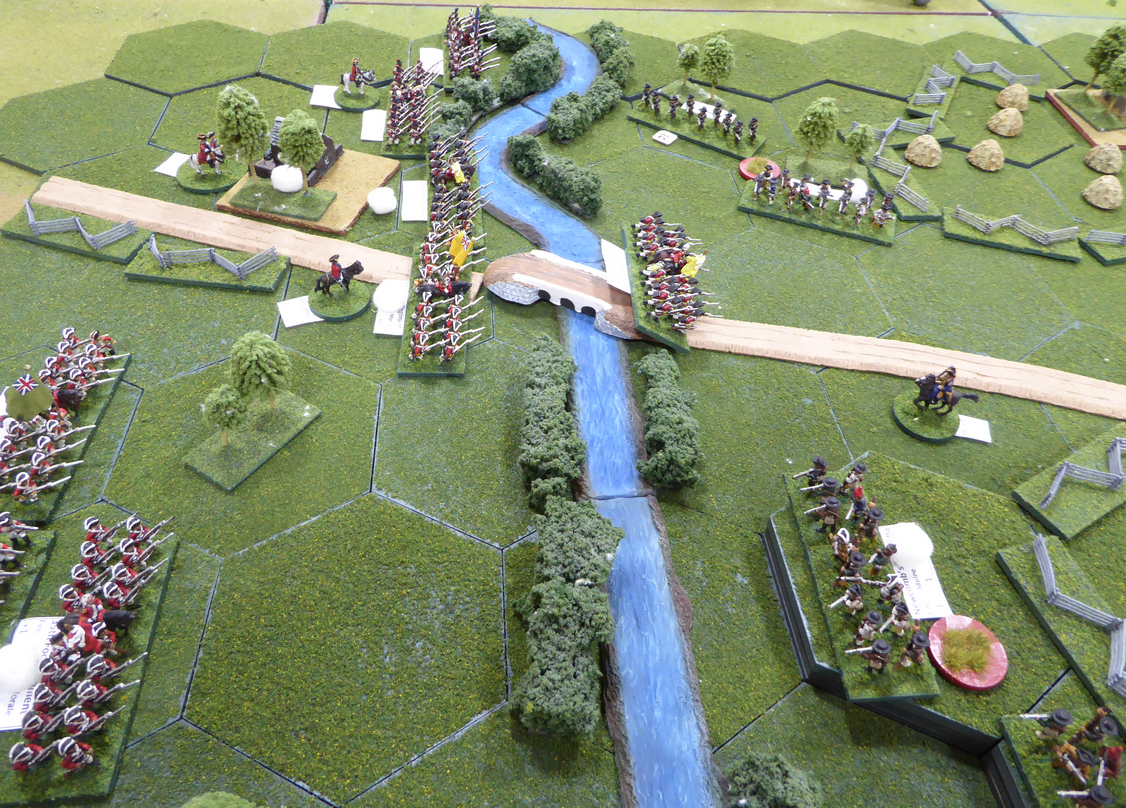
Matthews leading the two Guard battalions and Jones leading the 10th, 37th, and 38th foot, deploy into line and press on to the stream covering the bridge (Ian's commands).  Pigott and Smith deploy and advance toward Shoemaker's Farm (Will's command).

For the Americans, Nixon and Parson's Brigades begin streaming onto the field of battle from the direction of Brooklyn.

The British army approaches the stream
The British left splashes across the stream
 while the British right prepares to assault the heights. 
The British right wades through the stream
and readies for the attack.
On the left, lead elements of Jones' Brigade engage the rebels in the field as the rebels seek cover behind the fence.  On the right, militia defending Shoemaker's Farm are slowing the British advance upon the heights.  Casualties mount but the numbers and discipline of the British prevails.  The British are upon the heights!
Shoemaker's Hill is under assault!
Redcoats gain a foothold on the heights!
Success is short lived.  On the left, Jones is thrown back from the field while Smith sees a similar response from Shoemaker's Farm.  The British are tumbling back down the hill having suffered heavy casualties.
The British are thrown back!
After regrouping, the British Army launches assaults across its front a second time.  These extra efforts pay off.  The American right is driven back from the field with heavy casualties as the Guard is sent in to finish the task.  On the British right, heavy ranks of redcoats storm the farm.  Shoemaker's Farm falls!
British take Shoemaker's Farm
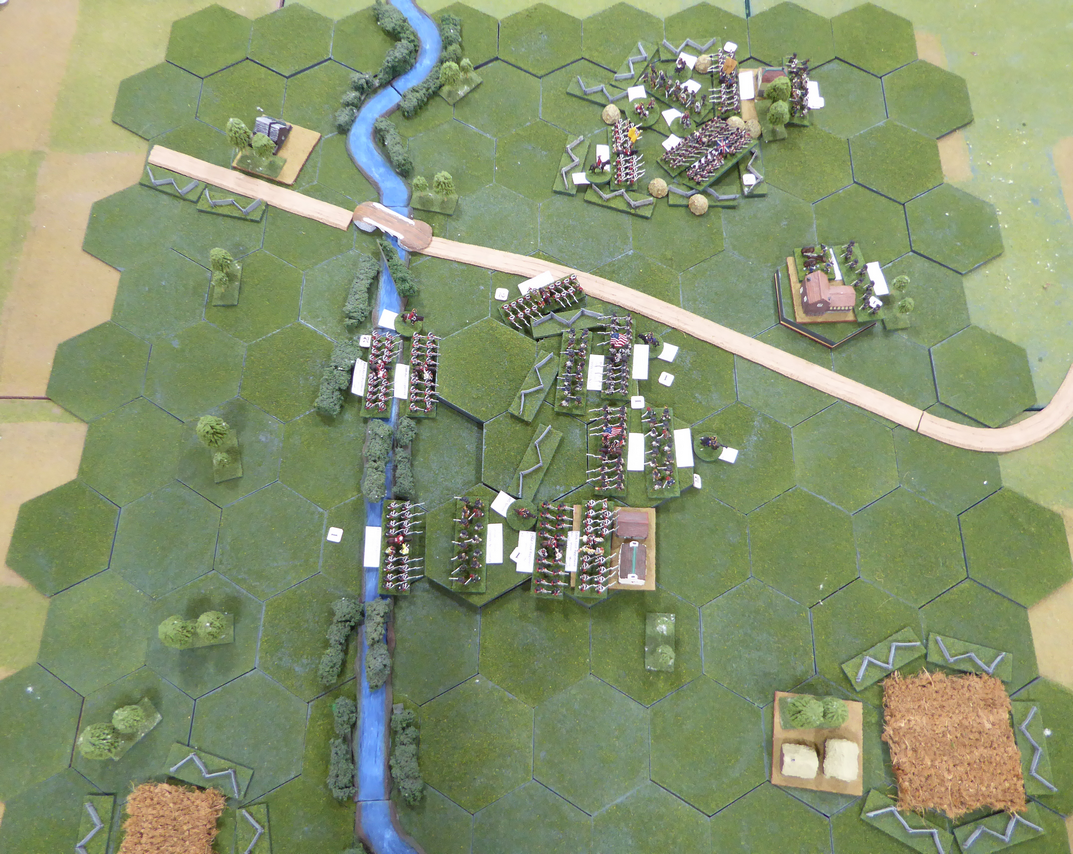
At this point following three hours of battle, we called the outcome inevitable as the American commander declares he will withdraw.  The ending position looked like this:
Positions at end of game
Clearly, with two separate British commands, the battle divided into almost two separate battles.  On the American right, the position was collapsing quickly once the Guard made its presence felt.  On the American left, the rebels still maintained a defensible position upon the heights.  For how long?  We will never know.

At the end of battle, the Butcher's Bill showed,
Butcher's Bill
Heavy casualties, for sure.  The British lost three regiments to the American's five regiments.  Many more regiments were only one hit away from destruction.  This was a costly battle but one the British may claim as a victory.

For Victory Points, The British tallied 19 points against 13. A tactical victory for the British.  Congratulations to Ian and Will!

Shoemaker's Bridge was a good introduction to Fields of Honor.  The players picked up the mechanisms quickly and play moved along at a respectable pace.  I could see tactics developing as the game progressed.  There was talk about a rematch.  

Friday, March 31, 2023

Back to the Revolution!

After a series of poundings on the fields of Ancient Sumeria, I cleared the table of terrain, figures, and haunting memories in order to change the scenery.  With a few encouragements, I opted for an AWI battle in 15mm.  Needing a short turn-around, I chose a scenario fought two years ago as part of the Battle of Long Island.

Today's battle would explore Cornwallis' flank march against the Americans in Brooklyn.  Fresh off his victory in Sumeria, my opponent would be Mark from Mud, Blood, and Steel blog.

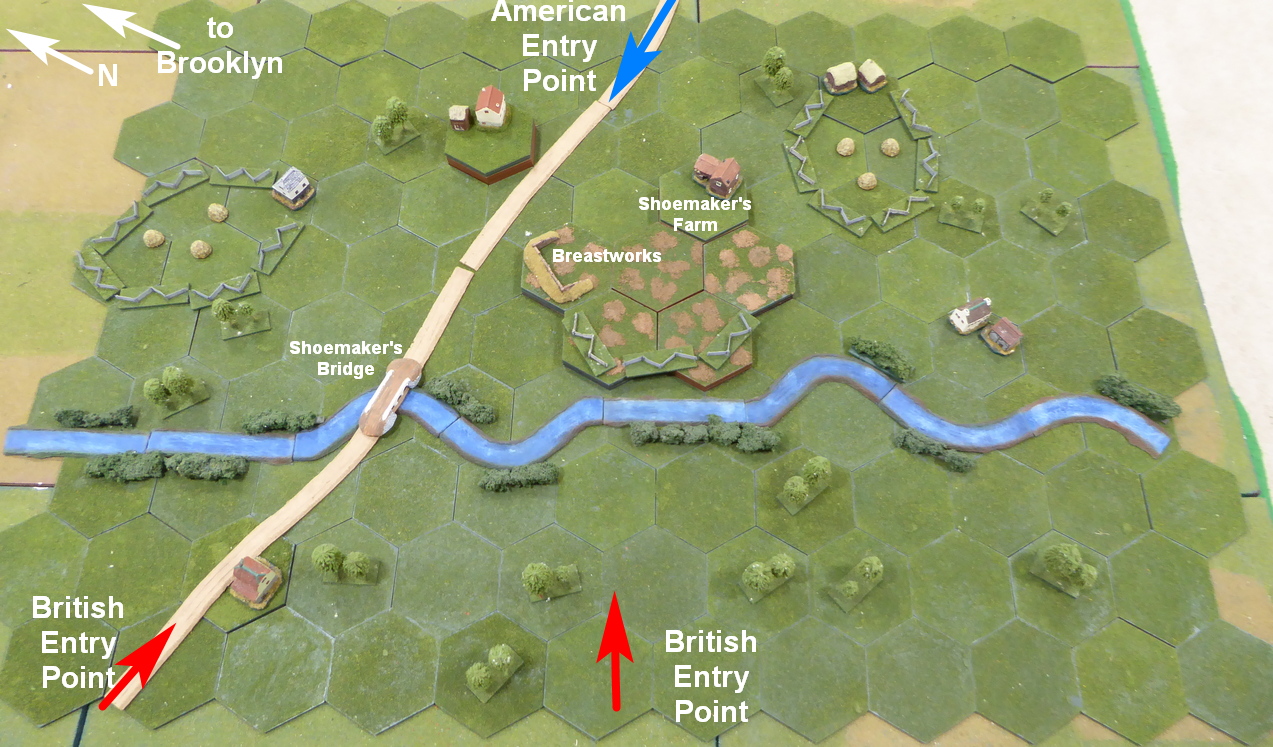
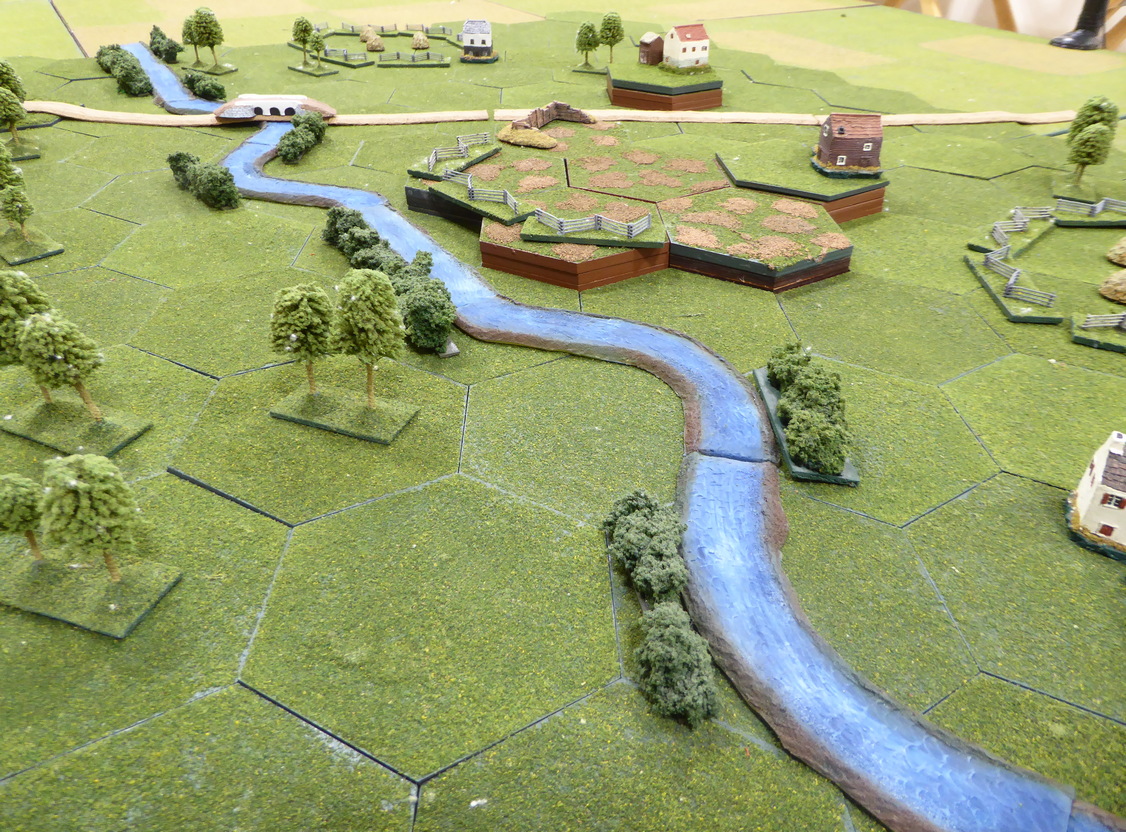
The map shows the route of the flanking march as the British approach Brooklyn from the east thereby bypassing the passes through the Brooklyn Heights. The road passes over the stream at Shoemaker’s Bridge. The passage over the bridge is controlled by the high ground around Shoemaker’s Farm and the farm on the knoll to the east along the road.
The Battlefield
For now, all is quiet
until lead elements of Rebel army
arrive to take up positions.
Mark chose to command the British.  I would command the Rebels.  The British Army under Lord Percy has four infantry brigades facing three Rebel infantry brigades.  The British hold both a quantitative and qualitative advantage over colonists but the Rebels are positioned on the defense.  The Rebels want to trade space for time without having their army destroyed in the process.

Let's see how the battle played-out.  

Brigadier General Heard's Brigade had taken up positions on the high ground at Shoemaker's Farm overlooking the bridge crucial to any flanking maneuver by Cornwallis.  For now, all that stood between Cornwallis and the road to Brooklyn were his four regiments of militia, a battalion of Continental Rifles, and a section of 6lbrs.  More American reinforcements were rumored to be on the way to stiffen this defense.

Heard need not wait long.  As Percy and his force appears on the battlefield on the west side of the stream, lead elements of BG Nixon's command are seen marching to Heard's aid.  Heard sends the Rifles up to the stream to harass the enemy's approach while one of his militia takes up a position along the stream below the heights.
The Red Thick Lines
While the Redcoats form magnificent and orderly lines along the stream bank, Nixon begins deploying his brigade for action fanning out to the north of the main road.  Rebel guns open up but fire is ineffective.  As the Redcoats approach the stream, BG Matthews' two regiments of Guards open up against the Rifles deployed along the east bank of the stream.  The Guardsmen's initial volleys tear through the riflemen.  They are drive back with heavy casualties.  The militia guarding the southern end of the bridge suffer a similar fate as the Rebels fall back from the stream.
Rebels are pushed back from the bridge.
Opposite Shoemaker's Hill, BG Smith's British brigade splashes across the stream.  The Redcoats let loose a volley in preparation for their assault.  The fire from the 63rd Foot rips through the militia directly to their front.  Casualties are heavy.  The 22nd's volley does not show the same effect.

Back near the bridge, both Matthews and Pigot lead their brigades across the stream as BG Jones comes up in support along the road.  Pigot, having just crossed the stream, finds himself in a hot place.  The 5th Foot takes heavy casualties from both gun and musket.  The 5th falls back through the 28th Foot. The 28th returns the favor with a volley put into the Continentals astride the road.
Matthews and Pigot cross the stream
 driving back the Rebels.
Back at Shoemaker's Hill, Smith attacks!  The 63rd with the 54th in support climbs up the slope to attack the militia.  Still reeling from the devastating volley received moments before, the militia break and run.  The 63rd gains the heights.  To its left, the second assault with the 22nd in the lead does not fare as well.  As the 22nd reaches the crest, it is sent tumbling back down the slope, shattered.  Lead elements of Parson's Brigade reaches Shoemaker's farm after its long march to the battlefield.  Figuring he would have time to deploy before under threat, Parson's leaves his Continentals in column.
Smith attacks!
63rd gains the heights!
Battle overview
Seeing Smith's attack against the Rebels stalling, Pigot orders his brigade to attack the guns on the heights.  With the 28th Foot leading the way, the Redcoats scale the heights and pour over the breastworks.  The Rebels guns are overwhelmed and destroyed.  If Pigot can secure this foothold before the Rebels counterattack, part of Heard's Brigade will be trapped. 
Pigot attacks the guns!
The guns are destroyed.
Militia reoccupies the breastworks
as Jones brings his brigade across the stream.
Sensing the danger to his rear, Heard falls back to occupy the breastworks.  Not a moment too soon as Smith's Brigade attacks the Continentals at Shoemaker's Farm in force.  Having suffered mightily from musketry while still in column, the Continentals form line only to be driven out of the farm.  Before the British can occupy this real estate, Parsons brings up militia to seize the farm.

In heavy fighting at the farm, the 54th Foot is scattered while the 63rd takes heavy casualties.  To their left, Pigot's 28th pushes the militia out of the breastworks as it retires down the hill.
Firefight at Shoemaker's Farm and breastworks. 
Casualties mount!
Back on the British left, Jones advances upon the enemy.  The Rebel militia look shaky as the British lines bear down upon them.  Volleys are exchanged.  The Redcoats give better than they get.  Within minutes, this entire flank of the Rebel army collapses as men stream to the rear.  For them, the battle is done.  
Jones advances upon the enemy right.
Back at Shoemaker's Farm, having witnessed the destruction of the 54th Foot in attacks against the farmhouse, the 43rd steps forward to take its place.  With the militia already wavering, one last shove is all that is needed to send the Rebels running toward the rear.  Shoemaker's Farm falls to the British! 
43rd comes up from reserve 
to lead the attack.
Shoemaker's Farm falls!
With the collapse of the Rebel right and now the loss of Shoemaker's Farm, the severely mauled Rebel Army begins its withdrawal back toward the safety of the Brooklyn defenses.  Will these Rebel remnants find solace when they return to Brooklyn or will they find themselves trapped and prisoners or war?

It may not matter.  For them, their battle is over.

Well!  A fine and convincing victory for Mark and his British army.  While the Rebels suffered greatly, the Redcoats did not pass through the fire unscorched.  Three regiments were dead on the field and another three were only just clinging to life.

Great fun to see the AWI troops back into battle and double fun to face Mark in another exciting contest.

Super job, Mark!  Well played! 

Expect to see this battle in a multiplayer, remote game next week.  With any luck, that is.

Tuesday, July 27, 2021

Shoemaker's Bridge, AUG 1776

My planned AWI Battle of Shoemaker's Bridge for today's remote game was bumped in favor of a review test of the recently released rules, ¡Arriba España! containing the Portable Spanish Civil War Wargame by Bob Cordery.  My game will be back on the slate for next week's remote session.

In anticipation of my return to the hosting role, I offer up the scenario specifics for the Battle of Shoemaker's Bridge.  This action looks at the fighting on the American left as one of the British columns approaches in an effort to outflank the Americans deployed in front of Brooklyn.

Battle of Long Island: Action at Shoemaker’s Bridge, August 27, 1776
The Map:
The map shows the route of the flanking march as the British approach Brooklyn from the east thereby bypassing the passes through the Brooklyn Heights. The road passes over the stream at Shoemaker’s Bridge. The passage over the bridge is controlled by the high ground around Shoemaker’s Farm and the farm on the knoll to the east along the road.
The Battlefield
Background:
The American Army, under the command of Greene, has fortified Brooklyn and is prepared for the threat of assault from the converging British under Howe. The plan is to remain behind the protection of the fortifications and stand their ground. After becoming ill, Greene is replaced by Sullivan. Confident of the defendability of the passes through the Guan Heights, Sullivan orders many of his troops to redeploy to hold the passes. With Grant attacking at Red Lion Inn on the American right and von Heister attacking the passes at Flatbush Pass, the Americans will be pinned in their forward positions. Cornwallis will conduct a flanking march on the American left and attack to turn the American left. Once defeated, Brooklyn can be captured.

While Grant and von Heister launch their attacks, Cornwallis’ main body is stopped by American forces deployed on the high ground beyond the stream at Shoemaker’s Bridge. The British main body is commanded by LtG Lord Percy. His objective is to brush aside these annoying Rebels in order to continue his flank march on the American positions situated upon the Guan Heights in front of Brooklyn.

Rules: Fields of Honor AWI amended for using miniatures on a hex grid with clarifications.
Figures: 15mm Frontier Miniatures and Jeff Valent Miniatures.
Battlefield: 4 inch hexes on a roughly 4’ x 4’ grid.
Reinforcements:
  • All British units enter on Turn 1. British first player.
  • Nixon’s Brigade enters on Turn 1 along road from east side of table.
  • Parson’s Brigade enters on Turn 2 along road from east side of table.
  • Heard, artillery and rifles set up on table on the east side of stream.
Order of Battle

American forces present

American forces present

British forces present

British forces present

OBJECTIVES:

American:
Strategic Victory: No British units present on east side of stream.

British:
Strategic Victory: No American units remain on table and at least three British units exited east side of table.

Otherwise:
+5 VPs for controlling Shoemaker’s Bridge hex.
+1 VPs for each farm hex controlled.
+1 VP for controlling each hex of Shoemaker’s Farm Hill (6 hexes).
+2 VP for each enemy unit destroyed.
+2 VP for each British unit exiting east table edge along road.
+1 VP for each American unit exiting east table edge along road.

Total points for each. Larger point total wins a tactical victory.

In addition to the remote game next Tuesday, plans are brewing to host a two-player remote encounter in order to play the scenario more than once.

Saturday, August 28, 2021

Defense of Shoemaker's Bridge

The action at Shoemaker's Bridge is up for one last replay.  This time the Monday Night UK Group (which plays on Tuesday!) is set for an encore game.  Rather than umpiring three players in the first game (see: Shoemaker's Bridge: Game 1), I had seven players participate in this game.  Quite a fistful of players for a remote game.  No worries since there were seven brigades on the OB.  Each player could command a meaningful and independent brigade.  Still, managing and coordinating seven players in a remote game is a challenge.

How did the battle unfold?  Please continue reading to find out!

General Heard deploys his brigade and the independent units of Rifles and artillery as seen above.  The artillery is deployed in the rear covering the bridge.  The rifles and one militia regiment set up on the American right, likewise, covering the bridge while the two remaining militia regiments position themselves on and around Shoemaker's Hill.  All are given Hold orders enabling them to react to British movements on Turn 1.  
React the Americans do.  As the British begin reaching the battlefield on their approach to the bridge,  Heard snaps into action.  The Rifles quickly cross the stream and let loose a volley into the arriving Redcoats.  Militia situated at the bottom of the hill along the stream climb back onto the heights before contact with the enemy. 
First contact on the British left near the farmhouse
The riflemen are driven off with casualties but their bold move forces the Redcoats to bunch up around the bridge. This concentration of force makes an easy target for both militia and guns. One of Jones' regiments scatters in these opening salvos.  Brushing aside these Rebels may not be so easy as expected.
Or will it?  The Redcoats wade across the stream all along the front with one regiment scaling the heights to contest Shoemaker's Farm almost immediately.  Lord Percy, Matthews, and the two guard regiments swing wide around the Rebel left in an attempt to pressure Shoemaker's Farm from two directions.  American reinforcements can be seen hurrying toward the front. Will they reach the front in time?
The answer to that question is unknown.  The Redcoats, having crossed the stream in strength, are driving the Rebels back on the American right.  Pigott's men advance and fight into the fields deep into the American right.  Percy and Matthews drive deep on the Rebel left.  Smith's Brigade is preparing to assault the heights.  This rapid advance is beginning to show shades of battles' past.

Pigott and Jones are thrown back
But the American defense shows signs of stiffening as reinforcements spin off to the left and right to contest these British probes. On the Rebel right, Jones and Pigott's commands are driven back from the fields as Heard and elements of Nixon's Brigade pushes forward.  The British suffer heavy casualties as they are thrown out of the field.  On the American left, skirmishes erupt as Parsons’ Brigade interrupts Percy and Matthew's thrust.
In the center, Smith prepares to assault the heights in force having gained a foothold on the lower slopes near the bridge.  The American defense appears to be stiffening.
Smith's assault goes in as his command climbs the heights.  The Rebels are driven back swiftly but casualties are high.  Matthews throws in one of the Guard regiments in the assault upon Shoemaker's Farm.  For now, the militia in the farm hold but for how long?
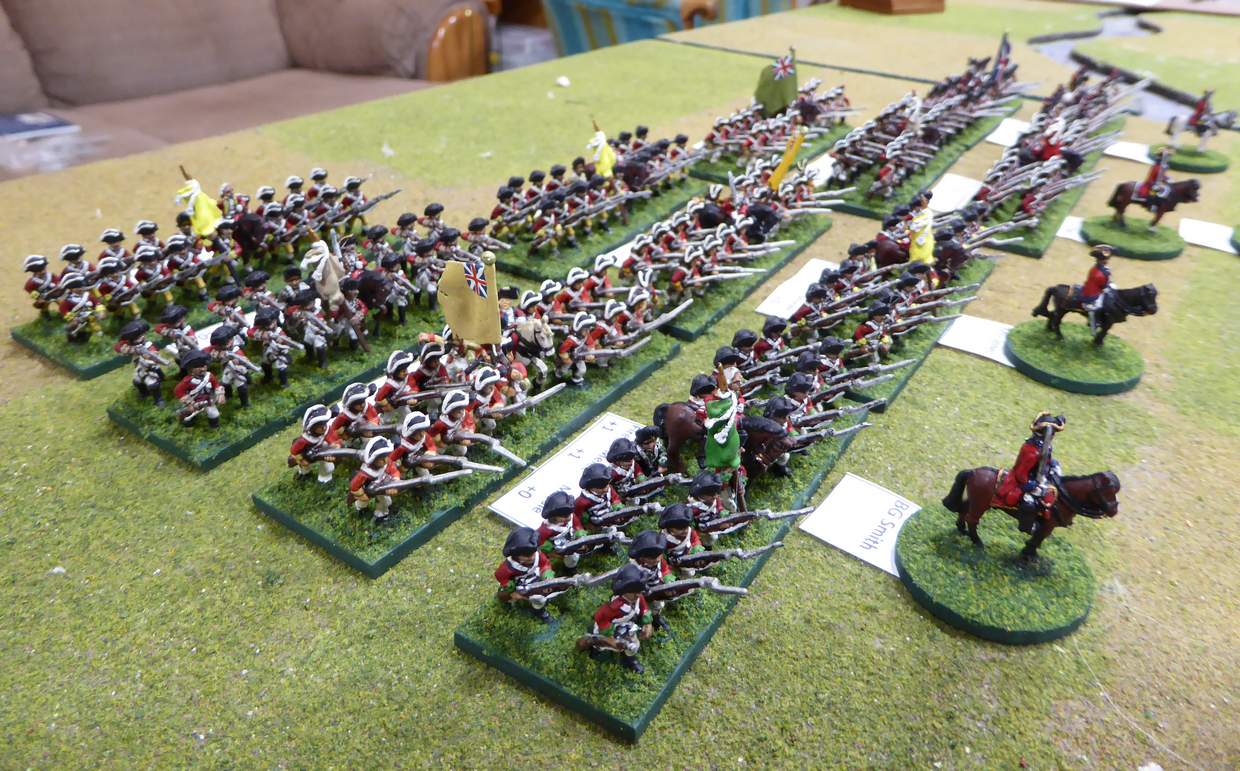
Jones goes in again on the left
The Rebels counterattack!  On the left, Jones' Brigade suffers greatly as his command takes withering casualties as the Rebels press forward.  In the center, Nixon goes on the attack in hopes of stopping the British advance.  Parsons, on the Rebel left, forms up to contest Percy's planned encirclement of the heights.
Smith storms Shoemaker's Farm and the militia are ejected.  Both suffer great loss.  Lead elements of Smith's command descend the heights flushed with success.  Can the Americans hold?  
While Parsons holds the Guards at bay on the left and Heard dispatches the remaining Redcoats on the American right, Nixon turns the tide in the fight for the heights.  
With the situation at the bridge under control, Nixon can turn his attention elsewhere.  In their possibly over-extended positions on the hill, the Redcoats are flanked by elements of Nixon's Brigade.
Softened by artillery and then assaulted from the rear, the Redcoats waver and then break.  In a matter of minutes, Smith's command is in tatters.  Smith must now figure a way out of this vise.  With Parsons pinning the Guard, no relief is in reach.  While Smith still holds the farm, his remaining brigade is either dead on the field or trapped.
The Redcoats are pinned!
With the British left destroyed and only remnants of Smith's Brigade clinging to the Shoemaker Farm, Lord Percy orders the Guard to retire from the field.  The Rebels have held the field and prevented the encirclement of their army outside of Brooklyn.  Hurrah!

Well!  Finally, the Americans taste victory in the fifth replay of this battle.  This was a hard-fought scrap that the Rebels could have lost once again.  A well-played game by the Rebel commanders.  This American victory with provide another interesting piece of evidence to a battle retrospective.

How about the Butcher's Bill and Victory Point totals?
Butcher's Bill
Battle Losses: British lost 8 regiments of infantry and three generals (!) to the American's loss of 7 regiments of infantry and one general.
Victory Points: British 20. Americans 34.

I declare this a decisive tactical American victory.  The Rebels have blunted the planned British flanking maneuver upon Brooklyn.

Ian, Graham, and Phil, you demonstrated how to win an American victory in this scenario and save Fort Brooklyn.  Decisively too!  Well done!  

For the British players of Will, Steve, Chris, and Richard, you fought valiantly and I thought I would witness another in a long string of British victories.  Alas, the Rebels live to fight on.

For a player's perspective of the battle, see Graham's account at,

Great fun in umpiring this very large, player count remote game.  Thanks to all!