or Hood's attack at Gettysburg.
Moving on from the long run of battles at First Manassas, focus turns toward the Gettysburg battle. Like the Manassas battlefields, I visited Gettysburg in May spending three days wandering around the battlefield. I came away from Gettysburg with a better understanding of the topography and its role in the direction of the battle.
I expect to examine several of the various actions within the three-day battle. Hood's attack on the Round Tops, Rose's Woods, Devil's Den, and Houck's Ridge will be the first.
Many wargamers, with an interest in the ACW battles, know the details of this part of the battle well. From the fight for the Wheatfield to Devil's Den to the 20th Maine's stand on Little Round Top, many of these landmarks are well-known and well documented.
 |
| Battlefield and army dispositions. |
For this game, many of the fine campaigners from earlier battles returned to the table. The players were:
CSA:
Each team received a Battle Briefing before the game with which to plan their opening strategy. Did these plans survive contact? Let's see.
When battle opens, Hood's Division is already on the move. Finding Big Round Top occupied only by skirmishers, Law's Brigade along with elements of Robertson's brigade clear the heights and swing around to the north to take Little Round Top. As these brigades advance upon Little Round Top, the Confederates are surprised to see that it was now occupied by Vincent's Brigade. In the valley below, Benning and Anderson's Brigades cross Rose's Run and enter the woods. It is not long before they run into elements of Birney's Division positioned along Houck's Ridge in a line stretching to Stony Hill.
 |
The Confederates discover Little Round Top
occupied by enemy troops. |
 |
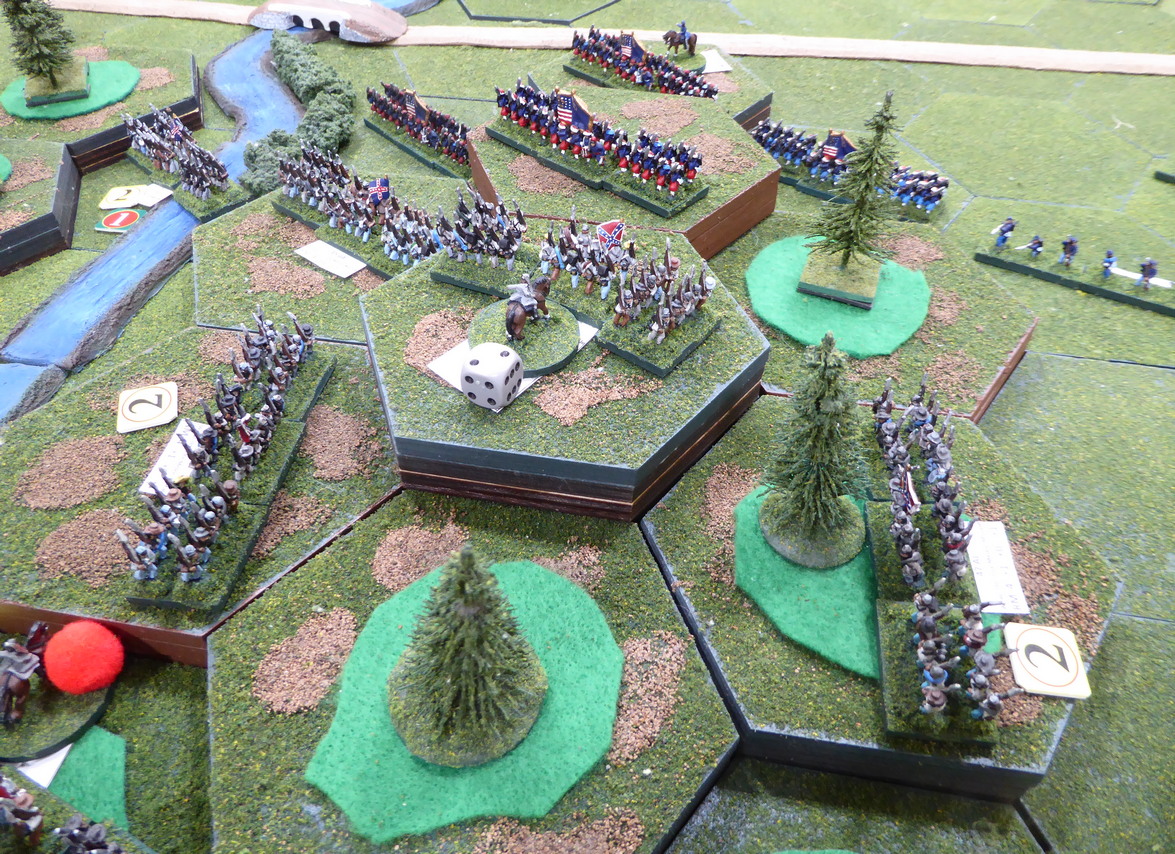
De Trobriand anchors the right at Stony Hill (foreground)
and Ward occupies Houck's Ridge (background). |
Robertson begins the attack against Little Round Top with the 4th and 5th Texas regiments advancing on the Federal positions. Rebel fire drives back the 83PA with heavy casualties. As Vincent forms up his line, the 4TX suffers two volleys. The 4th is crippled before it can clamber up the heights. In the Valley of Death below, Law's attacks are met with fierce resistance. The 44AL is repulsed from its attack upon the sharpshooters stationed in Devil's Den. No progress is made against the 4ME straddling Plum Run linking Houck's Ridge to Little Round Top.  |
| Robertson attacks Vincent on Little Round Top. |
 |
| Federal lines stand firm. |
Having withstood the first Confederate attack against Devil's Den, the US Sharpshooters fall back into the cover of the woods. 124NY comes down from Houck's Ridge to occupy Devil's Den. In fact, Birney has both Ward and de Trobriand on the move. Ward descends Houck's Ridge to contest the Rebel advance into the woods while de Trobriand forms a line between Stony Hill and Houck's Ridge running through the Wheatfield. |
Rebels are repulsed at Devil's Den as
Ward stiffens the Federal defense. |
 |
| Heavy fighting around Devil's Den. |
Fighting is hard along Rose's Run as the two battle lines form up and square off. Federal artillery on Stony Hill plasters the 9GA. Hood counters by bringing up Rebel guns. The Georgians fall back into Rose Farm to escape the heat. Casualties rise quickly as the two lines battle toe-to-toe in the woods and at Devil's Den. The Confederates stack up as they struggle to get across the wooded and marshy stream. Benning brings up more of his Georgians to contest Devil's Den. The Confederates storm Devil's Den and eject the Federals out of their defenses. The New Yorkers are destroyed where they stand. De Trobriand's line thins as the more numerous Rebel muskets begin to tell.
 |
Confederate battle line stretches from
Rose Farm to Big Round Top (in the distance). |
 |
| Rebels are stacking up as progress slows. |
 |
| Artillery at work. |
 |
| Benning prepares to attack! |
 |
| Devil's Den captured! |
 |
Slow going through the woods
but a split is forming between Ward and de Trobriand. |
Returning to the fighting at Little Round Top, Robertson attacks with his Texans but is driven back with murderous casualties at the hands of the 20ME and the 44NY. Robertson goes down! The 20ME continues pouring a deadly fire into the 4AL. The Mainers remain unflinching as volleys are traded. The Alabamans waver.
 |
| Robertson falls! |
Fixing bayonets, the 20ME charges down the hill and into the Alabamans. The 4AL breaks and runs! General Law falls! Thus far, the Rebel attack on Little Round Top has cost two generals down on the field. Casualties are high and the Rebel attack is unraveling. Receiving word of the setbacks, Hood leads Robertson's two remaining regiments toward the heights. 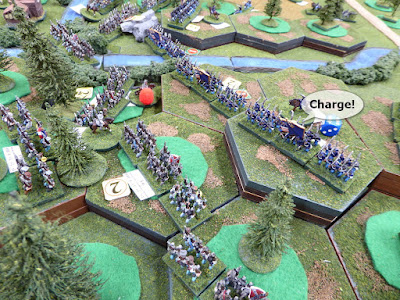 |
| The 20 Maine charges into the 4 Alabama! |
 |
| The Rebel attack unravels on Little Round Top. |
 |
| Hood brings up reinforcements. |
While Vincent and the 20ME successfully hold off the attacks on Little Round Top, in the valley below, the tables are turning against Birney and his Federal troops. Vincent is not out of harms' way, either. His brigade is slowly being overwhelmed as Rebels advance up Plum Run threatening his position.
Having pulled regiments off of Houck's Ridge to reinforce de Trobriand, Ward finds his brigade being cut to pieces by the overwhelming numbers of Confederates. In what seems like only minutes, Ward's Brigade is broken, Houck's Ridge is devoid of Federal troops, and the Rebels press on. De Trobriand's Brigade disintegrates soon thereafter. The Federal right has been shattered. In the distance brightly colored reinforcements are seen along the Millerstown Road. Weed's Brigade has arrived!
 |
| The Federal right is breaking! |
 |
| Only Federal guns remain on Stony Hill. |
 |
| Vincent's position is turned but help is on the way! |
 |
| Weed's Zouave Brigade arrives! |
After holding out on Little Round Top for a couple of hours, Vincent and the last vestige of his brigade (20ME) collapse. The barren ground of Little Round Top is open to the enemy.
As the Rebels encircle Little Round Top, Weed brings his brigade up for the fight. Benning leads his Georgians up to the top. Little Round Top is in the hands of the Rebels! Not for long, though. Weed counterattacks and sends Benning and his boys tumbling down. Benning is killed.
 |
| Rebels find the heights unoccupied. |
 |
| Benning claims Little Round Top. |
 |
| Weed retakes the heights and challenges all comers. |
With attack after attack going in against the Federals on the heights, Weed and his Zouaves cannot be dislodged. The fighting ends with the Federals still controlling the heights.  |
| Repeated attacks cannot throw off the Zouaves. |
WHAT A GAME! What a start to the series!
Mark and Tony scored a Federal victory on the very last turn of the game. This action was closely fought with heavy casualties to both combatants. Sickles really was hammered and hammered hard. The outcome really did go down to the wire and hinged (literally) upon the last die rolls.
Congratulations to the Federal commanders. My condolences to the Rebels generals.
The battle showed much ebb and flow as I suspect generals thought they were winning one minute and losing the next.
What could be better than seeing both history and the cinema come alive on the gaming table with the 20th Maine's determined stand and counterattack against the Alabamans on Little Round Top?
Great fun and thanks to Mark, Tony, Chris, and David for indulging me once again at the gaming table. You make it great fun as I watch the battle unfold.
Until next time!