Saturday, November 12, 2022

Swiss Regiment Salis and More!

Work continues on the SYW project in 18mm.  Actually, work at the painting desk sees a number of different projects getting a run-out.

First up is a 23-figure regiment of Swiss Regiment Salis to add to my growing French Army.  Foot figures are Blue Moon led by a Eureka mounted colonel.  Flags are by David at Not by Appointment

Looking over at the queue to the photo booth, Salis is the last in a long line of French troops for this project (for now, anyway).  Next up for the SYW project is a turn to fielding Spanish infantry for the WAS but I am getting ahead of myself.

Two more odds and ends moved across the painting desk of late.  Both entries are for the 30mm ECW collection.

Mustering out is another command stand using The Assault Group figures.  This command stand features Wallenstein from the 30YW range but he will be pressed into service for ECW battles wherever needed.

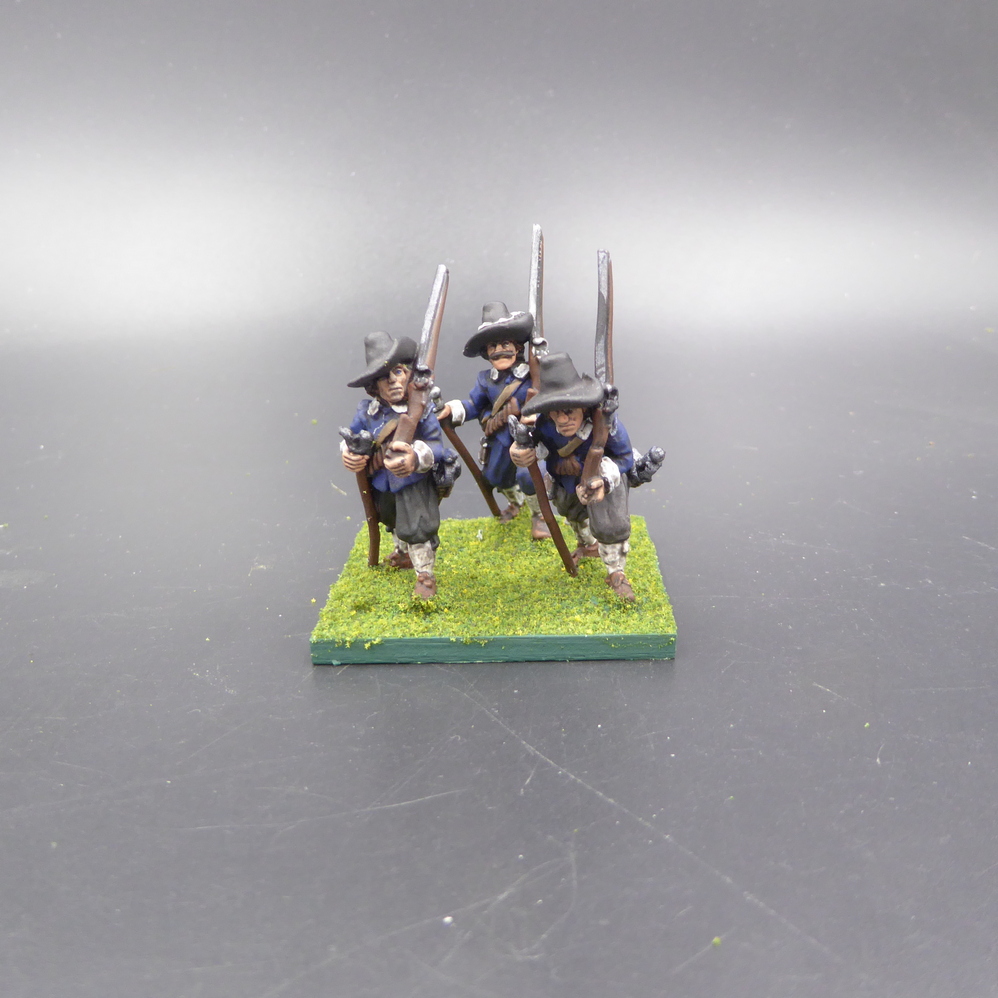
Next, are three stragglers from the recently completed commanded shot unit.  When I originally painted the commanded shot, 26 figures were painted.  When I put the figures into the painting queue, I was almost certain there were 27 figures.  27 figures went in and only 26 figures came out.  Since the figures are based in threes, I only fielded 8 stands of three.  The other two figures were set aside.  Fortunately, during a quick clean-up, the missing figure was found underneath a box of figures on the floor.  He was quickly primered, painted, and now joins his comrades.

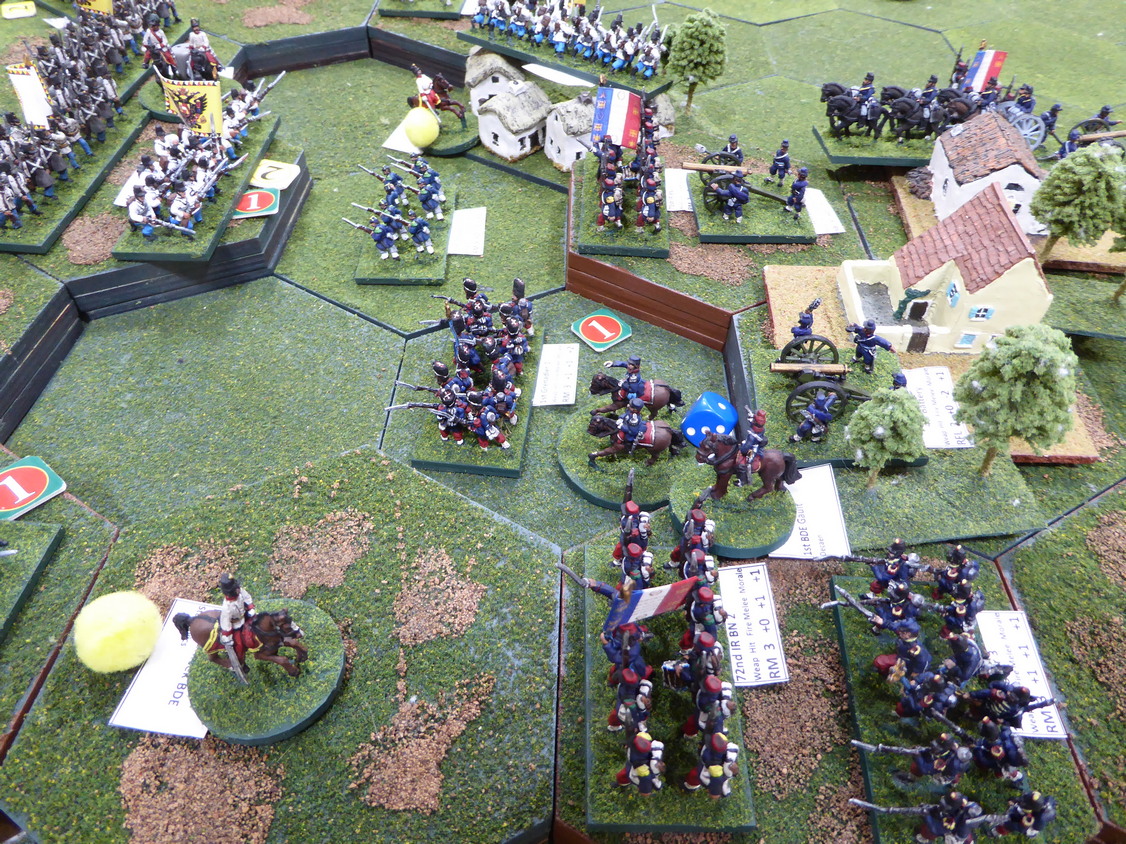
Finally, Matt and I return to our long-running AWI with a continuation of the campaign on Sunday.

Matt never holds back on his table layouts.  Sunday's action at Bound Brook is no exception.  Just look at the marvelous layout I get to fight over tomorrow.

Stunning stuff!

Battle of Bound Brook, 1777
photo courtesy wargamesinthedungeon

Wednesday, November 9, 2022

Battle of Telamon 225 BCE

After participating in two Reconquista battles at Ucles, David and Steve were willing to give Basic Impetvs on a grid another run-out in another period.  Next up would be an ancients battle exploring the Battle of Telamon in 225 BCE.  

The historical battled pitted a Gallic Army sandwiched between two Roman Armies as the Gauls were forced to fight the battle on two fronts.  In this contest, the situation is changed up such that the Gauls turn on their pursuers to the south and engage them in battle before the northern Roman Army can intervene.  This should offer up a much more even contest.  Or will it?

Now, Matt and I faced off on Sunday to fight this same battle.  The result was anything but close.  I leave that account for another time.

Let's see how this battle between Steve and David played out.

Steve won the dice roll and chose to command the Romans.  David took up the challenge of commanding the Gauls.

Initial deployments
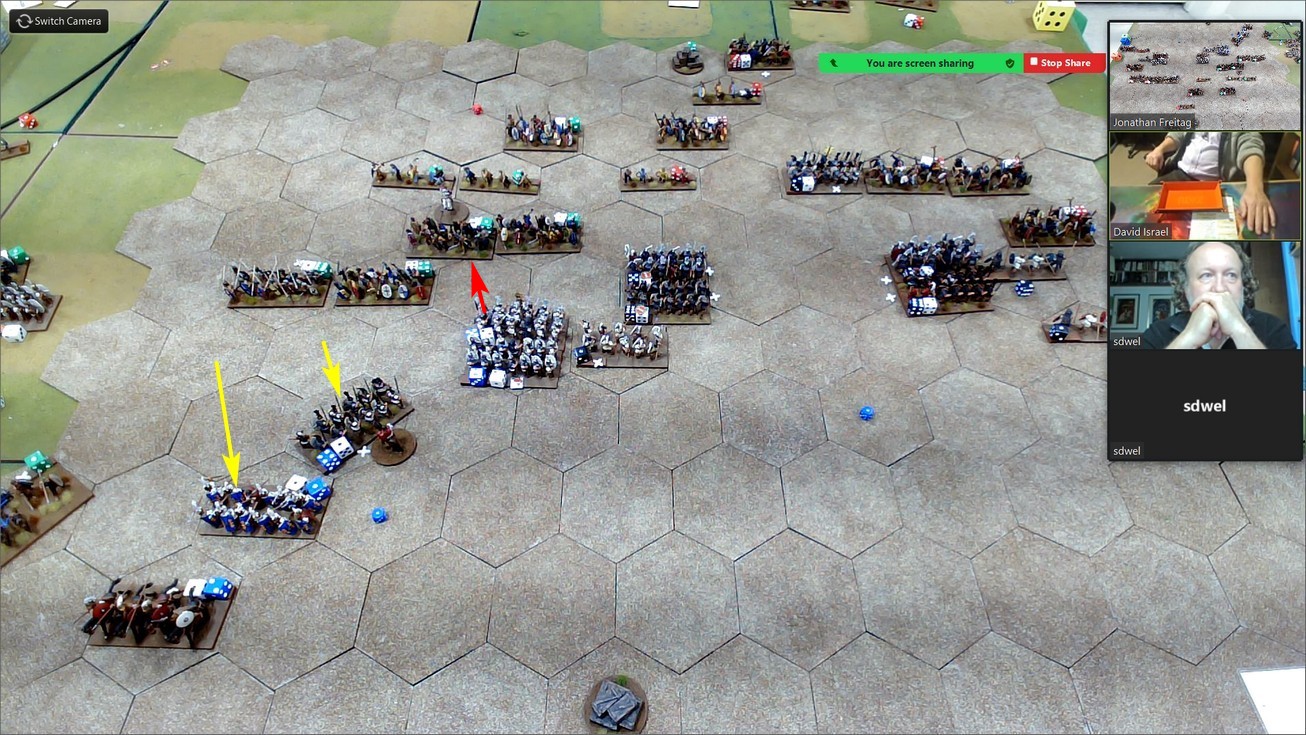
As the battle gets underway, both armies advance.  The Roman right jumps off to a quick start while the Gallic line advances slowly maintaining its order and formation.  Both Gallic chariots, positioned one on each flank move quickly to threaten the Roman flanks.

The battle begins.
After some preliminary skirmishing, with the Gauls coming out on top, the Gauls attack.  In the center, two warbands smash into a unit of light infantry.  On the Gallic left, the chariot charges into the Roman right wing cavalry.  As the clash of shields intensifies in the center fight, the Roman cavalry are pushed back.  Despite holding a great advantage, the chariot fails to pursue.
The Gauls charge in!
View of the Gallic left as it marches into battle.
Having beaten the Roman cavalry,
 the Gallic chariot refuses to pursue.
As the melee continues in the center, the warbands finally overpower the Roman light infantry.  The light infantry are scattered while one warband is destroyed. Despite suffering in the clash, the remaining warband pursues.  Its pursuit carries it into contact with a Legion.  The fight is brief as the warband disintegrates under the power of the legion.  
Warband pursuit stopped by a Roman Legion.
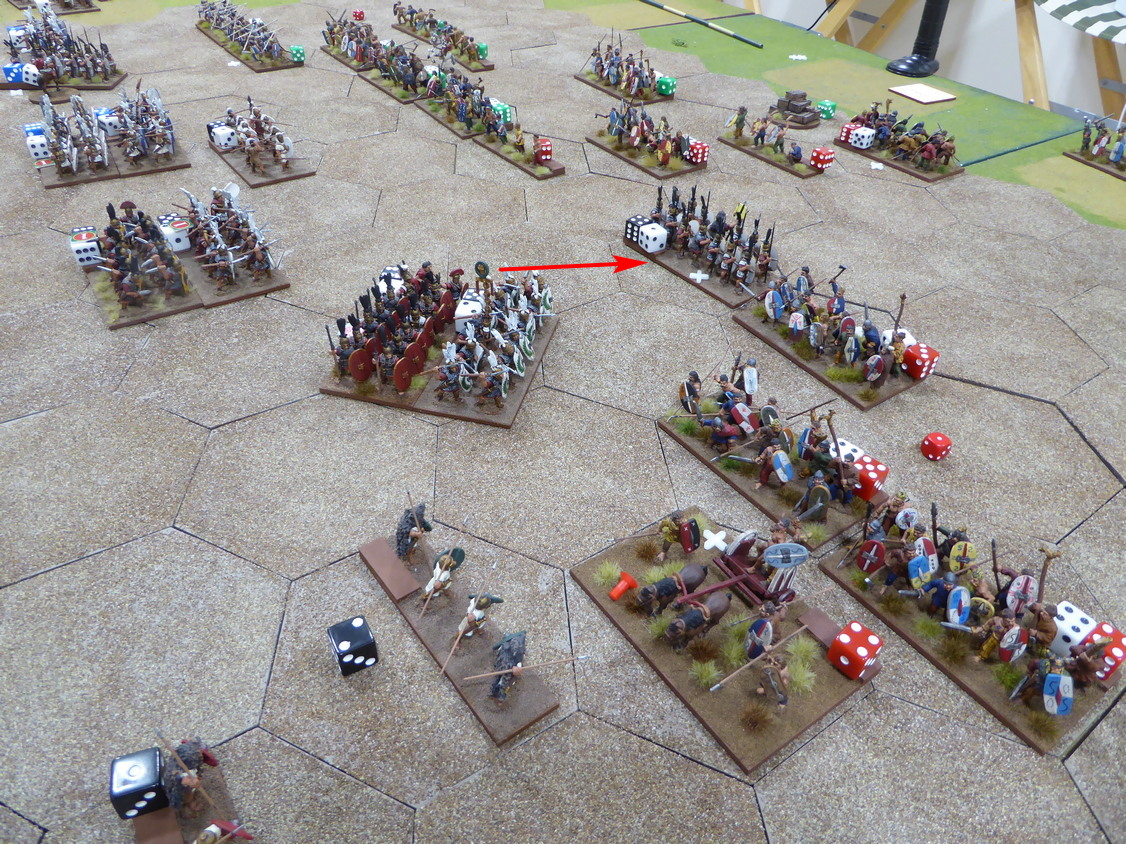
Having seen off the first serious Gallic attacks, the Romans respond.  The leftmost legion advances into contact with a warband positioned to protect the left flank of the chariot.  With Hastati in the lead and Principes in the rear, the Romans strike.  To the right, Triarii come up in support.  The Gallic chariot bypasses the Roman foot and heads into clash with the Roman cavalry in the rear.  In the center, a second Triarii passes through the gap between two legions to attack the Gallic center.
The leftmost legion wheels before the attack. 
The Romans strike back.
The battle on the Roman left is heating up.  While the chariot drives into the Roman rear to challenge the cavalry, the combined effort of the Legion makes short work of the warband.  It is scattered.  
Gallic battleline looks solid.
Warband scattered.
In response, two warbands charge into the legions.  The legion is cut down to half strength in the clash but both warbands are repulsed.  The Roman infantry line holds.
The legion is wearing down but holding on.
While the infantry melee continues, the chariot overpowers the first Roman cavalry unit encountered.  In pursuit, the chariot drives off the second Roman cavalry.  With Roman cavalry in flight, one more pursuit could destroy the remaining opposition.  The path to the Roman rear and its baggage will be unprotected.  Unfortunately, the chariot fails to pursue. 
Heavy fighting on the Roman left.
The infantry battle on the Roman left is not over.  Another warband charges from the Gallic line into the Triarii flank in an attempt to break the Roman left.  
Warband attacks from the flank!
A gap is torn into the Gallic center!
Steve is pleased to see the Gallic line in flight.
As the warband goes in against the Roman left, the Roman Triarii in the center hits the Gallic line.  The first warband encountered is cutdown where it stands.  As the survivors break, they carry away two warbands from the Gallic second line.  The Gallic center is in flight as the victorious Triarii pursue.
Triarii cut a swath through the Gallic line.
Back on the Roman left, the flank attack against the Triarii fails.  The warband is repulsed with heavy casualties.  Wanting to keep pressure on the Roman left, two more warbands hit the wavering legion.
While one warband retreats, two more attack.
The legion retreats!  This victory is short-lived, however.  The second legion on the Roman left wades into the Gauls to its front.  The Gauls are scattered and the battle is won.
One legion retreats!
Another legion attacks!
One more Gaul destroyed and victory!
Victory to the Romans!

While Steve's Romans came away with the victory, the battle was tense and action-packed.  The decision was for grabs until the very end.  Both sides suffered heavy casualties.  As the Army Breakpoint clock ticked down, the outcome pivoted on which army would suffer the next loss.

With the Roman left in disarray and in retreat, an activation by the Gallic chariot could easily spell defeat for the Roman Army.  Within the chariot's sight was a retreating Roman cavalry unit which could easily be rundown followed by the sacking of the Roman baggage.  Alas, it was not to be.  Before the Gauls could capitalize on this opportunity, the Gallic army broke.

Great game and well-played by both David and Steve.  Intrigued by the battle and possibilities missed, both players requested a rematch of the battle.  Next time, however, David and Steve will swap sides with David taking command of the Romans and Steve leading the Gauls.

I look forward to the rematch!

Monday, November 7, 2022

GWS2022 A Look At Group Size

One question from the 2022 Great Wargaming Survey asked about group size.  Specifically, the question asked what size of group one gamed with in the past year.

Now, being one susceptible to reading into a question more than intended, I had to stop and think about this question.  Since I actively participate in more than one group including many one-on-one contests, this question raised more questions.  Which group's headcount do I use as a response?  Do gamers typically game with multiple groups throughout the year or do they stick to one core group?  Do I take the headcount for one group or an average of several groups?  Do I total all of the distinct gamers from all of my 2022 games?  Perhaps no one else faced this conundrum in answering the question.  Next year, the question may need some clarification.  Until then, let us forge ahead with a look at the survey responses relating to group size and its association to some of the other survey attributes. 

First, the table below shows the tabulation of counts by Group Size.  Almost 13% of respondents identify as primarily solo gamers.  Given my own experience and preferences, I figured this percentage might be higher.  Since gaming and hanging out with friends are always at the top of the list for the best part of wargaming, I suppose the low solo response should not surprise.  The largest segment of the population (45%) claims that its group has between one to four other participants.    
Can any insights or tendencies be gained by examining Group Size from only a handful of attributes?  A few of my favorites are highlighted below.

Age Group
With the exception of the often under-surveyed 20 and Under cohort, solo gaming tends to increase with age as small group size (1-4 others) tends to shrink.  Almost 21% of the 61+ age group primarily games solo. At the lower end of Group Size, does solo gaming crowd out small group participation? 
Primary Game Venue Choice
There are several interesting observations when Group Size is cross-tabulated with Game Venue.

First, clubs have a tendency to host larger groups than do game stores.  From the survey, about 20% of clubs see groups above 16 gamers.  Second, when gaming at either home or a friend's, group size is dominated by the 1-4 category.  Private homes seem to be the domain of small gaming circles.    

Gaming Frequency
Ignoring the More than once a week gamer, for now, as gaming frequency falls so does group size.  With little or no gaming, there seems to be a very tenuous connection to groups.  For the infrequent gamer playing less than quarterly, 44% of play is solo and 46% is in groups of 1-4.  The More than once a week gamer tends to run in bigger gaming circles but still finds time for solo play. 

Primary Interest
When examining Group Size by Primary Interest, Fantasy/Sci-Fi gamers show a similar pattern to the Mixed category of gamers.  The distinguishing feature between these two groups and Historical wargamers is that Historical wargamers prefer solo games almost two to one.   
Remote Gaming
Given the social interaction required for remote gaming, gamers playing remotely tend to game in larger groups than their counterpart.  Solo gaming is less than half for those gaming remotely.  
Years Spent Wargaming
Finally, a look at a gamer's duration in the hobby suggests that the percentage of gamers remaining in small groups (1-4 others) decreases over time.  Excluding solo play, group size tends to increase as the years go by.
A look at group size offered up some interesting and unexpected tendencies and insights.  I leave an exploration of these attribute interactions for another time. 

What do you suppose some of these interactions might show?

In the selection of charts above, do any particular results draw your attention and prompt reflection on your own gaming experience? 

Food for Thought
As we march toward and into retirement, the survey suggests that gaming group size tends to shrink and solo gaming increases as we age.  Similarly, solo gaming tends to increase and group size shrinks as gaming frequency decreases.  For the Historical gamer, this is especially true.  Are these natural tendencies?  If remote gaming offers a possibility to reduce solo gaming and increase group size (and perhaps gaming frequency) then remote gaming may warrant further investigation as a means to reconnect with like-minded gamers and overcome this downward spiral.

Friday, November 4, 2022

French Du Roi and Telamon

Work continues on producing SYW French for the ever-increasing French army.  Today's offering is Regiment Du Roi.  Figures are Old Glory foot led by a Eureka Miniatures' mounted colonel.  Flags are by Not by Appointment

One goal for 2022 was to add an 18mm SYW French army to the SYW collection.  This looks to be one goal kept.  To date, 2022 has seen 29 French units cross the painting desk and muster out for battle.  Many of these French troops even saw action at Bassignana mid-year.  Still lots more work to do but emphasize may shift to adding Spanish and Piedmontese units next.  

After a four-game run at the table, the Reconquista armies have been packed away for another day.  Battle reports still remain to tackle.  In their place, the table is reset with another collection rarely seen out on the table.

Telamon prequel
Next out of the storage boxes are Romans and Celts/Gauls for a look at the events leading up to the 225 BCE battle of Telamon.
Telamon prequel

Rather than fight the battle with the Gauls sandwiched between two Roman armies and needing to fight fore and aft, this action explores the possibility of the Gauls turning on their pursuers before contacting Regulus' army to the north.  

First test of battle will be on Sunday.

Tuesday, November 1, 2022

Colonel-General's French Cavalry

Despite a busy gaming schedule, the number of figures rolling out from the painting desk is beginning to pick up.  A couple of non-project related distractions crossed the painting too.  After a relatively quiet summer at the workbench, October saw my typical painting seasonality kick in.  Coming close to painting 100 figures in each of August (90) and September (86), October finally breached 100 figures painted (105) for the month.  Hooray!  
Mustering out from the painting desk today are a dozen troopers from the Colonel-General's Regiment.  Figures are Eureka Miniatures.  Flag is from Not by Appointment by David.  David was worried that a 15mm-sized cavalry standard would be too small to see the detail and not worth the effort.  I disagree!  Even the detail on this diminutive banner clearly illustrates David's fine work.  
While painting work is moving units through the queue at a good pace, units are stacking up at the photo booth.  
Lots of units to document over a variety of periods.  This traffic jam is primarily due to all of the gaming seen over the last several weeks.  Besides the effort with Solferino, the Reconquista Battle of Ucles has been action four times.  The latest Ucles saw a rip-roaring action on Monday.  I have one Ucles game to make up due to a sore back.  With a little luck and time, some of the Ucles battles can be chronicled here over the upcoming weeks.

Now I am off to prepare my Fokker Dr1 Triplane for the last sortie in the WWI aerial campaign.  One more kill puts a tenth mark next to my name into the squadron ledger.  With luck, my pilot may survive the war. 

Saturday, October 29, 2022

Solferino: The Finale

After two action-packed sessions, the battle reaches its final blows.

For recaps of how the game arrived at this juncture, please visit,

Solferino: Contact and

Solferino: Assault on San Cassiano

As the battle resumes, the Austrians still control much of the high ground around San Cassiano.  San Cassiano remains firmly in Austrian hands.  MacMahon is seen shifting more resources toward San Cassiano.

Situation on Austrian Right

Wherein the previous session the French showed great resolve and committed great resources in taking San Cassiano, the start of Session #3 suggested a change in French strategy.  Rather than continue to pound at San Cassiano with little effect, French movements suggest that containing and bypassing San Cassiano may be the new order for the day.

Rather than stick to the earlier French objective of taking both San Cassiano and Cavriana on the path toward victory, MacMahon seemingly switched the goal from taking vital ground to destroying the Austrian's will to fight.  With two Austrian brigades already broken, only one more enemy brigade wrecked would secure victory.  The difficulty is that the French must wreck one Austrian brigade before wrecking two of its own.  As seen from the rosters in Session #2, this task may be easier said than done!  Let's pick up the action.

French attack the heights!
Maintaining pressure against the Austrian right, the French launch attacks toward the Austrian second line of defenses along the ridge protecting Cavriana.  The problem for the French is that these attacks must cross open ground covered by enemy artillery.  If a foothold can be gained on this secondary ridgeline, Austrian units deployed to the west could find themselves trapped.  With Stankovic's Division wrecked, Clam-Gallas will use this depleted formation as a speed bump to delay French aggressions as he prepares a defense in-depth.
Heavy fighting for the high ground.
Austrian defense in-depth.

The initial French attacks from the plain below are repulsed with heavy casualties to all as the attackers are blasted by canister.  French moving from the west bypass San Cassiano and secure a vital foothold on the heights.  Not only do the French gain a foothold on the crucial heights to the east of San Cassiano but in close combat, an Austrian battery and infantry battalion are destroyed in the fight.  The French look well-positioned to press on with the attack.
You win some; you lose some.

The western most ridge is in French hands.

Spirits are high among the victorious French but that jubilation is short-lived.  Out on the plain, two French battalions are destroyed by concentrated artillery fire.  

Austrian plays its hand on the plain.
Undaunted, the French press on with MacMahon and Gault pushing the Austrians back to the second ridgeline.  Wrecked, Stankovic's Division is melting away under unrelenting French pressure.
MacMahon leads the attack!
In the attack upon the second ridgeline, MacMahon and Gault's coordinated efforts see the Austrian line waver.  The Austrian right is showing signs of collapse.  All is not easy for the French, though.  Far from it!

In a series of cavalry attacks and counterattacks, Mensdorff's cavalry division overpower Desvaux's remaining cavalry.  In the back and forth action, casualties mount and Desvaux' division breaks!  In the confusion, Desvaux is killed.

With Desvaux' formation wrecked, the next army to suffer a brigade failure must retire in defeat.  Which army will blink first?
Attacks against the Austrian left and right.
Desvaux breaks!
Desvaux is killed.
Seeing the Austrians fall back from repeated French attacks against the Austrian right, French hopes for victory are high.  Those hopes are dashed when the French take the high ground overlooking Cavriana.  Looking down onto Cavriana, the French are met with the unpleasant sight of seeing Montenouvo's Division preparing to defend the village in strength.
Montenuovo defends Cavriana
as the French press on.
Processing the positioning of the Austrians around Cavriana, the French redouble their efforts to wreck the Austrian army.  An overwhelming attack against an isolated battery supported by grenz sees the destruction of both guns and grenz.  Still, not enough to force an Austrian capitulation.  Even though the attacks are successful, these efforts further weaken the attackers.
Isolated enemy are attacked
and destroyed.
The French assaults have carried them too close to the enemy gun lines.  With little cover and weakened from the day's fighting, the pounding from the Austrian guns is enough to break General Lefevre's Brigade.  MacMahon has seen that his Corps is spent and taking Cavriana let alone San Cassiano is too great a task.  The battle is over.
The French within reach of Cavriana
while San Cassiano continues to hold out.
No place to hide out on the plain.
Yes, that is correct.  After three long sessions of fighting on this field, the battle is over.

The Austrian's score a victory by not only hanging on to both San Cassiano and Cavriana but also breaking the French army.

Congratulations to the Austrian commanders and well-played by all!

The rosters show the final dispositions of each formation.  Red losses are from Session #1, blue losses are from Session #2, and green losses are from the final Session #3.
Was the final tally close?  It sure was!

For the Austrians, both Bruner and Mensdorff's formations were only one hit away from breaking.  Pazsthory's Brigade was only two hits away from wrecking.  A slight change in the order of play or concentration on another front may have changed the outcome of battle completely.

This was a very near run thing!

For me, this was a great gaming experience.  One that I will remember for a very long time.  When memories fade, I can return to these pages to relive the event!

I encourage the players to voice their thoughts on the game.  Seeing battle from player perspective detailing the evolution of their plans and strategies over the course of the battle would make interesting reading.  Lee has already given his impressions at, Battle of SolferinoI may even tackle my thoughts on the battle and an analysis of play.

Thank you to all of the Rejects (French: Richard, Ray, David, Surjit; Austrian: Lee, Steve, John) who participated in this long, three session battle.  I reckon we put in about 12 hours of gaming, all remotely.  Hopefully, they enjoyed this exercise as much as I and will be back for more.