
 |
| French advance along two axes. |
 |
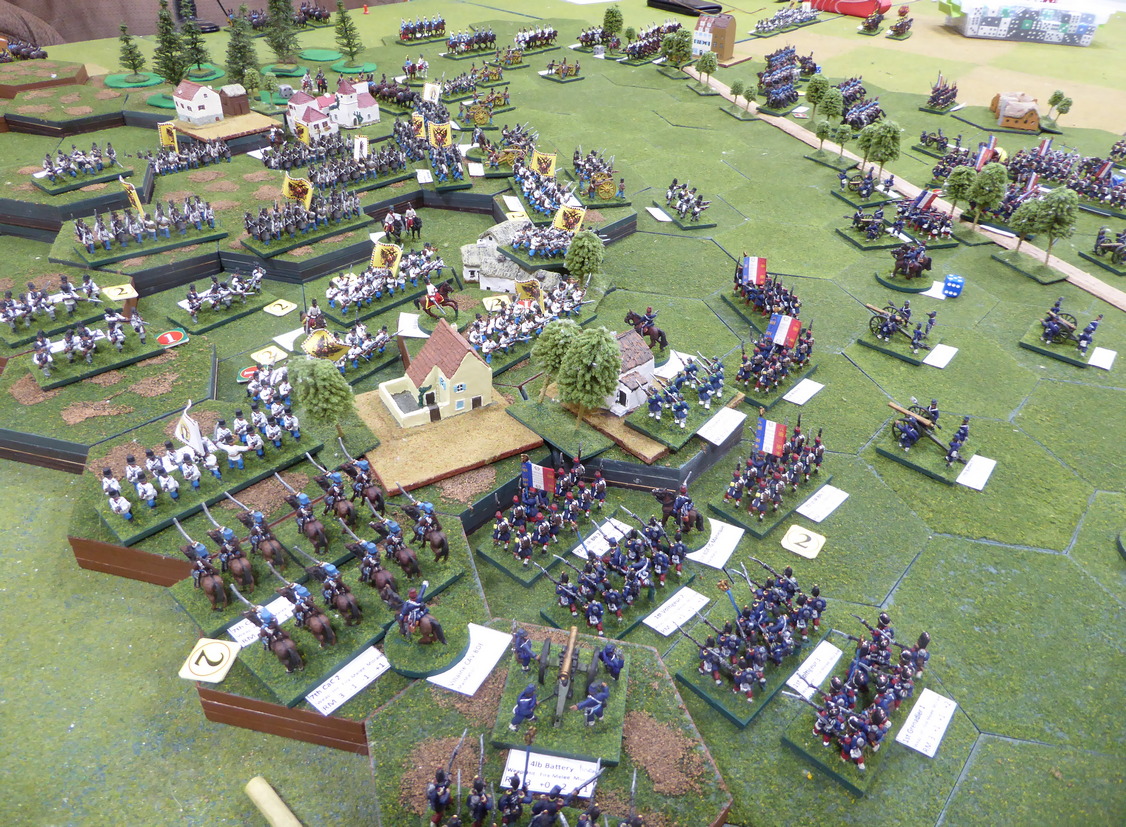
| French advance on the Medole Plain. |
 |
| Austrians, on the high ground, await the attack. |
What about French high command? Was MacMahon satisfied with his current plan of attack? Perhaps, not.
Seeing the difficulty in taking the ground around San Cassiano, the plans for the French right changed. Instrumental in this decision were wasteful casualties suffered from concentrated artillery fire on the approach across the Medole Plain toward Cavriana. No longer was a direct march on Cavriana considered. Elements of LaMotterouge's Division would veer north to support Decaen's attack near San Cassiano.
 |
| Bringing up reserves, the French left prepares to attack the heights. |
 |
| Douay's Brigade veers to the north. |
 |
| Defenders suffer from artillery fire |
 |
| while the French prepare to attack. |
 |
| Austrians, suffering from artillery and musketry, fall back into the valley. |
Villaine's cavalry brigade leads off the attack, advancing over the rough ground on the hills to the north of San Cassiano. The horsemen are driven back after only advancing a few hundred yards. Their advance is stopped by a deadly volley from Austrian infantry positioned along the spine of the hill. Villaine's cavalry brigade is wrecked.
 |
| On the left, Villaine's cavalry breaks. |
Seeing the French cavalry scattered, French infantry respond pouring fire into the Austrian defenders from multiple directions. Austrians positioned on the ridge suffer mightily. Still Hoditz' Brigade holds on. In attacks and counterattacks, the two armies wrestle for control of the ridge. Hoditz' stout defense with support from Reznicek is throwing the French timetable behind schedule. Without a breakthrough soon, can San Cassiano be successfully assaulted?
 |
| Douay’s Brigade moves to support the French left. View of battle from the east. |
 |
| The French attack! |
 |
| Austrian casualties are heavy in the firefights among the farms. |
With the French now on the heights, superior firepower sends the Austrians tumbling back into the valley. Caught in a deadly crossfire, 1st Battalion 16 IR is destroyed. Reeling from mounting casualties, first Hoditz and then Reznicek's Brigades break. Among the chaos, 2nd Battalion 48 IR, with Hoditz nearby, clings onto San Cassiano.
 |
| Austrians waver as pressure mounts. |
 |
| With heavy casualties and lost ground, Stankovic's Division is wrecked. |
 |
| Surrounding San Cassiano, Stankovic's Division gives ground as it breaks. |
 |
| Overhead view looking south as Austrian right is pushed back. |
 |
| The French press on against the Austrian right. |
 |
| French close in on San Cassiano. |
 |
| Algerian Tirailleurs on the way to San Cassiano. |
Both San Cassiano and Cavriana remain in Austrian hands but the grip on the former is looking tenuous.
What about the action on the Austrian left?
While there were some cavalry clashes on the plain, Austrian artillery, in great numbers, prevents any serious thoughts of making headway on this front. That could change.
At the end of the session, each army had two brigades broken. The French saw Villaine and Castagny broken. The Austrians counted Hoditz and Reznicek broken. With army breakpoints of three brigades wrecked for the Austrians against four brigades lost for the French, the Austrian cannot afford seeing a third brigade break.
What about casualties?
The rosters tell the tale. Red losses are from Session #1. Blue losses are from Session #2.

Compared to the Austrians, the French suffered comparatively fewer casualties in Session #2. With two brigades broken and Desvaux' cavalry nearing that point, the situation is becoming desperate.

One more gaming session remains as we reach for a conclusion to the Solferino battle in the next installment. The outcome could be close!
Most spectacular Jonathan kudos for managing all those units and the instructions from the various online antagonists. The action is every bit as bloody as the real battle, the French look to have the numbers for the next phase, but?
ReplyDeleteThanks, Phil! It may be a big task stage managing a large remote game but someone has to do it!
DeleteWe will see if the French can muster the numbers to carry them to victory in the next episode.
An exciting and desperate amount of fighting, looks really good.
ReplyDeleteGlad you enjoyed the presentation, George!
DeleteSuper account Jonathan. Whilst Lee and the Austrians continued their insane dice rolling. This portion of the battle did feel like we were getting the troops to the right places and untangling earlier error of deployment. It was hard but fun. I love games that set dilemmas... even if sometimes self inflicted.
ReplyDeleteThanks, Richard! Lee's dice were other worldly. Looking at his casualty counts after Session #2, most of his command has passed onto the Other World!
DeleteSometimes, getting out of a jam is more challenging and just as much fun as getting into the jam and seeing easy success.
I did suspect I witnessed changes in the French plan at the start of Session #2.
We did make some changes. In particular was the right hook which we hoped could be screened by the cavalry.
DeleteCassiano was a Hougoumont moment. We should have contained and bypassed it. Too much energy was poured into it.
Using cavalry to screen your infantry would have been solid play. Even bringing Villaine across to the plain to screen would have been useful. Containing San Cassiano and bypassing may have paid dividends too. So much time and energy were consumed in taking San Cassiano and never fell!
DeleteLooks like a tough fight.
ReplyDeleteIt sure has been!
DeleteI know I asked last time whether artillery was too deadly, it still seems to dominate! Though perhaps my napoleonic (favoured period) artillery is actually under-powered.
ReplyDeleteWhen orders are changed, does that become a private communication between the player and your good self, or does the zoom style game mean everyone is privy to all conversation?
Norm, you did ask about the lethality of artillery last time! My answer remains the same!
DeleteGiven that the French were able to concentrate five batteries against the heights and the Austrians out on the Medole could concentrate as many or more batteries, would you not expect measurable losses from five or six concentrated batteries. Even in a Napoleonic battle, five batteries masse against a target ought to open huge holes.
If anything, the Austrians on the ridgeline suffered fewer casualties from artillery fire than expected due, in part, to Lee's heroic Morale Tests. Perhaps, the players will weigh in with their thoughts on artillery lethality?
As for orders, players could communicate through chat. I never knew when orders actually changed. I only saw and moved units when ordered to do so. Their opponents only saw and heard what I did.
I don't think the artillery was anything other than what one might expect from the period. The difference from the French point of view was that the Austrians could concentrate batteries from quite early in the game. Whereas us French were slow to deploy our batteries in order to maximise impact. Plus, Austrian morale rolls were extraordinary. Knowing what I know now, I would play the game a liitle differently.
DeleteAs for orders, we communicated via Whatsapp.
Excellent, on-the-ground feedback! Thank you!
DeleteWeighing in, I have to agree with Richard. Our artillery had clear fields of view across the plain and could concentrate on each French infantry wave as it approached the high ground. We had a target rich environment!
DeleteThanks, Lee!
DeleteTremendous looking battle and what a scale ! You will have earned a medal by the end of it 🎖
ReplyDeleteThis was a big one, for sure! Loads of fun for me. Hopefully, an enjoyable experience for all of the players too.
DeleteMy reward is seeing the large battle, over multiple sessions, through to the end with players still engaged and anxious to play.
Oh, really interesting battle Gents!
ReplyDeleteYou are welcome, Michal!
DeleteImpressive action - and certainly very bloody. The real thing must have been pretty horrific...
ReplyDeleteCheers,
David.
David, the real battle was very bloody and the largest European battle since Leipzig. The ossuaries on the different battlefields are stacked with bones from those fallen in battle.
DeleteVery grim! I thought I remembered that the Red Cross was founded as a direct result of the battle and so it was - Henry Dunant founded it in 1863 after his experience of seeing the wounded after the battle back in 1859.
DeleteCheers,
David.
You have a good memory, David!
DeleteSay, I got to see your WSS French flags in action today in a remote game with Tony from http://prometheusinaspic.blogspot.com/. I was commanding the British army. I will let Tony tell the tale...
Spectacular game and a bloody tussle
ReplyDeleteThanks, Neil! Bloody tussle, for sure.
DeleteMy money was on the French after the first session, and I would be prepared to back them even more after this session now they have gained the heights.
ReplyDeleteOK! You sticking as a pro-Bonapartist then.
DeleteAs already commented above, Solferino was quite a bloody one and this game is certainly going down that same road. Really like the idea of presenting the casualty rolls to give a better idea of the mounting casualties.
ReplyDeleteAs for the battle itself, the French seem to be gathering momentum now, putting all their pressure to bear on the narrowest of fronts. Actually this seemed initially a disadvantage for them as they could not put their superior numbers to use but credit to the French players for turning this into an advantage, leaving the Austrians no room to deploy more than a few units at a time.
DeleteThanks, Mike!
Showing the casualty counts at the end of each session provides for a good sense of the ebb and flow of battle. It also demonstrates which units carried the brunt of the fighting.
French plan morphed after the first gaming session. As Richard says above, this change was out of necessity, fluidity of the situation, and a change in their path to victory.
I'm still traumatised from day 2's battle. We did change our plan, mainly trying to correct the mistakes we French made in the first game. Not sure how you remembered all the details on the game Jonathan, it certainly was a bloody affair!
ReplyDeleteRay, what I don't remember, I make up!
DeleteSounds like my approach to battle reports 🤣
DeleteI almost always recall the general flow of battle. The in-game photos help to trigger memories of the details.
DeleteI thought my impression of the first AAR was that, without Lee rolling exceptionally good dice, the Austrians would already have been dans la merde at the conclusion of the first session ....this seems to be confirmed by some comments above, and indeed, seems like he did a repeat performance in the second session! From this, I believe the French will suddenly crash through and win, as luck like that cannot last indefinitely, and it seems like lucky dice may be all that is keeping the Austrians in the game.
ReplyDeleteWhile Lee threw above expectations in Session #1, if you look at casualty counts for his division at end of Session #2, you will see that Lee suffered horrendous casualties. Lucky dice may be helping the Austrians out but the French are on a tight timetable. Taking both San Cassiano and Cavriana within the allotted time is not so easy even in the best of times. Ask the French how they feel about attacking east across the Medole Plain when faced with an abundance of Austrian artillery.
DeleteAnother fine AAR there Jon and both sides have taken a right old battering. Too close to call as to which side will break first, looking at the rosters and the state of the units therein.
ReplyDeleteRather like our BBB games, often massed artillery forces you to seek shelter on the reverse slopes, which happened here to the Austrians. Even worse when you have to face Prussian Krupp guns!
Thank you, Steve! Both sides have taken a pounding but the outcome looks undecided to me.
DeleteOne day, I will begin a Prussian army so that I can experiment with Krupps on the battlefield.
Great review of the second session. It was a bruising game and by this point I think all players were mentally exhausted. I certainly was! Looking forward to your review if the final stage of the battle.
ReplyDeleteGlad you approve, Lee!
DeleteMentally exhausted? I hope the game was not that fatiguing.
A hard pounding, gentlemen ;)
ReplyDeleteIndeed! Good to see you back and commenting again, Markus!
DeleteAwesome looking game and very much a meat grinder!
ReplyDeleteBest Iain
Thanks, Iain!
DeleteQuite the endeavour keeping track of all that Jon! Surely those Austrian dice rolls cannot continue?
ReplyDeleteQuite the endeavor, for sure. If you want to see if the Austrians’ luck holds, read the final episode.
Delete