The Battle of First Manassas was joined when McDowell launched a flanking attack against scattered Rebels on Matthews' Hill. All replays of this mid-morning fight ended with the Confederate Army in tatters. In every refight, the Rebels lost three brigades early on in the fight. The destruction of these three Confederate brigades mirrored the historical outcome. Once on the backfoot, the Confederate Army struggled to regain its balance. Actually it never did regain its footing and all games, ultimately, tipped for the Federal Army. These results were ahistorical. How could this be? Well, there could be many reasons why but one observation was that the Confederates fed their troops into battle piecemeal and exposed them to risk too early. The Union Army was much better at managing unit rotation and replacement.
To give the Confederate Army a fighting chance, the next scenario resets the battle after the early afternoon lull with Jackson already on Henry House Hill and Rebel reinforcements streaming pell-mell to the field. Would this change the outcome?
On short notice, I was able to dragoon four players into taking up the gauntlet of command. Players (and their blogs) are:USA:
David B. (The Ragged Soldier) as General McDowell, General Tyler, General Porter (three brigades total).
CSA:
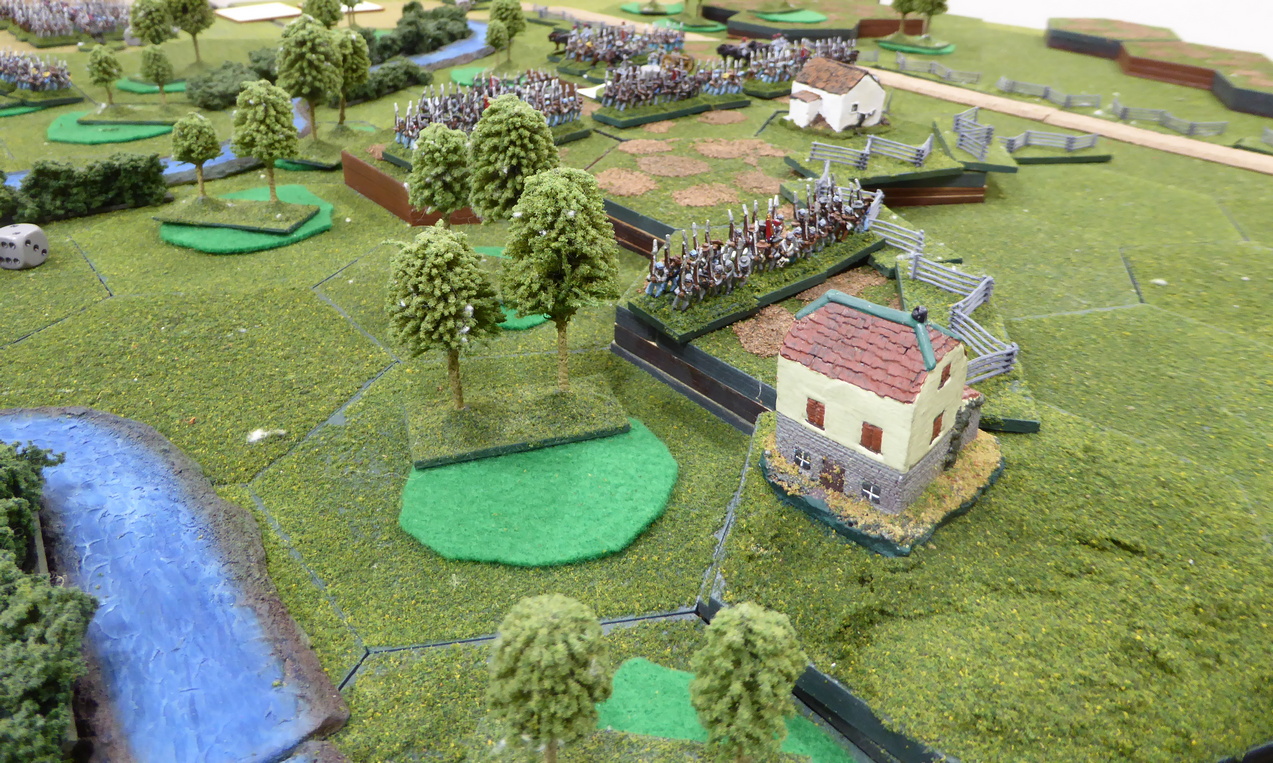
As a reminder, the battlefield at the start of the 1pm game turn looked like this:
 |
| Situation 1pm. |
Let's see how the battle played out in yesterday’s game!
After putting the Confederate Army to flight following the action at Matthews' Hill, the Federal Army pauses to regroup. Burnside's Brigade is wrecked and Porter's Brigade has sustained some casualties. Their division commander has been wounded and carried from the field. The stage is set for the fight at Henry Hill.
As the action unfolds, Porter deploys along the Warrenton Pike facing the enemy positioned on Henry House Hill. Tyler brings up Sherman and Keys' Brigades on his left while Heintzelman brings his division down the Sudley-Manassas Road. With Hampton's Legion covering the salient at Robinson House, Johnston deploys Jackson and his brigade on Henry House Hill.
 |
| Federal Army poised along Young's Branch |
 |
| while Tyler brings up two brigades of his division on the left. |
 |
| Sherman moves up to support Porter. |
 |
| Jackson silently watches from afar. |
 |
| Hampton's Legion at Robinson House. |
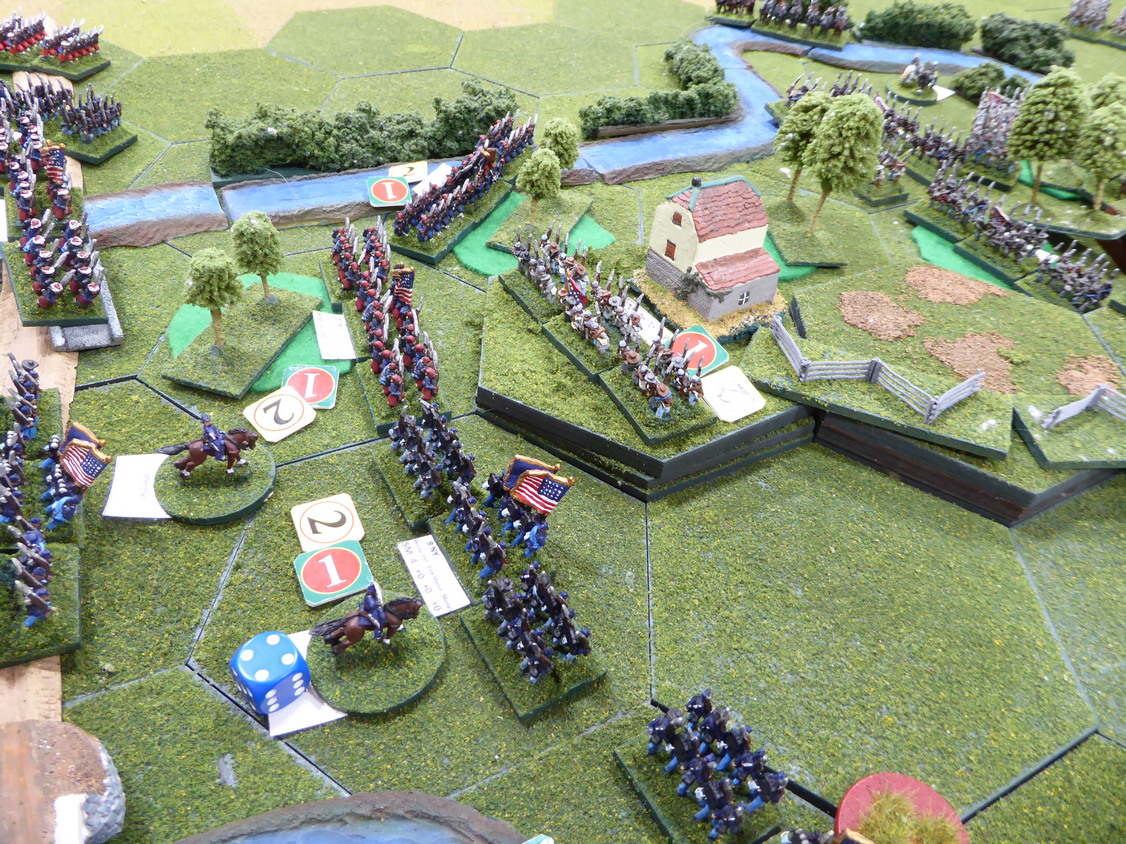
With Tyler bringing up two brigades on his left and Heintzelman bringing up three brigades on his right, Porter boldly crosses the Young's Branch stream. Cautiously, Sherman shakes his brigade out into line as he comes up in support of Porter. Wilcox leads his brigade across the stream on the Federal far right with an eye toward turning the Rebel left. As the Federals step across the stream, Jackson orders some of his men off the heights and down to the road. What? One Rebel regiment and one gun section are quickly followed by a second regiment and gun section. Now, Jackson has four guns and support astride the road. The two armies begin exchanging artillery fire.  |
| Union troops splash into Young's Branch. |
 |
| Sherman shakes his brigade out into line. |
 |
Jackson orders troops off Henry Hill and
onto the Sudley-Manassas Road. |
 |
| Wilcox marches across the stream intent on turning a flank. |
 |
| Jackson stands ready. |
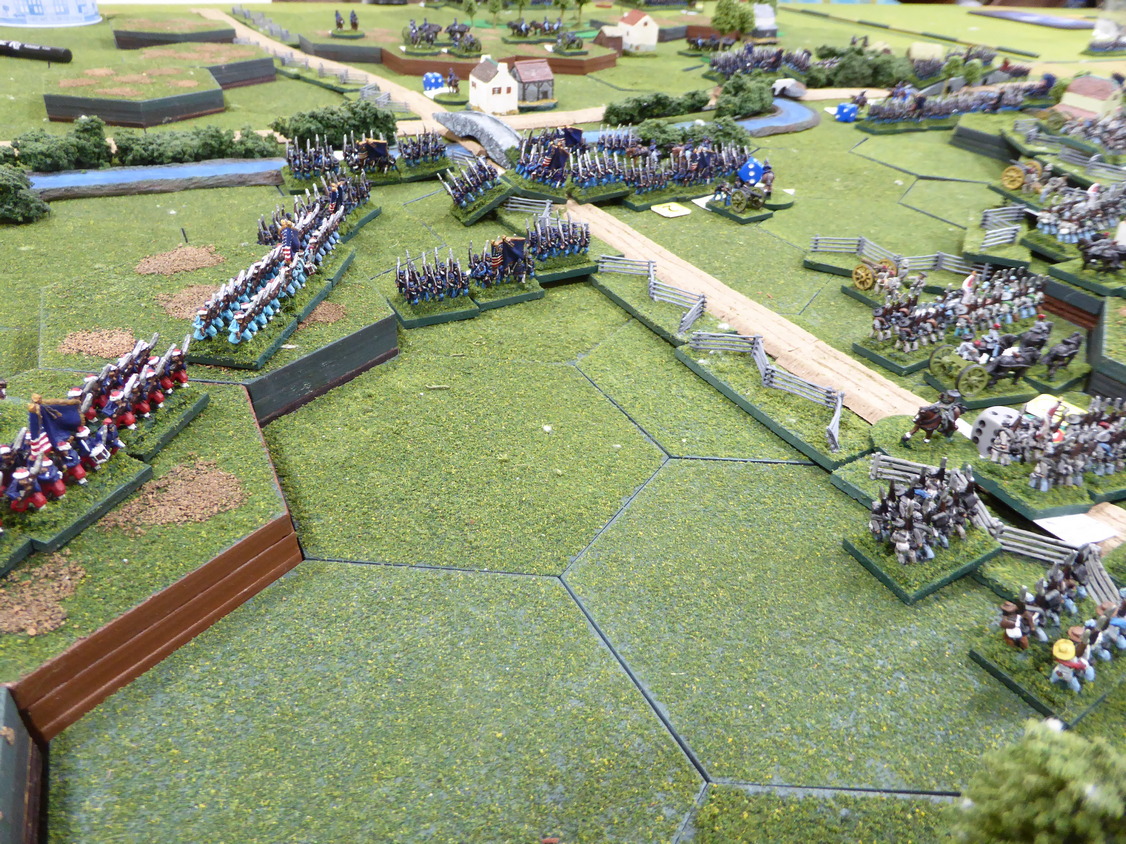
With reports of Cocke's Brigade of Rebels moving up on Jackson's right toward Robinson House, Porter moves to envelope Hampton's Legion before it can be rescued. With Sherman moving up in support and Keyes swinging even farther left, Porter attacks. To prevent Cocke from reinforcing Hampton, Keyes moves around against the Rebel right. Lining the stream and occupying the woods, Cocke holds on. Advancing up the slopes to Robinson House, Porter's first attempt is shattered. Reconsidering, Porter switches to musketry to try to root the Rebels out of the farm. Robinson suffers but stands firm at first but eventually succumbs.
 |
| Porter prepares the attack on Hampton's Legion |
 |
as the Long Blue Lines form up along the pike
all the way to Sudley-Manassas Road. |
 |
| Porter attacks! |
 |
| Keyes moves up on Porter's left. |
 |
| Keyes attacks! |
With the Federal left stuck in a firefight with no advantage gained, the battle focus shifts back to the fight along the Sudley-Manassas Road. Franklin moves up to cover Howard as he brings up his brigade and deploys for battle. The 33rd VA positioned at the foot of Henry House Hill absorbs punishment from Franklin and Federal artillery firing down from Matthews' Hill. Suffering some, they remain firm. Meanwhile, Howard's lead regiment is cut down before it can successfully deploy as Elzey's Brigade forms up on Jackson's left across the Sudley-Manassas Road. Elzey's lead regiment shares a similar fate as it is shredded forming up into line. With Wilcox working his way around the Rebel left, does McDowell still have time to push the Rebels from Henry House Hill? |
| Firefight below Henry House Hill. |
 |
| Wilcox works his way onto the Rebel left. |
 |
| Jackson is relieved to see Elzey arrive! |
 |
With Bonham arriving onto Henry House Hill,
Rebel positions look secure. |
 |
| Wilcox cannot counter the arrival of more Confederates. |
With Porter and Franklin nearing their breaking points, McDowell calls off the attack. The Rebellion will not be quashed today. |
| Dispositions at battle's end. |
After nearly four hours of play and the hour late, the Federal Army, while not conceding defeat, calls off the attacks.
Victory and congratulations to the Confederate commanders of Tony and Mark! My condolences to David and Chris.
Having the same group of players fighting over much the same ground within a few weeks' time is a joy. With rules and situation still fresh in mind, tactics are developing and rules are becoming more familiar. Still, Henry House Hill is a rather large game to tackle at the regimental level and remotely. Could the Union Army have fought on? Yes it could. Would the outcome have been changed? We will never know but the Confederate positions looked solid upon Henry House Hill. Having only momentarily gotten a toehold at Robinson House, the Federals never really threatened Henry Hill. The Federal Army may have won the battle in the morning on Matthews' Hill, they lost it in the afternoon on Henry House Hill. Did the introduction of a lull (and reset) between the fight on Matthews' Hill and Henry Hill alter the outcome of the previous, full battle fights? It did. The Rebels carried the day.
My many thanks to Chris, David, Mark, and Tony for a very enjoyable session. What's next? While there remain battles to yet chronicle, I look forward to the next new scenario. Will we stick to ACW? Stay tuned.
Up next is a second run-out of this Henry Hill scenario on Thursday.


Quite the action, nice read of a fine game. The difference between the two games is interesting. It was a good idea to reset without adding any artificial conditions to either side. I am looking forward to the next showdown on Thursday , with I assume a different group?
ReplyDeleteThanks, Joe. Happy to see you enjoyed the battle report. This battle has a different starting point to the fight than the previous actions. Different starting point produced a different result. Yes, Thursday sees a different player roster. On Thursday, I take a command.
DeleteAnother great looking game and excellent report Jon! Like Joe, I look forward to the next instalment....can the Rebs prevail a second time at Henry Hill?
ReplyDeleteThanks, Keith! Can the Rebs prevail a second time? I hope so! I will be leading them on in battle!
DeleteThe sense of ‘big battle’ is nicely demonstrated. The next game will help establish where balance falls ….. if similar plans / results follow 🙂
ReplyDeleteAre those bases 40mm?
Norm, I appreciate your approval of the battle presentation! The two games are completely different situations. One begins with the attack on Matthews’ Hill. The other with the attack on Henry Hill. It will be difficult to compare and contrast the two since starting points and forces are different. Bases are 7/8” x 1-1/8”. Weird, huh? I think this is the base size I used for 15mm Fire & Fury many years ago.
DeleteAahh my bad!
DeleteI was trying to gauge base size v hex width v the number of 10mm figs, so seems I was out quite a bit there. I think that may be the size that TV Wars use for their AWI. A very good visual in any case.
No worries! Three bases per regiment and one regiment's frontage occupying most of the four-inch hex looks good to me too.
DeleteAnother great looking game Jonathan!
ReplyDeleteThanks, Michal!
DeleteSuperb game, once again, Jon. A totally absorbing session - well designed, set up and managed.
ReplyDeleteThank you, Tony! Your very kind sentiments are very much appreciated. I thought the four-hour session flew by. I was waiting for your Cajun accent to kick in.
DeleteAnother great looking and sounding game, would another option to have made the Federal command less effective and the CSA more, in my modest reading on the subject the rebels seem to have been generally better led?
ReplyDeleteBest Iain
Thanks, Iain! You make an interesting point on game and scenario design.
DeleteDo you want the players to be either blessed or hampered by their historical counterparts' tendencies or should players be thrust into combat to make their own record?
For a game like this, I want to set the historical stage and allow players to be thrust into the decision-making role. I want to see how they respond since we know how the historical commanders acted. I did boost Jackson's morale effect on units in his brigade.
There really was no need to introduce artificial limits on the Federal command Iain. At least on my side!
Delete:-D
In many games, players add enough friction of their own with no need to introduce additional friction mechanisms. The annals of wargaming lore are filled with these examples.
DeleteBrilliant game and lovely to play in such good company. Thanks again for the invite and allowing me to make up for my dismal showing the last time around.
ReplyDeleteThanks JBM! Everyone deserves a chance at redemption, don't you agree?
DeleteThis certainly is a terrific group to have in a game especially when MSFoy asks the easy rules' questions first.
Another cracker there Jonathan.
ReplyDeleteThanks, Phil!
DeleteA crackin looking bash, Jonathan!!!
ReplyDeleteIt was a good one, Ray!
DeleteThanks Jon, a great report and it was a terrific game! You said at the end that the Union needed to get onto the hill very quickly to have a chance of winning, and I think that is where I went wrong - should have just stormed forward with Porter's brigade and then fed Sherman in to exploit, i was far too cautious!
ReplyDeleteThanks for your superb hosting and rules guidance as ever, indeed the evening went very quickly!
p.s. and of course thanks to all the other players, a great bunch of chaps!
DeleteDavid, you are most welcome! Happy to see you enjoyed both game and After-Action Report Out.
DeleteIt is always easy to Wednesday Morning Quarterback after the Tuesday game but I think a more aggressive stance may have paid dividends. With the Federals having a guaranteed first activation on Turn 1, launching an attack with Porter against Robinson House and Hampton may have secured the former and destroyed the latter. Of course, we may never know and hindsight (at least mine) is always 20/20.
Four hours rarely passes so quickly as did the time during Tuesday's game.
Another great battle report Jonathan, roll on the next one
ReplyDeleteThanks, Neil! Roll on the next one...
DeleteThe decision to drop regiments to cover the road was an interesting one, but it seemed to be the right one.
ReplyDeleteFun playthrough Jon - interested to see how your own command tackles this scenario.
I was shocked (Shocked, I say!) when Mark moved down from the heights to cover the road. He did bring one of the gun sections and infantry back up onto the hill once Elzey arrived.
DeleteIn the next game, I play the Confederates. If I can pull off a victory as well and Mark and Tony did, I will be pleased.
A fine game and IMHO it's always good to have the chance to explore some 'what if's' with historical actions, whether it be different commander ratings (as already suggested above) or as here with Jackson in play and reinforcements on their way.
ReplyDeleteIn Bloody Big Battles the author does give some historical options to allow one to explore what might have happened etc. This sort of thing I find fascinating. Certainly looking forward to reading how the next game plays out:).
Thanks, Steve. This scenario is not quite a "What if" in that there was a lull in the historical battle that allowed the two armies to sort themselves out. The Rebels needed much more sorting out since three of their brigades were routed from the fighting on Matthews' Hill.
DeleteLooking at alternatives through wargaming is a fascinating undertaking for me as well. Just look at how many times I tend to replay a particular battle.
I thought a Confederate win may have been on the cards, and so it proved. Looks like a well-balanced scenario, so the next installment will be interesting.
ReplyDeleteI thought the Rebels had a good chance to even the score on Henry Hill. Without pressure early on, the Confederates were able to prepare themselves for the attacks they knew would be coming. In the next installment, I take command of the Rebels. I am not so sure I would back my chances...
DeleteEpic battle! Very interesting. YOU have a serious approach to wargame, Jonathan!
ReplyDeleteThank you, Valentine! Still doesn't seem much like work.
DeleteGreat bat rep. Though it helps that I’ve become intimately familiar with the set up and dispositions. Why do you think the CSA managed to pull off a victory? Brilliant generalship? Or being able to accumulate more troops on the defense?
ReplyDeleteThanks, Stew!
DeleteI reckon battle reports make much more sense when you have actually fought over the ground. I often wonder if non-participants get much out of them.
Well, historically, the CSA did win the battle! Brilliant generalship certainly contributes to victory. The main difference between our game that began with the fight on Matthews' Hill and this fight beginning with the action on Henry Hill is that the Rebels did not sustain the casualties seen in Matthews' Hill battle.
In the Henry Hill fight, Jackson's command had not taken any casualties so his command was fresh. They were positioned well too and reinforcements were arriving more quickly since the game cut out the time during the lull between the two fights.
I think the Union Army could have pressed the fight more vigorously putting more pressure on the Rebels.
What are your thoughts having participated in one battle and read several other battle accounts?
It’s hard to have a good idea without seeing the actual game played. I imagine that the CSA made better use of going on reserve / had more opportunity to do so in order to get defensive Fire.
DeleteSounds like the USA were also slow to advance. Who knows. I’m sure you’re refight will show some differences. 😀
Historically the battle can be summarized in a simplified version that as both armies fought in piecemeal advances the Union came out on top bc more pieces. But when the CSA finally made a good defense line under Jackson the Union piecemeal advance was stopped, and then they panicked. Low morale roll perhaps. 😀
The use of Reserve was not common only seeing a few instances late in the battle. While a useful ploy, it is difficult to pass up instant gratification for delayed reward.
DeleteYou offer a good summary of the historical battle. In my refight against Peter, Peter led the Federal Army more aggressively than in this playing. The result? Heavy casualties to both!
Super game and your usual excellent reporting Jonathan.
ReplyDeleteRichard, you are kind and encouraging!
DeleteExciting read Jon. Now if your Union players today have read this AAR and realize Tuesday's loss may have been due to too much caution, you may be in trouble! Best of luck today.
ReplyDeleteThank you, Vol! I am usually in trouble no matter what!
DeleteHaha so am I, but it's usually with my spouse!
DeleteVery interesting AAR Jon, even though I knew what the result was going to be! It was a grand game to participate in, with a great bunch and well managed by your good self again.
ReplyDeleteI certainly learnt a painful lesson about troops on 'reserve'. Ouch! And reading your article, and looking at the pictures made me realise I should have been more aggressive on my flank too.
Seeing those Zouaves in the photos made me remember Tony had it in for them. It almost seemed personal 😆
Chris, glad you found the AAR interesting even though you knew the outcome! Hopefully, I at least captured the general flow of battle.
DeleteIf you want to see what a more aggressive Federal plan can yield, stay tuned for my next battle account.
Excellent as always.
ReplyDeleteI have to agree with your point on friction and 'national' leadership. Multiple players always find a way to gum up the works!
Also, if it interests you, another fascinating series of articles on data and their manipulation:
http://datacolada.org/109
Thank you, Greg! I am off to follow your link to data manipulation.
DeleteA great read Jonathan. I wonder how many times First Bull Run/Manassas has been refought? I know I have played it at least half a dozen times.
ReplyDeleteMuch appreciated, Mark! As for First Manassas refights, I am up to five games in this series.
DeleteHave you read the Edward Longacre book "Early Morning of the War: Bull Run 1861"? He gave me a few insights into the battle that I hadn't seen.
DeleteI have not! Thanks for the recommendation.
DeleteSuperb game Jon. A big well done to you and the players and not really surprised at the outcome. Once the rebs get their act together, it is very difficult to dislodge them from the strong defensive position that is Henry House hill. At least, that’s what I have experienced when our group played Bull Run.
ReplyDeleteThanks, Mike! The challenge for the Confederates is getting their act together before the serious blows begin to fall.
Delete