Friday, May 5, 2023

Montgomery One More Time

After last week's game, consensus formed to give the Battle of Montgomery one more run-out on the table.  This Wednesday's game again saw three players with two Royalists and one Parliamentarian.  Two of the three players from the game before showed up for an encore performance.  Chris (Horse and Musket Gaming) and David (The Ragged Soldier) shared command of Byron's Royalist Army.  Mark (Mud, Blood, and Steel) commanded Meldrum's Parliamentarian Army.  Please visit the The Battle of Montgomery 1644 for the prior battle report and brief battle background.  Last week, the battle ended in an inclusive draw although there was discussion on both sides making good points to tip the outcome toward one army.  Still, a draw seemed a reasonable conclusion.  Would the result be similar this time out?

As a refresher, the two armies array for battle as shown in the photo below.  Meldrum is outnumbered but is expecting a cavalry foraging party to return at some point in battle.
Initial dispositions
Royalist Left
Royalist Right
Parliamentarian Left
Parliamentarian Right
On to battle!

Constricted by the hedges and enclosures, Byron sends his cavalry forward.  Not too far forward.  The Royalist horsemen advance into the open in preparation for action.  Fairfax brings his cavalry, deployed in front of Salt Bridge slightly forward so that he has room to maneuver.  Byron holds a four-to-three advantage in numbers.
Without hesitation, the two armies' cavalry strike in a series of charges and counter charges.  Could the battle be decided from the first blows?

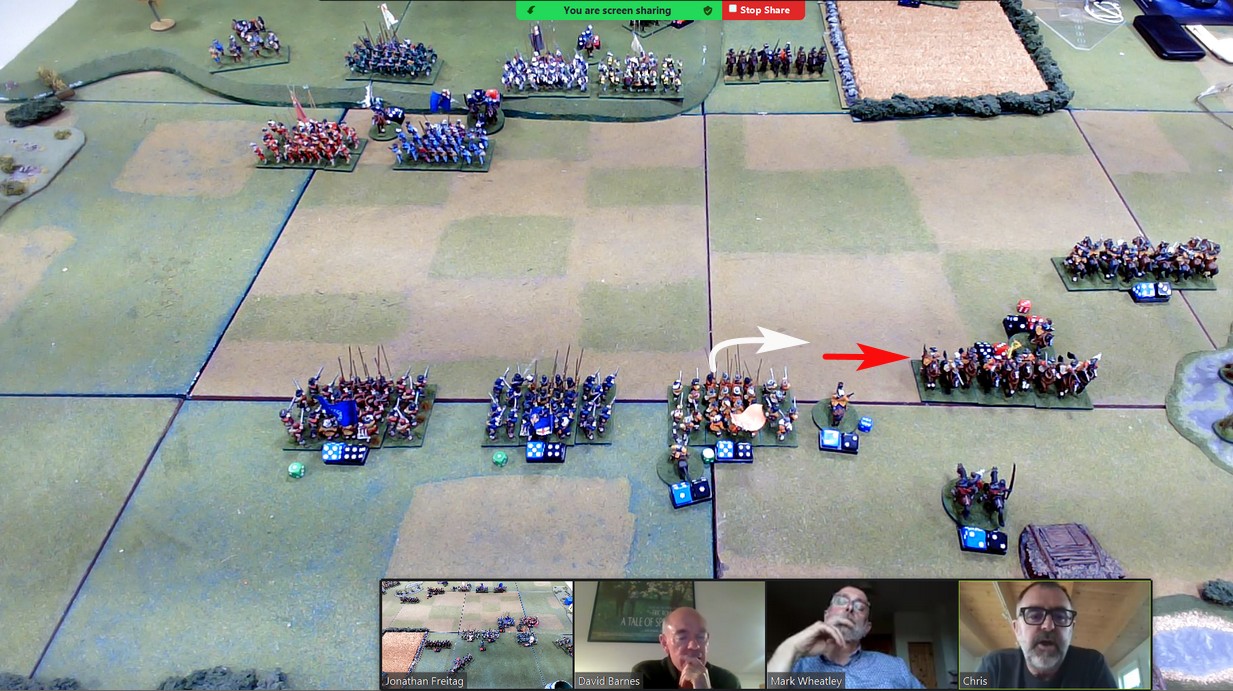
Leading with the horse regiment on the left, Tyldesley attacks!  Fairfax counters!  In a ferocious clash of man and beast, Fairfax's rightmost regiment is driven back with Royalist cavalry in hot pursuit.  The chase brings the Cavaliers nearly to Salt Bridge, itself, as the enemy disintegrates.  Fairfax has a breach in his line.

Tyldesley's right regiment of horse charges forward too.  As before, Fairfax responds in counter charge.  This time, Tyldesley's horsemen suffer a reverse and are seen scurrying back to their lines.  Pausing to regroup, Fairfax is hit by a second wave of galloping Royalists.

Tyldesley's cavalry looks to be gaining the upper hand when catastrophe strikes.  Weakened from the heavy fighting, the Royalist horsemen have seen enough fighting and break for the rear.  Fairfax's horsemen follow, close on their hooves.  Over enclosures they ride trying to shake their pursuers.  With Tyldesley already engaged in pursuit near Salt Bridge, no general is close at hand to rally these Cavaliers.

In the initial clash of cavalry on the Royalist left, two Roundhead cavalry regiments are wrecked.  One Royalist horse regiment is wrecked while two other regiments head toward the rear to regroup. 
Cavalry clash!
Destruction and pursuit sees Fairfax's command in tatters.
Despite these successes, all is not going perfectly for Byron, however.

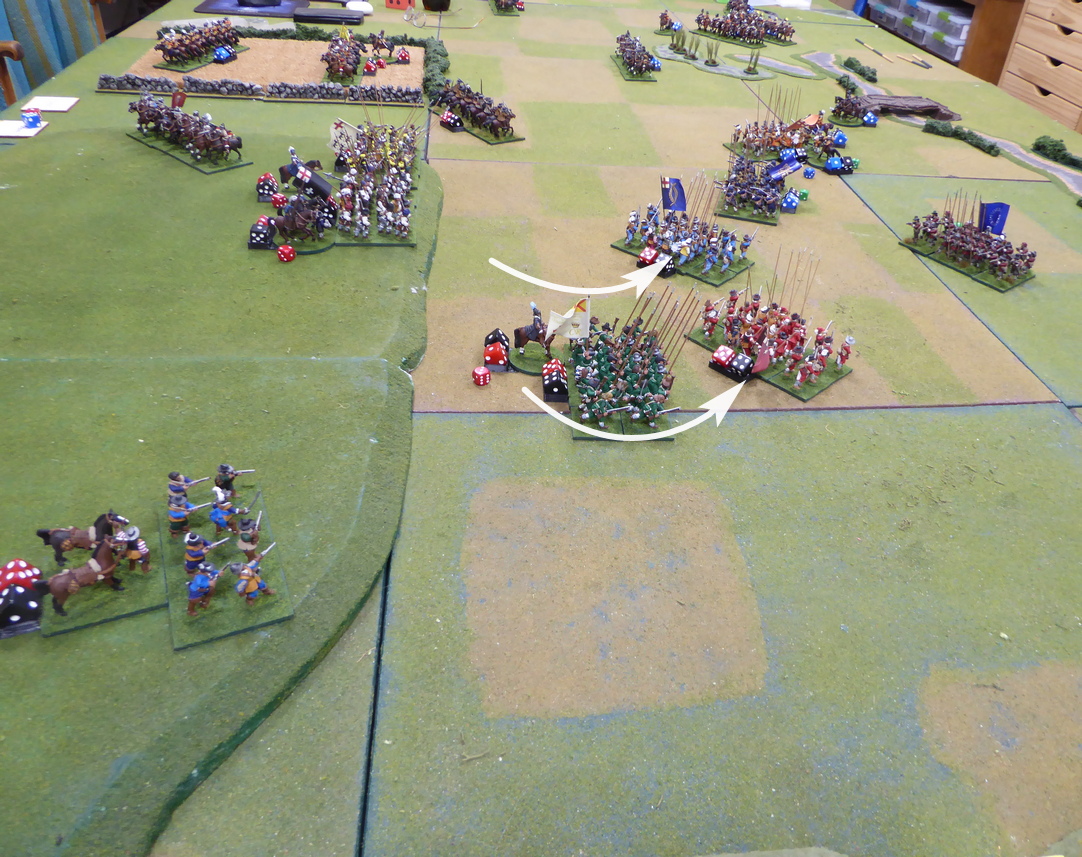
Having witnessed the destruction of friendly cavalry to its right and the route of escape under threat, Lothian's rightmost infantry regiment turns to bring Tyldesley's over-extended and pursuing cavalry under fire.

The Roundhead infantry wheels right and gives the horsemen a salvo.  Already exhausted from the fighting and pursuit, Tyldesley and his horsemen buckle and gallop away.  For Meldrum, disaster averted for now.  For Byron, disaster strikes!
Meldrum's infantry turns to give Royalist cavalry a blast.
Tyldesley breaks and gallops away.
Tyldesley looks on in disbelief.
The other two players enjoy the sight.
Tyldesley falls back to regroup.
With the opening cavalry actions seemingly settled, Byron orders his foot forward.  Woodhouse's two infantry regiments remain stationary on the heights while Broughton sends his brigade forward.  They cautiously descend the hill then swing about to confront enemy infantry to their front.

Seeing his right shredded in the cavalry duels and his escape over Salt Bridge in jeopardy, Meldrum shifts Lothian's infantry brigade east toward the bridge.  Where is Myddleton's cavalry?
Broughton's infantry descend the heights.
Woodhouse stands as a reserve.
Broughton swings about to bring enemy to bear.
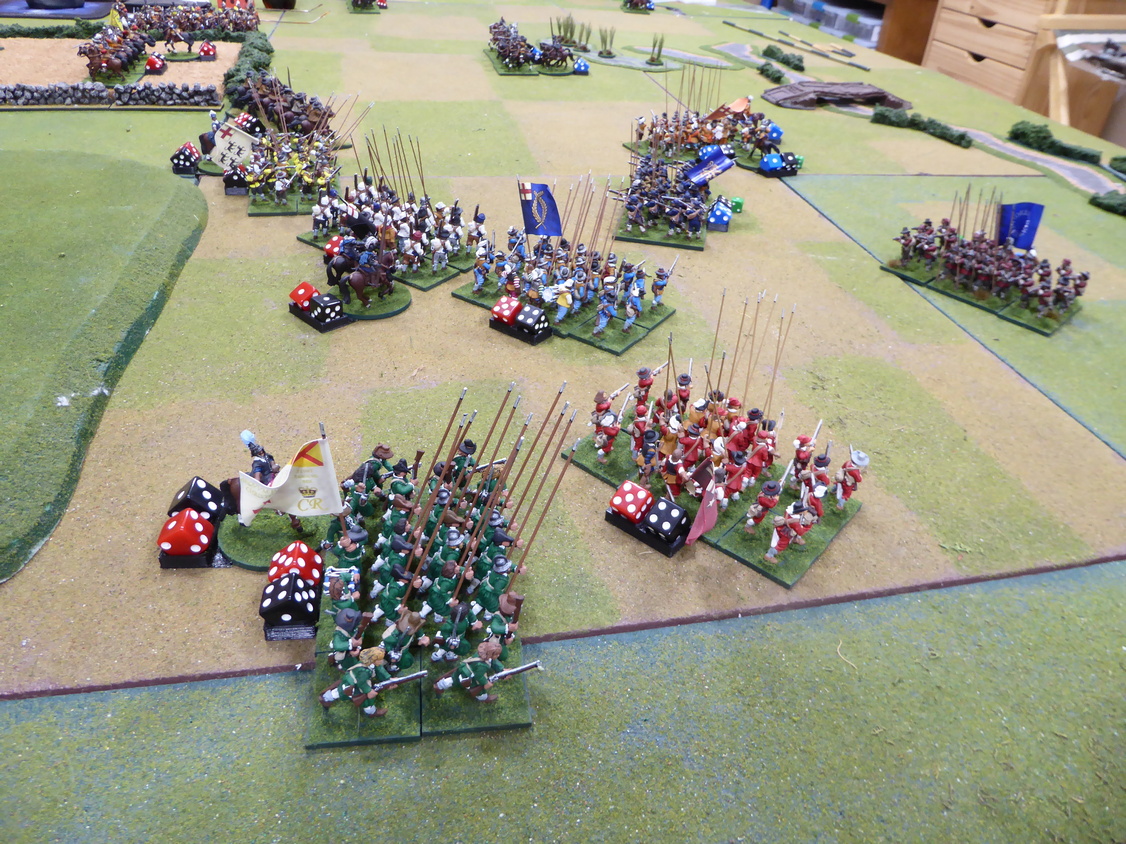
Surveying the battlefield, Byron likes his chances holding an advantage of five foot regiments to three.  He pushes forward.  The first attacks concentrate on Lothian's infantry in the middle of the line.  After a couple of preparatory salvos, Broughton attacks.  In lengthy push of pike, Lothian's infantry breaks and scatters.  Now the Royalists hold a five to two advantage in infantry.  Is the battle over? 
Royalists bring their advantage in numbers to bear.
Lothian's middle infantry is dispatched.
Maybe not?

Meldrum sees the return of Myddleton's foraging party as the two cavalry regiments cross the enclosures.  The first regiment strikes Tyldesley's fleeing cavalry in flank and scatters it for good.  Tyldesley, himself, barely makes good his escape.  Now, it is the Royalist left that may be in trouble!
Myddleton returns and turns the Royalist Left.
Back to the plain below the heights, Broughton presses forward.  Perhaps showing overconfidence, Broughton's redcoats are repulsed in their first attack although the enemy is weakened.  Leading from the front, Broughton attacks with a second regiment.  This time, the Roundheads are scattered.  With two of his three infantry regiments destroyed, Lothian's remaining regiment heads back to the bridge.  Every man for himself! 
Broughton's first attack repulsed
but the second attack finishes the job!
Lothian scrambles over Salt Bridge.
While Lothian has a change of heart and brings his infantry back to the north side of the bridge and Myddleton's cavalry could present some interesting issues for the Byron and his Royalists as the left is turned, Meldrum concedes victory to Byron.  The Battle of Montgomery ends in a Royalist victory.

Thanks to the three combatants.  Congratulations to Chris and David.  Condolences to Mark.

Could the battle have been waged differently yielding a different outcome?  Perhaps.  Those discussions may be reserved for another time.

No matter the outcome, I thought the game great fun.  All three played well and fought hard.

Tuesday, May 2, 2023

More Spanish Infantry and Spring Returns!

In the Inland Pacific Northwest, Spring seems to have finally arrived.  Improving weather means regular cycling outdoors returns in earnest.  Hooray!  Despite a thunderstorm or two, I managed to put outside miles into my legs the last six days running.
I will be heading out today once the temperature creeps up a few more degrees.  Still, it is great to feel the warm sun on my back even if a bit cooler than I like and actually going somewhere not in my garage.  Of course, I must get today's miles in early so that I return for game time later this morning.  Stalingrad is on the slate, I think, using a ruleset not played.  Should be interesting.
With warming temperatures (it is actually forecast to be hot today), snow is melting off the mountains and the river is rising.  Although, it is early, already water over the falls increases.
What about Spanish infantry?

Well, two more regiments of Spanish infantry muster out from the painting desk.  This time we see regiments Toledo and Africa.  Each regiment contains 23 figures with Old Glory foot led by a Eureka mounted colonel.  Flags are by David from Not by Appointment.

Many more SYW/WAS units are in work as I plug away at Hanoverians, Piedmontese, and a unit of Grenadiers de France.

For now, time to hit the road!

Saturday, April 29, 2023

Battle of Montgomery, 1644

On Wednesday, three players volunteered to take command in a remote game seeing my 30mm ECW collection out for battle.  The Battle of Montgomery in 1644 was on the docket.

Situation
Royalists, under Byron, are besieging Montgomery.  Meldrum has crossed the River Camlads in order to lift the siege and resupply the town and garrison.  Meldrum sends out a foraging party of cavalry to bring in supplies for both his troops and the besieged troops within Montgomery.  Seeing that his command outnumbers Meldrum after Meldrum sent off about 30% of his cavalry, Byron orders an attack to drive the Roundheads into the river.  Camlads is only crossable at Salt Bridge.  Meldrum is outnumbered but expecting his foraging party to be recalled and return at some point in the battle.  Byron is overconfident and does not offer much in personal command for the battle. Lothian's Chelshire foote have sworn to stand and will fight to the death.
Initial deployments
Royalists win if the Parliamentarian Army can be broken before it falls back across the River Camlads to safety.  Parliamentarians win if the Royalists can be broken and the siege lifted.  Parliamentarians gain a minor victory if they can cross back over the River Camlads to safety before their army is broken (but what fun would this victory condition hold if Meldrum runs away at the first sound of battle?).

Armies drawn up for battle.
View looking down the Battle Lines. 

Historically, Meldrum won the battle even though outnumbered.  Several deployment variations are hypothesized.  I choose the deployment will the cavalry massed upon the Royalist left.

Royalists automatically have initiative on the first turn.  Mark and Chris command Byron's Royalists.  Steve takes the helm of the Parliamentarian Army under Meldrum.

Meldrum readies his army for battle.
Byron holds the high ground.
On to battle!

The two armies watch on expectantly, waiting for the first advances of battle.   The wait is not long.

Byron orders Tyldesley's cavalry forward negotiating the hedge to its front.  Almost immediately, one of Fairfax's regiments is upon them.  In a quick, sharp clash, the Roundhead cavalry is driven off.  Casualties are heavy to both.

The cavalry face off on Meldrum's right.
Fairfax strikes!
As both commanders move up their foote, Fairfax keeps the pressure on the Royalist cavalry by charging back into the enemy before they can regroup.  At the hedge, the Royalists are trapped and are cut down before they can escape.  Along the lane, Fairfax charges in, scatters the enemy cavalry to his front, and then launches into pursuit.  Pursuit is stopped cold by a second body of Royalist horse. Fairfax retreats.

Out on the Royalist right, the dragoons come off the hill to take up a position in the rough ground.  Immediately, these dragoons come under pressure from enemy foote.

Foote advance.
Fairfax attacks!
Two Royalist cavalry are destroyed.
With a swirling cavalry battle on the Royalist left seeing the Royalists coming up short, Byron turns his attention to the infantry.  With his dragoons engaged on his far right, Broughton's foote are ordered down from the heights.

Seeing the dragoons overrun and the Royalist right threatened, one regiment swings around to counter enemy advances.  Catching the Roundhead infantry unprepared for an attack from that quarter, the Roundhead infantry is dispatched.

In the center, having let loose a volley into the Parliamentarian infantry to its front moments before, Broughton pitches into the enemy.  Disordered by the volley, the enemy cannot withstand the Royalist attack. It breaks for the rear.  The Parliamentarian left is no more.

Having suffered in the unequal exchanges in the cavalry battle on the Royalist left, success against enemy foot elsewhere looks to be tipping the battle's outcome back toward the Royalists.

Royalists descend the hill
and prepare to attack.
Two of Meldrum's foote are scattered.
Those thoughts are short-lived. Fairfax keeps pressure upon the Royalist cavalry wing routing a third horse regiment.  Only one cavalry regiment remains on the Royalist left.
Destruction of another Royalist horse!
As the Royalists' cavalry wing is destroyed,
Royalist generals look on in horror and dismay.
Having seen off the Roundhead left, Royalist foote turn to face the threat of Myddleton’s late arriving enemy cavalry returning from their foraging exercises.   Byron needs to stabilize his left in case his final horse regiment is seen off.
With their right secure, 
Royalist foote march into the plain.
Byron need not wait long.

Fairfax presses on and over the hedge to engage the sole remaining Royalist horse. Outnumbered, the action is over quickly.  The Royalist cavalry wing is gone.
The last Royalist horse regiment is destroyed.
Fairfax's hard-charging horse!
Royalist foote turn to face a new threat.
Situation when the two armies disengage.
At this point in battle, the Royalists had seen all of their cavalry scattered and the Parliamentarians had lost all of their infantry.  Both armies were hovering close to their Army Breakpoints.  The ultimate outcome could have easily gone either way.

With the Parliamentarian Army outnumbered, Meldrum could gain a minor victory by escaping back over the River Camlads before his army was broken or trapped against the river.  True that the Royalists prevented the siege of Montgomery from being lifted but Meldrum kept a viable army in the field to, perhaps, make another attempt at relieving the siege.  Given those conditions, each army could logically argue that they won a minor victory.  Meldrum could claim victory by not being destroyed.  Byron could declare victory by keeping the siege intact.

I called the battle a draw.

Thanks again to the players for providing a very entertaining game.  Montgomery may return to the field next week in an encore presentation.

Monday, April 24, 2023

Glory Days

David from Not by Appointment and I had a recent email exchange on game room aspirations.  In one of the emails, David sent a copy of this whisky advertisement from the '70s embodying his vision of the essence of a proper game room (well, without the whisky and horse).  So much to work with in this ad that I could not resist the temptation of making my own adaptation or meme.

While you may be able to take a White Horse anywhere, I wondered what the horse was thinking as it surveyed the battlefield below.  I am sure the man and woman are having an interesting conversation or a few repressed thoughts but I focused on the horse, itself.

My meme attempts to conjure up memories of the Glory Days from battles passed.

This ad offers a target-rich environment for captioning.

Your turn...

Edit 25APR2023:

David from Not by Appointment sent me this one: