Showing posts with label Ironsides. Show all posts

Sunday, December 1, 2019

Back to Southam, 1642

A second solo battle of Southam jumps into action on the gaming table.  After this battle is wrapped up, the deck will be cleared for the next planned battle.  I think it may be Kunersdorf.  

As a reminder of the situation, see deployments below:
Who is Who at Southam
Turn 1.
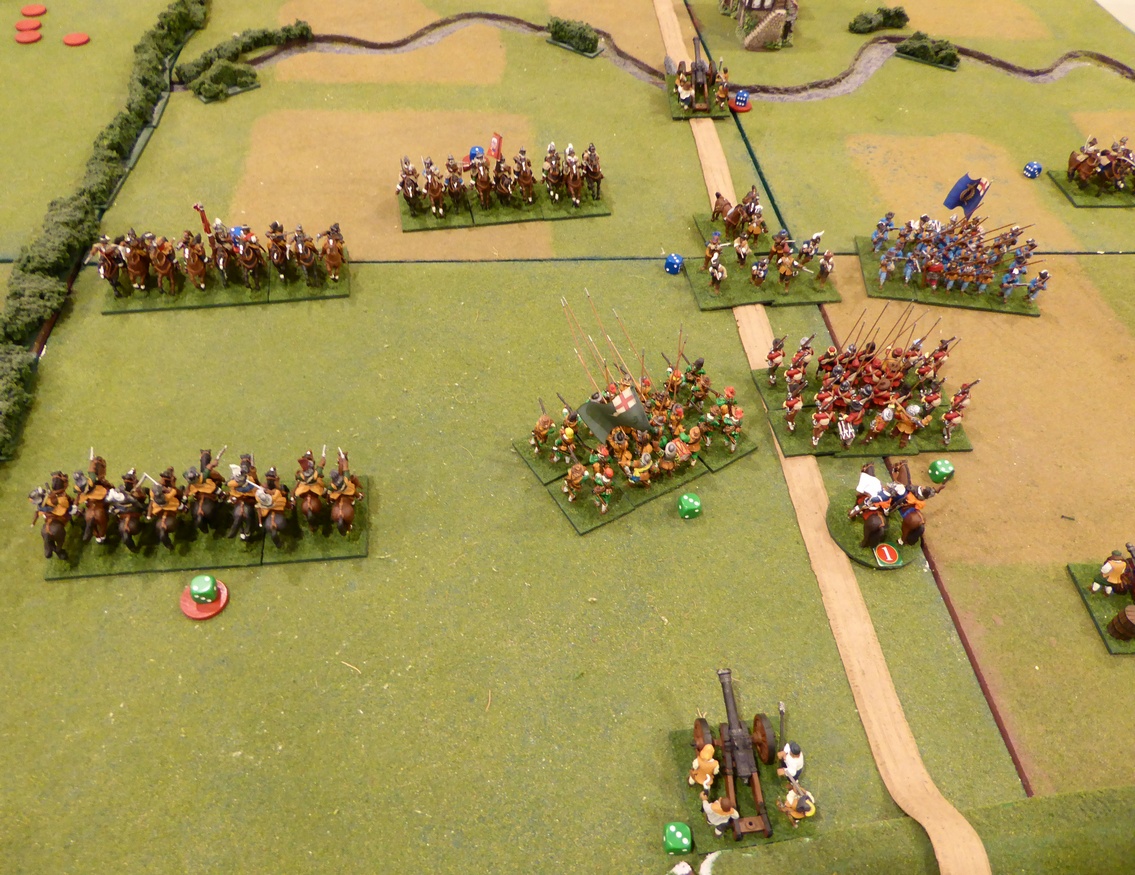
Parliament army under Lord Brooke steps off toward the Royalist positions.  As Brooke's force descends the heights, one of his light guns positioned astride the road fires into Carnarvon's Horse disrupting its ranks.  Carnarvon withdraws to a safer distance passing through Clarke's Horse drawn up to his rear.
Handily outnumbered in infantry, the Earl of Northampton tries to bring his comparative advantage to bear early.  That advantage? Cavalry.  On the Royalist left, Northampton's Horse wasted little time and sets off toward the Parliamentarian line.  Facing him in the distance, Goodwin's Horse responds.  In the initial clash of man and horse, Goodwin's disciplined horse gains an advantage and the Royalist horse breaks for the rear.  Shaken from the clash, Goodwin does not pursue.
Northampton and Goodwin clash
Northampton breaks for the rear
In support of Northampton, Middleton's Horse passes through the retiring horse on his way to seek revenge upon Goodwin.  Shaken from the earlier melee, Goodwin attempts to evade the charging Royalist horse.  Beginning his retrograde a little too late, Middleton catches Goodwin near the foot of the heights.  While both suffer from the fight, Goodwin receives more than he gives.
Middleton vs Goodwin
Continuing his withdrawal, Goodwin's retreat uncovers Hampden's Foote.  Middleton's pursuit targets the Parly foote.  While Hampden cannot stop the charging Royalists through volley, Middleton is sufficiently discouraged from pressing on and recoils after a brief melee.  Both suffer in the fight but Middleton is much worse for his exertion.  Still, the charge is deemed a success as Goodwin is sent packing and Hampden is shaken and weakened.  Still, Middleton teeters on collapse.  One little shove and he may be gone. 
Middleton pursues into Hampden's Foote
Middleton retires, exhausted
Turn 2. Lord Brooke retains initiative.  
Hampden's Foote rallies while Goodwin's Horse does not.  Brooke's two guns on the left fire on the Royalist guns near the bridge.  The fire is too much and the Royalist gunners scamper away.  The guns deployed on the right of the road fire on Northampton's Foote to no effect.  Lord Brooke's Foote advances up the road.  
Brooke's Foote advances
For the Royalists, Carnarvon's Horse rallies while the nearly exhausted Middleton withdraws.  The Earl rides over to rally his own regiment of horse.
Royalists regroup
Turn 3.   The Earl of Northampton seizes the initiative.  
On the Royalist right, Clarke's Horse charges Fiennes' Horse.  Fiennes' cannot muster the courage to counter charge.  Instead, he falls back.  Unfortunately, this retrograde uncovers one of Lord Brooke's guns.  The gun gets off a shot before overtaken by the hard charging cavalry.  Clarke's Horse absorbs the casualties from the close range artillery blast but overruns the guns.  The crew are cut down where they stand and the gun destroyed.  Their momentum carries them into Brooke's second gun.  Again, the crew manage to fire off a last minute blast and more horsemen hit the ground.  Tired from their exertions and exposed, Clarke's horsemen retreat toward a less hazardous environment. 
The charge
The pursuit
The destruction of a gun
The stall
Following up on Clarke's success and with Fiennes unable to respond, Carnarvon charges the remaining gun that had only moments before driven off Clarke.  Seeing Carnarvon come on from a great distance, the gun has time to reload and fire.  Although mostly ineffective, the artillery fire is enough to discourage Carnarvon from pursuing the prize.  He turns and retreats back to his lines.
The repulse
Riding over to Middleton, Northampton rallies his victorious troopers and leads them back into the fray.  Wanting to knock Goodwin's Horse out of the fight for good, Middleton charges.  Shaken, Goodwin withdraws cautiously. The Earl, leading Middleton's horse in pursuit of the withdrawing cavalry of Goodwin, reaches the end of his tether.  Nearly exhausted from the long charge, Middleton balks at the sight of Goodwin not in full flight.  At the end of his tether, the elastic snaps and Middleton breaks.  Oh, the tragedy!
The Earl leading the charge
and pursuit
and retreat
The Earl in rout
Fiennes and the remaining gun on the Parliament left rally but Goodwin does not.  Brooke's Foote fires into the dragoons.  The dragoons suffer from the volley but hold their ground.   Holles' Foote advances upon Carnarvon's Horse and unleashes a volley.  A number of horsemen fall as Carvnarvon continues his retreat.
Brooke volleys into Saville's Dragoons
Holles fires into Carnarvon
Carnarvon retires
Turn 4. Lord Brooke regains the initiative.
Goodwin fails to rally and Hampden's Foote fires into the exposed flank of Middleton's Horse but fails to find its target.  Fiennes' Horse charges Carnarvon.  With a Combat Effectiveness at 1, Carnarvon is likely to retreat.  He does. 
An easy shot at Middleton misses
Fiennes charges
and crashes into Carnarvon
Carnarvon sent packing
The gun on the right fires into Northampton's Foote.  The Royalist infantry take casualties and falls back.   Holles' Foote advances on Clarke's Horse.  Clarke smartly falls back.  Brooke's Foote fires into the dragoons.  Saville's dragoons suffer casualties but hold their ground.  After unleashing a volley, Brooke charges.  The dragoons evade and scamper back across the river by way of the bridge.
Dragoons fall back across the bridge
With the dragoons turning tail and retreating, Brooke veers to hit Northampton's Foote.  Northampton buckles and the regiment falls back in retreat.  With both Royalist artillery and dragoons wavering near the bridge, Northampton's retreat through their ranks as it scrambles to reach safety on the south side of the river is too much.  Both the dragoons and artillery break when Northampton's panicking infantry pass through them.
Brooke charges Northampton's Foote
Northampton breaks and stream across the bridge.
Artillery and dragoons carried away in Northampton's retreat
Brooke and the Parliamentarian Army holds the field of battle
With the only Royalist troops on the north bank of the river being cavalry and they in shaky condition, the Earl of Northampton abandons his position and admits defeat.  Southam is a victory for Lord Brooke and the Parliamentarian cause.

Again, Southam provided an interesting little action.  With no more than eight units per side, fate can play a big role in determining the outcome.  Even with the possibility of luck rearing its head, the battle was closely contested.  Ebb and flow of battle was present throughout.  The Royalists saw good success early on with their cavalry.  Taking out one gun, a second gun was in great peril.  Cavalry battles witnessed successes and setbacks for both.  Goodwin's cavalry once shaken never managed to regain its composure.  The best Roundhead horse regiment on the table neutered early on.  What a waste.In the end, the Royalist position disintegrated when retreating units fell back onto themselves in the rush to clear the bridge before being trapped.

For now, the ECW collection will be boxed up and put away for another day.  Next up is likely a try at Kunersdorf in December.  Details on the scenario are still in work but I am forging head with deploying the terrain onto the table.  Kunersdorf will be another in a long line of battles in which I wonder how Frederick ever got the moniker of The Great.  

Friday, November 1, 2019

ECW Battle of Southam, 1642

Having refought the ECW Battle of Southam three times in August, I returned to the drawing board to see what could be done to affect an historical outcome.  All August battles ended with a decisive Royalist victory which ran counter to the actual outcome.  In the historical encounter, the Royalist foot and artillery suffered from the imbalance in the number of their kind opposing them and fled the field.  Only the more numerous Royalist horse was able to cover this withdrawal.  

In all three earlier games, the Royalist cavalry superiority played havoc with any attempt by Parliament forces to come to grips with their opponent.  Superior in cavalry on both flanks, the Royalists quickly dispatched their less numerous counterparts and controlled the field of battle.  Given the historical outcome, I needed to investigate how this came about.  Since this is a solo game and I will be commanding Lord Brooke's Army, all photos will be taken from that perspective.  References to "left" and "right" will be assumed to be seen from the Parliamentarian side of battle unless specified.

For game specifics, first, I likely rated all cavalry on the field as having a better Combat Effectiveness (CE) than warranted.  Being early in the war, these ratings were likely too generous.  I will begin by downgrading all horse regiments across the board.  Some formations will be rated better than others but a general downgrading is in order.

Second, Parliament fielded six guns to two.  In the August battles, Parliament was allocated two gun stands to the Royalists' one.  To keep the gun ratios historical, Parliament will receive a third gun stand.  Being light pieces, all guns will be able to prolong a little farther than in the earlier battles.  More numerous and slightly more mobile, perhaps artillery may play a larger role?  
Initial dispositions
As a reminder, the Order of Battle for Southam is:

Parliamentarian Army OOB:
Army Commander: Lord Brooke: Average

Infantry:
Colonel John Hampden's Foot (CE=3)
Lord Brooke's Foot (CE=4)
Colonel Denzil Holles' Foot (CE=3)

Cavalry:
Left Wing Cavalry: Fiennes Horse (Trotters CE=3)
Right Wing Cavalry: Goodwin's Horse (Trotters CE=4)

Three artillery stands (CE=3)

Royalist Army OOB:
Army Commander:Earl of Northampton: Good


Infantry:
Earl of Northampton's Foot (CE=4)
Sir William Saville's Dragoons (Dismounted) Cavalry (CE=4):

Wilmot's and Carnarvon's Horse (Galloper CE=3)
Legge's and Clarke's Horse (Galloper CE=3)
Compton's and Northampton's Horse (Galloper CE=3)
Saville's and Middleton's Horse (Galloper CE=4)
One artillery stand (CE=3)

Lord Brooke advances off from heights
Turn 1:
Royalists take the initiative and begin a timid advance toward Lord Brooke's position on the heights.  Too far out to allow his cavalry dominance to come to bear, the Earl of Northampton closes the distance to Roundhead positions carefully.  Lord Brooke gives the signal for a general advance and his army descends from the heights.  Having the advantage in foot and guns, Northampton urges his center forward while his two cavalry regiments protect the wings.

Turn 2:
Lord Brooke seizes the initiative.  With his cavalry within striking distance of Royalist horse, his cavalry push forward to engage the enemy.  On Lord Brooke's left, Fiennes' horse charges forward.  Opposing Fiennes, Carnarvon's horse, counter charges.  Before the two bodies of horse collide, one of Brooke's light guns gets off a shot on the oncoming horse.  The light gun scores a lucky hit.  Carnarvon fails his response test and falls back.  His withdrawal is halted when he reaches Clarke's Regiment of Horse.  Fiennes follows up the retreat but pulls up short of contacting the enemy.  
Cavalry clash on left
Royalist horse repulsed
Goodwin's Horse on the right charges forward.  Middleton's Royalist Horse responds.  Both become shaken during the charge but both close.
Cavalry clash on right
In the clash, Middleton suffers a hit and retreats passing through Northampton's Horse to the rear.  Northampton's Horse calmly allows Middleton to pass through before charging Goodwin's Horse, himself.  Being shaken from his earlier effort, Goodwin cannot respond and takes the charge at the standstill. 
Royalists repulsed again
As Northampton closes, Goodwin's trotters, armed with pistols, get off a shot.  Shocked by this close range pistol discharge, Northampton's troopers turn tail and retreat.  Their panic carries them into the already shaken troops of Middleton.  This is too much for Middleton's wavering troops.  Middleton retreats back toward the bridge.  The Royalist left seems to be in peril.   
Goodwin vs Carnarvon
While the Royalist left is disintegrating, on the right, Carnarvon withdraws through Clarke's Horse in an attempt to remove himself from harms' way and seeks a place to recover.  Unfortunately, Carnarvon's move disorders Clarke and his troops become shaken.  In the center, the sole Royalist gun fires into Brooke's Foote at short range.  Brooke takes a hit but remains in place, shaken.
Royalist cavalry falling back
Seeing Brooke's regiment wavering, Northampton rides over to join his own regiment of foot.  Leading his regiment, he encourages his men to push into Brooke's regiment.  As Northampton bears down on Brooke, the defenders fire an ineffective volley before Northampton closes.   
Infantry fight in the center
Lord Brooke's Regiment of Foote repulsed
In the close combat, Brooke suffers heavy casualties and falls back between the gap separating his supporting regiments.  Northampton's regiment suffers casualties but stands firm.  For now, Northampton and his regiment are victorious.
Northampton's Regiment of Foote
Turn 3.
Lord Brooke retains initiative. Fiennes' Horse, now, precariously situated far from support and within the sights of Saville's Dragoons, falls back in search of a less hazardous place to reform.  As Fiennes disengages, the dragoons send off a parting volley.  Many troopers are left on the ground as the regiment withdraws.
Fiennes' horse falls back out of harms' way
In the center, Hampden's Foote fires into Northampton's Foote.  Northampton's Foote suffers casualties when the volley finds its target by a fortuitous reroll.  Not only does the infantry regiment take casualties but the Earl of Northampton is unseated and falls to the ground dead.  With the death of their commander, the fighting spirit of the Earl's army drops.
Push of pike
The Royalists fight on until the Earl's battered and weary army can disengage.  While many of Northampton's force are teetering on the brink of collapse, the fatigue in Lord Brooke's Army leaves it in no position to pursue.  The Royalist army retires from the field.  Minor Victory to Parliament.
For the Royalists, the battle is lost
Well! Parliament finally sees a victory on the ground at Southam.  Luck played a role in the outcome of this battle.  First, Parliament's outnumbered cavalry saw limited success on both wings.  With Royalist cavalry superiority negated, this early success set the tone for the battle.  Having many of the regiments on both sides either rated raw or poorly trained, there was little margin for error when combat effectiveness began to ebb.  Staying power was fleeting.  When the Earl of Northampton fell in the center, the effect of his loss rippled throughout his army.  The result was most of the army was shaken and nearing the brink.  A slight shove would have pushed the entire army over the edge.  

Was the result a fluke?  Perhaps.  Maybe the historical result was a low probability result too?  Had the light gun not found its target when Carnarvon counter charged Fiennes in the first charge of the day, Carnarvon may have defeated the Roundhead cavalry.  An early victory here would have opened up that flank for exploitation.  Did adding the third gun to Northampton's army make a difference?  I think it did.  While not many casualties were caused from artillery fire, its presence may have entered into Brooke's calculus on how to tackle the battle.  Allowing the light guns to prolong helped in supporting Brooke's general advance in the center.

An entertaining action.  The battle was swift and developed a plausible narrative.  A battle I plan to repeat before putting the soldiers back into their box.  Has Southam really been out on the table since August?  Yes, it has.  If nothing else, having Southam on the table and in sight every time I enter the game room for a painting session, has motivated me to push a few more ECW units into the painting queue.  

Wednesday, October 14, 2015

ECW Battle of Southam - Ironsides

The final ruleset of the trilogy under scrutiny using the Battle of Southam as the baseline is Howard Whitehouse's Ironsides.  Actually, Whitehouse's Ironsides forms the foundation for my interpretation and amendments to his rules.  Earlier trials tested One-Hour Wargames (see Southam BatRep using OHW) and Basic Baroque Impetvs (see Southam BatRep using Impetvs).

As a reminder the battle began with the deployments illustrated in the photo below.
Initial deployment 
Parliamentarian Army under Lord Brooke leads off the battle by advancing his line from the heights.  Brooke's guns open up against Northampton's gun deployed near the river.  In a spot of excellent shooting or good luck, the Royalist gun is hit and retreats back across the river searching for safety among the buildings of town.  The Royalist gun was not to take any meaningful part in the remainder of the battle.
Royalist gun retreats to safety
Middleton's horse on the Royalist right charges towards Brooke's Left Wing horse under Fiennes.  Passing its Response Test, Fiennes' trotters counter charge as horse crash together.  Both horse regiments take casualties in an even fight.  With neither gaining an upper hand, both recall.
Middleton charges on the right
while Carnarvon charges on the left
Middleton v Fiennes
Keeping pressure on the Parly's left wing, Northampton's horse moves through Middleton and then launches a charge towards Fiennes.  Disordered from the clash with Middleton, Fiennes calls for his troopers to retreat from the hard-charging cavaliers.  Fiennes' troops just manage to stay out of reach of the Royalist horse as Northampton becomes disordered from the charge. 
Northampton Horse pass through Middleton
and targets Fiennes
but Fiennes avoids contact for now.
On the Royalist left wing, Carnarvon charges towards Goodwin's Horse opposite him.  Goodwin counter charges.  In the clash, both regiments suffer heavy casualties but Carnarvon suffers more and falls back in disorder.  Brooke's Right Wing horse under Goodwin pursues, catching Carnarvon in retreat.  Caught while falling back in disorder, Carnarvon's command scatters.
Carnarvon charges and Goodwin counters
Melee!
Carnarvon caught in pursuit and destroyed
Seeing the destruction of Carnarvon, Clark leads his regiment of horse towards the now nearly exhausted horse of Goodwin.  Unable to respond, Goodwin's Horse is caught blown and cut down where they stand.   
Clark's Horse charges the blown horse of Goodwin
Caught blown, Goodwin is destroyed
Witnessing the destruction of Goodwin's Horse and with Clark bearing down on the nearest Roundhead Regiment of Foot, Brooke intervenes to stiff his regiment's resolve.  Brooke's Foot is able to form a hedgehog before Clark's Horse smashes into it.  Seeing the foot form hedgehog, Clark attempts to rein in his pursuit but hits Brooke's Foot, nonetheless.  Each combatant takes some casualties and Clark recalls away from the hedgehog.
Flush with victory, Clark targets Brooke's Foot
Luckily, Brooke is ready to repel the attacking horse
Horse v. a row of pikes
After light casualties, Clark recalls
Northampton takes initiative away from the Roundheads and presses on in the center with his foot while Clark withdraws out of musket range.  Not far enough from Fiennes' Horse to get up a full head of steam on the Royalist right, Northampton's Horse pursues the Roundhead horse who fails to stand in the face of the threat and retires.  Unfortunately, Fiennes is not able to fall back far enough and is caught by the pursuing Northampton.  Fiennes takes heavy casualties and flees the scene with the Cavaliers in hot pursuit.
Royalists advance in the center
while Northanpton attacks on the right
and scatters Fiennes' Horse
Having lost both cavalry wings, Brooke presses his foot forward in an attempt to defeat the Royalist center before Cavalier horse can return to the fight.  Lord Brooke joins his own regiment to rally them while Holles' Foot advances along the road to cover Brooke.  Hampden's Foot charges the dismounted dragoons near the main road.  The dragoons discharge their weapons to no effect before falling back in front of the Parly foot.
Parly foot advance in the center
Maintaining initiative Clark advances back into action on the Royalist left to threaten Brooke's Foot in hedgehog while Northampton's Foot charges the bristling hog.  To protect his comrades from a one-two punch from the Royalist horse and foot, Holles leads his regiment in a supporting charge.  Holles catches Northampton before he can contact Brooke.  With Northampton, himself, leading the charge, Holles' Foot is destroyed.  On the right center, the dragoons pour an effective volley into Hampden's advancing foot and the casualties suffered force Hampden to recoil.
Foot charge and counter charge
Holles intercepts Northampton
Seeing the destruction of Holles, both Brooke and Hampden disengage with Brooke making it back up onto the heights.  With Royalist horse in his rear and two horse, one dragoon, and one foot regiment to his fore, Brooke quits the field.
Roundhead foot retire
while Royalist forces press on.
A Royalist victory in an exciting and tactically interesting fight.  This game was decided in less than three full turns and played as quickly as any of the other two.  I would classify all three as fast play and all three produced entertaining contests.

Now that the soldiers have returned to their storage boxes, remaining to complete is a recap and summary of how these three sets of rules modeled the ECW battlefield.  What did I like and dislike about each?  What were their strengths and weaknesses?  After having played the same battle with three sets of rules, which set do I prefer?

From the BatReps from each of the three battles, which contest did the reader prefer and why?