With nothing but 18mm figures parading across the painting desk for three months, time to interject something different. Something different I found.
Out from The Lead Pile is a Black Tree Design 28mm German Pak 40 with three crew. I picked this piece up on a BTD sale awhile back along with a couple other pieces of ordnance. Finally, I decided to put the gun together to give the Germans some punch in the next Chain of Command (CoC) game. I gave this gun a weathered and beat up look. Hopefully, not too beat up.
While the last CoC game is but a faint memory, work on this project is an even more distant memory. Looking at the Painting Log, the last figures to see action at the painting desk were a German sniper and spotter team almost two years ago. My, how time flies!
Following the Zorndorf game (I need to tap out a BatRep for that), activity at the painting desk returns to fielding more 18mm troops. In the queue are more units for the 1799 project. Included in the batch working through the production line are another pair of Austrian guns, Austrian infantry, French legere, and dismounted Russian Cossacks. Just enough to keep me busy.
Wednesday, August 29, 2018
Sunday, August 26, 2018
Austrian Guns for 1799 Project
While Saturday was spent battling on the fields of Zorndorf, Sunday evening's painting session produced two 18mm guns and crew for the 1799 project. Not a lot of progress but progress nonetheless. Figures are from AB Miniatures' FRW range of Austrians.
As always, terrific sculpts from AB and a pleasure to paint. Two more guns for the Austrian cause are making their way through the painting queue. This next pair of Austrian guns will be crewed by Grenz artillerymen. Austrian artillerymen in casquet are splendid!
One shortfall that needs to be addressed for the 18mm SYW project is that I have yet to field any Prussian or Austrian howitzers. Zorndorf needed two howitzer batteries and I was forced to field 6lb guns instead. I am nearing the tipping point for a Eureka order and when I do, Prussian and Austrian howitzers and crew will be in the mix.
Also, with Jake's massive Russian army fielding limbers for all of his guns, the pressure is mounting to field limbers for my artillery park. Oh, how I hate painting limbers...
As always, terrific sculpts from AB and a pleasure to paint. Two more guns for the Austrian cause are making their way through the painting queue. This next pair of Austrian guns will be crewed by Grenz artillerymen. Austrian artillerymen in casquet are splendid!
One shortfall that needs to be addressed for the 18mm SYW project is that I have yet to field any Prussian or Austrian howitzers. Zorndorf needed two howitzer batteries and I was forced to field 6lb guns instead. I am nearing the tipping point for a Eureka order and when I do, Prussian and Austrian howitzers and crew will be in the mix.
Also, with Jake's massive Russian army fielding limbers for all of his guns, the pressure is mounting to field limbers for my artillery park. Oh, how I hate painting limbers...
Thursday, August 23, 2018
Zorndorf: The Scenario
Zorndorf. The raison principale for Jake to tackle the mustering of a Russian Army for the Seven Years War in 2018. It is done! Now, it is on to the battle for a refight on the 260th anniversary of the actual engagement.
With troops deployed for battle, attention turns toward the scenario and rules of engagement. The battlefield and troops are positioned. What will be the objectives and constraints governing the battle?
First, the battlefield and deployments,
![]() |
| Battlefield overview |
| Zorndorf with initial deployments |
then the Order of Battle.
Scenario Details:
Rules: Honours of War
Start: 0900 End: 1900
Prussia Considered the attacker
Army Break Point: Prussia:24 Russia:24
Terrain:
Grunds not passable where vegetation exists. Rough otherwise.
All woods are dense.
Zorndorf is burning.
Units take one hit if forced to pass through Zorndorf.
Units defending from attacks across a grund are uphill and no charge bonus.
Special Situations:
- Moritz is second in command and General of Infantry. He may act as CiC for any infantry formation in the same manner in which Frederick acts.
- Prussian Musketeers and Fusiliers move as Austrian for flank/rear/form change. These are not the same troops as began the war.
- Prussian Brummers may pivot but may not prolong nor limber.
- After third Russian unit broken and every unit broken thereafter, Fermor rolls Command Test. (-1) for each broken unit. If he fails (Poor or worse), he must leave the field and Saltykov takes over. Saltykov command taken over by DEPENDABLE replacement. Each turn Fermor rolls to see if he returns to battle.
- Russian Observation Corps are rated as Standard due to their steadiness in this battle but fire as Inferior.
- Russian Cossacks to south of Quartschen did not participate in the battle but if the Prussians attempt something untoward in that quarter, they may join the battle.
- -1 point for each unit Done For. Points are doubled if Russian unit is Done For and retreats/routs into woods behind Russian Second Line or if Prussian unit is Done For and retreats/routs beyond Zorndorf.
- -1 point for Russian loss of Zicher
- -2 points for Russian loss of baggage train
- -3 points for Russian loss of Quartschen
- -1 point for Prussian loss of Wilkersdorf
- -3 points for Prussian loss of Zorndorf
This scenario summary should provide just enough information from which commanders may formulate a plan of battle.
Monday, August 20, 2018
Zorndorf: Finishing the Prussian OB
The first unit off the painting desk is the 4th Hussar Regiment mustering two squadrons of a half dozen figures each. Although the stated paper strength of two squadrons is a dozen figures, in the Zorndorf game, these dozen figures of the 4th will represent about five squadrons of cavalry. The white and medium blue uniform of the 4th will make a colorful contrast against the masses of dark blue coated Prussian infantry and the white coated cuirassiers.
Also off the painting desk is one more command stand for the Prussians. During the drafting of the Prussian OB, I discovered a need for one more command stand to provide the cavalry reserve under Marchall an on-field commander.
While these two figures were in work, the Prussian OB underwent a slight consolidation in independent commands. This consolidation freed up one existing command stand that could be used for Marchall. Nevertheless, I finished this pair off and it will represent Marchall as originally planned.
Having all Prussian figures accounted for the battle, attention now turns to OB finalization and scenario design. Making unit labels, rechecking the QRS, and qualifying special rules are all in work. With four players confirmed for the game, each player will have plenty of troops under his command. Figures from Eureka Miniatures.
Friday, August 17, 2018
Chaeronea, To the Strongest! Style
| Scott's beautiful 15mm hand-painted shields |
| The long Greek battle line |
| Greeks pinning a yellow-shield phalanx |
| The lone Greek cavalry |
| Greek Center under Lysicles |
| Greeks advance |
| While the Macedonians wait |
| Greek right |
| Alexander's cavalry disordered and driven back |
| Piles of cards signifies action on the right |
| Clash on the Greek left |
TtS! is a fun and challenging game that I want to try again soon. The game motivates me to put 28mm ancients into the painting queue and build myself a gridded mat. I think I could defeat the Macedonians next time...
Wednesday, August 15, 2018
Hiking the Palouse
| Lake Pend Oreille |
| Marching single file along the wooded trail |
Once departing the trailhead, a hiker must go up before going down to the lake. Once the bluff is crested, a partial view of the lake is visible. A stunning view it is too!
| First glimpse of Lake Pend Oreille |
After many a switch back and an hour later, we arrive at the serene waters of the lake. Beautiful 180 degree views showing the calm lake waters and surrounding mountains are present with every turn.
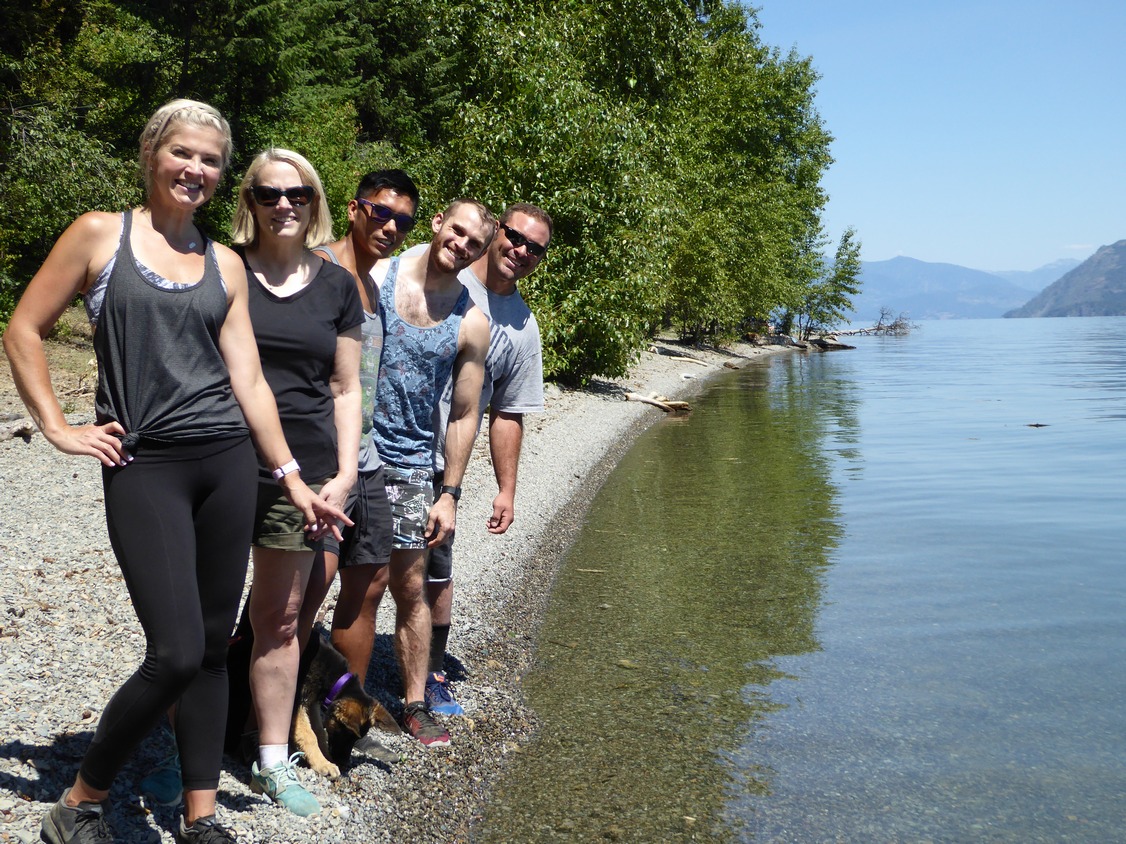
The hike down was hot so after reaching the lake we found a suitable stretch of graveled beach to rest. After a light lunch, cold drinks, several photo ops, and a quick wade into the cool lake waters, we gathered our belongings and headed back up the steep trail to return to our vehicle.
| The day's hikers |
While indoor activities of our hobby frequently beckon, when the weather is pleasant and friends and family are willing, enjoy these opportunities to connect to both family and nature.
Sunday, August 12, 2018
Montcalm & Wolfe: Capitulation!
| Battle of Oswegatchie from Gridded Wargames |
With the severe mauling of the French at the battle of Oswegatchie and the death of Rigaud from wounds suffered during the battle, the remnants of Rigaud's force retreat into the woods. Unfortunately, the militia having sustained heavy casualties have had enough and disband. For details on this hot engagement, please visit Peter's Gridded Wargames, FIW Campaign Game 20.
Still reeling from the heavy losses at Oswegatchie, the French choose to roll on the Command Table to set their forces into motion. The result? No French activations! A band of Algonquin join the French cause and move to join the retreating Regulars from Oswegatchie but no French forces respond. The loss of Rigaud and Oswegatchie must have been a hard blow for the French. A hasty retreat back to Montreal seems the only option for the defeated survivors of Rigaud's force.
| Heavy French losses at Oswegatchie |
The loss of any French activations provides the British with a chance to take a double move. The British could play it safely and opt for a guaranteed single activation or choose to roll on the Command Table. The British choose the latter and roll three activations for June.
| British maneuvers in June |
With Braddock threatening Fort Niagara in the west, Amherst blocking any attempts to gain access to the Mohawk Valley at Fort Stanwix, Fort Isle aux Noix under threat, and both Quebec and Montreal under British control, the French government sees the writing on the wall and seeks terms of surrender. Of course, the British accept. The war is over.
Well! This campaign game has yielded much more enjoyment and many more interesting battles than I imagined when first conceived back in February. In February, I never expected the campaign to command six months activity. In that time, Peter has fought 20 battles on his gridded gaming table while the operational situations were conjured up by me using Rob Markham's DTP game, Montcalm & Wolfe. While I became very familiar with Markham's operational design, Peter honed his own gridded, tactical rules. I enjoyed seeing Peter's rules evolve over the course of the campaign. Seeing his troops battle it out on the table was always a joy.
What began as a response to Peter's desire for campaign context for his gridded battles, this Montcalm & Wolfe campaign blossomed to develop an interesting and captivating narrative punctuated by Peter's tabletop battles. While the campaign would draw up the forces and location for each battle, Peter crafted the terrain and tactical situation to reflect the context of the campaign. Sometimes the battle outcome was expected; sometimes it was not.
Montcalm & Wolfe presents difficult challenges for the campaigner. Due the nature of the terrain and harsh attrition rules, movement is channeled through only a few corridors protected by forts within one month's march. Those few corridors such as the Mohawk and Hudson Valley drainages saw much action during the campaign. How many times were battles fought over Forts William-Henry, Stanwix, or Oswego? Many! Those landscapes became quite familiar territory to the follower of this campaign as the reader was treated to Peter's tabletop renditions of the terrain.
The French have a difficult time in Montcalm & Wolfe. A war of attrition cannot be won with the uneven reinforcement schedule. To do well, the French must strike early and often before British troops begin pouring into America. When the balance of power changes, the French must adapt quickly. Having played through one complete campaign game, I have a very good feel for the play and design of Markham's game. Perhaps a review and thoughts on the game, itself, will follow at a later time?
Until then, tremendous thanks go out to Peter for diligently tackling every battle thrown up against him. His battle resolution gave an extra dimension to the game and added tension as I awaited publication of each battle's outcome. Twenty games played out on the table for a campaign is a feat not easily duplicated. Peter, I hope you enjoyed this experiment as much as I. Chapeau to you!
Montcalm & Wolfe presents difficult challenges for the campaigner. Due the nature of the terrain and harsh attrition rules, movement is channeled through only a few corridors protected by forts within one month's march. Those few corridors such as the Mohawk and Hudson Valley drainages saw much action during the campaign. How many times were battles fought over Forts William-Henry, Stanwix, or Oswego? Many! Those landscapes became quite familiar territory to the follower of this campaign as the reader was treated to Peter's tabletop renditions of the terrain.
The French have a difficult time in Montcalm & Wolfe. A war of attrition cannot be won with the uneven reinforcement schedule. To do well, the French must strike early and often before British troops begin pouring into America. When the balance of power changes, the French must adapt quickly. Having played through one complete campaign game, I have a very good feel for the play and design of Markham's game. Perhaps a review and thoughts on the game, itself, will follow at a later time?
Until then, tremendous thanks go out to Peter for diligently tackling every battle thrown up against him. His battle resolution gave an extra dimension to the game and added tension as I awaited publication of each battle's outcome. Twenty games played out on the table for a campaign is a feat not easily duplicated. Peter, I hope you enjoyed this experiment as much as I. Chapeau to you!
Subscribe to:
Posts (Atom)