Over the last two Mondays, the 1859 Battle of Montebello has been raging over my gaming table. The combatants were six members of Postie's Rejects in the UK. Montebello represents the third remote battle hosted for these fine fellas. Two of the participants' perspectives on the battle can be found at Lee's BatRep, Richard's BatRep Part 1, Richard's BatRep Part 2. I suggest reading through my account before hopping over to read each of these individual accounts.
The Rejects enjoy fighting battles with a heathy dose of fog of war. I obliged.
Each army was provided with a briefing outlining the general situation, a map, its OB, and objectives for carrying the day. Objectives were kept vague as were enemy dispositions and enemy objectives. Neither army knew enemy strengths or reinforcement timetables.
 |
| The Battlefield |
General Briefing
On 9 May, Austrian FZM Gyulai’s uninspired offensive in Piedmont ground to a halt without ever contacting the enemy. Concerned that the French would attempt to turn his left flank by advancing upon Piacenza, FML Stadion’s V Corps was ordered (20 May) across the Sesia River and move on Casteggio and Voghera. This reconnaissance-in-force was determined to discover French dispositions, interdict the Voghera-Piacenza Road, and thwart these perceived threats.
As the Austrians approached Casteggio, they ran into Sardinian cavalry screens. The Sardinian mission, deployed east of Voghera, was to act as an early warning system to prevent surprise attacks from the Austrians. The Sardinian light cavalry were to hinder any enemy movements westward buying time for the French army to come up, if needed. The only means of crossing the River Coppa in this area are via two bridges: the bridge at Casteggio and the railroad bridge to the north of that town. Running from Genestrello north, the Fossa Gazzo can be crossed everywhere but with difficulty. The railroad bridge at Casina Nuova and the bridge near Genestrello are the best places to cross the Fossa Gazzo.
Being heavily outnumbered, the Sardinians traded space for time as they slowly gave up ground to the approaching Austrians. After reports arrived detailing the action earlier in the day and the fall of Casteggio, Forey’s division of the French 1st Corps quickly marched on Casteggio. In the meantime, Stadion had taken first Montebello and then Genestrello as the Sardinian cavalry retired.
Austrian BriefingIt is now 2pm. Urban occupies Genestrello, Montebello, and Casteggio with Schaafgotsche’s Brigade. Baum advances on the rail bridge at Casina Nuova. Hesse’s wing is marching upon Lungavilla from the north. Paumgarten’s Center Wing is spread out north of Casteggio with Bils and Gaal’s Brigades hurriedly marching to the front. Sonnaz’ Sardinian cavalry have fallen back across the River Coppa and vacated both Montebello and Genestrello. They can be seen deployed in the vineyards and cultivated land north of the Voghera-Piacenza Road and between the River Coppa and the Fossa Gazzo.
Reports suggest that the French are rapidly bringing Forey’s Division forward to contest Austrian gains. Forey has two brigades of infantry in route to Genestrello and Casina Nuova to secure the bridges.
FML Stadion, your objective is to hold the gains made this morning. Deny the bridges at Casina Nuova and Genestrello to the enemy. Hesse will be arriving from the north to threaten the French left as it drives east. If Forey is defeated, drive on Voghera to complete the victory. If faced with overwhelming odds, fall back slowly, challenging ever meter, to take up positions on the east bank of the River Coppa. Do not allow the enemy to cross the River Coppa. Allowing the French to take Casteggio opens the road to Piacenza and jeopardizes the whole army’s position in Piedmont. Your corps must remain a viable fighting force.
French Briefing
It is now 2pm. Sonnaz’ Sardinian cavalry have fallen back across the River Coppa and vacated both Montebello and Genestrello. They are deployed in the vineyards and cultivated land north of the Voghera-Piacenza Road and between the River Coppa and the Fossa Gazzo protecting the French left. Sonnaz reports that the enemy occupy Genestrello and Montebello. Estimates are that the enemy are in brigade strength to the west of the River Coppa. Stadion appears to be commanding the Austrian Left Wing from Montebello. An Austrian column is approaching from the north toward Lungavilla. Reports suggest that this enemy body is the Austrian Right Wing under the command of Hesse. Hesse has the potential to turn Forey’s flank if not countered. Enemy are seen advancing upon Casina Nuova to the south of Sonnaz’ cavalry.
Beuret’s Brigade is within sight of Genestrello. Blanchard’s Brigade is advancing eastwards to the north of Beuret toward Casina Nuova and the railroad bridge.
General Forey, your objective is to push the enemy out of Genestrello and Montebello, and advance upon Casteggio. The bridges over the Fossa Gazzo and River Coppa should not be allowed to remain in Austrian hands. Push the enemy back across the River Coppa. Taking Casteggio and moving east toward Piacenza would make the Austrian position untenable.
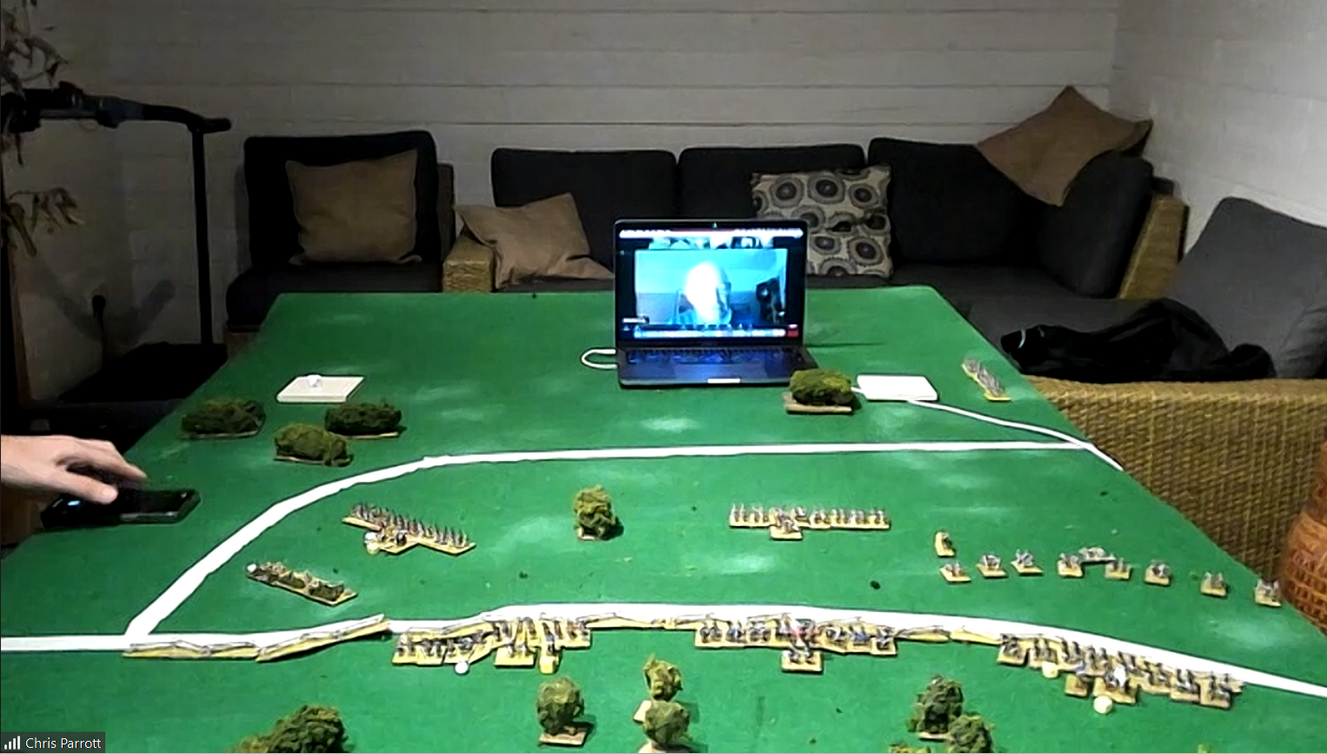
These briefings are all that is known of enemy dispositions until battle is joined. When battle is joined, this is the view greeting the armchair generals.
 |
| Situation at start |
Let's see how the battle played out.
 |
Sardinian cavalry occupy the central position
between the Fossa Gazzo and River Coppa. |
 |
Urban's Austrian wing deployed among the
towns along the Voghera-Piacenza Road.
Skirmishing erupts near Genestrello
(background) as the French arrive. |
 |
As Blanchard's French Brigade crosses the stream
at the rail bridge at Cascina Nuova,
Beuret attacks Genestrello.
General Forey leads the assault.
First assault repulsed! |
 |
Hesse's Austrian wing arrives at Lungavilla and
is immediately attacked by Sardinian cavalry.
Austrian reinforcements are brought up as Urban
orders Baum to advance west along the rail line. |
 |
With fighting in the north, Sardinian cavalry are sent
reeling while Austrian reinforcements stream across the Coppa. |
 |
Austrians pay a heavy price for the deep push along the rail.
Blanchard strikes quickly catching one battalion
in column and overrunning two guns.
Austrian morale sags. |
 |
Forey and Beuret attack Genestrello a second time.
This time, the French attempt encircling the village. |
 |
In the north (background), Hesse dispatches remaining
Sardinian cavalry and shifts his attention toward falling
upon Blanchard's exposed left flank. |
 |
As the Austrian center gels, the French take Genestrello.
Losses are heavy. |
 |
Austrians pour over the Coppa winding their way
behind Montebello.
Paumgartern plans to make a stand on the heights. |
 |
With Beuret making limited progress along the main road,
Blanchard finds himself in a bowl surrounded by the enemy
after the Sardinians have been scattered. |
 |
Blanchard (French masses along railway)
is in a precarious position.
Blanchard dispatches two cavalry squadrons
north to stabilize the situation. |
 |
At Genestrello, still, Beuret is having great difficulty
pushing the Austrian light infantry back.
Casualties mount and valuable time is lost. |
 |
Austrians form a solid, defensive arc
from Montebello stretching north to Lungavilla. |
 |
| Situation midafternoon and at end of Session #1. |
 |
Although the Austrians facing Blanchard look heavily damaged,
the French change strategy following the one-week interlude. |
 |
Faced with seemingly overwhelming odds,
the French pull back to consolidate. |
 |
Having recovered from the earlier debacle in the center,
the Austrians push out light infantry to harass the French.
In the south, the Austrians fall back upon Montebello
as Beuret works his way around Genestrello. |
 |
Coordinated French attacks go in against the
defenders of Montebello.
More Austrians rush up to plug any gap in the line
and to replace wavering units. |
 |
Working around Montebello from the south
will be a difficult challenge.
French casualties are heavy. |
 |
| The French attackers at Montebello are driven back. |
 |
The Austrian defenders stand firm.
The Austrian left is solidly anchored upon Montebello. |
 |
With the attack on Montebello repulsed
and the French center under increasing pressure,
General Forey orders a withdrawal from battle.
The battle is over. |
 |
Battles's end.
The French retire. |
Victory to the Austrians! Congratulations go out to Steve, David, and Lee as the Austrian wing commanders. Richard, Ray, and Surjit (as the French) put up the good fight and made for an enjoyable contest. Well played by all.
While an Austrian victory may have appeared imminent at the time of French withdrawal, looks can be deceiving. Urban's Left Wing had suffered heavy casualties and both brigades (Baum and Scaafgotsche) were each perilously close to breaking. A hit or two here or there would have forced Urban to retire from the field. Urban's retirement may have opened up gaps in the Austrian defenses. Defending while simultaneously allowing friendly units to retire through, may have been a tall order for Paumgarten's wing. That question remains unanswered.
Confronted with a handful of known unknowns, each army was forced into making decisions based upon incomplete information. Had the French known how close Urban's wing was to collapse, they likely would have pressed on from their early success along the railway. For their part, the Austrians did not know the strength of the enemy they faced nor its combat effectiveness. In response to early attacks against Urban, the Austrians made haste in bringing up reinforcements to screen and protect Urban from catastrophic harm. The Austrians never knew how close Urban was to breaking until the game ended. There was a collective sigh of relief. Were more French reinforcements on the way to the battlefield? Yes!
For me, this produced a very interesting battle to watch unfold. This result did not match the historical account but the Austrians were not saddled with their historical counterparts' command lethargy. Also, Austrian reinforcement arrival was compressed to allow all three Austrian commands to have meaningful forces on table at the start.
Would I have fought the same way? Perhaps not but I am viewing this action with 20/20 hindsight and face my own preconceptions. I reckon I will give this battle a try on my own while still set out on the table. Will my results differ? Possibly. For me, the unknowns are now known.
Besides enjoying stage-managing half-dozen gamers in a large battle, one of the benefits of these repeated, multi-player games is to see the rules in action. Many times, odd situations arise that catch me off balance. Situations not seen before or not remembered. When you have six players, each with their own ideas and tactics, unexpected combinations surface. Following each game, I take my notes, carefully review the situations, and then adjust the rules as needed. This game was no exception. Every playing advances the rules, sometimes only marginally, but always with benefit. Well, sometimes it is two steps forward and one step back. Repetition brings clarity too.
The participants play a big role in this process. I thank them.
Now, please go read Lee and Richard's battle accounts.