Showing posts with label Rebels and Patriots. Show all posts

Friday, August 14, 2026

Action at Pitzer Woods

After having restarted remote gaming with Matt (see Battle of Germantownafter a seemingly long hiatus, Matt hosted a second game without hesitation.  On Wednesday, Matt brought his 28mm ACW collection to the table for a Rebels & Patriots game to refight the action at Pitzer Wood at Gettysburg on Day 2. 
Federal OB
photo courtesy wargamesinthedungeon
Matt sent a scenario briefing and my Federal command for the day.  Rebel troops were unknown, but Matt hinted that opposing forces were about equal in size.  Notice that the Federals field two units of Berdan Sharpshooters.  Sharpshooters are powerful having +1 DRM to fire and a longer, 24-inch range.  All Federal infantry are veterans.  This is a far cry from the American rabble I see in our long-running AWI campaign.  You will see how the sharpshooters controlled the narrative.  
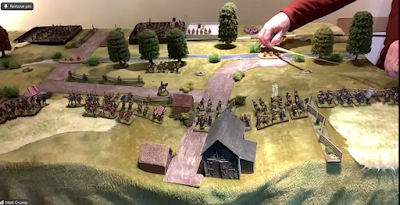
Battlefield and Federal objectives
photo courtesy wargamesinthedungeon
The Federal objective is to scout the woods and pick off as many of the objectives (yellow circles) as possible.  The Federals need to scout three such objectives for victory without seeing their command broken.  Federals arrive at the bottom of the table while Rebels come onto the table at the top.

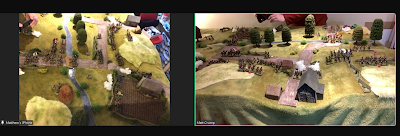
Now, I know that Matt will provide a BatRep with in-house photos, but for now, I provide my brief impression of the action from a remote viewer's perspective. 
Federals approach Pitzer Wood
 but the US Cavalry fails to move.
Federals continue their advance into the woods.
Rebels are seen in the distance.
Federal Left is having trouble getting started!
All Federals are now on the field with
 two of the five objectives reached.
Rebels come within range of the US Sharpshooters
and Federals open up on the enemy at long range.
Two objectives successfully scouted.
Keep an eye on the Rebel Dead Pile in the top left corner.
Taking fire from Rebels on the left,
US cavalry retires as more Rebels move up to contest the ground.
Sharpshooters in center retire to keep the enemy at arms' length.
Reb casualties mount as US Regulars in the woods open fire
in coordination with sharpshooters. 
More Rebels fall as Federal fire concentrates. 
Sharpshooters continuing picking off the enemy from a distance.
Federal concentration of fire is beginning to tell
as Federals gain fire superiority.
US Cavalry takes losses, but the enemy Dead Pile continues to grow.
Constant sharpshooter covering fire disorders the enemy
as the Federals advance into the woods. 
US cavalry advances to the objective on the left
while Federal skirmishers press on into the woods.
Federals dominate the firefight!
Fire from the Rebs forces the US Cavalry to withdraw
 from the objective before it can successfully be scouted.
Taking much fire in the open field,
 Rebels are forced to seek cover.
Having pushed up into the woods,
concentrated Federal fire causes much disorder among the Rebs.
Are the Rebs nearing their breaking point?
Yes!
Having to take morale tests, the Rebels withdraw from battle!
Victory to the Federals!  With the collapse of the Confederate positions in this part of the line, there may be no Day 3 of Gettysburg!

This was a short and sharp action in which the US Sharpshooters dominated the field of battle.  The Federals kept the sharpshooters back so that they could reach the enemy, but the enemy could not reach them.  With their +1DRM to fire they were expected to cause six hits with every volley.  Sometimes they managed even better than expectations.  The Rebels were being ground down with each volley.  Compound that with Matt's uncanny ability to roll poorly on almost every morale test and the Rebels did not stand much of a chance. 

Good fun (for me!) and a nice change of pace from the AWI fighting.
Thanks, Matt, for a very entertaining game!

Thursday, December 11, 2025

Farming with Matt

photo courtesy wargamesinthedungeon

Picking up the long-running AWI campaign finds the campaign in 1777 and at the Battle of Freeman's Farm.  Long-running campaign, indeed!  Looking back into the archives, I discover that Matt and I have been fighting our way through the AWI since 2021!  Incredible, and we are only up to 1777!

Wednesday's action saw the combatants meeting on the fields of Freeman's Farm.  As always, I commanded the American Army and Matt took the helm of the British Army.  This is a large battle and Matt laid out a beautiful spread across the breadth and length of his 8'x5' table.  
The Americans had great difficulty coming up for battle and a huge traffic jam developed.  Not what you want to see when facing those menacing Redcoats!  Well, unless you are the British!
American traffic jam!
photo courtesy wargamesinthedungeon
Choosing to bring the American Army on behind Freeman's Farm, it was a mad dash to thwart the British attempt to turn the American Left.  Poor's Brigade (Gosh, how appropriately named!) made it just in time to line the fence before crashing British volleys rang out.  Taking fire from multiple directions, scores of Americans were cut down before Poor had seen enough and began to be retire.  Retire?  That suggests an orderly withdrawal.  There was no orderly retrograde.  One unit was destroyed triggering a calamity of morale checks.  Several regiments fled on the spot.  Much of Poor's Brigade was skedaddling to the rear!
Poor comes up...
photo courtesy wargamesinthedungeon
and goes back!
photo courtesy wargamesinthedungeon
How did the battle ultimately turn out for the Americans?  This is a tale best told by the victors!  One for the history books, no doubt.  Farming with Matt?  Well, many Americans were planted on this bloody field.

Great game and great fun!  Thanks, Matt, for a most enjoyable session!
See Matt's battle account at Freeman's Farm 1777.  

Monday, March 3, 2025

The Week That Was...

While not as vigorous as six games in seven days as seen a few weeks ago, I did manage four games over the past seven days.

Three of the games saw a return to the 203 BCE Battle of Po River using CCA and my 6mm armies.  Like the other two sessions (we fought the battle a total of nine times), Carthage came out the victor in two of the three battles.  Great fun although time to find another, equally entertaining scenario. Po River may be my favorite battle played.  Even though the Carthaginians wound up winning six games to three, the Romans seemed in the fight until the last banner fell.  Very well balanced and a fun challenge for both armies.

The fourth game of the week was a remote game with Matt (wargames in the dungeon) where we fought the opening moves of the AWI Battle of Brandywine Creek.  This session saw the British and Hessian attacks at Chadd and Brinton's Fords.  I only have screenshots but Matt will likely have a detailed expose of the battle soon.

I leave the battle account for Matt to spin!  This week, only one game on the docket for Wednesday.  Of course, that may change.

On the painting front, the brushes have been moderately busy with February seeing 70 figures cross the painting desk.  Weather has improved enough to prime figures too.  Painted units are stacking up at the light box so I need to get a move on.

First up are two British regiments for the SYW/WAS project.  These are the first of hopefully many British units to march out from the painting desk in 2025.

The two regiments muster out as the 1st and 2nd Foot Guards.  Each regiment has 22 Blue Moon foot figures led by a Eureka mounted colonel.  Only two regiments but it is a start.

Finally, weather improved enough to get out for a pleasant afternoon bike ride.  Oh, it is good to be back outside.  Very nice change of pace from a winter spent indoors on the trainer.  I am feeling the difference between trainer and actually cycling outside in the body today.  Still much grit and too many potholes to contend with on the road but things are looking up.

Tuesday, July 30, 2024

A New Project and a Game

Given that June saw good production at the painting desk with nearly 150 figures crossing over to the "Painted" side of the ledger, July has been a letdown.  With games, planning for games, research, scenario development and summertime activities, painting production took a precipice drop in July.  I did manage to complete one, three battalion regiment of Prussian infantry, though, and I started a new project.
Well, "New" in the sense that I have finally overcome the inertia of expanding my 1859 project to bring in Prussians for the 1870 conflict.  These 48 figures represent the first of hopefully a serious attempt at fielding a small Prussian Army for the FPW.  The figures have been in The Lead Pile for years.  Time to do something productive with them.  The problem is that I have not felt much like painting of late.  I keep getting distracted by other calls for attention. 
Anyway, these figures are 15mm Lancashire Games.  Great figures that paint up quickly when I sit down at the painting desk for a meaningful painting session.  The regiment still needs to collect its flags.  Perhaps I can find some suitable flags on the internet?  In July, those meaningful painting sessions were few and far between.  With luck, August will see a pick-up in productivity.  At least this is a start to a Prussian Army!
Cheriton Battlefield
Photo courtesy Gridbased Wargaming
On the gaming front, I joined Matt on Sunday to resurrect our AWI campaign.  A nail biting and unexpected finish.  I am sure Matt will provide an accurate chronicle of the action at Fort Anne.  The first game in Peter and my home-and-away series of Battle of Cheriton replays is on deck for later this week.  Peter is hosting (see Remote Game Preparation) the first round and then I will host the second.  Both games will be played remotely using different scenarios and different rules.  We completed a similar exercise before with Lake Trasimene.  It was great fun and we both learned a lot about the battle in these refights.  I wonder what insights might come out of our Cheriton refights?  Research for my game is still in progress.  Battle layout nears completion.  I am sure I will pick up some useful tips after having played Peter’s interpretation of Cheriton.

Tuesday, November 15, 2022

Bloody Bound Brook BatRep

Bound Brook Table
photo courtesy wargamesinthedungeon

Matt and I returned on Sunday to our long-running AWI campaign using Rebels & Patriots.  This campaign has been in action for two years running.  On the docket for this day was a recreation of the action at Bound Brook in 1777.  Matt provided a battle briefing showing the situation and the initial Rebel dispositions.  The action opens with the Rebels guarding Queen's Bridge and the Old Stone Bridge from British advances.  The main British advance is across the causeway through the marsh to Old Stone Bridge.  Hessian Grenadiers approach across the Raritan River forcing their way across Queen's Bridge.  The Rebel objective is to prevent being overrun and giving up this strategic position.  Matt pointed out that, historically, once the Hessian grenadiers were seen storming across Queen's Bridge, the colonials panicked and fled.  Battle over in a few minutes.  Looking at my situation as the American commander, I felt my chances were equally slim.

With two skirmish units, one guarding at each bridge, they may only offer speed bumps to the superior Crown Forces once the enemy come onto the table.  Having to overcome two narrow avenues of approach, the Americans would need to contain the enemy while not sustaining too many casualties.  I asked if the Americans only needed to hold out for three turns to declare victory.  Matt laughed but warned that I ought to be careful in not allowing my skirmishers to be overrun on Turn 1.  Noted! 

Let's see how the battle played out.

Shadow animals or battle briefing?
British column arrives marching on Old Stone Bridge.
American skirmishers fall back from Queen's Bridge
while the Rebels shift their positions near the crossroad.
Rebel reinforcements arrive!
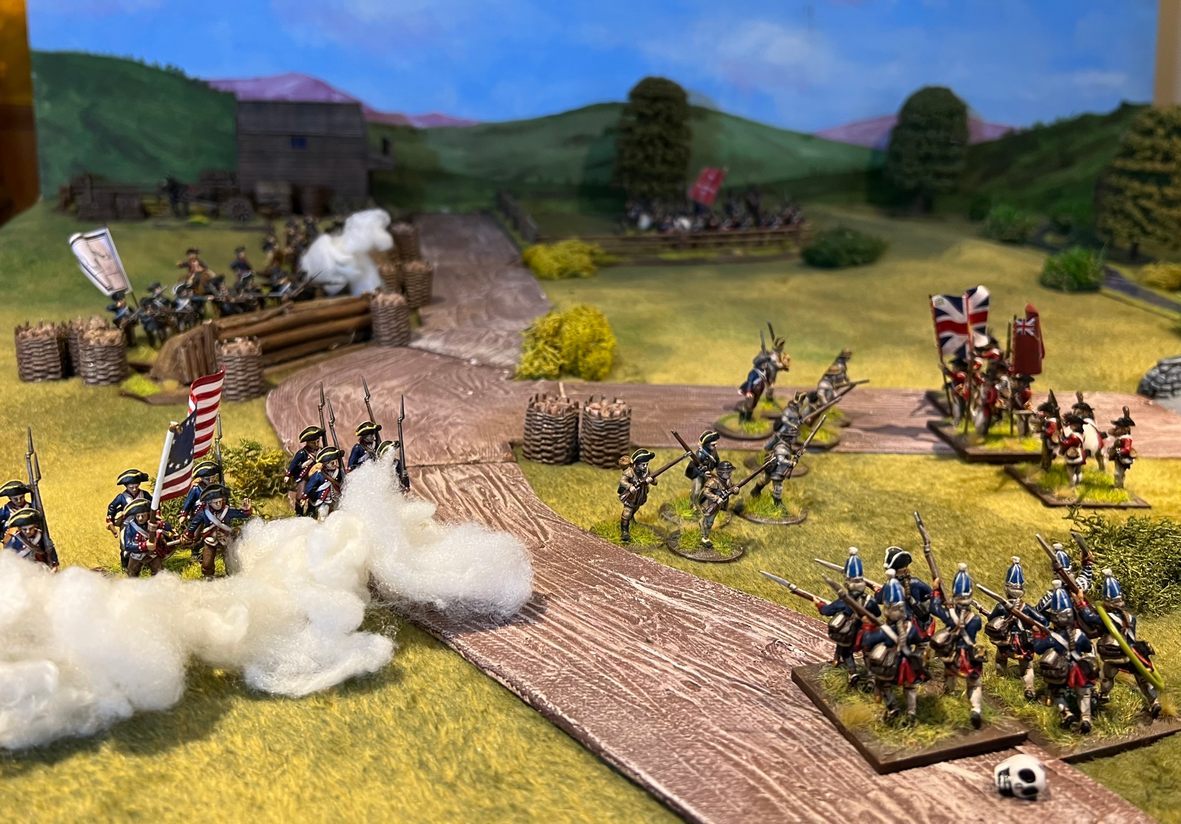
Skirmishing at both bridges
Hessian grenadiers cross Queen's Bridge under
skirmish fire from the Rebels.
American reinforcements fan out as militia
reinforce the skirmishers at Queen's Bridge. 
At Queen's Bridge, skirmishers fire and fall back as the
 grenadiers are caught in a crossfire from both cannon and musket.
Casualties are heavy.
Compelled to take a morale check from all of the fire,
the Hessians break and run!
I recall the Hessians rolled a double one! Rout!
Coming up in support, a second Hessian
grenadier unit crosses Queen's Bridge.
It, too, is welcomed by a hail of cannon and musketry!
At the Old Stone Bridge, the skirmishers fire
and retire as the odds against them mount.
In all of the commotion and traffic jam at Old Stone Bridge,
 the Jaegers take friendly fire (double one) from the rear!
The jaegers are forced to retire. 
The British guard charges over the Old Stone Bridge
 but comes up short of the skirmishers.
Stopped short from reaching the skirmishers,
 the guard falls to intense fire from multiple directions. 
In an attempt to relieve pressure, Hessians charge over
 Queen's Bridge toward the skirmishers.
They, too, are caught in a murderous crossfire.
Both must make morale checks.

Double ones!  Again!
The guard in no-man's land on the Rebel side of
 Old Stone Bridge routs

The Hessian grenadiers fare no better.
They turn tail and run away!
The victorious rebels scatter the opposition
photo courtesy wargamesinthedungeon
After only a few turns, the British commander 
throws in the towel and calls off the attack.

A major American victory!

Another fantastic game packed with lots of action.  Unfortunately, Matt picked up where we last left off with handfuls of terrible morale check dice rolling.

And, the Americans actually did only need to hold on for three turns although the outcome was not the expected result.

Stay tuned for Matt’s version of the action with loads of close up photos.

Saturday, November 12, 2022

Swiss Regiment Salis and More!

Work continues on the SYW project in 18mm.  Actually, work at the painting desk sees a number of different projects getting a run-out.

First up is a 23-figure regiment of Swiss Regiment Salis to add to my growing French Army.  Foot figures are Blue Moon led by a Eureka mounted colonel.  Flags are by David at Not by Appointment

Looking over at the queue to the photo booth, Salis is the last in a long line of French troops for this project (for now, anyway).  Next up for the SYW project is a turn to fielding Spanish infantry for the WAS but I am getting ahead of myself.

Two more odds and ends moved across the painting desk of late.  Both entries are for the 30mm ECW collection.

Mustering out is another command stand using The Assault Group figures.  This command stand features Wallenstein from the 30YW range but he will be pressed into service for ECW battles wherever needed.

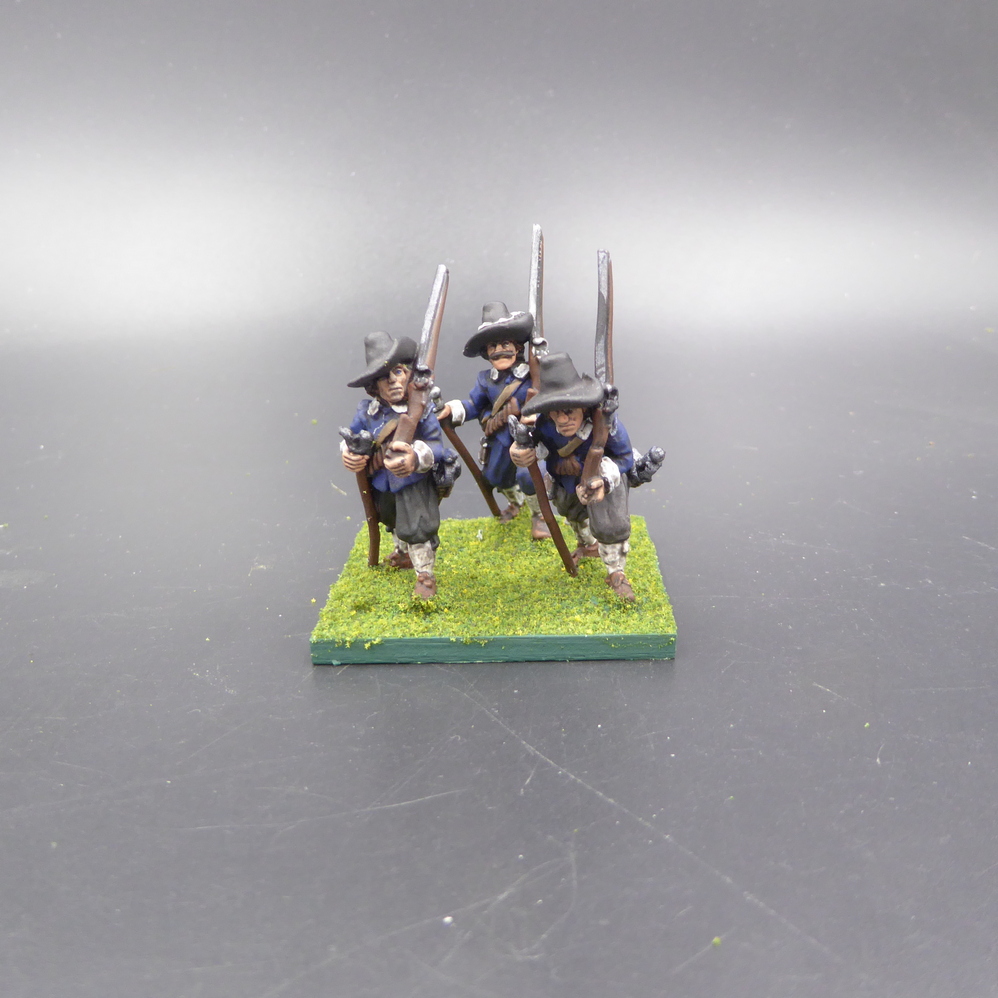
Next, are three stragglers from the recently completed commanded shot unit.  When I originally painted the commanded shot, 26 figures were painted.  When I put the figures into the painting queue, I was almost certain there were 27 figures.  27 figures went in and only 26 figures came out.  Since the figures are based in threes, I only fielded 8 stands of three.  The other two figures were set aside.  Fortunately, during a quick clean-up, the missing figure was found underneath a box of figures on the floor.  He was quickly primered, painted, and now joins his comrades.

Finally, Matt and I return to our long-running AWI with a continuation of the campaign on Sunday.

Matt never holds back on his table layouts.  Sunday's action at Bound Brook is no exception.  Just look at the marvelous layout I get to fight over tomorrow.

Stunning stuff!

Battle of Bound Brook, 1777
photo courtesy wargamesinthedungeon