Showing posts with label 15mm WWII. Show all posts

Thursday, March 12, 2026

"March"ing Matildas

Inspired by Matt's call to a March kit building challenge (see Mad March), I decided to dip my toe into the challenge.  As mentioned in the previous post, I have a Tamiya 1/48 Matilda kit laying unbuilt for several years.  This challenge would provide sufficient motivation to actually unbox the kit and get on with it. 
Likely little surprise to regulars, I also have a tall stack 1/100 (15mm) Zvezda models similarly laying around unbuilt.  Since there are Matildas in this stockpile, why not make the build a trio of Matildas?  The Zvezda Matildas are both Mk I and Mk II models.
The little Zvezda models only have six or seven pieces so they can be put together in a flash.  The larger Tamiya model contains considerably more pieces and took much more time to build.  However, all three models took less time than I expected.
While Matt's challenge required only the raw build, I forged ahead and painted my offerings as well.  The paintwork was kept simple using bronze green.  Decals were omitted from the Tamiya build since I just did not like the look of them.  For me, unmarked AFVs on the table are fine.
Perhaps one day, the 1/48 Matilda will actually see tabletop action with a complement of support troops?  She is ready when the call comes!

Since building these models put me into the WWII gaming spirit, I downloaded Chain of Command 2 to give the rules a look.

Saturday, December 3, 2022

Sumerian Archers and Battles Fought

Despite a continued steady-stream of games (three, this past week) and a number of battle reports and analyses projects in work (not all wargaming related), figures are still mustering out from the workbench.  In fact, total figures painted for 2022 is nearing 1,000.  I should push through that hurdle by year-end.

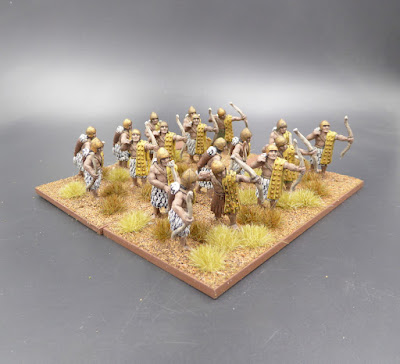
Today sees two, nine figure units of Sumerian archers emerge.  These two stands of massed archers will be classified as 'T' missile troops in Impetvs.  To the Strongest! likely has an equivalent classification for massed archers.  Figures are from Newline Designs.

More Sumerians to come with one unit of heavy infantry and two skirmisher bow finished and awaiting time at the photo booth.  One more BMU of heavy infantry and one more massed archer unit is currently in work at the painting desk.

Also finished and awaiting a turn for a photo shoot are four regiments of Spanish infantry and two regiments of Reichsarmee infantry for the SYW/WAS 18mm project.

On the gaming table, Cropredy Bridge lingers.  My goal I to get at least one or two more playings from the scenario before packing it all away and moving onto another battle.  I am tempted to have a go at it solo and see if the Royalists can triumph after seeing two tabletop losses.  With the rules fresh in minds, perhaps another ECW battle should be given consideration?  We will see if there is interest for a follow-up battle.

Besides the Cropredy Bridge remote fight on Monday, Tuesday saw me participating in a WWII tactical action on the Western Front.  As German platoon commander, I faced an attacking American company. The German objective was to defend two vital points: a bridge and a crossroads.  Funny that the only American at the table commanded the Germans while all British players commanded American platoons.  Facing 3:1 odds against, how did my Germans fare?  While I did not take many screenshots, I may be able to piece together some semblance of a BatRep.  Good fun!

On the Western Front

On Thursday, Peter (of Grid Based Wargaming) invited me to participate in a remote game using his D3 Horse and Musket rules and his 40mm paper soldiers.  Of course, I jumped at the opportunity.

In another post, I will follow-up with a brief recap of the Jacobite battle to demonstrate how the D3 rules work, first impressions, and how my Highlanders fared.

As a glimpse of possible battle outcome, the screenshot below shows my Highlanders maneuvering onto the government army's left flank.  

Highlanders flank the enemy!
Any guesses on the outcome?

Saturday, May 15, 2021

Prussian Musketeer Regiment #34

The 18mm SYW project has not seen much in the way of attention over the last six months.  My plan prescribed working on a French army in the New Year.  That plan has not survived collision with other projects.  The main Project Interruptus has been building out a few Battles for the WotR in 28mm.  I did manage to field a handful of Bavarian and Irish regiments late last fall but the production line has been silent since.  Until now, that is.
Off the painting desk today is a 23 figure battalion from Prussian Musketeer Regiment #34. The figures are all Eureka Miniatures and the flag is one I made myself.  With David from Not by Appointment recently publishing his flag set for Musketeer Regiment #34, I will likely reflag this unit with one of his superb flags once I get enough of his flags together to print an entire sheet.

Also off the painting desk is a pair of German trucks in 15mm.  With Graham's recent SCW games loaded with transports, I figured I ought to do something about my own WWII transport situation.  To that end, two more Zvezda Opel Blitz trucks make their way off from the workbench.  Nice little models.
Finally, on the remote gaming front, I took to the skies Tuesday in the next instalment of our WWI aerial combat campaign.  The two German pilots added two more kills to their totals and returned safely to base.  Hurra!

Later today, I join Ross and friends for a playtest of one of his planned games to be presented at Virtual Huzzah on May 22.  We will be playing a French Revolution game using his MacDuff to the Frontier rules and 54mm figures.  I used an earlier version of these rules more than 25 years ago to fight both colonial and French & Indian War battles.  I wonder if I will remember any of it?  No matter.  Should be fun.    

In the category of It's A Small World, I signed up to take part in another virtual game on May 22 with the authors of the newly released WotR rules, Test of Resolve.  I did not make the connection to Ross' playtest and the Test of Resolve game both being a part of Virtual Huzzah until re-reading Ross' email and writing this post.

Tuesday, June 2, 2020

Tretten in Flames - BatRep

With game set up completed, victory conditions checked, and QRS in-hand, the scenario was ready for its initial trial.  As First Player, the German side acts first.

11:00 On the German left, the Germans begin their advance upon Tretten by moving on the two, unoccupied BUAs positioned between the two opposing deployment areas. The Germans lay smoke and then advance.
Germans in the south advance
Almost immediately, the German advance draws fire from the British held building at the base of the hill.  The Germans suffer no casualties as the British section is marked with Op Fire.  On the German right the mountain troops, on skis, advance toward the hills overlooking Tretten.  German support weapons deployed in the center add into the advancing fire.
Germans taking fire on the move
Before the advancing Germans can reach the BUAs, the British shuffle rifle sections into the house and garden to set up a defense to thwart this move. 
British take the house and walled garden

British reach the building first
11:06 Outnumbering the British holed up in the house, the Germans assault the somewhat isolated British section.  Fire bursts from the house as the Germans close.  As the assault goes in, the British remain defiant.  The German attack is repulsed with the attackers suffering one hit (Pin) and returning to their jumping off point.
Germans attack!
The British rifle section (with the second LMG) moves into and deploys in the adjacent garden.  It takes fire from the section to its front as well as from the machine gun in the woods in the center.  The cross fire pins the British within the garden walls.  Encouraged by the repulse of the attack upon the house, the British CO orders a second section into the house.  Perhaps this is a defensible position?
British defending walled garden
11:16 While the Germans (recently repulsed from their assault on the house) recover, one British section in the house is pinned by covering fire.  The mountain troops to the north make their way across the valley floor.  Realizing that being pinned in the garden is no safe place to linger, the British section falls back to safety under the covering fire of their comrades. Two German sections are pinned from this effective covering fire.  One of the ski troops is pinned as well.   
Firefight heats up
11:25 Recovered from their assault against the house, the two German sections are ordered back into the fray.  Under the cover of smoke, the Germans charge in.  With one British section pinned, the second attack is successful.  The British take two hits to one.  One Brit section is killed and a second is pinned.  The attackers take one hit resulting in pinning one German section within the building.  The surviving Brit falls back out of the house.   
Germans assault a second time

Fighting in the building

Germans throw the defenders out

Building held by Germans
11:31 Random Events. Germans roll a HQ Suppression result while the British roll Infiltration result.  With a HQ Suppression, each hex must roll to be in command.  Few German units manage to overcome this paralysis with the exception of the mountain troops in the north and a few rifle sections in the south.  On skis, the mountain troops continue their advance upon the Tretten Heights.  
Current situation
For the British, the infiltration roll allows them to move one unit into an adjacent, non-occupied hex. They move the section to the top of the hill covered in deep snow.  This stealthy move allows the British to take up position in the deep snow and bring fire down upon the German mountain troops in the valley below.  With some good marksmanship, one surprised German squad is destroyed.
Destruction of ski troop
11:38 Placing the southern sector back into command, the Germans move forward against the walled garden.  The sections in the adjacent house provide covering fire.  German units, having been held in reserve, begin shifting to the center.  The PzII is seen in the northern sector slowly crawling forward through the snow as the ski troops continue to glide toward the northernmost house.

The British unleash a wallop of firepower pinning several units and destroying a second mountain section as the Germans move up in the north and fall back from the open ground in the south. 
Cross fire hurricane
To open up a fire lane from the machine gun to the garden, German sections fall back to a safer position allowing the MG to open up.  The MG and supporting rifles do their job and eliminate the defenders in the garden.
Fallback to open a fire lane
While the Germans fall back to clear a fire lane in the south, the German center snaps into action.  Finally, the German reserves begin to advance in the center with support from the PZII.  Despite seeing the destruction of one of their sections in the walled garden, the British reinforce defeat.
Germans advance in the center
11:46 The German advance in the center continues but this late attack may be running out of time. MG fire from the woods pins a British section in the walled garden. 
Center push
After spending much of the last 30 minutes pinned inside a building, the British rifle section with the extra firepower of the LMG, sends a devastating burst into the German occupied building next to the garden.  One rifle section is destroyed.
Devastating fire
11:50 With the Germans advancing in the center, several defeats in the north and a seeming battle of attrition in the south, the German command reassesses what needs to be done to push through into Tretten.
Situation 11:50
With a clear fire lane into the walled garden, the MG and its supporting rifles pour withering fire, once again, into its defenders.  The heavy firepower from the MG position kills one rifle section. The remaining pinned rifle section is finished off by cross fire from nearby German infantry. 
Withering fire into walled garden
Under cover of smoke, the German center advances into the deep snow to threaten both of the buildings situated on the northern half of the battlefield.
Germans advance in deep snow under cover of smoke
As the Germans reoccupy the house adjoining the garden, British fire eliminates any defender unlucky enough to find itself there.
Another one bites the dust
11:56 The Germans in the center come down from the hill to assault the British occupied homes
Situation at 11:56
after the defenders are softened up by MG fire.
Assault goes in
The German attackers finish off the defenders and then occupy the house.
Success in taking one of the northern houses
With the loss of that unit, the British defenders' Morale Level reaches zero.  Each remaining unit must now test morale to either hold its ground or fall back.  Three of the remaining defenders break and fallback.  One unit retreats off table. 
British morale breaks!
12:00 With the noon turn being the last turn of play, the Germans advance to consolidate their gains and capture the spoils.  The circled objectives show the BUAs held by the Germans at game's end.  Having taken four of the five needed for victory, the Germans fall just short of a victory.  German casualties were kept under 50% but they needed to take one more BUA to secure a victory.  
Close but no cigar
Well!  This battle turned out much closer than I expected.  Action ebbed and flowed throughout the contested hour-long battle.  At times, I figured the Germans had little chance.  Then, my sense was that the Germans had little chance.  Finally, on the last turn, the Germans made great strides but fell one BUA short.  Some of the firefights were extremely bloody.  Assaulting is very chaotic and a high risk venture.

The British suffered heavy casualties but held on by the skin of their teeth to deny the Germans victory.  With one more turn, the Germans could have sealed the victory but it was not to be.  In hindsight, there are different tactics I would use for both.  For the Germans, they waited too long to launch their attack up the center.  Their MG was misplaced too.  For the British, their initial deployment could be better thought out to provide more crossfire opportunities with improved lines of sight.  I will give it another go and see if these adjustments make a difference to the outcome.

The victory conditions and game length seemed appropriate in offering both sides a fair chance at victory.  I will replay and see if my initial impressions change.  A few rules' questions came up during play as well as thoughts on tactics.  I need time to ponder these questions before reaching a conclusion.  For me, this was an interesting battle with more tension than expected.  Much more interesting than I thought after first finding and then converting this ASL scenario.

Saturday, May 30, 2020

Tretten in Flames, Norway 1940

British prepare to defend Tretten
Following up on my five trials of Tigers at Minsk (TaM), Scenario 2 - Follow the Elefants transported to 1940 France, I have been tinkering with transporting the game to 1940 Norway where my primary interest lays.

Wanting to add weapons into my earlier pure infantry Scenario 2 exercise, I looked for small theater-specific scenarios that might fit the bill.  Having found a number of Norway scenarios among the pages of ASL Journal #3, I narrowed my search down to ASL Scenario J37, Tretten in Flames. 

Norm, the author of TaM, was kind enough to rustle up some weapon statistics for this earlier period.  Included in the request were stats for Panzer II, 75mm IG, and a Hotchkiss H39.  While the Pz II and 75mm IG will see action, the H39 will take to the field another time.
Germans prepare to attack
Situation: 23APR1940
After a disastrous start to the campaign, the Anglo-Norwegian forces find themselves on the losing end of encounter after encounter.  The allies decide to make a stand at Tretten.  With Norwegian troops managing to extricate themselves from the situation before the German hammer falls, the British, now alone, are determined to make a last stand in Tretten.  Elements of the 1/5 Leicesters, HQ coy of 1/8 Foresters, and 148th BDE HQ prepare for the attack they know is coming.  The German  attack upon the town includes elements of the 196th Inf Div, 138th Gebirgsjager Rgt, one Infantry Gun, and a single PzIIa.

OOB:
British: Morale Level = 5
7 x Rifle sections
2 x Rifles sections + LMG
1 x ATR

German: Morale Level = 8
9 x Rifle Sections
1 x Rifle section + LMG
1 x MMG
1 x 50mm Mortar
75mm IG and crew
2 x Gebirgsjager sections (with skis)
1 x Gebirgsjager sections + LMG (with skis)
1 x PzIIA

Notice that some of rifle sections carry an extra LMG.  In Squad Leader and ASL, squads are assumed to include the firepower of the squad-level LMG fire team.  TaM does the same.  With the extra firepower offered by these separate LMGs, I give these sections one additional D6 in firepower.  Stands with this extra firepower have an LMG stand attached.

Table Situation:
North is top.  British deploy first in the British Deployment Zone. Germans set up second in the German Deployment Zone and move first.  The German Gebirsjager start in the top right corner of the board.  The PzII enters at 1125 in the top right corner.
Snow is on the ground.  Deep snow is found on higher levels (L2 and L3).  Rules added for SNOW and DEEP SNOW Effects.
The IG may not change locations.
Gebirgsjagers are always in command.
Germans may make smoke.
Game begins at 1100 and ends at 1200.

Victory Conditions:
Germans win if controlling the two center BUAs and three of the five BUAs in the British Deployment Zone while sustaining no more than 50% stand losses (ending Morale Level greater than 0).

Are the victory conditions balanced?  We will see after I play a game or two.

Wednesday, April 1, 2020

Tigers at Minsk - Takes 2-5

Following my first attempt at Tigers at Minsk, (see: Tigers at Minsk - First Play) and having given force placement and plans of attack some thought, I returned to the table.

While the Germans came close to reaching the French baseline, the last-gasp, German section was cut down before it could make a successful exit from the board.  With that close call, I figured the German player might have a good chance of winning the scenario.

With only a handful of units in the game, initial deployments are critical and loss minimization paramount.  Given the small size of the game and lack of covering terrain, few viable options present themselves for force set up.

For the French, I see only one real option for deployment.  The wire must go in the hex on the far left of the French line to block a German section from sneaking to the baseline under the cover of the scrub.  Each village hex gets one HMG and one infantry section.  No other option seems reasonable.  The village provides cover and the infantry sections provide support for the HMGs.  With this deployment, all French troops are in command every turn.

For the Germans, set up must be in and behind the three woods hexes.  How the German forces are deployed is up to the player.  One force could represent a main attack and the other secondary with troops deployed accordingly.  However the Germans deploy, if in two groups centered on the woods, only one group will be in automatic command each turn.  The other group will need initiative to act.

Given the French have the First Turn, the German player cannot afford to stack his troops within LOF at start.   In this game, I deployed the Germans as two and five with the bulk of the Germans on the right.
Initial deployments
German right with two sections in reserve and out of LOS
 On to the game!
French opens up on the German HMG
 pinning the supporting infantry
German HMG provides covering fire as infantry advances
 on the right under the cover of smoke.
French infantry is pinned in the village.
Under cover of smoke,
advance on the German right continues.
  French pour fire into the HMG hex, pinning the gun while
a German section moves up in support.
The smoke clears and French fire opens up.
One German section KIA and a second pinned.
German HMG returns fire into the village
 hoping to weaken the defenders 
The firefight continues as one section in the woods is KIA.
Infantry section advancing under cover of smoke escapes,
 for now.
With smoke gone, the advancing Germans
are cut down in the open.
Coming up to support the HMG,
 another German section is KIA.
With four units destroyed, the German morale breaks and the remnants of this dismal affair withdraw.

This was a quick battle and barely consumed 30 minutes on the game clock.  With the French hunkered down in the two villages and clear lines of supporting fire to the German positions, the German attack seems doomed.

Was it the dice?  Die rolls were average with few extremes.  Given French firepower, almost two hits per turn can be expected even when firing into cover.  I set up the game again with same starting positions.  The result?  The same.  This time, the Germans broke in about 15 minutes.

I tried two more games, all ended in the same result.  I tried putting more force on the German left.  I tried reinforcing the woods hexes at the outset.  All ended in brutal German defeats. 
A different German deployment
With the French commanding the central position, intersecting Lines of Fire, and the First Player turn, this scenario seems very difficult for the Germans.  Perhaps since the Germans are attacking, they should be awarded the First Player turn?   Still, an engaging action. 

Thoughts?