Pages

Wednesday, September 25, 2024

Shiloh and the Attack on Sherman

Wednesday last, Mark (Blood Mud and Steel), David (The Ragged Soldier), Chris (Horse and Musket Gaming), and Tony (Prometheus in Aspic) joined in to refight the opening stages of the Battle of Shiloh.  For a brief background on the battle, see my post My God! We are attacked!  Mark and Tony took on Sherman's command while David and Chris settled into the roles of the attacking CSA.  When the fighting opens, the general battle situation is illustrated in the map of the gaming table below.  The battle opens at 7:45am when the first wave of Confederate attacks against Sherman at Shiloh Church begins.
Situation at 7:45am.
Before battle is joined, the Federal Army is enjoying a quiet Sunday morning in camp.  Patrols are sending back reports of enemy activity in front of Shiloh Church but these early reports are dismissed.  The 53rd Ohio continues sending reports that the enemy is advancing in large numbers to its front.  Sherman dismisses these reports until he can no longer do so as enemy artillery disrupts morning breakfast and prayers.  The Confederates are attacking!
Quiet Sunday morning at Shiloh.
The Rebels are on the attack and bearing down on Sherman's position.  With high water in Shiloh Branch Creek, Cleburne's Brigade faces a tough time coming to grip with the enemy.  Having his command split by the marsh around the bridge over Shiloh Creek, Cleburne's attack is uncoordinated.  First to taste combat is the 53 OH as the 6 MS emerges from the cover of Shiloh Creek.  Both units take punishing losses as the 53rd falls back to the creek.  The 6 MS does likewise as it comes under Federal artillery fire.  The battle has begun!      
Rebels attack in waves of lines.
Shootout in Rhea Field!
Leading the attack, Cleburne's Brigade steps into the swollen Shiloh Creek in tight formation.  These dense formations attract enemy musketry and artillery fire.  Many are cut down before they can negotiate this obstacle.  Even with two Confederate batteries offering support from the high ground behind, by the time Cleburne emerges from the heavy cover lining the creek nearly half of his effectives are down.  This is going to be a tough fight!  Still, a combination of artillery and musketry forces one of Buckland's regiments to head deeper into the woods.  A gap has opened in the Federal line!  Seeing the difficulty Cleburne faces, Pond pushes his brigade out on the left in an effort to turn the Federal position on the ridge.  Despite Cleburne's heavy casualties, more Rebels are stacked up waiting to take up the fight. 
Cleburne steps into the morass of Shiloh Creek...
emerging with fewer fighting formations.
Pond sweeps out to the left to turn the Federal Right.
A gap opens in the Federal position!


Confederates attacking in depth.
Taking advantage of the opening in Sherman's line, Cleburne pushes the 2 TN forward. Reaching the Federal camp, the Tennesseans stop to loot the now abandoned camp. This is no way to win a battle! With enemy on its flank, Buckland swings a regiment around and Taylor does the same with one of his batteries. The 2 TN comes under tremendous fire.
Rebels gain a toehold on the ridge
but devolve to looting rather than fighting.
Looting Rebels come under close range enemy fire.
With both Pond and Anderson now in the fight, McDowell's Brigade on the Federal Right is under increased pressure to hold the line.  McDowell is forced back off the ridge as the Rebels gain a second toehold on Shiloh Ridge.  McDowell falls in the action.  Taking McDowell's ridgeline position was not without drama, however.  In the confusion, one of Pond's regiments is subjected to friendly fire by Anderson's Texans.  Luckily, no harm befell the Rebels.  Over on the Confederate Right, Cleburne's detached regiments make their way back into Rhea Field.  Hildebrand counters by bringing his Federal brigade down to the creek.        
Hildebrand counters Cleburne's push to the creek. 
McDowell driven back!
As the Federal Right gives way and McDowell disengages, the Federal Right is turned.  Cleburne's Brigade has been wrecked in the process.  With the Federal Right in jeopardy, Hildebrand takes the fight to the enemy as the blue bellies slip into the creek.  Buckland adds one regiment to this operation.  In a hammer and anvil move, Hildebrand catches a Rebel regiment in the creek and sends it scampering to the rear.   Hildebrand follows up.  Now, the Confederate Right has been turned! 
Federal Right is turned...
but Cleburne wrecked in the process.
Hildebrand moves to crush the Confederate Right.
Hammer falls upon the Rebs!
Confederate right is broken!
While the fighting remains hot around Shiloh Church, Raith's Brigade finally joins into the fray to shore up the Federal Center and stop the hemorrhaging.
Heavy fighting around Shiloh Church
but Federal reinforcements arrive just in time.
With the hour very late and few prospects of taking back the ground lost on the Confederate Right, the Rebels concede the battle.  They have had enough!  The Butcher's Bill was high but not uneven.  McDowell's Brigade was broken as was Cleburne's.  Both Hildebrand and Buckland were teetering on the breaking point, but the Confederates simply ran out of time and momentum.  
Butcher's Bill
While the Federal Right crumbled, Hildebrand's bold attack likely tipped the scale in balance to Sherman.  Fascinating game to watch develop.  Seeing the loss, both Confederate commanders wondered what might have been and how they would tackle this problem differently next time.  Next time?  Yes, a rematch might be in order.  First, though, two games are lined up for the next two weeks with two different groups of players.  Let's see if they tackle these challenges any differently.  Both of the upcoming games will feature limited intel for the players.  Will this reduced information set change the battle?  We will see!

Thanks again fellas for another fantastic game.  Very enjoyable.  Game time was about four and a half hours.

Saturday, September 21, 2024

Now for Something Different!

After a productive August at the painting desk, I hoped to carry that momentum into September.  Well, the month began with good progress and good intentions but quickly ground to a halt.  Too many other distractions to make it down to the painting desk for any meaningful painting sessions.  Cycling and other outdoor activities, scenario study and design, and gaming all contributed to snatching away much of my free painting time.  
Vicenti Infantry Regiment
Despite these pulls on my time, I did manage to muster out two regiments of infantry for the 18mm SYW/WAS project.  Today's release features an army not often seen on the wargaming table, Genoese!  These two, 23-figure regiments represent the Vicenti and Biembo Infantry Regiments.  Foot figures are Old Glory lead by Eureka mounted colonels. Flags provided by David at Not By Appointment
Biembo Infantry Regiment
This week (Wednesday) saw the first game of refighting the Confederate attack on Sherman at Shiloh.  With a little luck, maybe a battle report can be hammered out in a few days.  The game was a long one but one featuring some surprise, jubilation, despair, and a lot of laughter.  All good fun.  A rematch is in negotiation.  
Rebels advance!
On cycling, weather has been absolutely perfect with warm, sunny days and a slight breeze.  A real pleasure to be out on the bike in such conditions.  A handful of photos from recent outings follow.


I will be back on the bike later this morning once the thermometer climbs about 25F.

Wednesday, September 18, 2024

12 Years and Still Here!

The Palouse Wargaming Journal (PWJ) sees another annual milepost crossed.  The milepost on my path today reads, 12 Years Blogging.

This experiment began twelve years ago with my first post here.  Times have changed in the intervening dozen years but much remains the same.  While the early years saw many posts on figures painted and few on games played, recent years have seen a shift to gaming and reporting on those games.  

Writing about wargaming and reading about the wargaming exploits of others remain a constant place in my daily routine.  On the writing front, I still manage to hammer out about ten posts per month.  At my current rate of publication, the total post count may not reach what has become a standard 120 posts per year but the ending count will be close.  Looking back to January, a reduction in frequency was foretold.  Still, my pace remains consistent and steady.  I have yet to run out of topics to consider and chronicle within these pages.  Hard to believe that even after a dozen years pounding away at the keyboard, I have neither lost inspiration nor motivation. A bit surprising really since having sufficient content was one of my concerns when I first began all of those years ago.  As mentioned in last year's marking of time, I am convinced that I actually could spend all of my time simply writing scenarios, hosting games, and writing battle reports.  There are times when I wonder if the results justify the efforts.

My gaming schedule continues on a robust pace but there has been a switch to hosting more games than I attend.  New gamers continue to find themselves seated at the remote gaming table often with one or two games per week.  I am even seeing a pick-up in F2F gaming.  There remain several distinct groups that regularly take up my offers for a game.  So far, they are all willing to keep returning for more.  Remote gaming opens up my connection to many more likeminded wargamers than I thought possible even a few years ago.  I always look forward to our games.  All are considered close friends and solid gaming companions.

What about blogging statistics?

Well, wargaming blogs have come and gone but I remain still standing.  The PWJ is up to 1,698 posts (1,579 posts at this time last year), 51,551 comments (45,318 last year), and 331 Followers (322 last year).  The number of followers does not move much but I have seen a few new names joining in lately.

As I wrap up this brief commemoration, I am grateful to anyone who stops by for a quick read or a long linger and doubly grateful for those readers who regularly offer up a comment or two.

Thank you for your patronage and friendship.

Another remote game is on today's docket and a return to regular programming soon.

Sunday, September 15, 2024

My God, We Are Attacked!

Having wrapped up the five game Cheriton series, time to turn my attention to the next battle to tackle.  With at least one request for a return to the ACW, that is what I will do.  With First Manassas and Hood's attack at Gettysburg in the logbook, I thought a Western Theater battle would offer a different and interesting challenge.  The early Western battles featured fighting in woods and few battle-hardened formations.  Thumbing through books on the shelf, I settled upon the Battle of Shiloh for consideration.  Rereading Jay Luvaas' Guide to the Battle of Shiloh and O. Edward Cunningham's Shiloh and the Western Campaign of 1862, I gained enough perspective to develop a scenario.  Helping out was Brad Butkovich's This Bloody Field scenario book.  Butkovich's Sherman Attacked! will lay the foundation for my battle interpretation in addition to studying several hex-and-counter wargame treatments of the battle.  I have four such games to use in this study.
Since the full battle is too large for a full battle recreation via a normal remote session, I settled upon the early morning attack on Sherman at Shiloh Church on 06 April.

While scenario preparation is still in work, the battlefield has been laid out on the table.  Hopefully, the battlefield image below stands up to scenario development.  For now, the battlefield looks like,
For a brief overview of the situation Sherman faced, t
he Confederate attack began early on Sunday morning, 6 April, catching many Federal troops unprepared in their camps.  The Confederate plan was to drive Federal forces away from the Tennessee River and cut off their line of retreat.  Sherman's division was one of the first Federal formations to be hit, as it was encamped near the main approaches to Pittsburg Landing around Shiloh Church.  Despite being caught off guard, Sherman's men were not completely surprised.  A patrol sent out very early in the morning had engaged Confederate forces and alerted the division.  When the main Confederate assault began around 7:00 AM, Sherman's troops were able to form battle lines to receive the attack, though they were initially out of position.
Outnumbered by about two to one, Sherman personally led his division with "poise and coolness" throughout the day, riding along the lines to direct the defense.  He was wounded twice and had three horses shot out from under him.  The Confederate forces pushed Sherman's division back, forcing Sherman to give ground throughout the morning.  By afternoon, Sherman's remaining regiments were low on ammunition and had taken heavy casualties.  Despite putting up stiff resistance, Sherman's division was eventually pushed back to the area around Jones Field by late afternoon.
Will our latter-day Sherman manage to repeat this fighting withdrawal?  Stay tuned.

Wednesday, September 11, 2024

Cheriton, It's a Wrap!

Last week witnessed the fifth replaying of the 1644 Battle of Cheriton.  Game #5 saw an encore performance by most of Game #1's participants. The first game saw Mark, Chris, and the Two Daves take to the field.  In the last game, Mark, Chris, and Dave B were joined by Tony to complete the foursome.  The three players in the first game all swapped allegiances for the game giving each a view of the battle from both sides of the table.  Army dispositions and player commands are shown on the following game map.
Initial army and player dispositions.
So far in this series, Waller has seen three victories, one draw, and no losses.  The single draw was awarded as time ran out.  By general consensus a draw seemed reasonable.  Could Hopton break this chain of Parliamentarian victories?
Haselrigge's Cavalry Wing forms up.
To review the action from prior games, please see the links below,

With four games already chronicled in the Battle Log, a reasonable body of work is available as a baseline for assessing game flow.  All of these previous actions saw the battle develop in a predictable manner.  Well, developing in a predictable manner after we witnessed how Game #1 played out.  By the way, it was Game #1 that saw the single draw.  Still, that first battle developed similarly to all of the following battles.

Whereas Waller begins holding the high ground on the South Spur, in all five games, Waller orders Potley's infantry down from the heights to take the fight to Hopton.  All recognized the importance of making a push toward the hedge-lined lane bisecting the battlefield while commanded shot units begin to contest Cheriton Woods.  
Battle lines as the action begins.
Both armies advance.
Parliamentarian Center enters the "arena".
Royalist foot push toward the hedge as well.
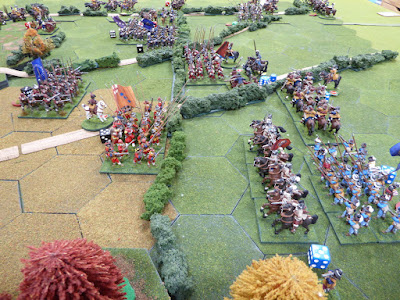
View from behind Royalist Left.
While both infantry centers make a beeline to reach the protective barrier in the center of the battlefield, Waller orders Balfour's Right Cavalry Wing to sweep around behind Roundhead lines in order to support Haselrigge's cavalry on the Left.  Confined by Cheriton Woods on the right, infantry to the left, and an open yet rough heath to the front, all of the Roundhead players chose to bring Balfour over to the Left in support of Haselrigge.  Now, this redeployment takes time but all make the same choice.  
Balfour redeploys...
by bringing his cavalry over to the Left.
As infantry converge upon the hedge in the center, Haslerigge strikes out toward the enemy's Right Wing.  In a series of charges, countercharges, and pursuits, Mark dismantles Lisle's (and Forth's) cavalry.  Royalist cavalry are sent reeling with at least one cavalry unit fleeing the field.  Losses are high for both armies but Haselrigge emerges victorious and controlling that sector of the battlefield.  Seeing the destruction of his right, Hopton sends Stuart's cavalry over to shore up that wing.  
The fight for the center...
as Haselrigge dismantles the Royalist Right.
Help is on the way!  Is it?
The fight over control of the hedge in the center intensifies as firefights and charges are the order of the moment.  Casualties mount as the battle ebbs and flows.  The Royalists make some headway only to be repulsed while the Roundheads see similar results.  The battle in the center is hotly contested and the ground is still up for grabs.
Fighting along Broad Lane.
Fighting in the heath.
Bard moves his infantry up to drive off the dragoons.
Paulet leads a Royalist foot over the hedge...
but the cost is high.
One Royalist foot regiment destroyed
as Paulet scampers to safety. 
As a second Royalist regiment is driven back and the purple coats come across the hedge, Bard's grey coats move up to contest the ground.  Bard successfully drives the enemy back but his advance exposes a flank.  Seizing this opportunity, Haslerigge leads a charge over the hedge and into the unsuspecting Royalists.  Unable to respond, Bard's regiment is cut to pieces.  Now Hopton's Right is gone.  Definitely gone!  Stuart attempts to stem this tide with one of his horse units but it is overwhelmed.  Not only has Hopton's Right been pulverized but the Center also looks lost. 
Bard's grey coats counterattack driving the enemy back...
but are put to the sword by Roundhead cavalry.
Skirmishing continues in Cheriton Woods.
Hopton's Right is gone and Center is in disarray.
Waller controls the field.
With word reaching Hopton that enemy cavalry are seen moving up to exploit these multiple successes, Hopton sees the writing on the wall and orders the remnants of his army to disengage.  For Hopton, this battle is over.
Roundhead cavalry coming up in support.
Hopton orders his army back.
With a score of 9-2 remaining on the Army Breakpoint Clocks in Waller's favor, Chris and David concede the battle.  The battle ends in a major Parliamentarian victory.  Congratulations to Mark and Tony for a battle well fought.  Fine play by all but there is no question as to the victors.  The action on this day was the most decisive of the quintet.  Very fun to watch this battle unfold and the way in which the Roundheads handled their troops.  Impressive guys!     
What have I learned from these five games?  For starters, Cheriton looks a tough ask for the tabletop Hoptons just as it was for their historical counterpart.

After five games, time to put away the ECW armies and contemplate a new challenge.  Next up will see a return to another civil war with a look at an early battle in the American Civil War, Western theater.