Saturday, June 29, 2019

28mm Zweihanders by CRM

During the recent series of Italian Wars To the Strongest! games and after I put the collection out on parade, I noticed that another stand of zweihanders could be recruited for the collection.  In the process of fielding the last pike block, I did not have the necessary figures to add the block's complement of zweihanders.  One or two Old Glory leftover swordsmen were painted but not enough swordsmen to field a four-figure skirmish stand.  Or so I thought.
Digging through The Lead Pile, I came upon a handful of zweihanders picked up in a figure exchange with Jake.  Not sure what I gave up in the figure swap but I received a handful of Casting Room Miniatures' (CRM) figures from the Renaissance range.  Three of these CRM figures made it onto the painting desk and joined one Old Glory figure (second from the right) on the stand.  The sculpting is good but the anatomy is suspect on certain figures but painting is straightfoward.  Overall, when painted and based, the figures make a pleasing sight.  The great swords are fabulous!  Look at the size of those things.

While not much on the gaming front of late, the painting desk has seen action.  A handful of units are finished and awaiting their turn at the photo booth.  A good mix of projects are crossing the workbench including Italians Wars (28mm), 1859 Franco-Austrian War (15mm), Ancients (28mm), and WSS (10mm).  The San Martino battle has been reset.  I am looking for some time to return to the table to give the scenario another try.

Despite cooler temperatures and a couple of days of rain, weather has been good on the Palouse and cycling enjoyable.  With the arrival of summer, the rapeseed is in bloom with its bright yellow flowers and wheat is tall enough to wave in the breeze.  Early summer is a fine time to be out on the bike.  A few photos from Friday's post-work, afternoon ride follow.  With the camera mounted on the handlebars, it is difficult to provide a more expansive view that is available at eye level but the near, ground-level perspective provides some of the color contrast.
Amber waves of grain
Rapeseed in bloom

Wednesday, June 26, 2019

Sardinian 2nd Grenadier Regiment

While this four battalion regiment has already seen service in the recent San Martino battle, it only now makes it into a pass-in-review.  These 48 figures form the four battalions of the Sardinian 2nd Grenadier Regiment.  Figures are from Lancashire Games' excellent range of 15mm figures.  I find the Sardinian sculpts not as handsome as either the French or Austrian infantry in the same range but good figures, nonetheless.  For me, a batch of 48 figures is about the largest group of 15mm figures I care to tackle at one time at the painting table.  Working this quantity is painful in process but satisfying when completed.
In their first outing in battle at San Martino, the grenadiers performed superbly.  Attacking without fear, they drove the opposition before them and charged across a stream to engage and defeat the enemy.  Beginner's luck?

When expanding the OB to encompass more of the San Martino action, I realized that additional units are needed to complete the Sardinian OB.  More artillery and grenadiers will be required.  Not many.  Perhaps two more battalions of grenadiers and two or three guns.  Expect to see these recruits working their way through the painting queue.

Sunday, June 23, 2019

Sash & Saber Kickstarter Arrives!

Sash & Saber Kickstarter contents
Early in 2018, Sash & Saber announced a Kickstarter project to jump start a proposed French & Indian War range of figures in 25mm.  Being a fan of Chris Hughes' work from his 25mm Napoleonic and ACW ranges, I knew the figures would be to my liking and that the risk of non-delivery was low.  Throughout the process, Chris provided frequent updates including photos of newly sculpted greens as they emerged from his workbench.

Fast forward to May 2019 and a big box from Old Glory (who casts Sash & Saber figures) arrived on my doorstep.  In the box were several dozen figure packs, all neatly hand labeled along with two resin buildings.  While I had ordered three buildings, the third was not far behind after a quick email to Chris.  It seems the resin building supply chain was having difficulty keeping up with demand.  
Selection of blockhouse and small cabins
Having a FIW collection already completed (yeah, "completed" is a famous last word) and relatively dormant (when did I last game or add to this project?), why commit to a Kickstarter project?

As noted earlier, one reason to commit to the project was to help in getting this low-risk project funded.  If my small contribution might push the bar towards fruition, why not?  

Second, the Kickstarter promised a number of figures not among the ranks of my troops at present.  Here was an opportunity to add provincials, British in cut down coats, British and French militia, casualties, and a number of Natives.  If response was great enough, even troops on snowshoes would be added.

Third, the Kickstarter offered some enticing incentives including a bonus of a resin blockhouse and a small cabin.  The temptation was too great.  I really wanted to add the buildings.  The ability to fill in some missing troop-types sealed the deal.

While figure delivery stretched out beyond the projected timeline, never was there a concern that the figures would not arrive.  Status updates were frequent and informative.  As for Kickstarters, this one from Sash & Saber presents a model for all others to follow. 

I look forward to sifting through the packs of figures and picking a few to add into the painting queue.

Thursday, June 20, 2019

Last of the BTD Celts

"Last of the BTD Celts" is only momentarily true.  While this dozen represents the last batch of BTD Celts in the The Lead Pile, a recent BTD sale including Celt chariots and cavalry prompted an order to resupply the Celts.  Just when I think I have conquered and cleared-out a small portion of the figure bins, BTD holds a sale and I relapse.  Sigh.  On a positive note, the newly raised Celts could use an additional chariot or two and cavalry.
The problem I have with BTD cavalry is that they are simply huge.  Outside of Renegade, no other manufacturer seems to match them in size and heft.  Perhaps, BTD Celt cavalry would be a good match to Renegade but I have yet to receive any.  Some 28mm cavalry look like little ponies or colts next to the big BTD and Renegade cavalry.  I sure regret not buying more Renegade figures when they were both available and cheap.  Ah, those were the days.

With BTD's recent announcement of order fulfillment challenges, it may be awhile before I see an  influx of this BTD lead.  Patience is a virtue.  Until then, a Celtic warband from Crusader Miniatures is in work at the painting desk.

Monday, June 17, 2019

Cycling and Hiking the Palouse

Sunday was Father's Day in the USA. 
Open roads of the Palouse
With expectations for a family activity later in the day, I set off on the bike to get the road work in before the day truly began.  Having the luxury of early morning temperatures around 70F, I set out on the 30 mile loop.  Roads were free of traffic on this holiday morning. 
More open roads of the Palouse
Still more open roads
While I typically ride mid-afternoon after the workday has ended and ideal daytime temperatures are present, an early morning Sunday ride presented much more company than usually seen.  The roads are nearly devoid of cyclists during midday especially when the heat begins to rise in mid-summer.  This morning I came upon several small group of riders.  In this part of the country, I never pass a fellow cyclist without receiving a wave and/or a salutation.  Sometimes these greetings are in French or Italian.  I think they are being funny.
Traffic! Buongiorno!
More traffic! Bonjour!
After returning home no worse for the wear, I cleaned up and prepared for the next item on the day's itinerary.  Next up?  A trip to Lake Coeur d'Alene, Idaho for lunch and a hike.
Lake Coeur d'Alene from Mineral Ridge 
The planned hike was a trek up to the summit of Mineral Ridge overlooking Lake Coeur d'Alene.  The lake is one of many beautiful lakes situated in North Idaho within an easy commute from Spokane. 
Beautiful blue water of Coeur d'Alene
The hike consisted of a three-and-a-half mile loop with much of the dirt path winding up among the many switchbacks leading to the summit.  Views from the top are spectacular.  Well worth the discomfort of plodding up a steep incline on an 85F, mid-June afternoon. 
Nancy still smiling after the hike to the top
This was a very enjoyable way to spend Father's Day outdoors on the Palouse. 

Friday, June 14, 2019

NEW! Early French Napoleonics

French Line Courtesy OldGlory15s
New 15mm Napoleonic figures!  Yes, that is correct and hot out of the casting room!

I received an email from Old Glory 15s on Monday announcing additions to their "old" and mostly dormant Old Glory 15mm Napoleonics ranges.  What piqued my interest?  Late Revolutionary French in bicorne and early cavalry.  Troops perfectly suited for expanding my 1799 project.  Also in this release are French for the early Imperial period (1805-1807) but I am only concerned with the 1799-1803 period for now. 
French Hussars Courtesy OldGlory15s
A few sample photos from the website are included and the figures look first rate.  The photos for the French in bicorne for the Late Revolution and Early Empire period are the same.  Both show grenadiers.  The Early Empire packs list grenadiers and voltigeurs as part of the contents while the Late Revolution do not.  Will the Late Revolution packs include grenadiers and voltigeurs, we shall see.  Before I had second thoughts, I quickly tapped out an order to sample some of figures.  On order are three packs of infantry, three packs of cavalry, and one pack of artillery.  
French Artillery Courtesy OldGlory15s
Package size has been downsized to 24 infantry, 8 cavalry, or 3 guns and crew for USD$10.  For the Late Revolutionary French, this release includes:
  • 3 packs of French infantry
  • 5 packs of cavalry
  • 5 packs of artillery
  • 7 packs of Consular Guard  
Details may be found at OldGlory15s/19th Century Miniatures. These are most welcome additions especially since Late Revolutionary French cavalry are scarce.  The figures look good, no?

Tuesday, June 11, 2019

1859 French Infantry Marching to the Front

Is this Deja Vu?  Am I recycling troops to make my production numbers look larger than they are?  No.  This is the second such French regiment marching off the painting desk within the last 30 days.  This regiment is also the second French regiment composed of the excellent Lancashire Games' figures seen in succession.  
These 36 figures in three battalions add to the ever-growing complement of French infantry for the 1859 project.  By my count, this is the fifteenth regiment of French infantry mustered for the project.  With three battalions per regiment, that totals 45 battalions.  Not included in these counts are the single battalion chasseurs.  The French are becoming a force to be reckoned with.
I really enjoy painting these figures.  Good thing.  A large pile of these Lancashire Games' French infantry await in The Lead Pile.  Seems I add one Battle Pack of 60 figures plus command to my shopping cart every time a sale is offered.  I really ought to quit that habit.  One day, I may make it through the entire backlog.  Not anytime soon but one more regiment is in the painting queue.

Saturday, June 8, 2019

A Pair of 1/72 WWI Aircraft

This past weekend, the urge to build a couple of WWI airplane kits arose.  What sparked this inspiration?  A recent purchase, of course!  I picked up a small assortment of old kits that arrived in-house this week.  Using the Last In/First Out method, I grabbed two models from the recent acquisition.  Those two kits were a British Bristol F.2B two-seat fighter from Renwal and a Fokker DR-1 Triplane from Revell.  Both kits are likely of a 70s vintage.

First up is the Bristol F.2B.  The Bristol is a great kit from Renwal.  I have two Bristol F.2B kits from Renwal in the pile, one of which is packaged with an "aero-skin."  Maybe I have more than two!  Today's kit is a regular kit without the aero-skin.  While I am not happy with the way in which the decals came out (they were a little oversized and did not stick), overall the model is a good addition to my aero-force.   


The other kit is a model of a Fokker DR-1 Triplane sporting the signage of the Red Baron.  Another nice kit that goes together well.

The triplane is a good, little kit.  Compared to the Bristol, the triplane is little.  Whenever I build a DR-1, I am always a bit surprised at how diminutive the aircraft is.  The relative size is shown in the comparison photo below:
What land are the two aircraft overflying?  That is the battlefield layout for the 1859 battle of San Martino in Northern Italy.  Having cleared the table of the Maisnon battle, the San Martino battlefield is expected to hold an extended engagement on the table.

Wednesday, June 5, 2019

Marching Beyond 1,000 Posts

Today's post marks the 1,000th entry in the Palouse Wargaming Journal (PWJ).  In September 2012, the PWJ started as an aid in documenting my wargaming activities.  A couple of my regular gaming comrades were blogging about their hobby activities so why not I?  When the PWJ reached the 500th blog post nearly four years ago, I reflected back upon that 2012 launch (see 500/5,000 Drawing).  Now, after a 1,000 entries, my expectations seem well-defined.  

I wanted the PWJ to become a place in which my hobby activities could be logged, archived, and tracked to provide some motivation for myself and as a handy reference resource.  Blogging as a self-motivational tool, for me, works.  Especially useful in keeping my work on track is the annual Project Planning post in which I guess where my efforts may be headed and plot a way to reach those goals.  Often successfully!

Some of my concerns when diving into the blogosphere in 2012 were:
  • Would I run out of ideas and content?
  • Would the novelty of blogging wear off as a passing fad?
  • Would anyone else find my work interesting or mildly entertaining?
  • Could I make a small contribution to the body of wargaming?
  • Would the effort required to maintain a blog quickly dampen my enthusiasm for the painting armies, reading, and wargaming?
Upon reaching 1,000 posts, I can say with certainty that I have not exhausted all ideas for blog posts.  I thought material would run out long before mow.  If anything, many more ideas and topics surface than I have time to consider.  There is a moderately sized list of draft posts on topics yet to be worked.  When an idea pops into my head, I make a note in the draft post folder with just enough detail to help resurrect the topic if needed.  Some day, I may revisit some of these topics that once triggered an interest.  Others will remain as skeletal reminders.

A thousand posts later, I have lost no enthusiasm for continuing.  For me, blogging was no novelty.  The PWJ has settled into a seemingly sustainable routine of a post every three days.  Often I am surprised that I can maintain this pace in a busy world but it is usually not difficult.  Slowing publication frequency has been considered but the ten posts per month works and provides a regular outlet for reflection and thoughtful organization.  The act of writing, like painting, is therapeutic.

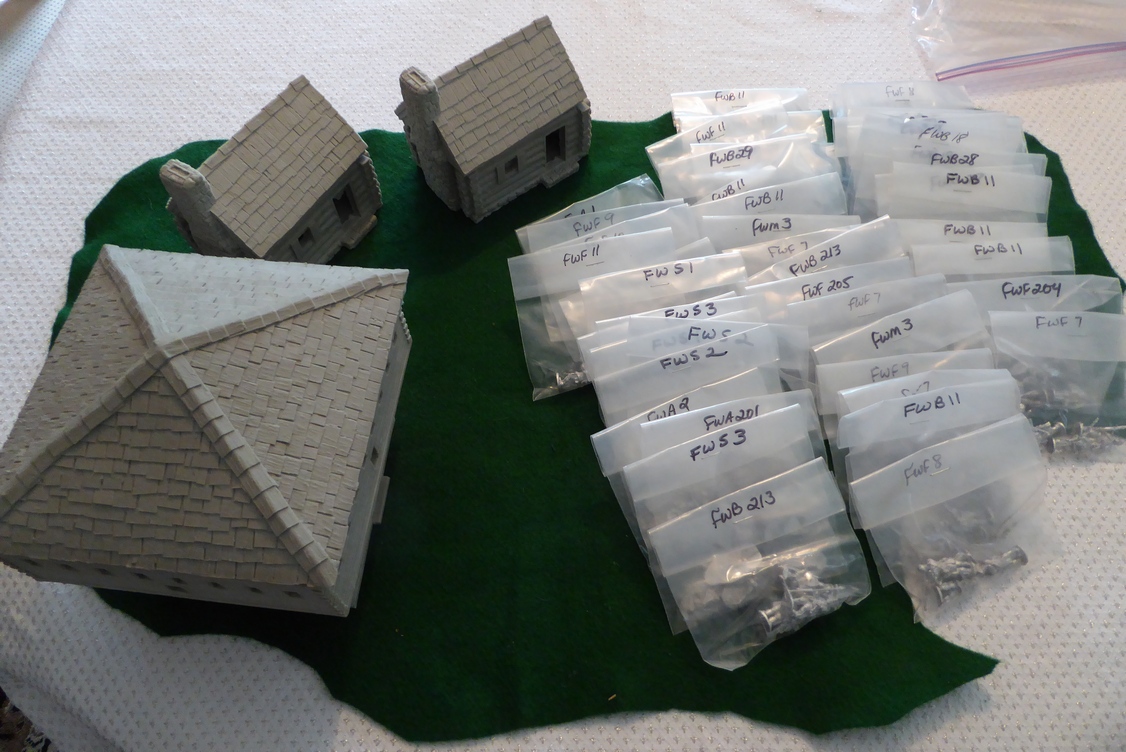
Speaking of painting, since 2012, more than 8,000 figures have crossed the painting desk; many have been featured here.  What about the remainder of the blog content?  Besides painting, which represents the largest component of content, battle reports, boardgaming, scenario design, reviews, travel, and cycling fill in where needed.  While I try to keep travel posts historically oriented, I do drift off.  That is ok.  My family appreciates seeing our travels documented.  Cycling may seem an odd fit into a wargaming blog but it is reassuring to see comments when I do post a bit on my cycling routine.  Who knew that a number of wargamers cycle as well?  Another common bond! 

Besides the standard blog fare of parading painted figures and battle reports, I have ideas for a few other wargaming related topics to add into the mix on a semi-regular basis.  These semi-regular, serial entries have not progressed beyond a few thoughts but I expect one or two of these to begin filtering into the publishing routine before the end of summer.       

While I find many benefits to sharing my thoughts and projects in a public forum, the commentary received in response to my posts is one of the biggest rewards to blogging.  Every post exposes oneself to possible criticism.  I do consider this possibility before pressing "Publish."  A risk to take, for sure, especially in today's world.  However, almost without exception all comments are supportive, offer encouragement, and provide much motivation to forge on with this work.  Please keep the commentary coming.  Each reader's response is appreciated and strengthens to reinforce the bond between author and audience.  The Top Commentators widget is, indeed, a Wall of Fame.  Your participation is greatly appreciated.  Even more so now than 500 posts ago, I count the frequent contributors as friends.  I look forward to a day I can face these gentlemen on the field of battle.  For a very few, this has been a reality.  For others, this might be possibility.   

What no contest to celebrate this milestone?  Well, I considered a prize drawing, for sure.  The last few contests have had fewer participants and a number of readers opted out.  Perhaps many find themselves in a situation similar to my own.  I am running out of storage space and being enveloped in wargaming paraphernalia.  No room even for free stuff!

Thanks for reading and contributing to the PWJ.  As always, reader participation is much appreciated.  Blogging would not be nearly as rewarding without reader support.  We soon return to regularly scheduled programming as post #1,001 is being prepared.

Monday, June 3, 2019

Battle of San Martino - Game 1

As scenario designer, one anticipates how the scenario is likely to play out.  When drafting an historical scenario, an attempt must be made to allow for the possibility of reproducing the historical outcome.  Overfitting a design to a specific battle account should yield to a broader narrative within the confines of the rules, scenario, and historical situation such that the historical outcome is possible but not guaranteed.  Objectives are set to help in guiding that narrative.  The translation from concept to reality is sometimes very different.  Luck plays a role in the scenario's outcome as do the actions and reactions of the players.  Sometimes, other factors, altogether, conspire to change the outcome.  Warfare leads to uncertainty.  The first run-through of the San Martino scenario is a case in point.

The San Martino scenario is large.  With two players committed to participate, a two-player game would provide a lot of troops under each individual's command.  Too many troops to command?  Perhaps, but feasible.  I would act as umpire.  As often happens, I was convinced to take an active player role in the game.  I took command of the two reinforcing Austrian V Corps brigades entering on the south edge of the table.  With most objectives concentrated around San Martino, this small secondary command would likely not be the primary focus of the action.  Wrong!  

The battle began as expected with the Sardinians under Mollard skirmishing with lead elements of Benedek's Austrian Corps for control of the San Martino Heights.  Rather than strike hard against Mollard's recon column, Benedek committed few troops to this action.  Throughout the action, Lippert's Austrian brigade fought gingerly over the heights in an attempt to wrest control of the key villages from the Sardinians. 
Skirmishing on San Martino Heights
The Sardinians showed more activity than the Austrians and did not waste time.  Upon the arrival of the Cuneo Brigade to San Martino, Mollard directed Arnaldi on his task.  Arnaldi was to deploy his brigade on Mollard's left and relieve pressure on the attacks against San Martino.  Drawing up on Mollard's left also prevented the Austrians from flanking the San Martino position from the east.  The Cuneo Brigade, in position to deploy, fanned out to the left of Mollard.  At this point in the battle, Mollard launched two of Monferrato's light cavalry squadrons to disrupt the Austrian countermove to oppose Arnaldi.  Miraculously, the Sardinian cavalry succeeded beyond expectations in this spoiling attack.  The target of its charge panicked and fled to the rear.  Turning its attention to the closest enemy infantry battalion, these Austrians, likewise, fell back from the attack.  Blown but pleased with their success, the Sardinian troopers returned safely to friendly lines.
Arnaldi deploys on Mollard's left
In response, Benedek reinforced and extended his right flank while keeping the bulk of his formations in reserve.  These large Austrian formations would remain inert for the entire battle.
Much of Benedek's Corps remains in reserve
On the road from Lonato, Durando's Sardinian division, consisting of two regiments of grenadiers and supporting Bersaglieri and cavalry marched quickly to the south.  Their objective was the bridge spanning the river.  Getting there first provided an opportunity to drive a wedge between Benedek's Corps and the bulk of the Austrian Army busy fighting at Solferino.

Gaal's Austrian V Corps brigade arrived near Madonna del Scoperta and passed through the town.  Gaal's objective was to reach the bridge before Durando's division.  It would be a race against time.  Gaal reached the bridge first but only just.  Durando's Division was deploying along the river banks almost as Gaal entered the town.  The intense firefights pushed many of Gaal's battalions back from the river.
Battle lines forming along the river
Gaal's small brigade was no match for the power offered from Durando's grenadiers.  Even armed with rifles against the Sardinian smooth bores, the Austrians were outclassed.  Some of this mismatch was not of their doing!
Firefight along the river
As Sardinian troops from Lonato continued arriving on the battlefield, the Sardinians prepared for an attack against the San Martino Heights from the west.  To counter this threat, Benedek ordered Reichlin's ad hoc brigade to march around the high ground to address this situation.
Reichlin marches to the sound of the guns
Reichlin was not alone to respond to the call to arms.  The second V Corps brigade arrived at Madonna del Scoperta and rather than setting up a defensive position to backstop Gaal, Koller's Brigade began crossing the river near Madonna del Scoperta to place his brigade on the north bank of the river.
Koller marches to sound of the guns
Without support from Koller, Gaal's brigade was in serious trouble.  As each of Gaals' battalions fell back from the river, confidence rose among Durando's grenadiers.  The time was ripe for an assault across the river.  The Sardinian grenadiers splashed across the water obstacle nearly unhindered and crashed into the already wavering Austrians.  In a few minutes, Gaal's brigade was done for and went streaming back from the field of battle.

While fighting continued over the San Martino Heights, Durando's grenadiers, having crossed to the south bank of the river, were a big concern.  What was Benedek to do?  Release his reserve formations in an attempt to take the heights before more Sardinians arrived or protect his Corps and the Austrian line of communications back to the Mincio River?  
Fighting for control of the heights
With Sardinian reinforcements arriving from the north and the heights threatened from both the north and west, Benedek called for his Corps to disengage from battle.  There would still be a hard fight to hold Pozzolengo long enough to allow the army, defeated at Solferino, to retreat to safety.  Little value in holding San Martino at this point in time.

Leaning over the table and surveying the situation, Benedek declared enough is enough.  Disengage!  To lunch!  The Sardinian Army and King Vittorio Emmaneule II are victorious on this day!
With hands on table, Benedek surveys the action
With a concession after two hours of battle, plenty of time remained in the day.  Rather than reset the battle for a second attempt, Commands & Colors Ancients was pulled off the shelf for an afternoon session of gaming.  Good fun!

As for the San Martino battle, a handful of mistakes were made in play.  Having not had the rules out for an exercise in over a year, my memory was a bit foggy.  Even though the rules are of my own design, I forget key facets without regular exercise.  The big mistake in this battle was forgetting that size DOES matter. Austrian infantry battalions are classified as LARGE in size while Sardinian infantry battalions are classed as AVERAGE.  Light infantry half-battalions are classified as SMALL.  The larger Austrian battalions should have been able to give and take more punishment than they did.  Similarly, the half-battalions of light infantry should not have been as effective and suffered losses much more quickly.  Would these changes have affected the final outcome?  Perhaps not.  The battle may have been more closely contested, though.

Expect to see more of San Martino in the future; hopefully, with rules of engagement correctly applied.             

Saturday, June 1, 2019

Battle of San Martino Setup

Mollard defends San Martino
The battle lines are drawn for the 1859 Battle of San Martino.  In the early morning hours, elements of the Austrian VIII Corps have been driven out of San Martino by a Sardinian recon column under direct command of LTG Mollard.  A second Sardinian recon column is probing to the west towards Madonna del Scoperta in an attempt to flank the Austrian VIII Corps from the bulk of the Austrian Army engaged to the south at Solferino.    
Austrians advance from Pozzolengo
In command of the Austrian VIII Corp, FML Benedek is tasked with two objectives.  The first task is focused on safeguarding the right flank of the Austrian Army and keeping an avenue of retreat open back across the Mincio River.  If defeated at Solferino, the Austrians will need to hold the strategic town of Pozzolengo until the army can cross the Mincio.  If Pozzolengo falls too early, the Austrian Army may be trapped.  Benedek's second task is to tie up as many Sardinians troops as possible to prevent the Sardinian Army from reinforcing the French at Solferino.
Battlefield with initial deployments
viewed from the east
For their part, the Sardinian Army under the command of King Vittorio Emmanuel II is to destroy the Austrian VIII Corps to its front, take Pozzolengo and cut off the Austrian Army's line of communication across the Mincio.  The Sardinians expect to eventually see three divisions on the field against two Austrian divisions plus elements detached from nearby formations.
Battlefield viewed from the south
Which combatant is better situated to achieve its objective?  The stage is set, what will tomorrow hold?